We often store in our team several photographs of many situations that we live, whether personal, family or corporate level and always an image will be a great memory to relive these moments..
Many of these photos are undoubtedly personal and private and some of them we may not want to be visible to any user who accesses our team with macOS High Sierra and that is why today we will see how to use the Photos application to hide or see again an image in macOS High Sierra and thus add security when we consider it necessary.
1. Hide photos in the macOS Photos application
Step 1
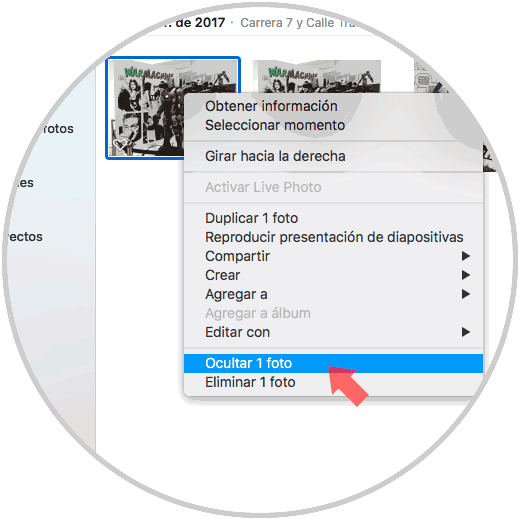
The process is simple and with few steps, for this, we go to the "Photos" application, select the hidden photo, right click on it and select the option "Hide 1 photo":
Step 2
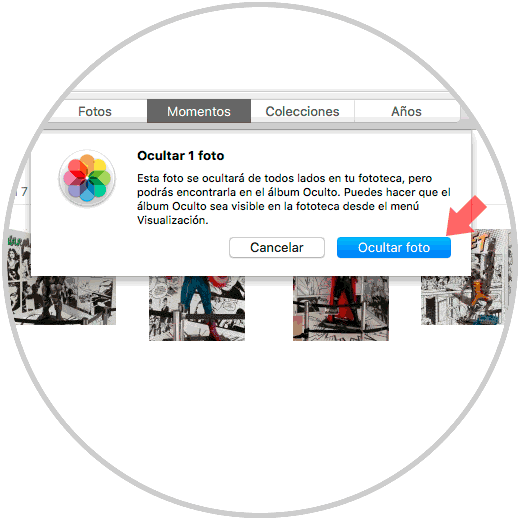
It will be possible to select several photos at the same time, right click on one of them and hide them all from the context menu in a single process. There we will see the following message. Click on "Hide photo" to complete the process.
2. See hidden photos in the macOS Photos application
Step 1
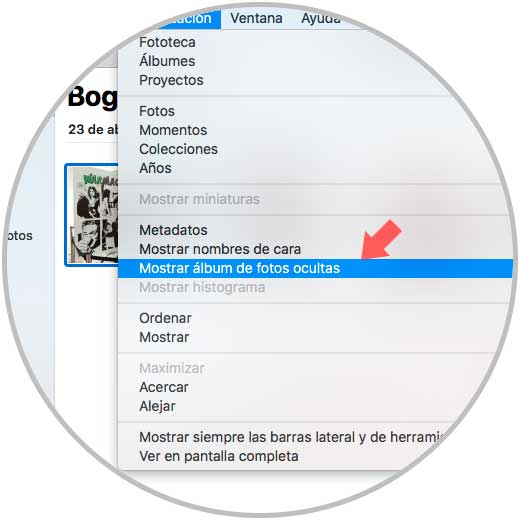
To have access to the images that we have hidden in macOS High Sierra, we must go to the “Visualization†menu and there select the “Show hidden photo album†line:
Step 2
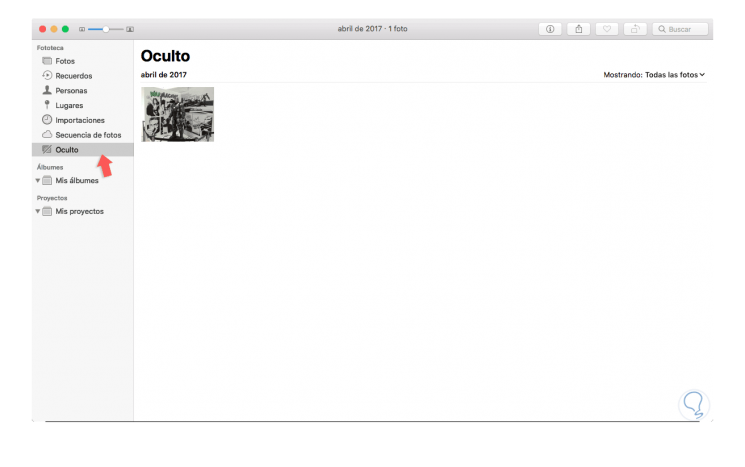
This will give us access to a new section called "Hidden" in the sidebar and the hidden images will be hosted there:
3. Show hidden photos in the macOS Photos application
Step 1
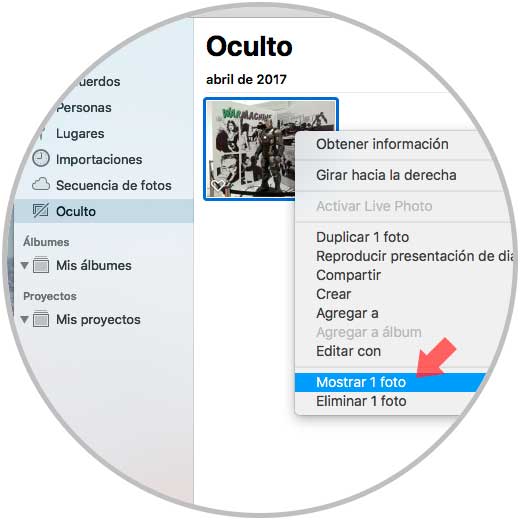
To restore hidden photos again, just right click on it and select the option “Show 1 photoâ€. This will make the photo visible again.
Step 2
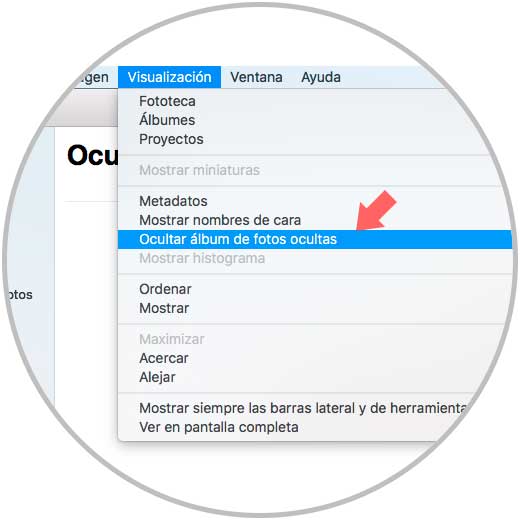
Finally, for security, we must remove the “Hidden†section so that no one has access to it, for this, we go to the “Visualization†menu and there we select the “Hide hidden photo album†option:
Thus, we have hidden or made visible our photos in macOS High Sierra..