Windows 10 offers various types of operating systems that have been developed for certain users and that is why we find editions such as Home, Pro, Enterprise or S, where each one has different characteristics that the others do not have..
Windows 10 Pro is one of the most versatile editions of Microsoft since they offer us more administration and development features such as a combination of domains, Group Policy Management, BitLocker and many more, which we do not find, for example, in the edition Pro.
In this tutorial we will see how to download the Windows 10 Pro ISO and thus enjoy this great Operating System..
By default, when we download the ISO image from the official Microsoft site, there comes the Home and Pro editions of Windows 10 but today we will see how to allow only Windows 10 Pro to be available.
To keep up, remember to subscribe to our YouTube channel! SUBSCRIBE
1. Download the Windows 10 Pro ISO
Media Creation Tool is a practical tool offered by Microsoft to download ISO images officially in a simple and practical way.
Step 1
To do this, we can download the tool at the following link:
Media Creation Tool
Step 2
Once downloaded, we proceed with its execution, and we will see the following window:
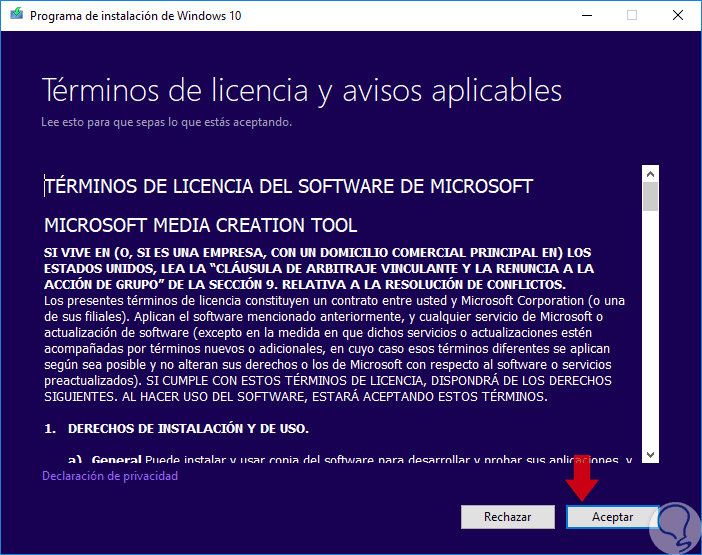
Step 3
There we must accept the license terms by clicking on the "Accept" button and then we will see the following:

Step 4
There we activate the box “Create installation media (USB flash drive, DVD or ISO file) for another PC†and click Next where we will see the following window and there we will select:
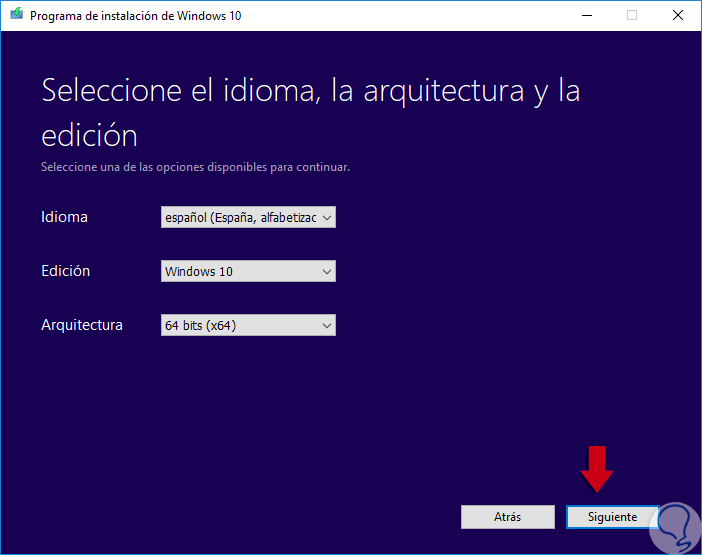
Step 5
Once these points are defined, click on “Next†and in the next window we will activate the “ISO File†box:
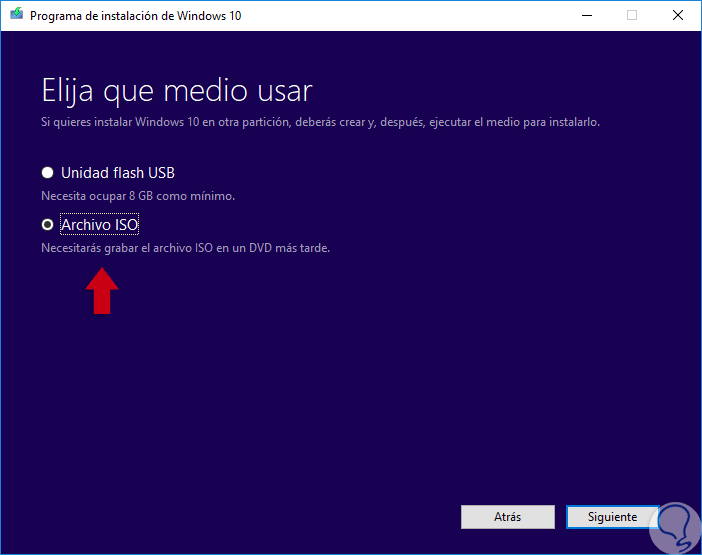
Step 6
Clicking Next will display the following pop-up window where we will define the storage destination of the ISO image:
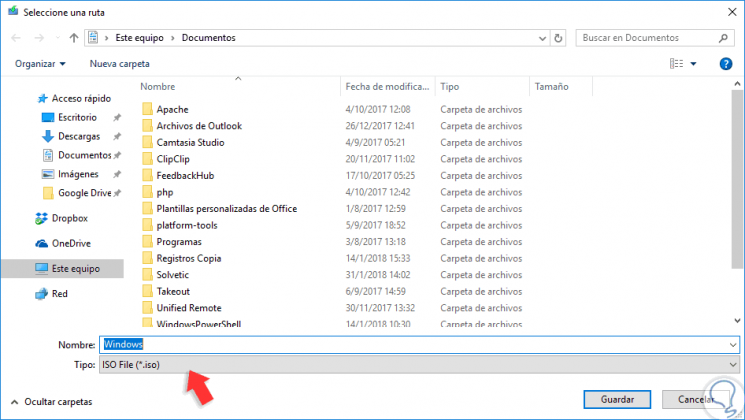
Step 7
The download process will take between 25 to 45 minutes depending on the speed of the network.
Now, we are going to open the program where the bootable CD, DVD or USB will be created with Windows 10 Pro, in this case we will use Rufus which we can download in the following link:
Rufus
2. Create the ei.cfg file in Windows 10
The next step to take is to create a file called ei.cfg which is responsible for determining which version of Windows is installed in an ISO image.
Step 1
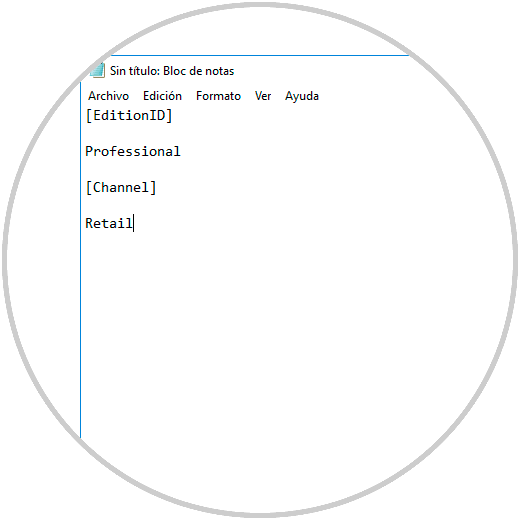
To create this file, we will open a notebook and paste the following:
[EditionID] Professional [Channel] Retail
Step 2
Now, this file will be saved as “ei.cfg†and for this we go to the “File / Save As†menu and in the “Type†field we select the option “All filesâ€:
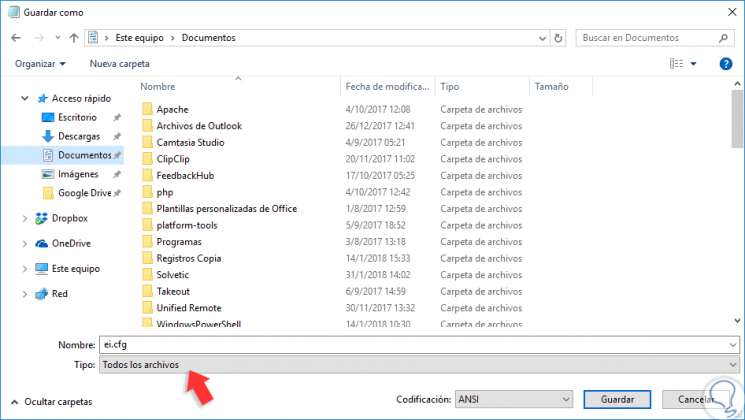
Step 3
If you do not select “All filesâ€, the file will be saved as ei.cfg.txt. After this step, we go to where the ISO image was saved, we will right click on it and select the option "Open with" and choose "Windows Explorer":
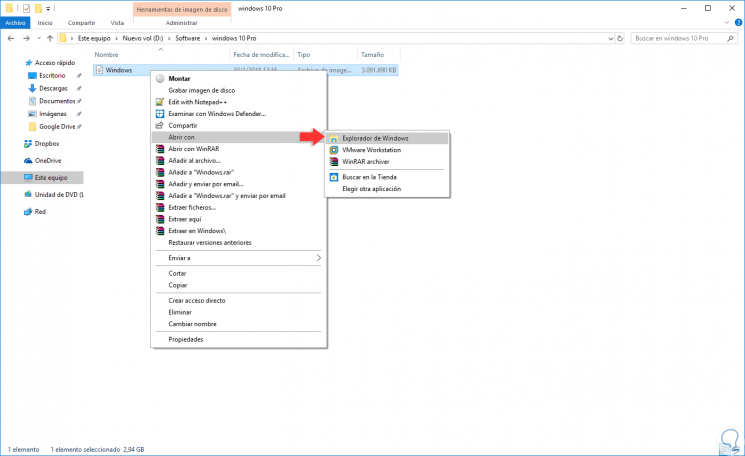
Step 4
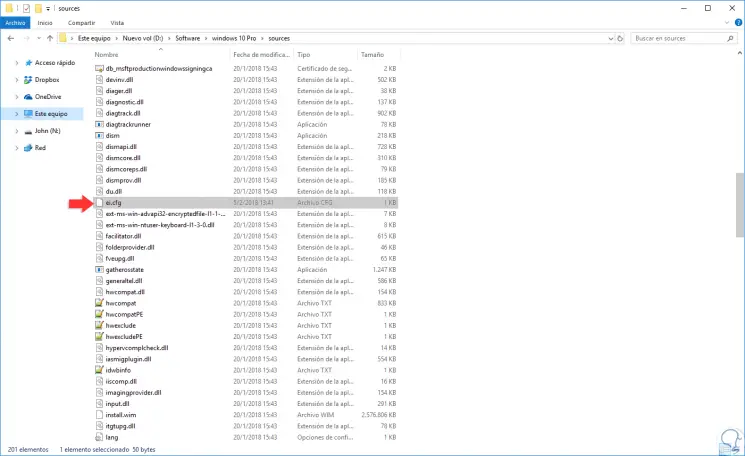
Once there, we will go to the “Sources†folder and paste the ei.cfg file.
Note
In case an error is generated by space, we must extract the ISO content in the folder using the desired tool such as 7Zip, WinRar, etc.
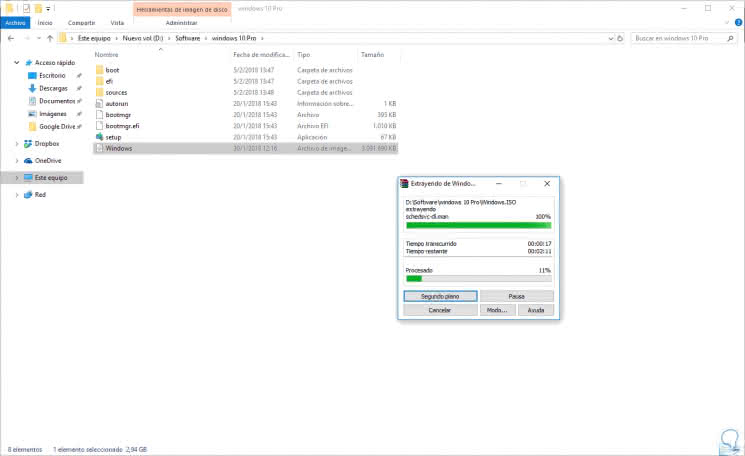
Step 5
Then if we can paste the ei.cfg file in the "Sources" folder:
3. Create ISO image and USB Boot in Windows 10
Step 1
Once this process is done, we can use some tool to convert the contents of this folder back into an ISO image and one of the options we can use is ImgBurn which can be downloaded at the following link:
ImgBurn
Step 2
Once downloaded, we proceed to its installation and once we execute it we will see the following:
Step 3
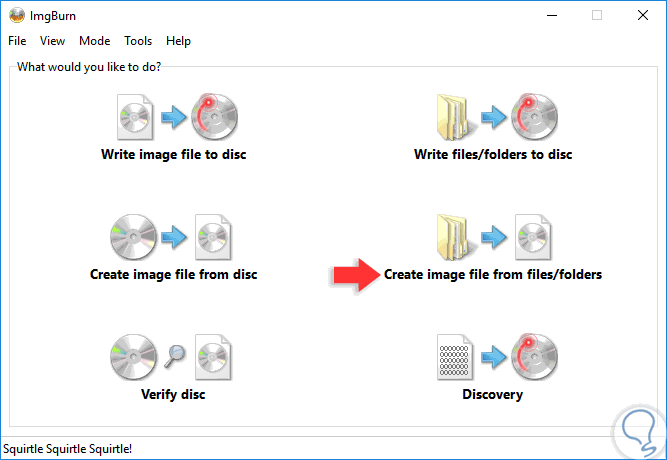
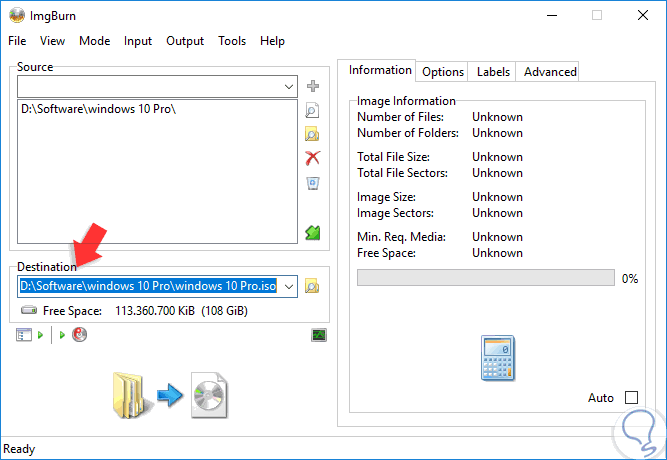
There we select the “Create Image file from files / folders†option and click on the folder icon and in the “Source†field we will select the folder where the ISO image has been extracted and where the ei.cfg file has been saved and in the “Destination†field we will select the route where the ISO image is to be saved:
Step 4
Click on the button below and we will see that the process of creating the ISO image begins:

Step 5
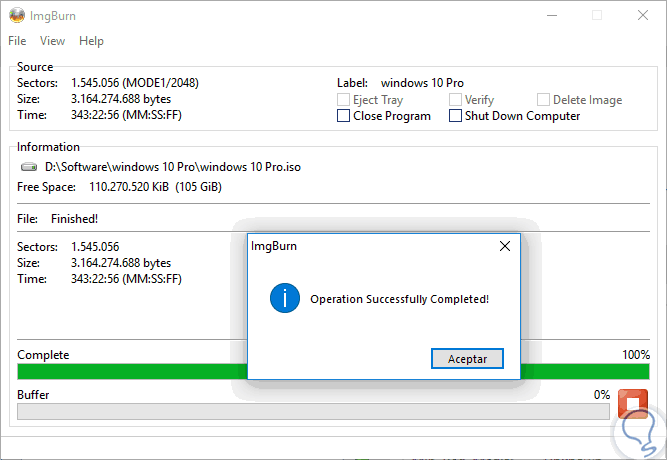
Once finished we will see the following. Click OK to exit the wizard.
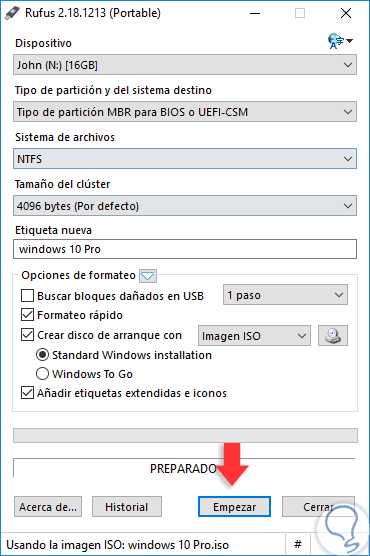
Step 6
With this we can use Rufus to create the bootable media with the new image of Windows 10 Pro:
With this method we can define that our installation of Windows 10 is with a single edition..