Windows 10 is a system that has been developed with a series of service and file components that allow its correct and proper operation based on the configuration criteria of each user. That is why a correct configuration can cause cascading errors that may not be pleasant for us and that is why Microsoft itself takes the necessary security measures to prevent you and me accidentally (or perhaps no) we get to delete some of these files and talk specifically about the system files which allow you to configure aspects such as hibernation, host previous versions of Windows, etc., which if deleted will have a negative effect on the behavior of Windows 10..
Therefore, these hidden files preserve the integrity of content that may be violated by other users if they see them in their computer searches. That is why it is important to keep in mind that we always have to control what is being seen and what is not inside our computer.
Therefore, in Windows 10 this type of files are hidden to prevent an inexperienced user from deleting such objects, this does not mean that we do not have access to them, since many administrative tasks require working on them, the Windows file explorer 10 allows us to visualize them and thus manage them as necessary..
Through this tutorial, TechnoWikis will explain how to view hidden Windows 10 files.
To keep up, remember to subscribe to our YouTube channel! SUBSCRIBE
How to view hidden system files in Windows 10
Step 1
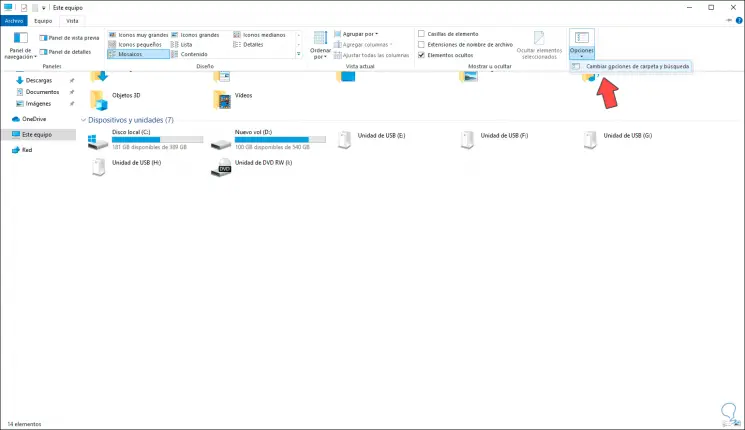
For this process, we access a new file explorer window and there we will go to the View menu and from the Options section we click on “Change folder and search optionsâ€:
Note
We can also access from the File / Change folder and search options menu.
Step 2
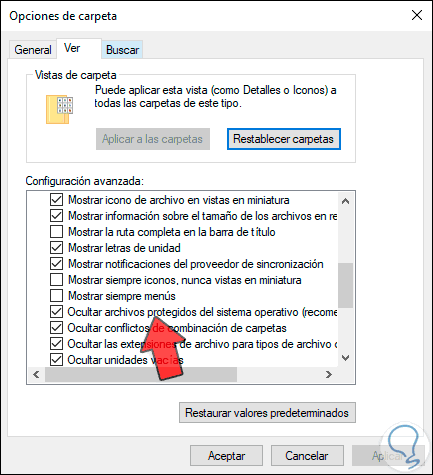
This will display a pop-up window in which we will go to the View tab and there we can see that the line "Hide protected operating system files (recommended)" is active by default:
Step 3
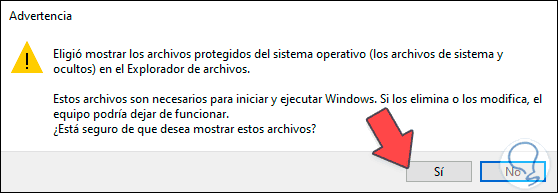
We proceed to uncheck it so that they are visible from the file explorer of the operating system and the following warning will be issued:
Step 4
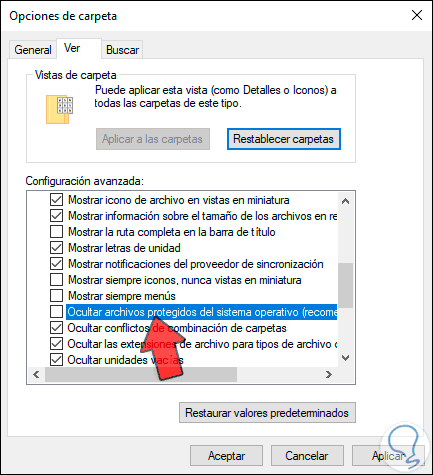
This is for security issues as we have spoken, we confirm by clicking on Yes and we will see that this line has been deactivated:
Step 5
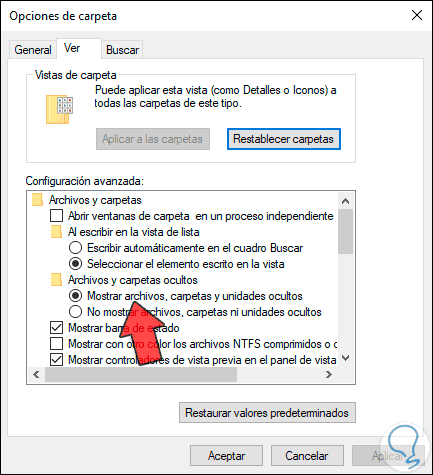
Click on Apply and Accept to save the changes and validate that the “Show hidden files, folders and drives†line is active as otherwise they will remain hidden. Click on OK to exit the wizard.
Step 6
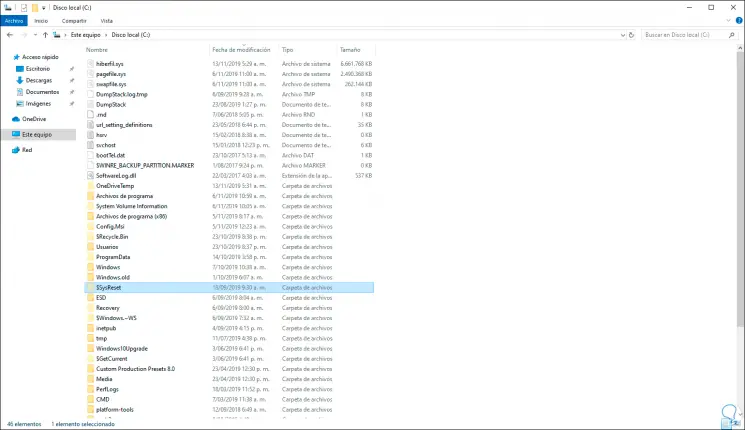
Now we can access the C drive from the file explorer and there we will see all those hidden files which are notable and stand out from the others since they have a faint touch in their design:
Step 7
We can access them and visualize, as well as work on their content. When we consider that it is no longer necessary to see the hidden files, we can hide them again by checking the Hide protected operating system files (recommended) box.
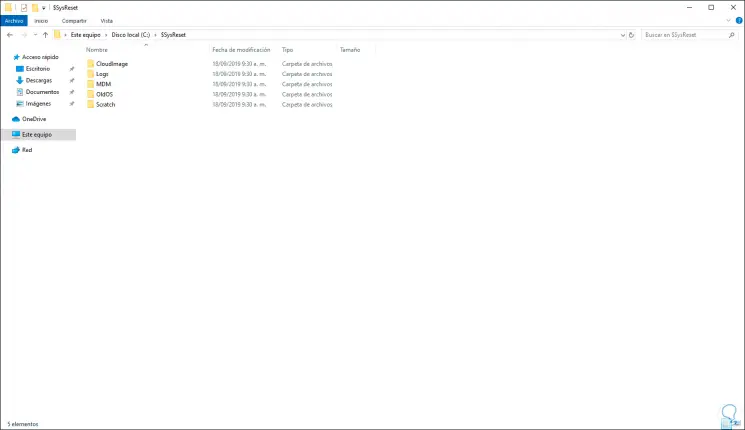
Thus, you can access the hidden system files in Windows 10 and see properties that are hidden by default..