One of the most important and vital elements in any operating system is the users since these, regardless of their privileges, allow access to the system and there to the applications or programs stored there..
In Windows 10 there are basically two types of users that are:
Local users
Thanks to this type of account, the desired settings can be hosted locally and you can have administration privileges
Online account
It is the new trend in Windows due to the rise of applications in the cloud since accessing Windows 10 using our email account we can synchronize all changes automatically on all devices where that account is registered.
In addition to this, we have other accounts such as the guest account and the integrated administrator account which allow you to carry out actions on the operating system or not. For this reason today TechnoWikis will make a complete analysis on how to create and manage user accounts in Windows 10 and in this way keep a much more centralized control over who and how you can access the operating system .
1. How to create additional accounts in Windows 10
In Windows 10, the process to create an account is simple.
Step 1
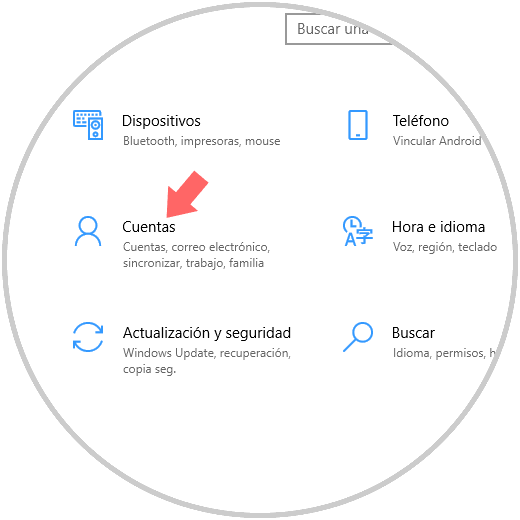
To do this we go to the Start / Settings menu and there we click on the accounts option.
Step 2
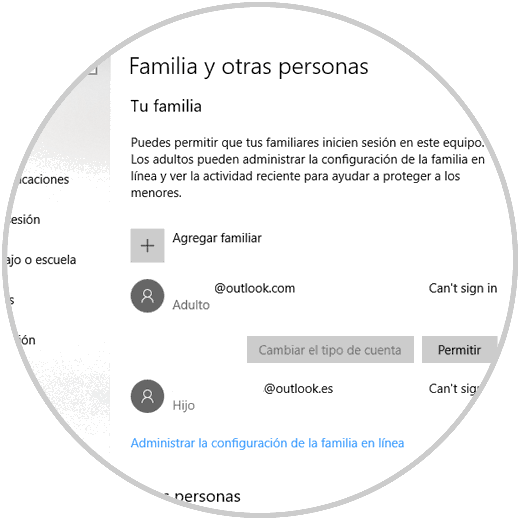
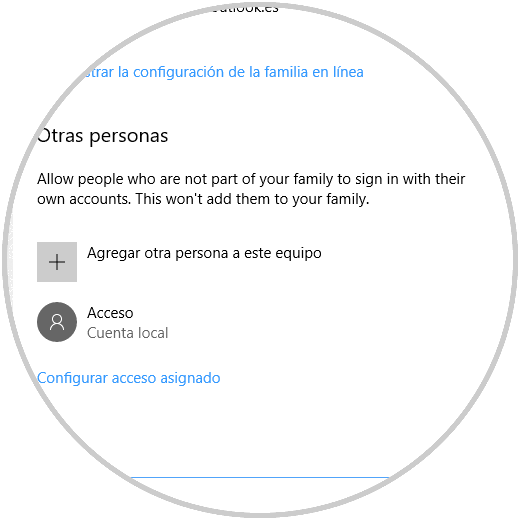
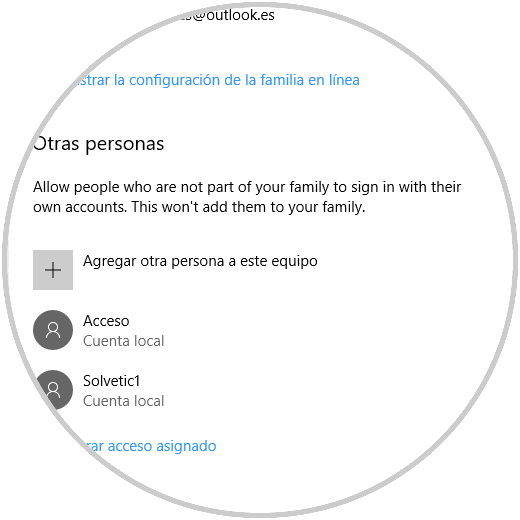
We go to the Family and other people section where we will see the following:
Step 3
To add a new account click on the Add another person to this team line and the following window will be displayed:
Step 4
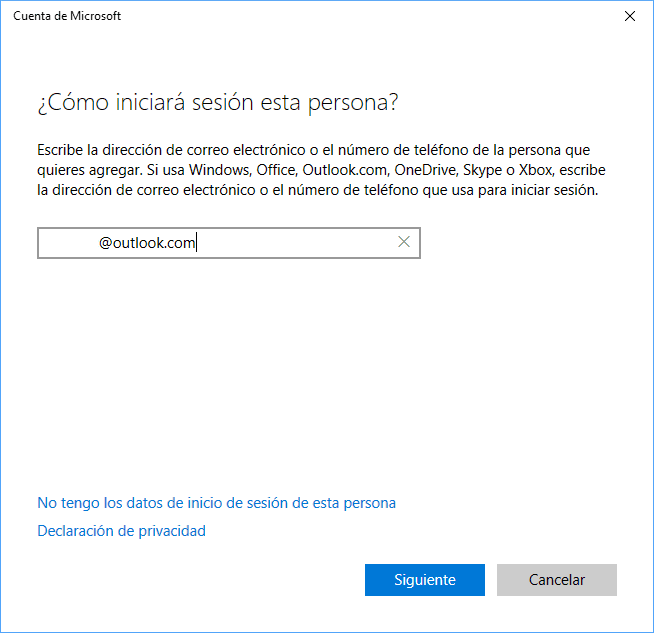
As we have mentioned, by default Windows 10 will create an online account so that it can be synchronized with multiple platforms and devices, if this is the type of account to use, enter the email address and click Next, if it is not and create a local account, click on the line I do not have the login data of this person and we will see the following:
Step 5
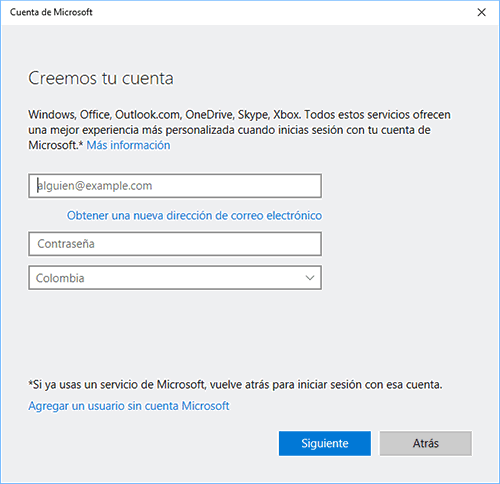
Now we click on the Add a user without a Microsoft account line and in the next window we will enter the name of the account, its password, and as an additional security measure, Microsoft introduced the security questions in build 17063:
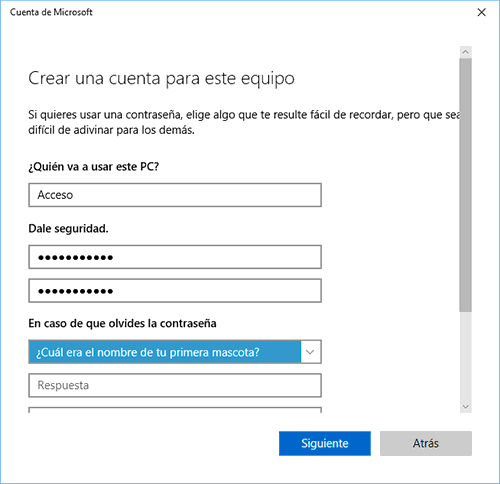
Step 6
Once these fields are complete, click on Next and the account will be created as a local account in Windows 10.
2. How to delete a user account in Windows 10
At the moment we do not want to have a user in the system we can proceed to its elimination.
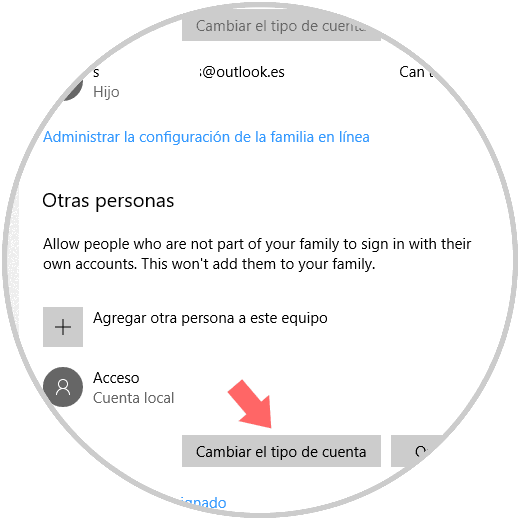
To do this, we go back to the Start / Settings / Accounts / Family and other people route and in the Other people section we can see the current users of the system. There we will click on the account to be deleted and we will see that two options are activated:
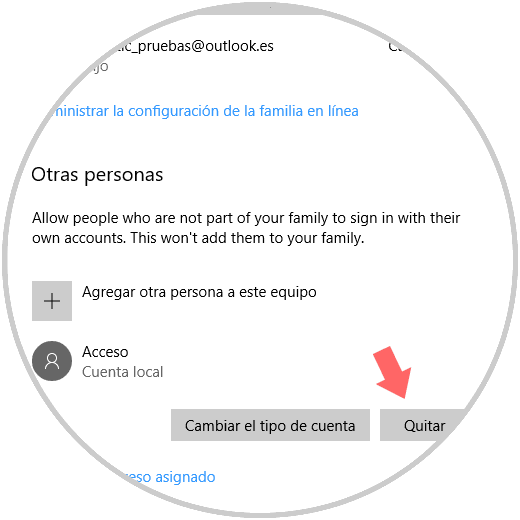
Click on the Remove button and the following message will be displayed:

If we are sure, we click on the Delete account and data button and in this way this user will be removed along with all its associated elements in Windows 10..
3. How to modify privileges to an account in Windows 10
We indicate at the beginning of the tutorial that Windows 10 allows us to assign various types of permissions or privileges and with each one it is possible to execute tasks such as installing programs, modifying system logs and more.
Step 1
When Windows 10 is installed, the first account created is known as a standard administrator, because Windows 10 brings by default an administrator who has full control over the system and is disabled by security issues.
Step 2
To change the type of account of a user in Windows 10, we go again to the route indicated above and click on the button Change the type of account:
Step 3
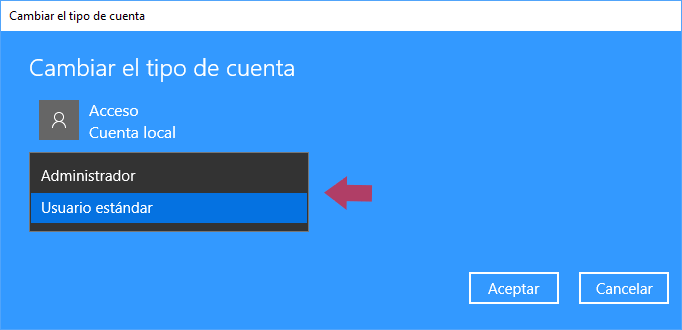
By clicking there, the following window will be displayed where we will see that the account is a standard user by default, by clicking on the drop-down field we can select that the selected account has administrator privileges in the system:
Step 4
Select Administrator and click OK to complete the changes.
4. Various account privileges in Windows 10
By default we can only establish a privilege of standard administrator or local user to an account created in Windows 10, but by default, and at the same time hidden, Windows offers us more privilege options for the accounts created in the system.
Step 1
To learn more about these privileges, we will use the Windows + R key combination and run the following line:
userpasswords2 control
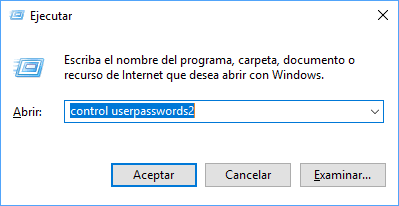
Click on OK and we will see the following:
Step 2
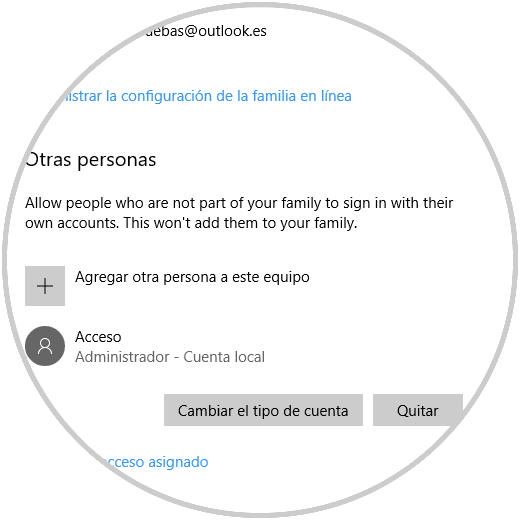
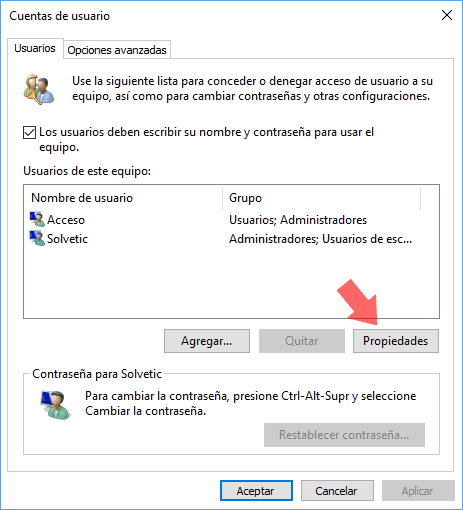
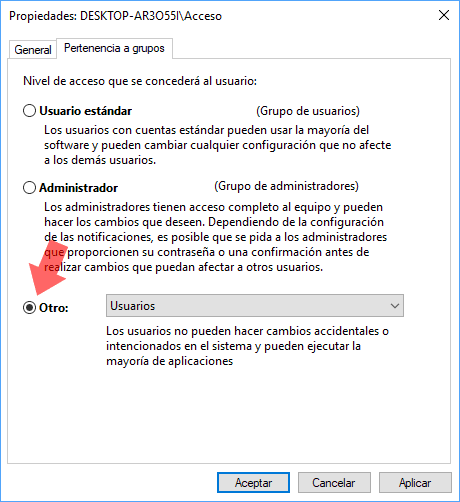
There we see the default account created during system configuration and the new account we have created. Now, we will select the account to be edited, click on the Properties button and in the pop-up window we will go to the Group Membership tab and activate the Other box:
Step 3
There we can click on the drop-down arrow and we will see the various options available at the privilege level to define:
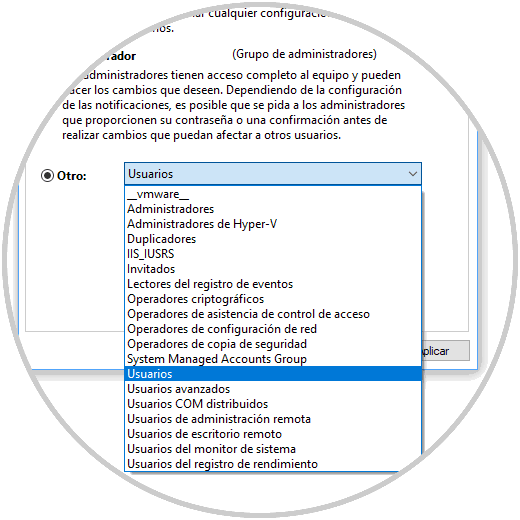
We can see that it is not only about local privileges or standard administration.
Some of these privileges are
- Administrators: Indicates the integrated account to manage the team
- Backup Operators: This type of account allows you to back up and restore files on all domain controllers using Windows Backup, regardless of the type of permissions that protect those files.
- Guests: Access and execution is restricted to most operating system parameters.
For a more detailed report of what each privilege can perform in Windows 10, we can go to the following link:
Windows 10 user privileges
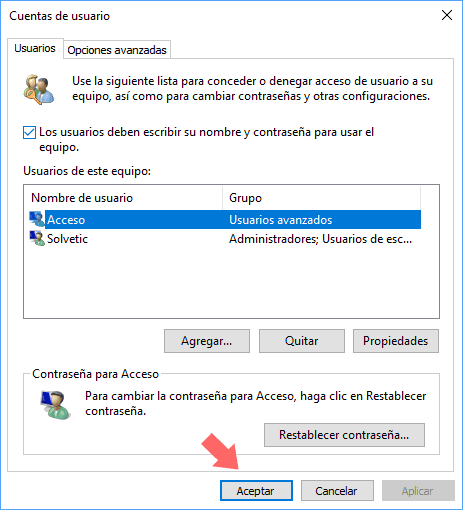
There, just select the new privilege, click on Accept and it will automatically be assigned to the selected user:
5. Modifying a user's passwords in Windows
Step 1
For security reasons it is ideal to change the password from time to time and thus increase the security in the system. To change the password of a user in Windows 10, we go to the path Start / Settings / Accounts / Login options:
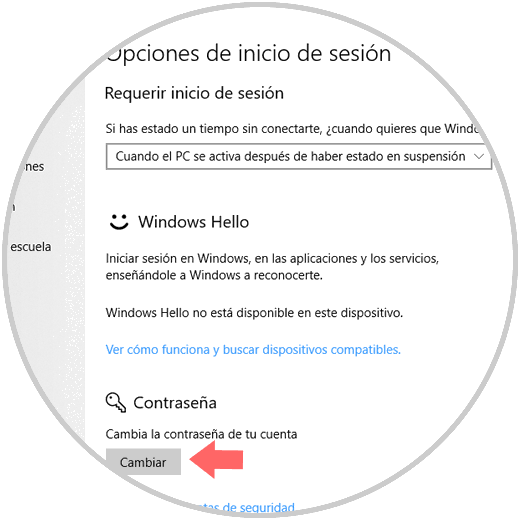
Step 2
There we click on the Change button located in the Password section and the following window will be displayed where we will first enter the current password:
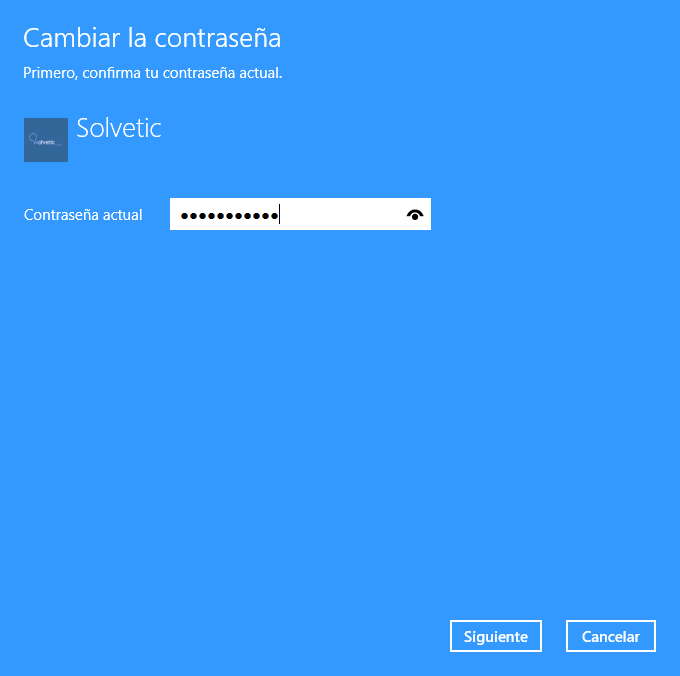
Step 3
Click on Next and now define the new password, as well as a suggestion for it:
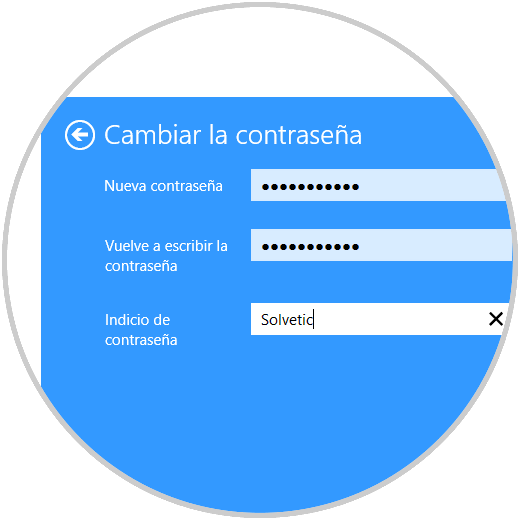
Click on Next and we will see the following:
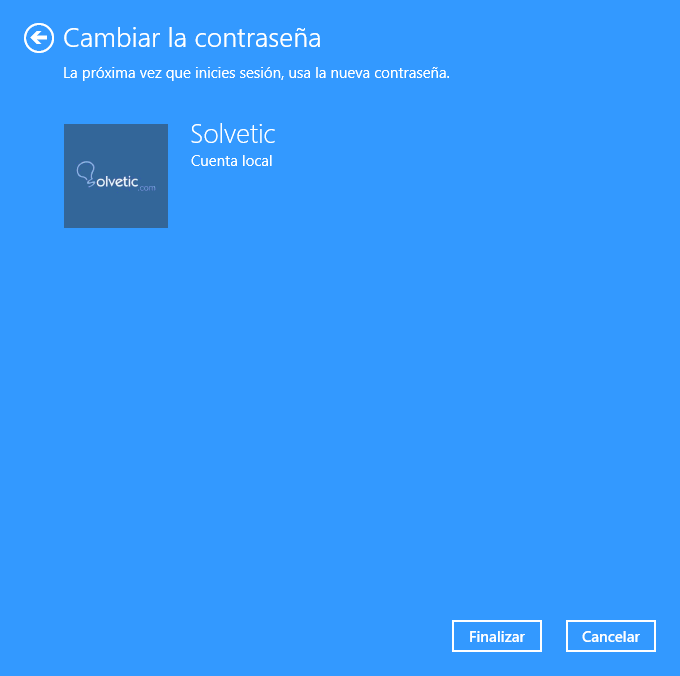
Step 4
There we click on Finish to complete the process. This process applies to the active Windows 10 user, therefore, if we want to change the password for a different user we will use the key combination again
+ R and we execute the line:
userpasswords2 control
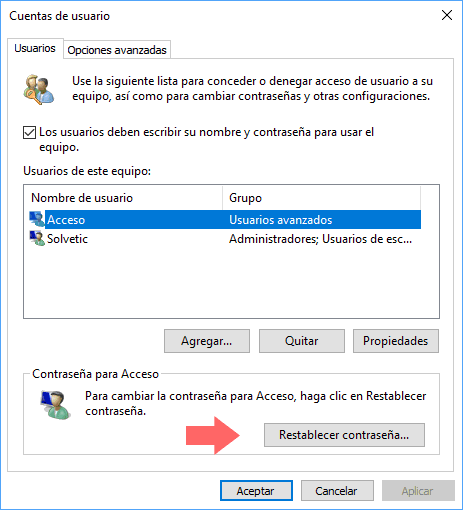
In the displayed window we select the user and click on the Reset password button located in the Password for Access section:
Step 5
By clicking there we will see the following window where we will enter the new password:
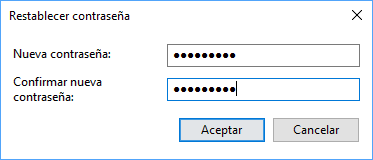
Click on OK to apply the changes..
6. Switch between local accounts or online Windows users
Step 1
In some specific cases we may want to edit the type of Windows 10 account and that it is not online or local. To change a Microsoft account to a local one, go to Start / Settings / Accounts / Your information and see the following:
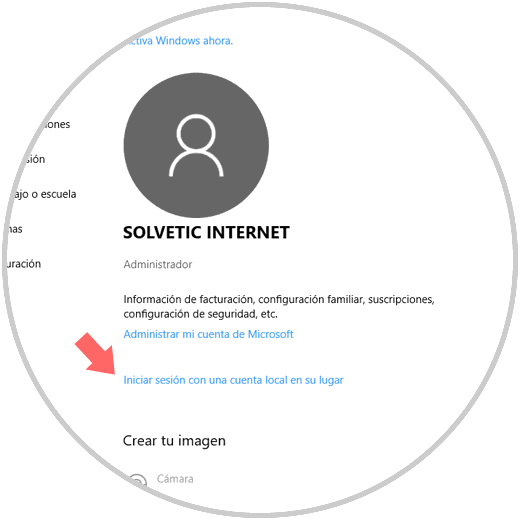
Step 2
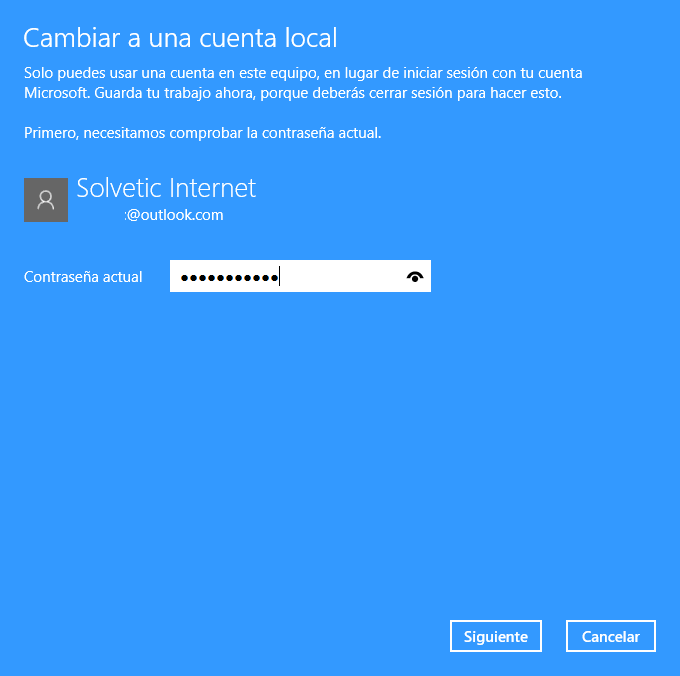
There we click on the line Log in with a local account instead and the following window will be displayed where we will enter the current password:
Step 3
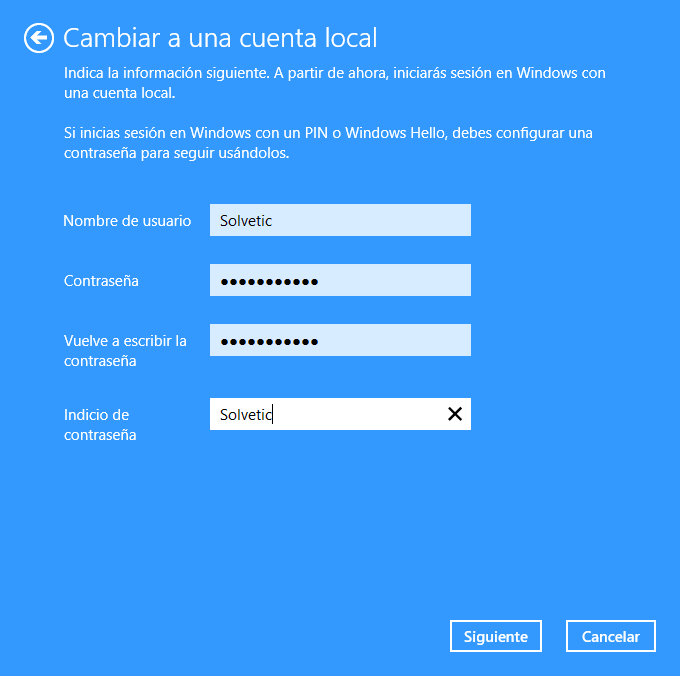
Click Next and now define the name of the account, passwords and some indication of these:
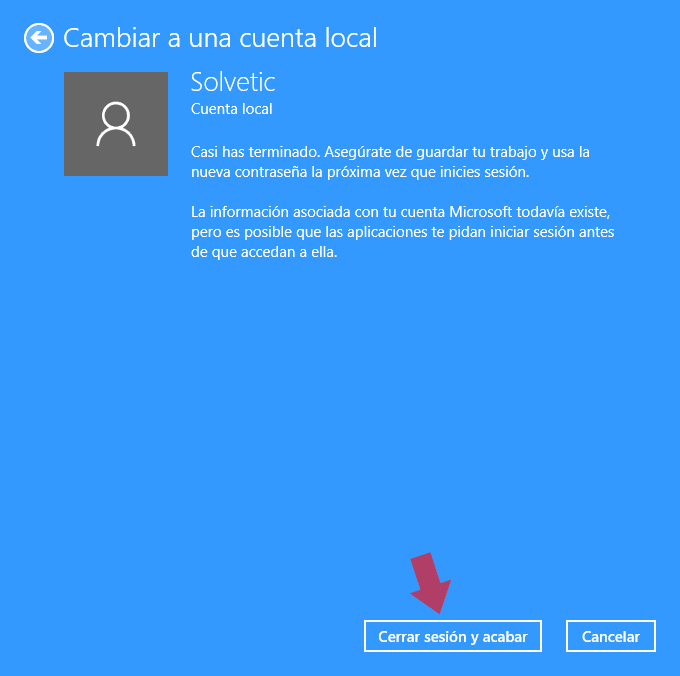
Click on Next again and we will see the following. There we click on the Close session button and finish to complete the process.
Step 4
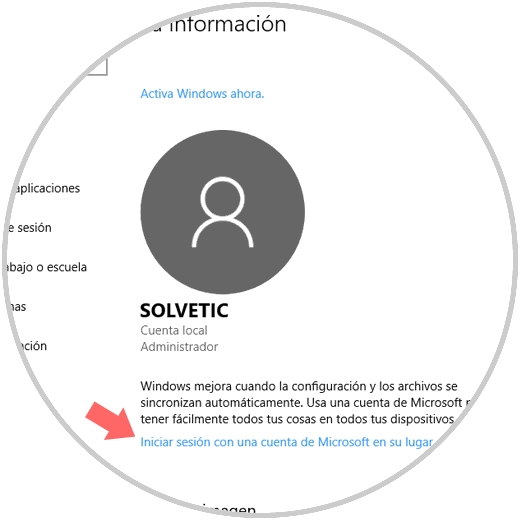
Now, if we want to change from a local account to a Microsoft account, we go back to the same route and click on the Log in line with a Microsoft account instead. The following window will be displayed where we will enter the email address:
Step 5
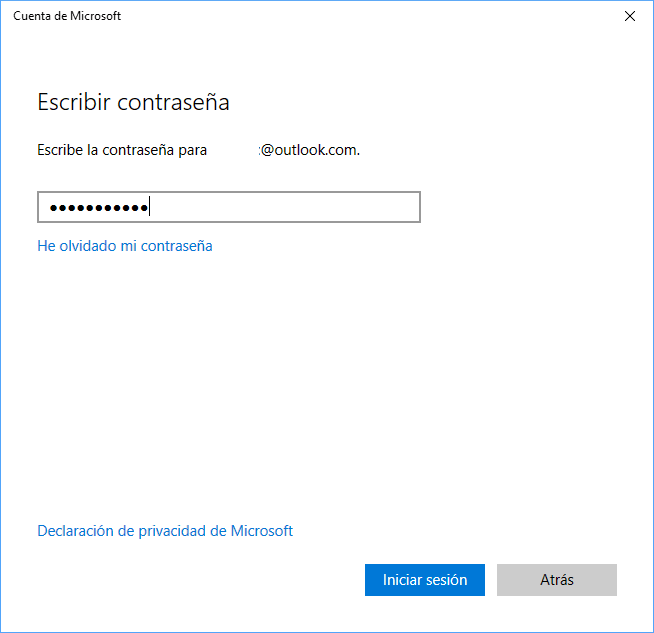
In the next window we will enter the password:
In case of having two-factor authentication we will see this:
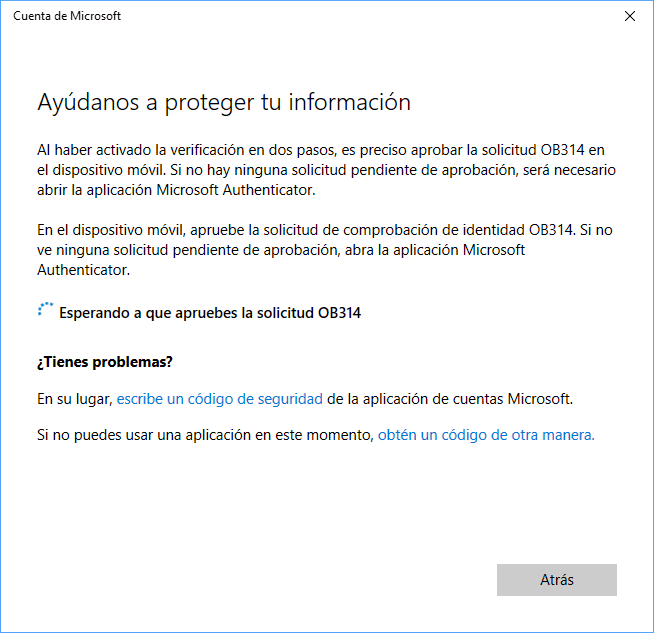
Step 6
Once the application is approved, the following will be displayed:
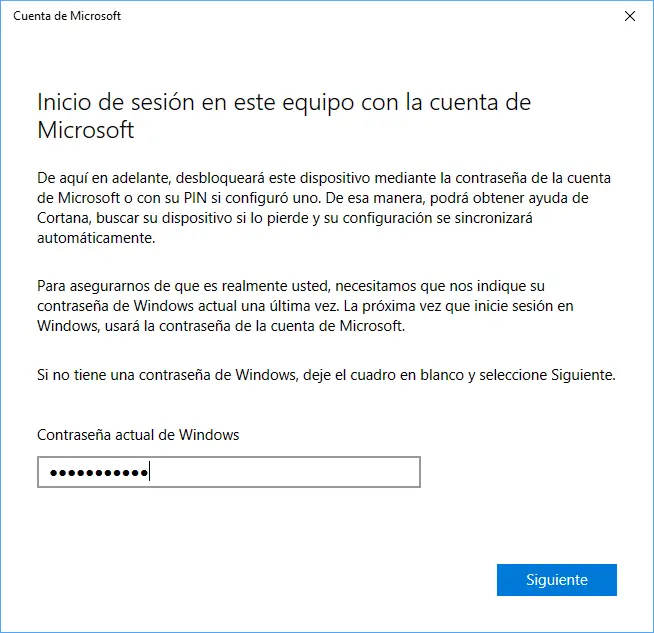
There we will enter the password of the account and by clicking Next we will be using a Microsoft account to access Windows 10.
7. How to enable the Windows 10 integrated administrator user
We have said that Windows 10 brings by default its integrated administrator which has full control over the system.
Step 1
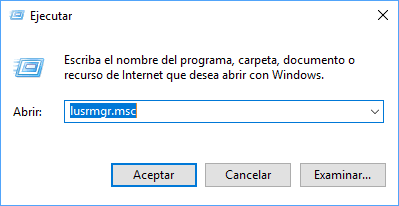
It is advisable not to enable this user lightly but only in cases where required. To enable it in Windows 10, we will use the key combination
+ R and execute the lusrmgr.msc command and press Enter or Accept:
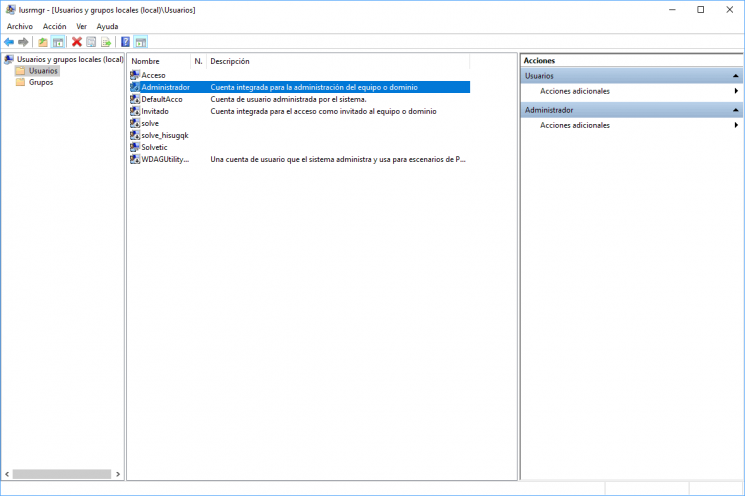
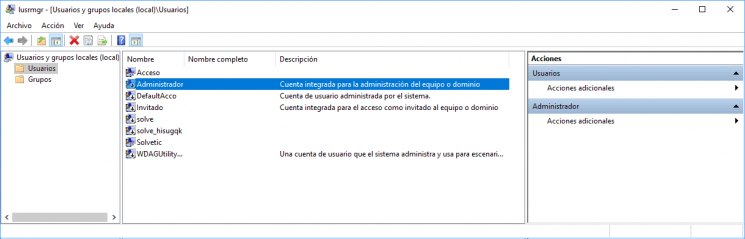
Step 2
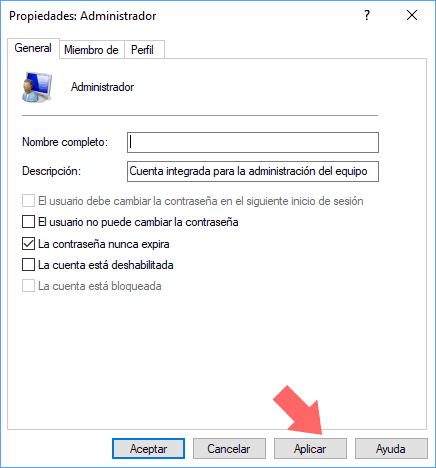
The following window will be displayed where we will go to the Users folder and there we will see the Administrator account disabled by default:
Step 3
Double click on it and uncheck the box The account is disabled. Click on Apply and Accept to save the changes and this account has been enabled in Windows 10.
8. User account management through the Windows command prompt
Windows 10 offers us the opportunity to manage all user accounts from the command prompt through the net user command and thus simplify many management tasks.
Step 1
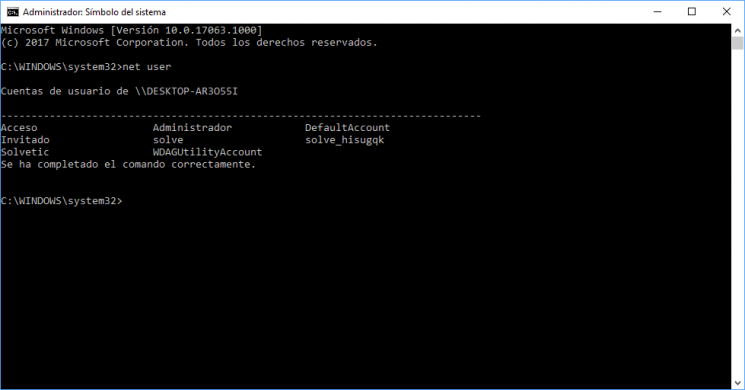
For this, we must access the command prompt as administrators by right clicking on the utility and selecting the option Run as administrator; Once the command prompt is open, we execute the net user command and see the list of current Windows 10 users:
Step 2
To create a user through the command prompt we must use the following syntax:
net user User Password / add
For example:
net user TechnoWikis1 TechnoWikis123 / add
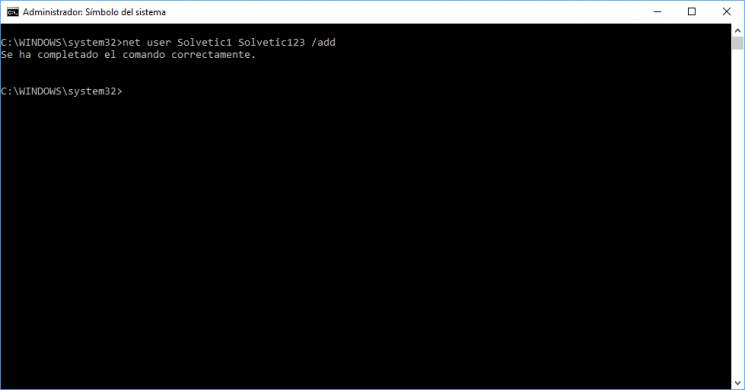
Step 3
We see that the command has been completed correctly. We can confirm that the user has been created:
Step 4
If we want to specify a group for the user we can execute the following:
net localgroup TechnoWikis1 / add duplicators

Step 5
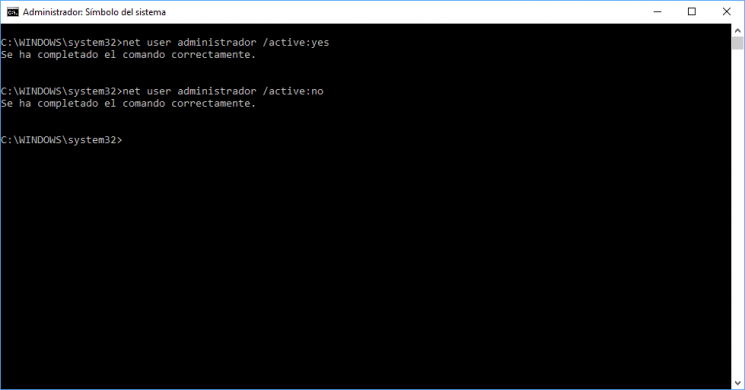
Optionally, we also have the opportunity to activate or not the Windows 10 integrated administrator user by running the following lines:
net user administrator / active: yes (Enable user) net user administrator / active: no (Disable user)
We have seen the different alternatives at the user level that we have in Windows 10 and thus optimize the permissions and privileges within it.