The users on Windows 10 play a key role in how it handles and manages the system as these are the ones who create profiles with different settings to use (desktops, programs, libraries, etc.) and based on the level of privileges each of them is granted system security. One of the best forms of security is to establish a password when creating a Windows 10 user for users who have access to the operating system, but Windows 10 gives us the opportunity to create users without a password who will have direct access to the system..
At this point TechnoWikis stresses the importance of knowing what type of Windows 10 account permissions this user will have, since if you access directly without a password you can make changes to the computer or its configuration depending on the permissions that it handles.
Now let's see how to create a local user without a password in Windows 10, remember that a local user does not generally have administrative permissions and Microsoft always recommends creating users linked to the Microsoft account for synchronization and control purposes..
We also leave you the video tutorial to create a local user without a Windows 10 password.
To stay up to date, remember to subscribe to our YouTube channel! SUBSCRIBE
1. Create local user without password Windows 10 from Settings
Step 1
It is the most traditional method for this type of account and for this we will go to the following route:
Step 2
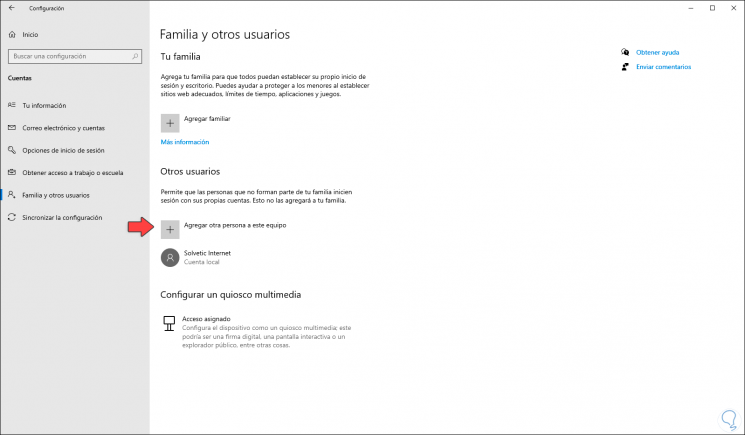
There we go to the "Family and other users" section and click on the line "Add another person to this team":
Step 3
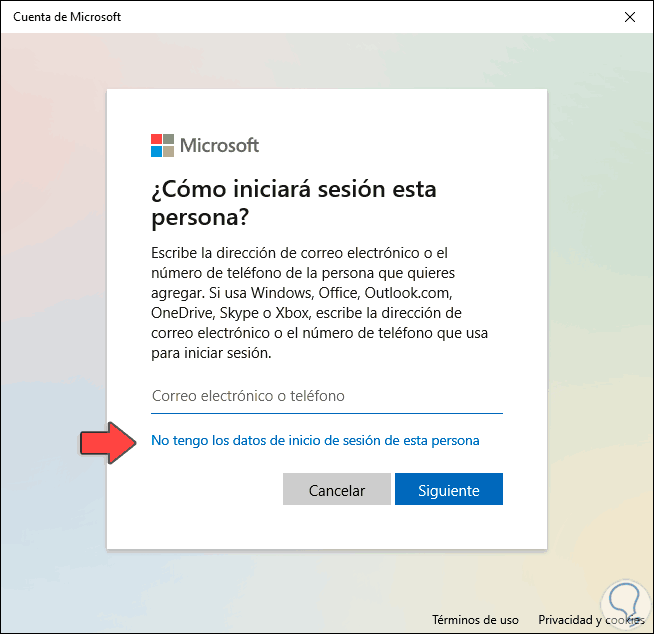
Here we will see the following window:
Step 4
There we click on the line "I do not have the login data of this person" and then we will see the following:
Step 5
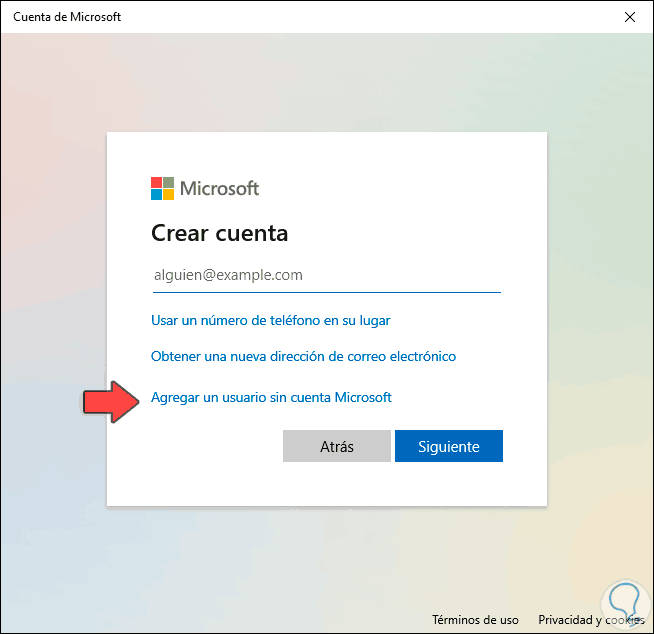
There we click on the line "Add a user without Microsoft account" to create the local user.
Note
These windows are visible because the equipment is connected to the network, if we want them not to be visible we simply have to disable Wi-Fi or the Ethernet network and create the user without being connected to the network.
Step 6
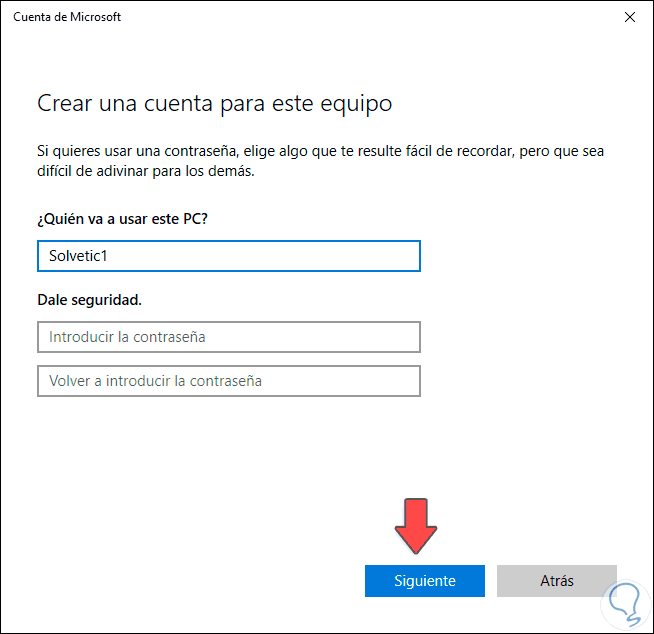
After that we will see the following window where we enter the data of the username to create:
Step 7
The fields "Enter the password" and "Re-enter the password" must be blank, we click Next and our local user will be created without a password. When we log in with this user, it will not be necessary to enter his password.
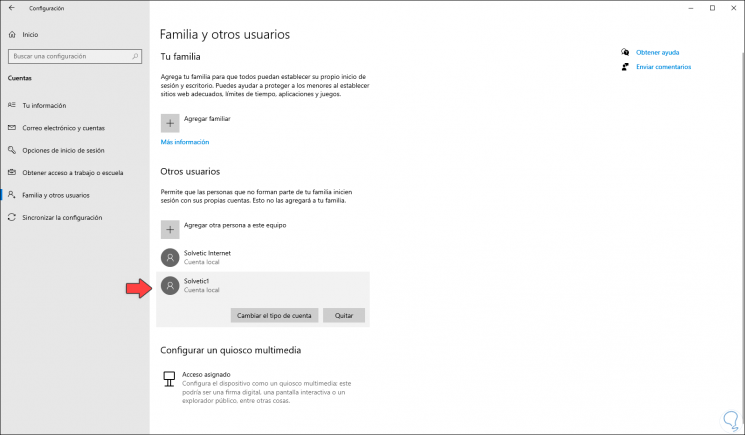
2. Create local user without Windows 10 password from lusrmgr.msc
The lusrmgr.msc command is a command from which we can manage system users.
Step 1
To use it we combine the following keys and execute "lusrmgr.msc":
+ R
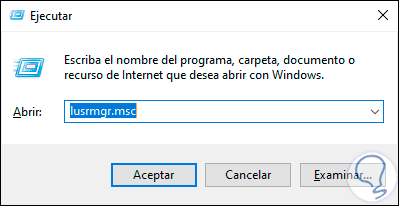
Step 2
Press Enter and in the displayed window go to "Users" and right-click on any area and select "New User":
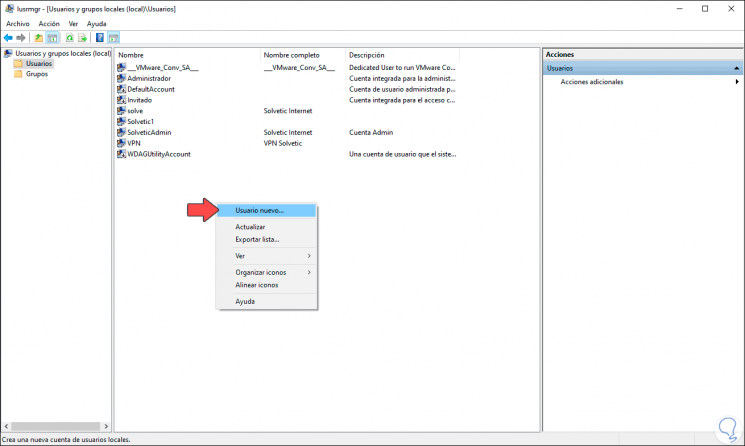
Step 3
In the pop-up window we enter the username, but the password fields will be blank:
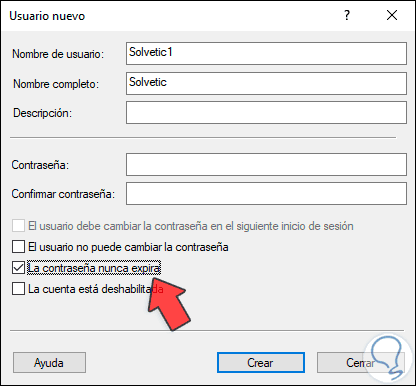
Step 4
We click "Create" and we can see our local username and password:
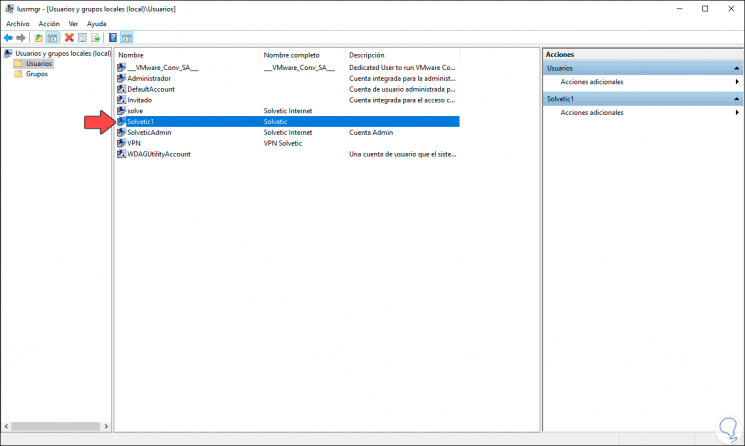
Step 5
To confirm that you are a local user, double-click on it and in the "Member of" field there should only be "Users":
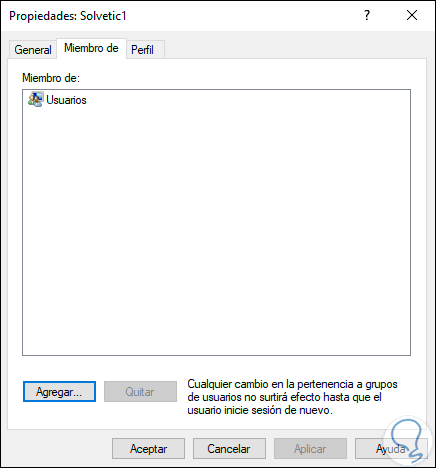
With this we have learned to create a local user in Windows 10 without password..