We often use our email to carry out personal or corporate tasks, the latter being an effective tool for managing meetings, synchronizing calendars and managing contacts which allows us to go beyond just sending and receiving emails..
Now, it is normal that at any given time we go on vacation or leave the office for a personal or organizational issue and if we do not manage the mail and the calendars it is 100% sure that when we return we will find ourselves before hundreds of emails and scheduled meetings that have already passed and which, for obvious reasons, we were unable to attend.
Today TechnoWikis will analyze in detail how to create an Out of Office type event in Outlook 2016 with the aim that everyone else has present when we are present or not in the office and thus not be involved in meetings or events to which they do not We can attend..
1. Create an out-of-office event in the Outlook 2016 calendar using the application
Microsoft's commitment to its Office suite is to create a safe, reliable and full of alternatives for its users.
The first alternative to create such an event is in the Outlook 2016 application, which we obtain when installing Office 2016 locally on our computer.
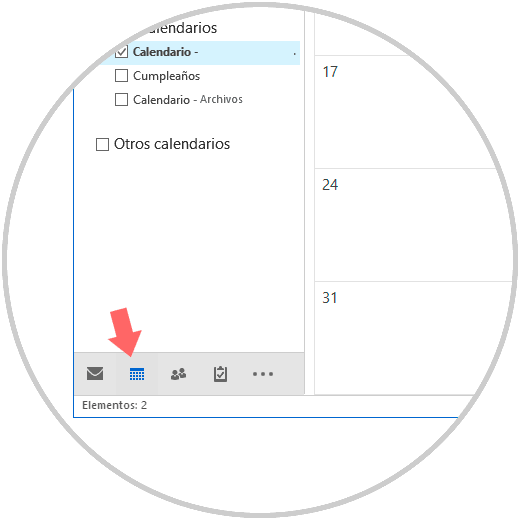
Step 1
To do this, we access the Outlook 2016 application and in the displayed window click on the calendar icon located at the bottom of said app:
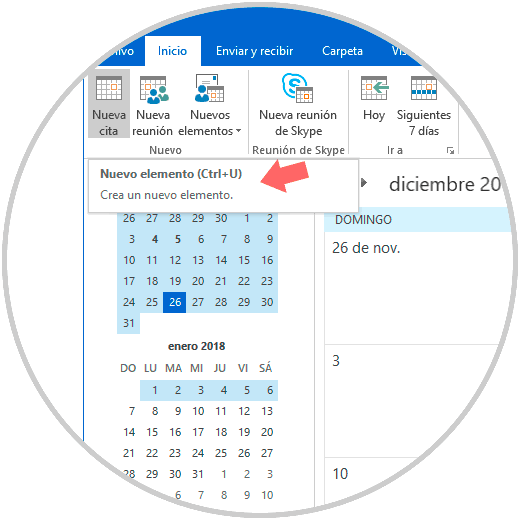
Step 2
There we will select the day on which the event is to be created and click on the “New appointment†option located in the Start menu, New group:
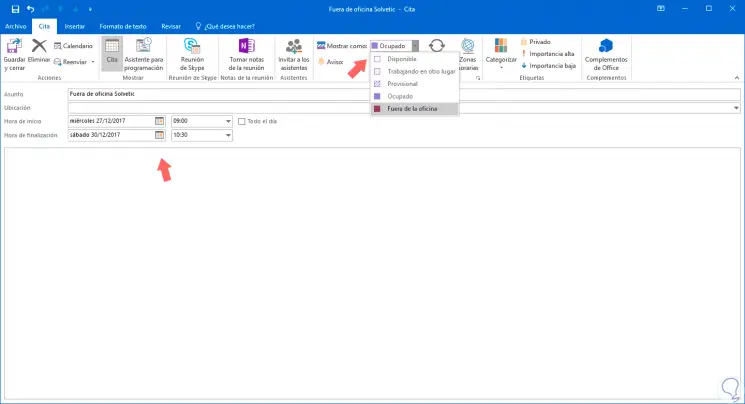
Step 3
When selecting this option we must do the following:
- Assign a subject that identifies the event to create.
- Define start and end date, as well as the time, of said event.
- Display the options in the "Show how" field and select "Out of the office".
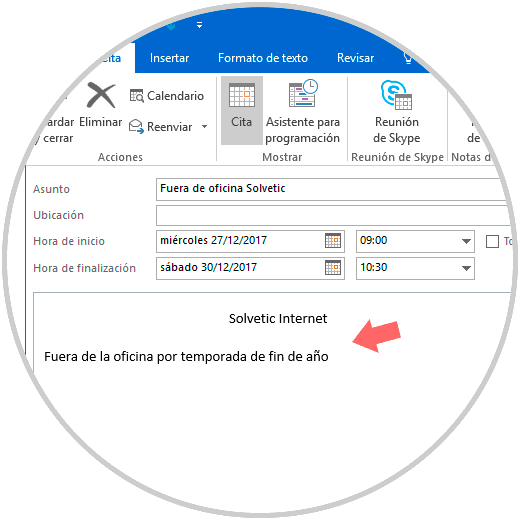
Step 4
If we wish we can add a message indicating contact instruction or the reasons for the absence:
Step 5
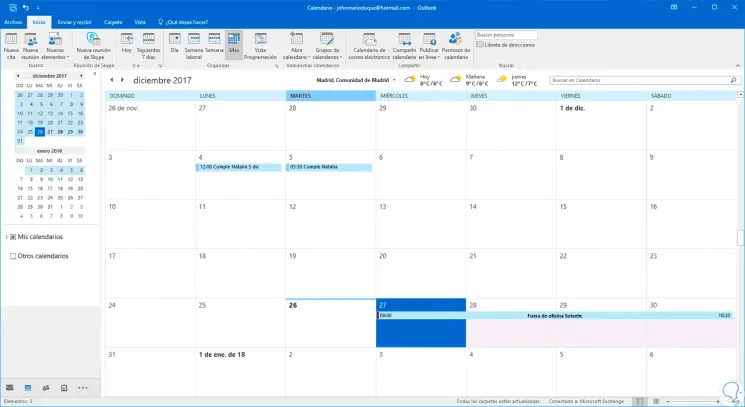
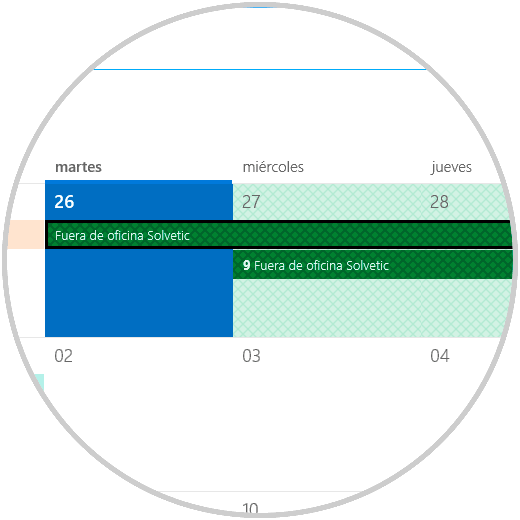
Once we define these values, click on the “Save and close†button and we can see in the calendar the defined date range, as well as its type of event:
2. Create an out-of-office event in the Outlook 2016 calendar using the website
As we know, Outlook 2016 is integrated into our Hotmail or Outlook mail, so we have the option of carrying out certain types of actions directly from our email in any web browser.
Step 1
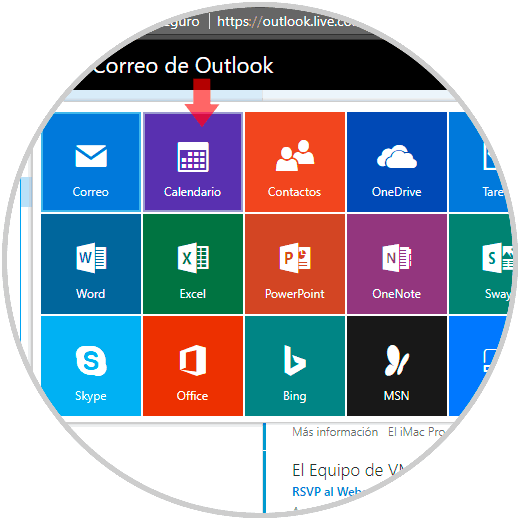
For this, we go to our email and there we click on the menu located in the upper left corner and select the “Calendar†option:
Step 2
We will see the following:
Step 3
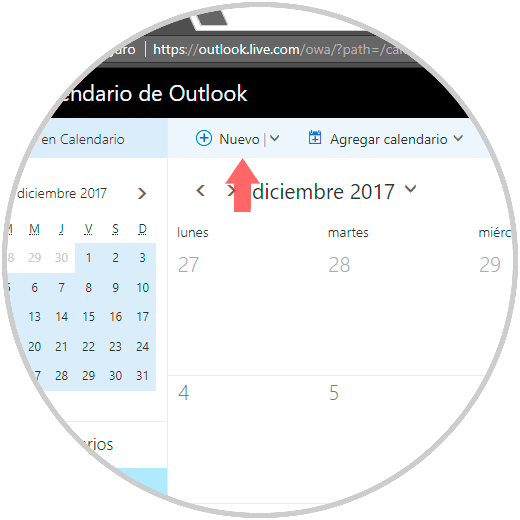
There we select the day where the event is to be created and click on the "New" button located at the top.
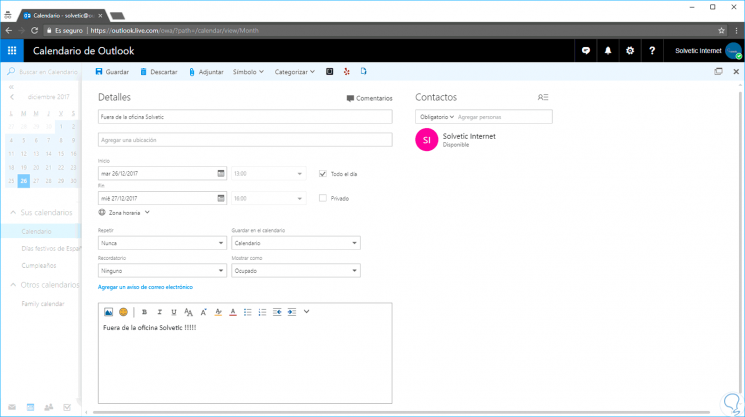
In the window displayed we will consider the following:
- Assign a name to the event
- Define date and time range of the event to create
- Activate the “All day†box so that the event covers the entire working day
- In the "Show as" field set the value "Busy"
- Define a message to be displayed
Step 4
We can see that we have some additional options such as defining if the event is repeated, assigning a reminder or more.
Click on the “Save†button to apply the changes and we can see the event created correctly:

3. Create an out-of-office event in the Outlook 2016 calendar using the Windows 10 Mail application
Windows 10 has the integrated Mail application by default with which it will be possible to add one or more accounts and manage them centrally with a single application.
Step 1
To create an event there, we open the application and see the following:
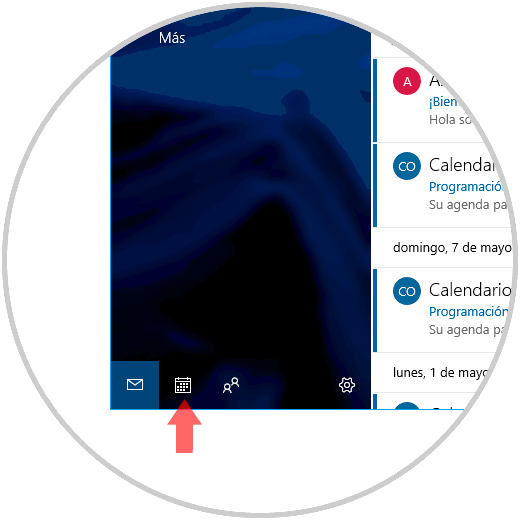
Step 2
There we click on the calendar icon located at the bottom and the following window will be displayed:
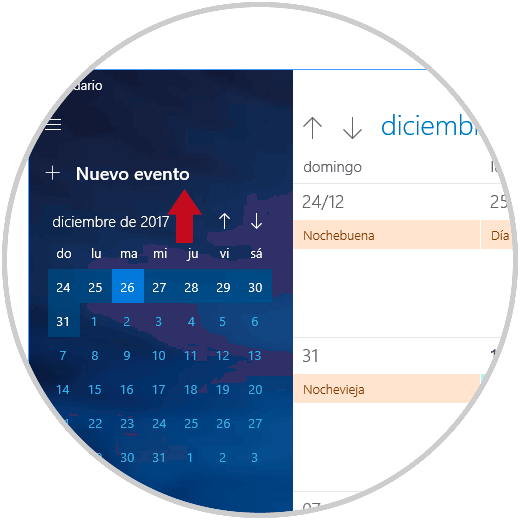
Step 3
There we click on the “New event†button and the following window will be displayed where we initially define the following:
- Date and time range of this
Step 4
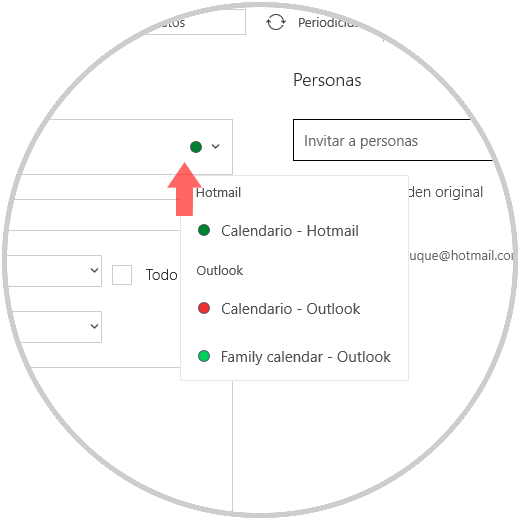
Alternatively, we can click on the button just next to the name of the event to select in which calendar to set:
Step 5
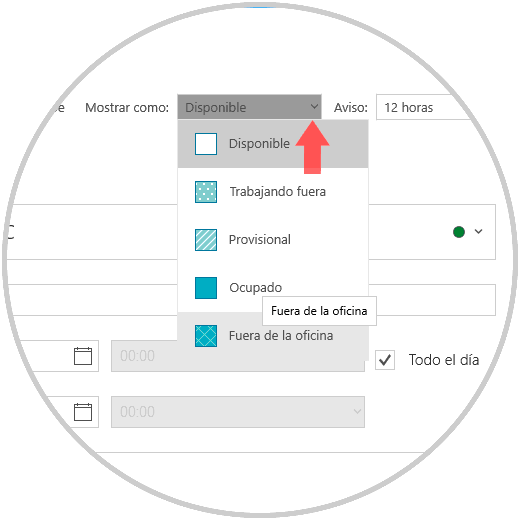
Now, we will do the following:
- Check the “All day†box
- In the Start menu we go to the “Show as†field and select the option Out of office
Step 6
Finally, click on the “Save and close†button and we will see our event created according to the defined parameters:
With any of these options it will be possible to create a new calendar that indicates our absence and thus allow others to know our absence.