One of the best ways to ensure the availability of the operating system as well as its installed files and programs is to use the system restore option..
This allows us at the time of some type of operating system failure, we have the opportunity to go to a previous restore point and thus recover the system as it was on that specific date.
Today we will see how to create these restore points automatically..
To keep up, remember to subscribe to our YouTube channel! SUBSCRIBE
1. Enable Windows 10 restore points
By default this option is not active in Windows 10, so we must enable it.
Step 1
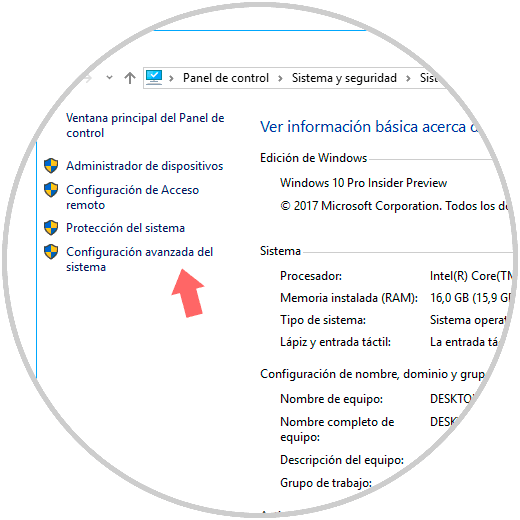
For this we will go to the next route.
Step 2
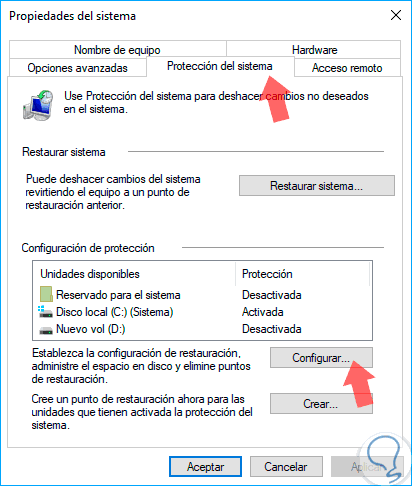
There we click on the “Advanced system configuration†line and in the new window we go to the “System protection†tab:
Step 3
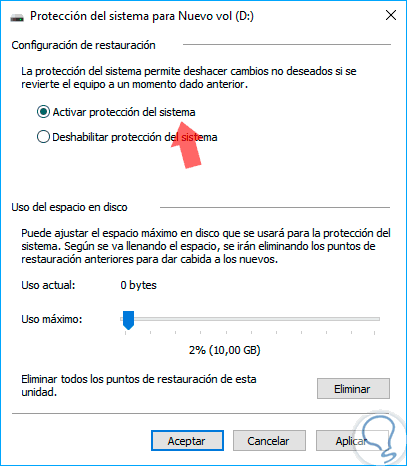
There we can select the unit that is Disabled and click on the Configure button, we will see the following where it will be necessary to click on the “Activate system protection†box.
Click on Apply and Accept to save the changes.
2. Create restore points using the Registry Editor in Windows 10
Step 1
To access this editor we will use the following keys and execute the regedit command.
+ R
regedit
Step 2
Once there we will go to the following route:
HKEY_LOCAL_MACHINE \ SOFTWARE \ Policies \ Microsoft \ Windows Defender
Step 3
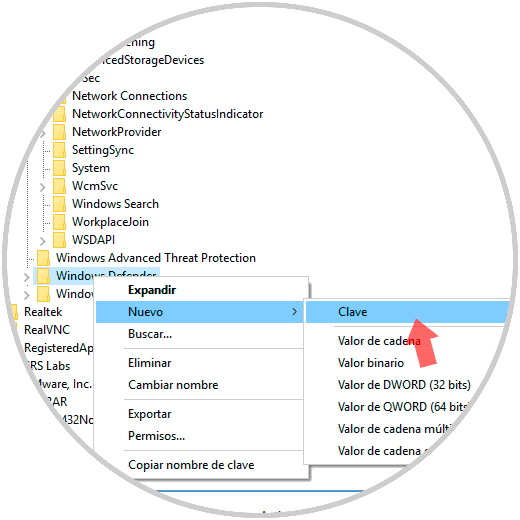
We will right click on the Windows Defender key and select New / Password:
Step 4
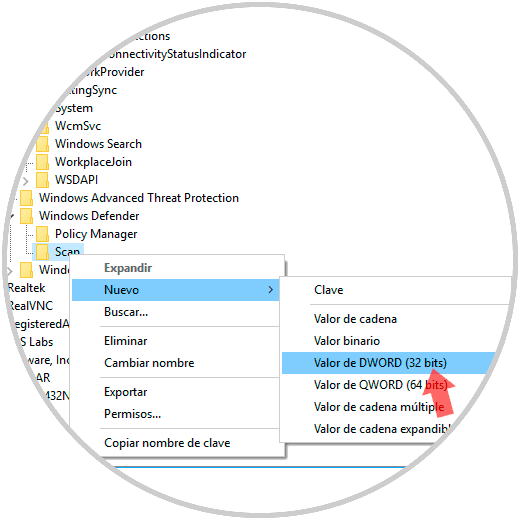
We will call this key Scan. Now, we will right click on Scan and select New / DWORD Value (32 bits):
Step 5
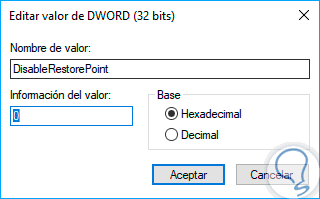
This value will be called "DisableRestorePoint".

Step 6
We will double-click on that value and we must ensure that the value in the Value data field is zero 0. Click OK. We can exit the registry editor.
3. Create restore points using the Group Policy Editor in Windows 10
Step 1
To access this editor we will use the following keys and execute the gpedit.msc command, press Enter.
+ R
gpedit.msc
Step 2
In the displayed window we will go to the route:
- Windows Defender Antivirus
Step 3
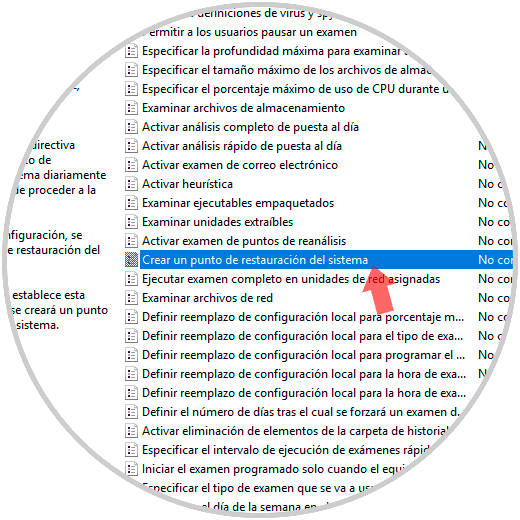
In this route we will locate a policy called “Create a system restore pointâ€:
Step 4
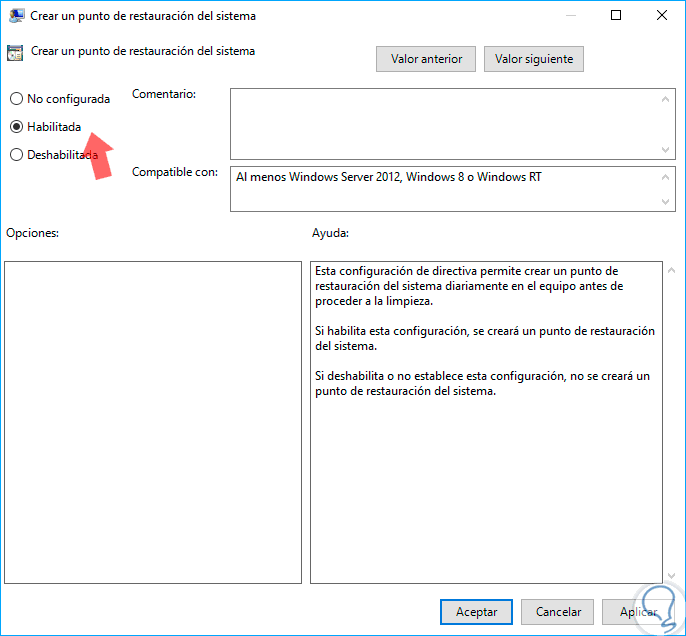
Double click on it and activate the “Enabled†box. Click on Apply and Accept to save the changes.
In this way we have created automatic restore points in Windows 10..