One of the ways we can have a Windows 10 optimization resource is to create a restore point, we know that when this point is created , at any time that the system presents some type of error it will be possible to return to an earlier date where the equipment worked optimally without losing data .
Today we will see how to create a shortcut to this functionality in Windows 10..
To keep up, remember to subscribe to our YouTube channel! SUBSCRIBE
Create a shortcut with a quick restore point in Windows 10
Step 1
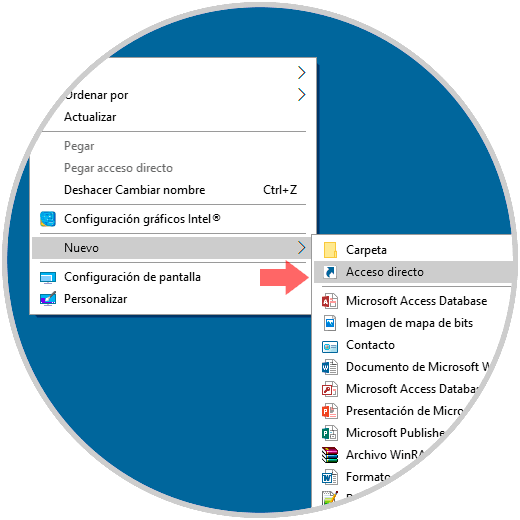
To create this shortcut we go to the desktop, right click and select the option "New / Shortcut":
Step 2
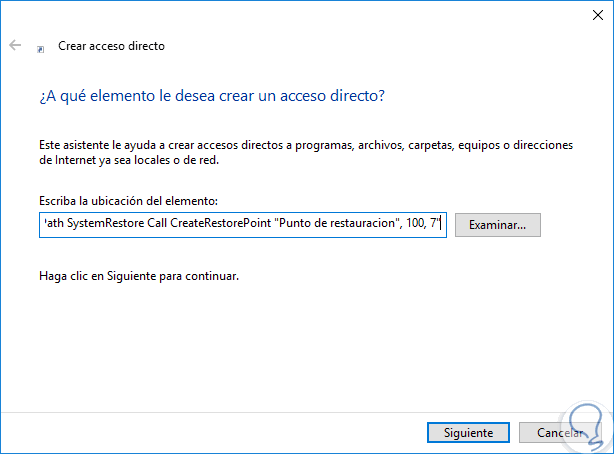
In the displayed window we will enter the following route:
cmd.exe / k "wmic.exe / Namespace: \\ root \ default Path SystemRestore Call CreateRestorePoint" Restore point ", 100, 7"
Step 3
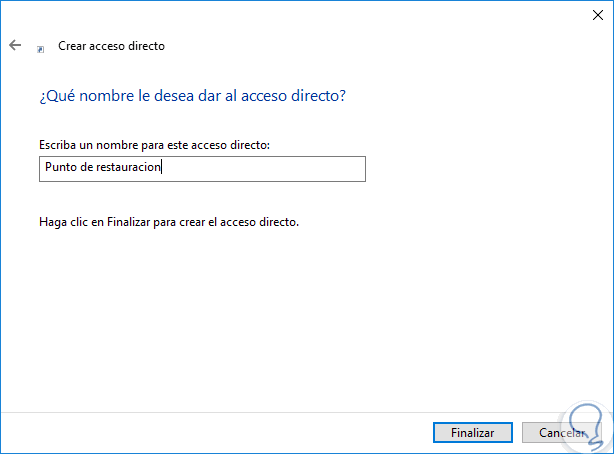
Click on Next and assign a name to that access:
Step 4
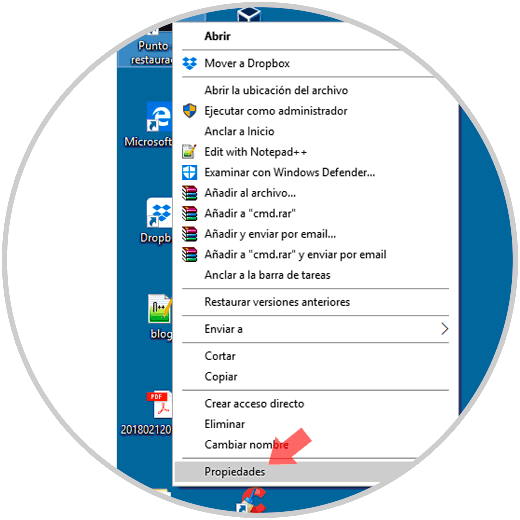
Click on Finish to close the wizard. Now, we go to the desktop and we will right click on the created shortcut and select the "Properties" option:
Step 5
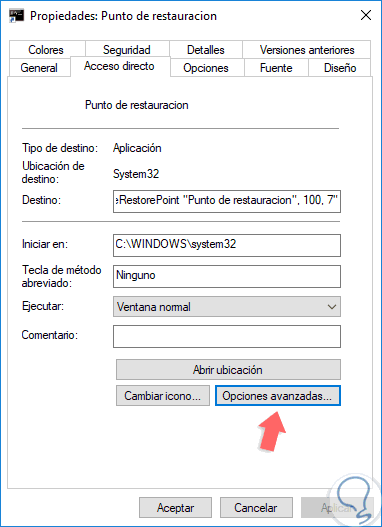
The following window will be displayed:
Step 6
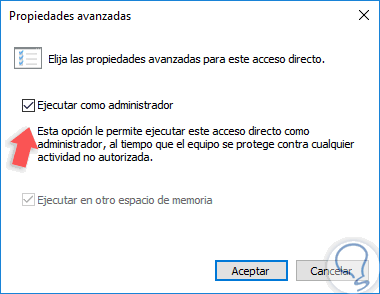
Click on the "Advanced options" button and in the window that will open, select the "Run as administrator" box. If we wish we can click on the “Change icon†button to customize it. Click on Accept and then on Apply and Accept to save the changes.
Step 7
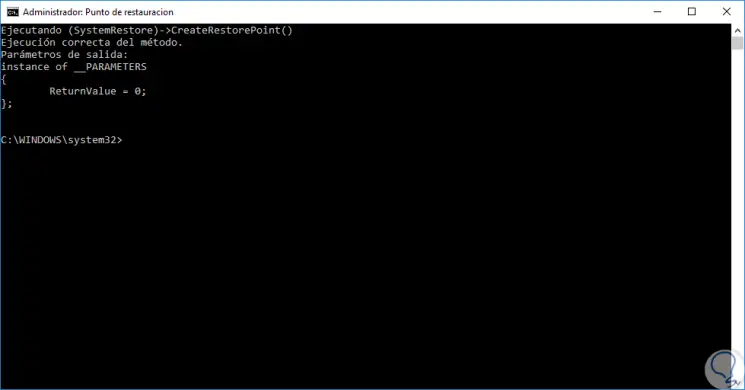
To verify that it works in the ideal way we will double click on it and the final result will be as follows:
This way we will create a restore point with few steps in Windows 10.