Checking the state of the ports is one of the fundamental tasks when we manage a network or a system regardless of the type of size of this, this because many tasks require that the ports be open for file transfer or user access, as well Like other ports, they must be closed due to security issues..
A basic way to validate that a device is active or not is using the "ping" command which is based on ICMP which gives us the opportunity to check the response time of the sending and receiving of the sent packets and obtain certain statistics of the same:
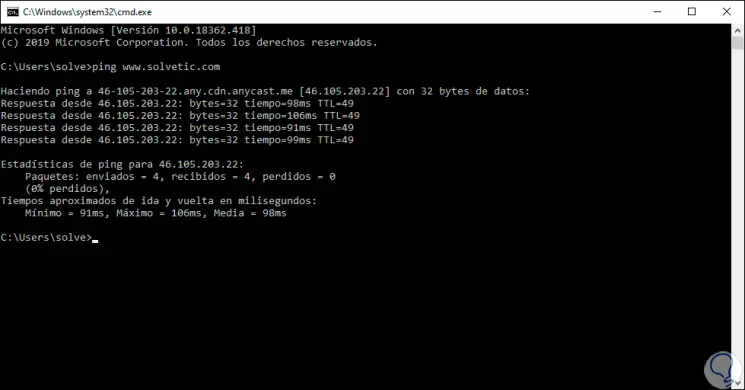
Although ping works well in its basic state, for other types of tasks it may not be completely reliable, in this case we talk about the validation of the TCP and UDP ports . The TCP and UDP protocols act on the Internet network layer protocol or IP protocol offering error checking services, but as we have mentioned, the ping command alone does not generate details of these ports. This is where we must take advantage of two utilities called Nmap and Tcping which we will see in detail for Windows 10.
To keep up, remember to subscribe to our YouTube channel! SUBSCRIBE
1. What is it and how to use Tcping in Windows 10
What is tcping
Tcping (tcping.exe), has been developed as a console application whose design and operation is similar to the ping command, but the difference is that Tcping works through a tcp port focusing its statistics on this type of ports.
This utility can be downloaded from the following link:
Tcping
Use tcping
The tcping utility measures the total time used by a 3-way TCP link protocol (SYN, SYN / ACK, ACK) both in itself and with a remote host, this results in all the details being generated in the final result of homework
To use tcping correctly, we must access the command prompt and go (with the cd command) to the folder where it has been downloaded to run the tcping.exe file..
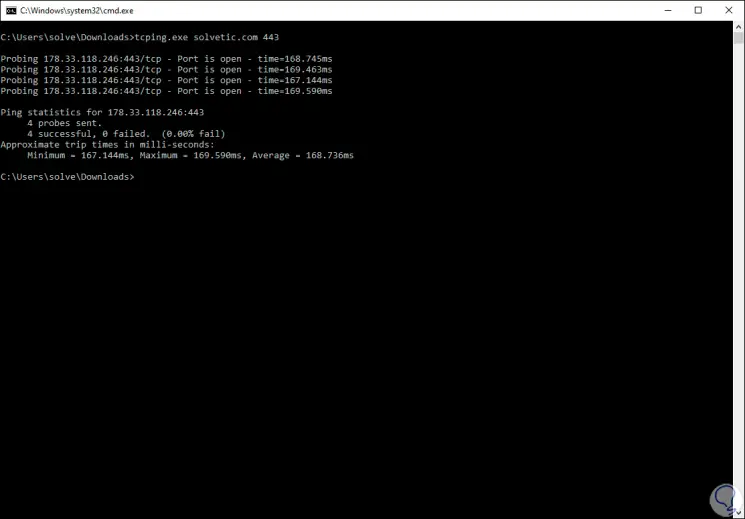
The execution is simple, we can do the following:
tcping.exe solvetic.com 443
As a result we will see details such as:
- Port status, open (open) or close (closed)
- Percentage of packages received or failed
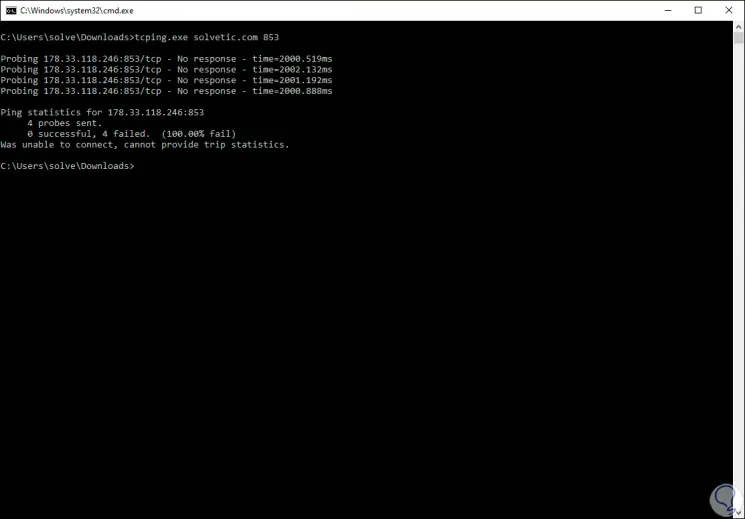
In case a port is closed, for example, TCP port 853 which is used by DNS over TLS we will see the following:
Main TCP ports
Recall some of the main TCP ports available:
- Port 80 which is used for non-secure HTTP web browsing
- Port 990 which is used for the FTPS (Implicit FTP)
- Port 443 which allows web browsing with the secure HTTPS protocol
- Port 22 which is used for secure SSH and SFTP connections
- Port 53 used by the DNS service, Domain Name System
- Port 25 used by the SMTP protocol
Tcping parameters
Now, Tcping.exe has some usage parameters that are:
- -t: run the ping continuously until it stops with the control-c keys
- -n 5: send 5 pings to the remote host
- -i 5: send a ping every 5 seconds
- -d: includes date and time on each line
- -v: display the utility version
- -4: assign IPv4 addressing
- -6: assign IPv6 addressing
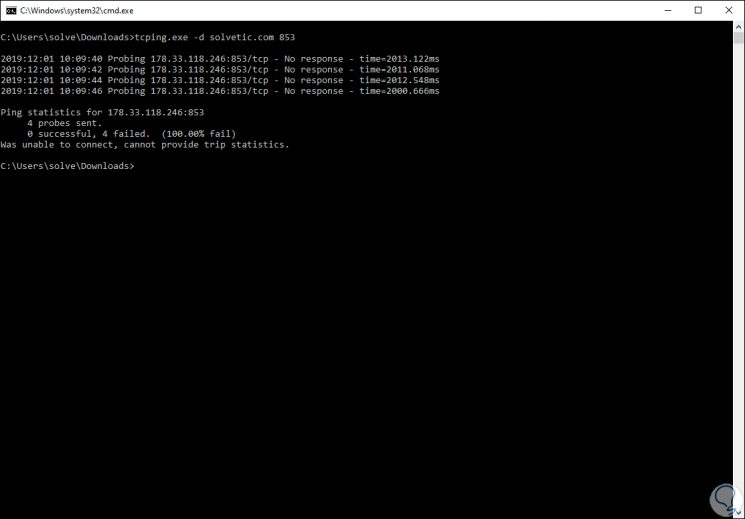
With this, we have Tcping to display full details of the TCP ports open or not in the system.
2. What is it and how to use Nmap in Windows 10
Nmap (Network Mapper) is a completely free and open source utility with which it will be possible to detect networks as well as carry out security audits.
The Nmap utility makes use of unprocessed IP packets thanks to which it will be possible to detect what computers are available on the network, what services with name and version of the application are hosted on them, what operating systems are installed, what type of filter packages / firewalls are used and much more..
Nmap Utilities
To further understand what Nmap offers, we must know that Nmap integrates utilities such as:
- An advanced GUI with a result viewer (Zenmap)
- A data transfer, redirection and debugging tool (Ncat)
- An ideal tool to compare scan results (Ndiff)
- A response analysis and packet generation tool (Nping)
Nmap is available for download at the following link:
Nmap
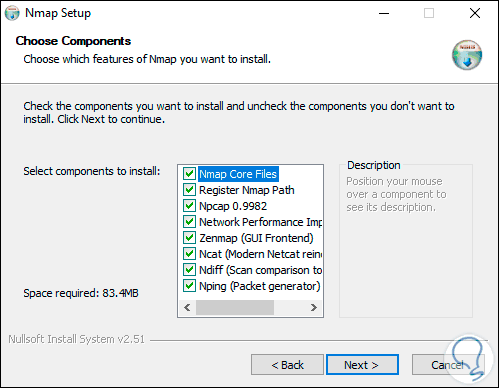
Step 1
Once we download the Nmap executable we must install it locally in Windows 10 selecting what tools will be available:
Step 2
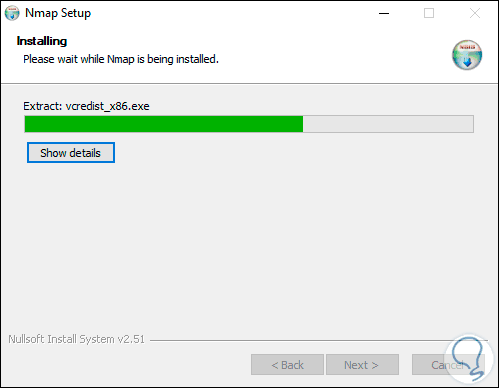
After this we can continue with the installation of Nmap:
Step 3
In the case of UDP protocols, we must keep in mind something and that is that with the TCP protocol its operation is based on a three-way sending, the origin will send a SYN to the destination, the destination is responsible for responding with a SYN-ACK and then from this the origin will send an ACK to finalize the request and thus establish the connection.
As UDP does not establish a connection, this process does not apply with the tcping utility, for example, here Nmap comes into play since it will give us these results.
Note
For Nmap to work correctly in Windows 10 we must install the Npcap function which is available in the following link:
Npcap
Step 4
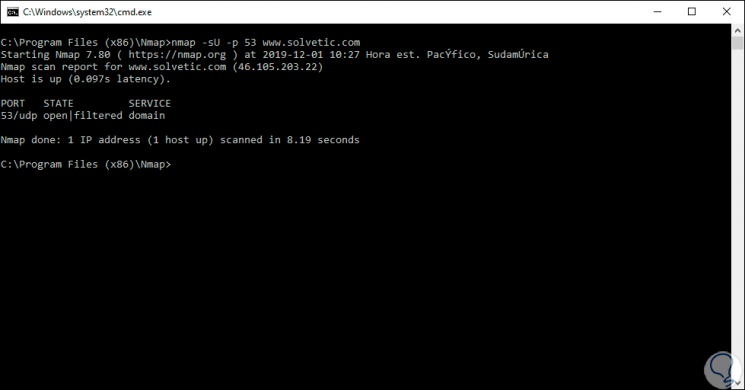
Once this is done, to check the UDP ports we will execute the following but first we must go, with the cmd command, to the route where Nmap has been installed:
"C: \ Program Files (x86) \ Nmap"
Now if we execute the following:
nmap -sU -p 53 www.solvetic.com
Step 5
As a result we will see the following:
Step 6
There we find the status of the selected port, some of the most used UDP ports are:
- Port 23: It is used on Apple devices with Facetime service.
- Port 53: used for DNS services
- Port 514: is used by Syslog
- Port 1701: Applies for the L2TP VPN protocol.
Step 7
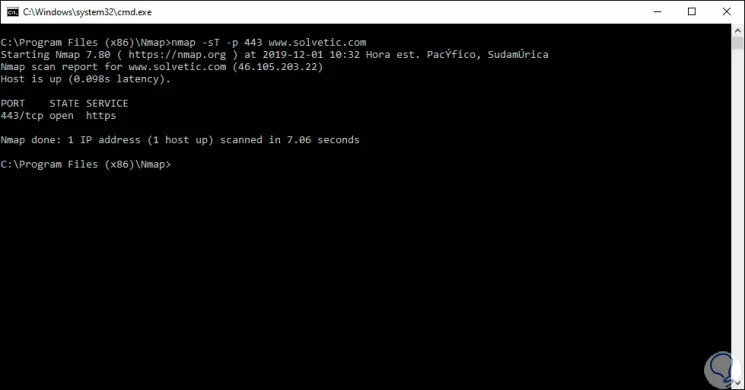
Similarly, Nmap allows us to validate TCP ports using the following syntax:
nmap -sT -p 443 www.solvetic.com
With these utilities we have the necessary tools to check the TCP and UDP ports through ping in Windows 10.