There are different mechanisms available that allow us to add security and privacy to our USB devices which have a much higher security risk because they are constantly connected on different computers, both public and private, and we do not know which of these moments can be seen affected the information stored there (which can be sensitive. If it gets corrupted we will be before more complex situations of use..
It is not enough just to use a secure password , but it is ideal to integrate encryption options and it is for this reason that TechnoWikis will explain two methods to encrypt and set a password on our USB devices and this process will be done in Windows 10. One of the best known by all users of Windows operating systems is BitLocker which is integrated into Windows 10 as a data protection function seeking to minimize theft of information, as well as exposing the computer to threats present both locally and remotely.
Below, we show you how you can protect your USB drives without installing programs in Windows 10..
To keep up, remember to subscribe to our YouTube channel! SUBSCRIBE
Put password or encrypt USB with BitLocker in Windows 10, 8, 7
BitLocker offers superior protection if combined with Trusted Platform Module (TPM) version 1.2 or later, remember that TPM is part of the hardware of some computers and can act alongside BitLocker to protect user data and prevent improper handling of the equipment.
BitLocker has an option that allows the system startup process to be blocked and will continue loading only until the user of the said device enters a personal identification number (PIN), a removable device that contains a startup key, etc., this prevents unauthorized users from accessing the computer.
Bitlocker features
Some of the most outstanding features of BitLocker are:
- XTS-AES encryption algorithm which is special against the kind of direct attacks on encryption which are based on the manipulation of encrypted text to edit system changes
- BitLocker supports the 128 and 256 bit XTS-AES keys
- It is possible to encrypt and recover devices with Azure Active Directory
- BitLocker offers DMA port protection using the MDM DataProtection / AllowDirectMemoryAccess policy to block DMA ports at device startup time
- A new group policy designed to configure Windows pre-boot recovery has been added
- Improvements in credential manager support
- It is possible to enable the Credential Guard function without UEFI blocking
TechnoWikis will explain below how to activate BitLocker on a USB device in Windows 10..
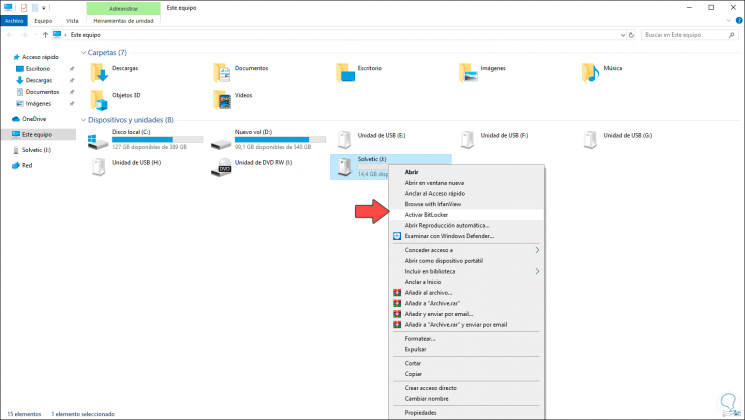
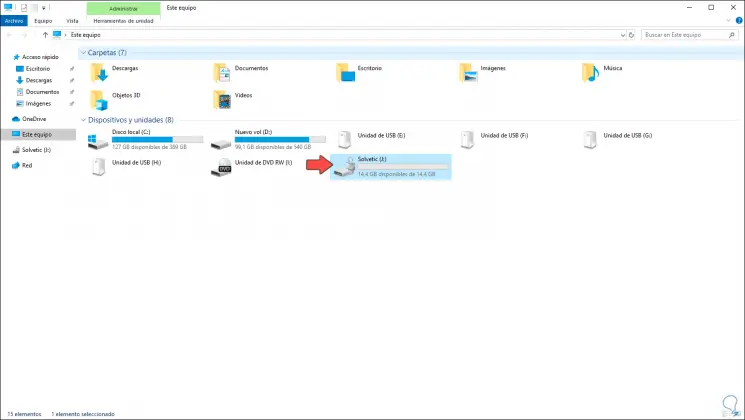
Step 1
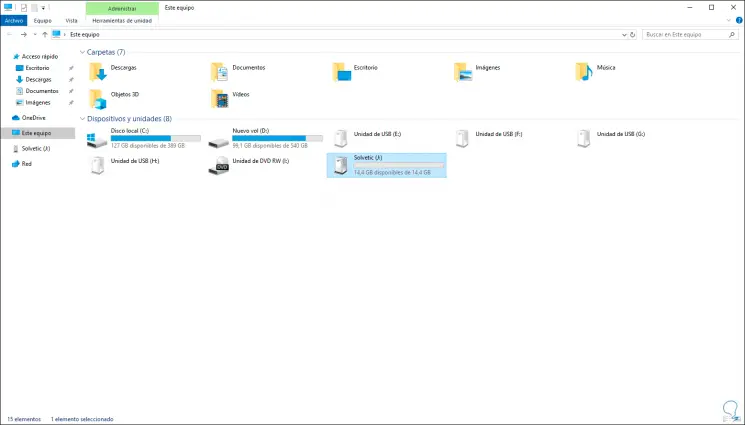
For this process we access the System File Explorer, right click on the USB drive and select "Activate BitLocker":
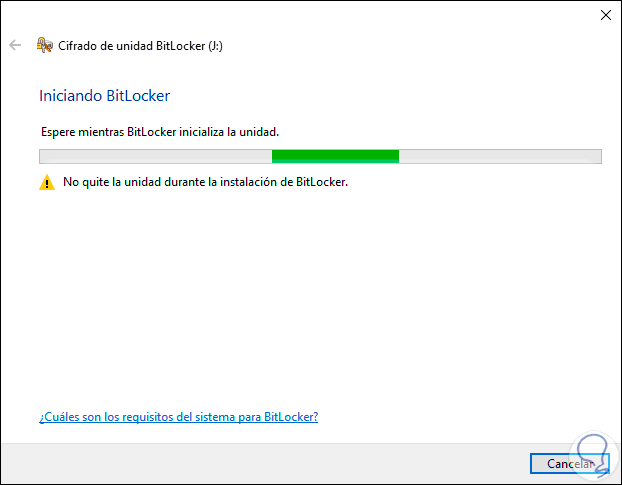
Step 2
The following BitLocker wizard will be deployed which prepares the unit for activation:
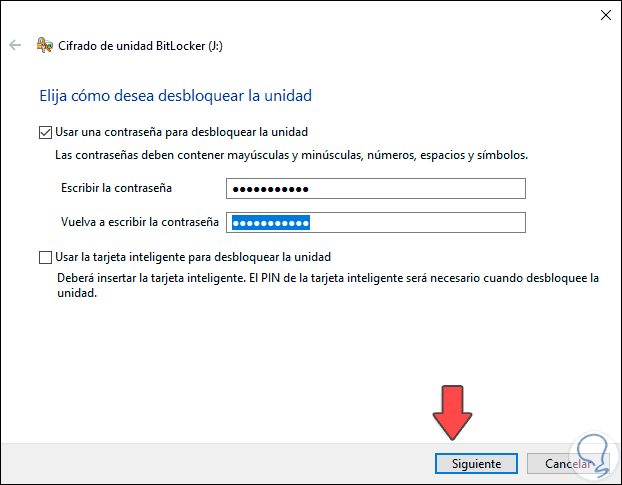
Step 3
After this you will be asked what type of unlock we will use:
Step 4
In this case, we will use a password, which will activate this box and enter the password along with its validation:
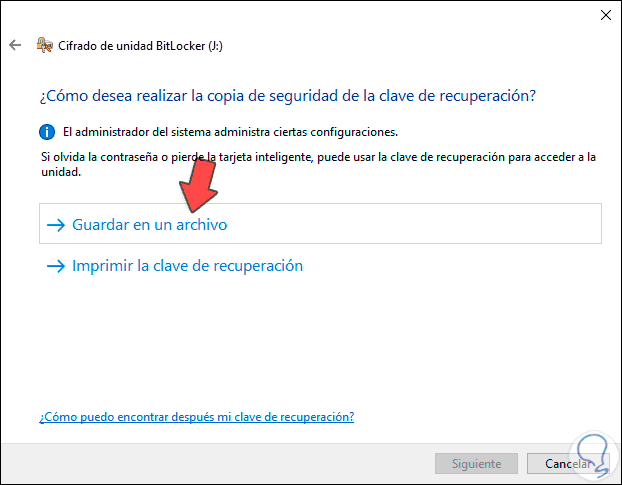
Step 5
We click Next and now we define how to save the backup copy of the recovery password:
- Store it locally in a file
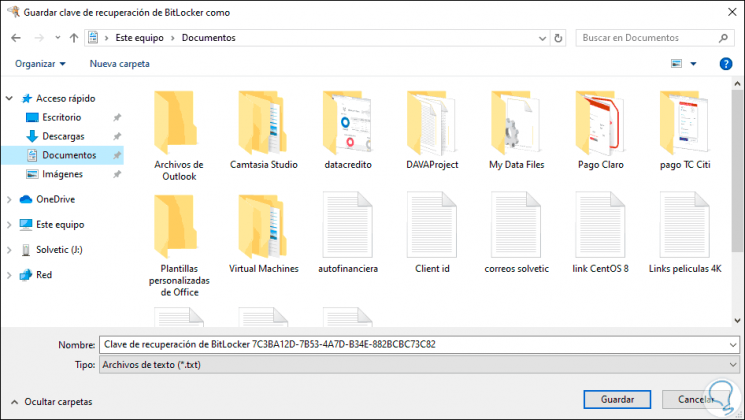
Step 6
For this example we will use the option “Save to a file†and it will be necessary to define the name and location of the file. We click on Save to complete the process.
Step 7
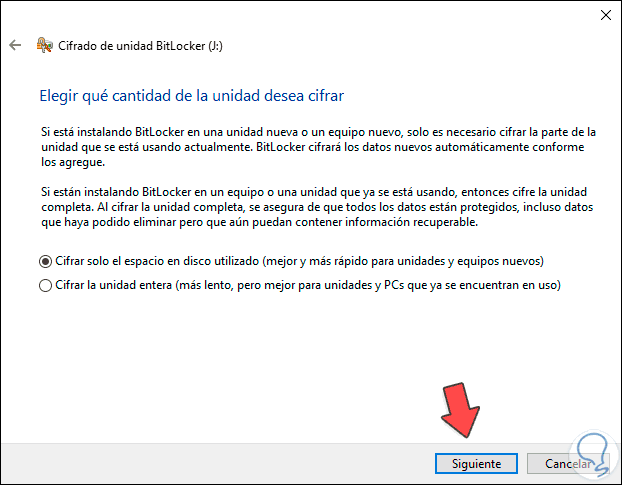
We click Next and now we must define what type of data to be protected, the options are:
- Encrypt only the space we have used
Step 8
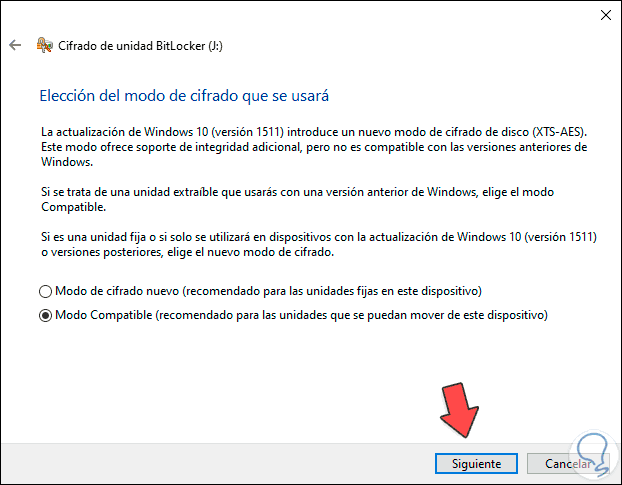
We select the option that best suits our needs and click Next, and now we must define the type of encryption to use, here the options are:
- New encryption which is ideal for units that are used only in this equipment.
- Compatible encryption which allows that unit to be used in other equipment.
Step 9
Select the appropriate option and click Next, now we will see the following message:
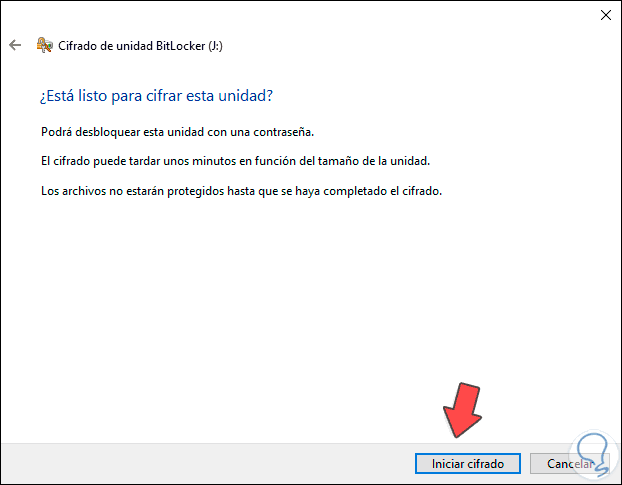
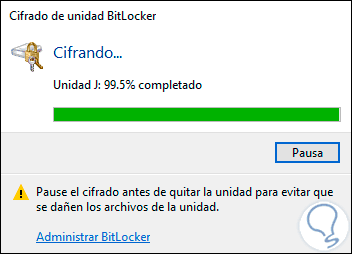
Step 10
If everything is in accordance with our need, click on "Start encryption" so that BitLocker is active on that unit:
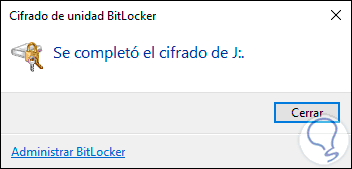
Step 11
When this process comes to an end we will see the following:
Step 12
We click Close to exit the wizard and we can see that the USB drive integrates a lock icon, warning that it is protected by BitLocker:
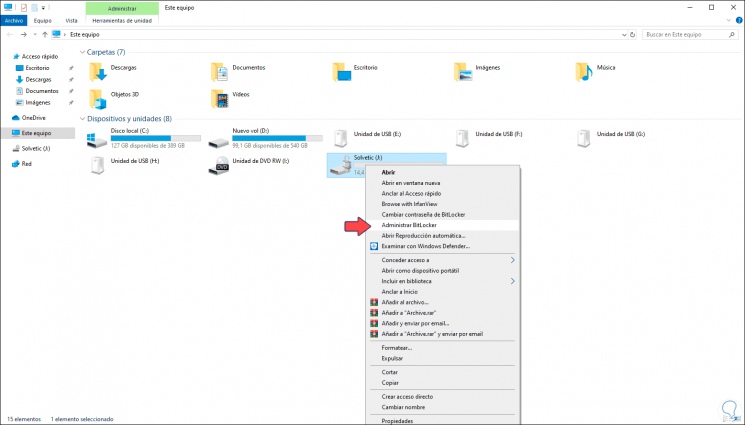
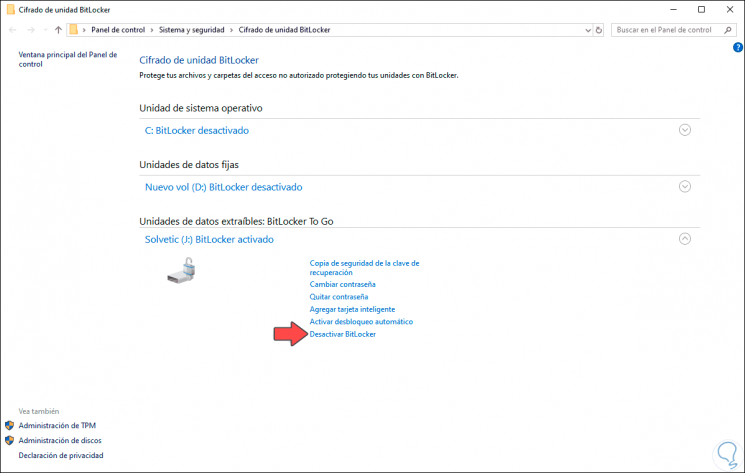
Step 13
From this moment when trying to access this unit we must enter the password that we have assigned, at the moment when it is considered that BitLocker is not necessary, we must right click on the unit and select “Manage BitLockerâ€:
Step 14
In the displayed window we select the line “Disable BitLockerâ€:
Step 15
The following message will be released:
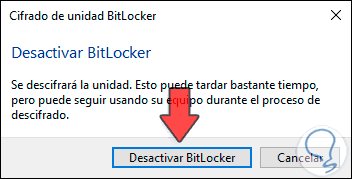
Step 16
Click on "Disable BitLocker" to start the process:
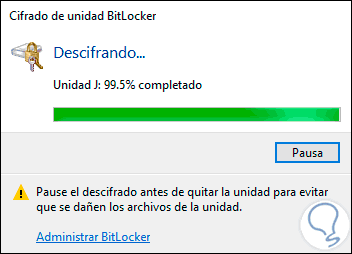
Step 17
When it reaches its end we will see the following:
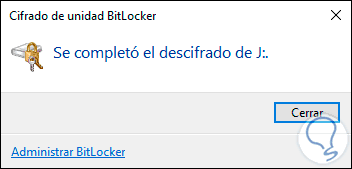
Step 18
Now, if we access the Explorer we can see that this unit no longer has the lock icon:
With this simple method it will be possible to add password and encrypt our USB drive using BitLocker in Windows 10. With this simple process we have an option to increase the security of our USB devices and protect the most sensitive information.