Today we have numerous online platforms that have been created to carry out specific tasks based on the user's tastes and one of these is Kodi. Without a doubt one of the most popular worldwide..
Kodi, or previously called XBMC â„¢ Media Center, has been built as a software media player for various platforms for free and being open source, receives constant updates designed to be an integral solution as an entertainment point for digital media . One of its main columns is HTPCs (Home Theater PCs).
Kodi can be downloaded at the following link:
Kodi
Kodi integrates a graphical user interface (GUI) from which we can access videos, photos, podcasts and music from different storage media . Being an open source application, we can find numerous add-ons that will make life much more complete. One of these is the Exodus add-on, which is a video addon in which various movie and series contents are available in multi-link..
There we can find content mostly in English, subtitled and some more content in Spanish. However, sometimes we can find an error such as "No transmission available" or "Exodus error message" and therefore it will not be possible to access or reproduce the available content. That is why TechnoWikis will give you a series of tips to allow Exodus to work as expected in our system.
1. How to update Exodus in Kodi
This process involves two options that are, directly update the Exodus plug-in or reinstall it again.
Step 1
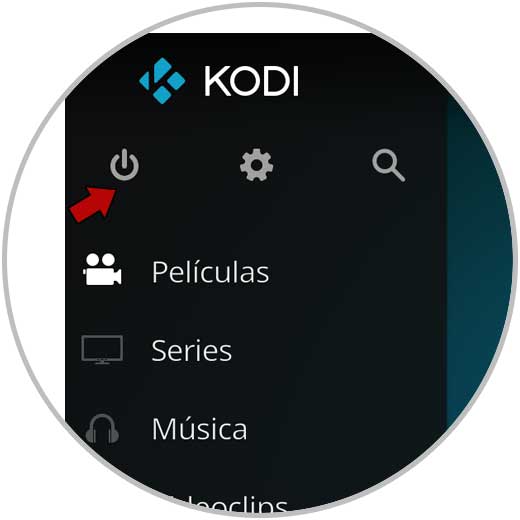
To update it we access Kodi and click on the gear icon located at the top:
Step 2
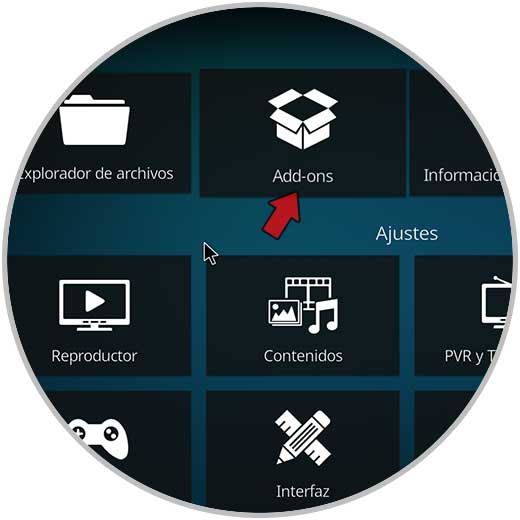
In the following window we select the category “Add-onsâ€:
Step 3
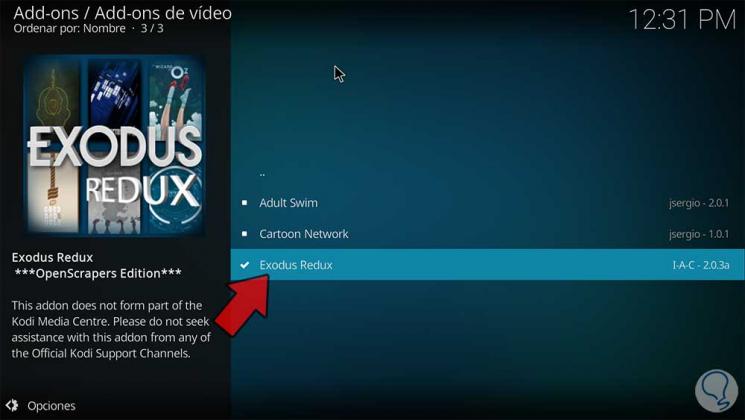
In the next window we select Exodus Redux:
Step 4
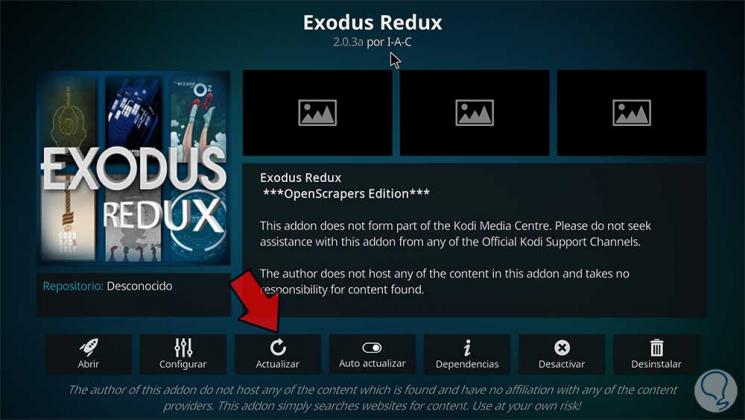
The following window will be displayed where we find the different options of the complement. We click on “Update†to check new versions of Exodus
Step 5
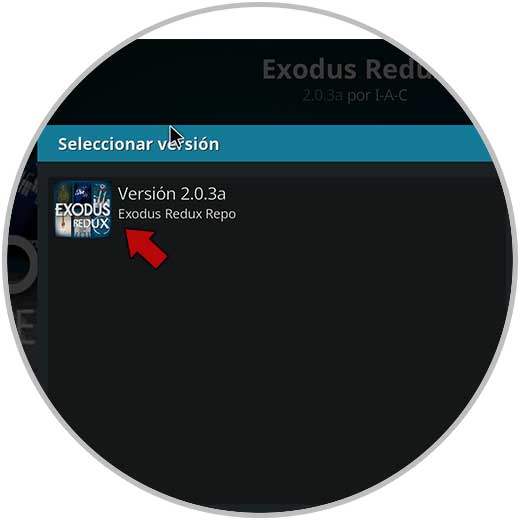
We select the available version and the plugin will automatically be updated:
Step 6
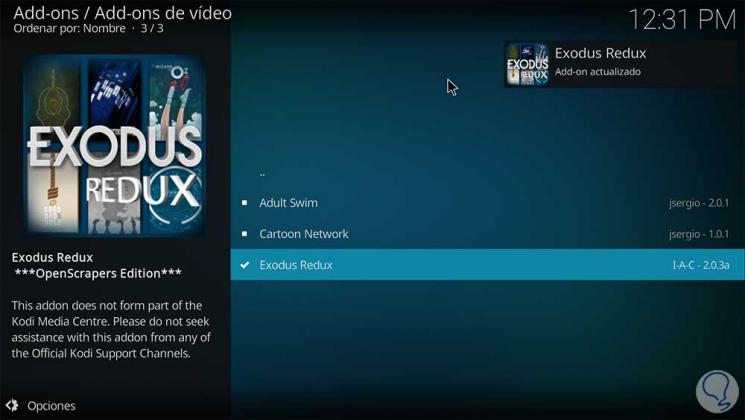
Now, if this does not work, we must click on “Uninstall†and follow the steps of the wizard to remove Exodus from Kodi
Step 7
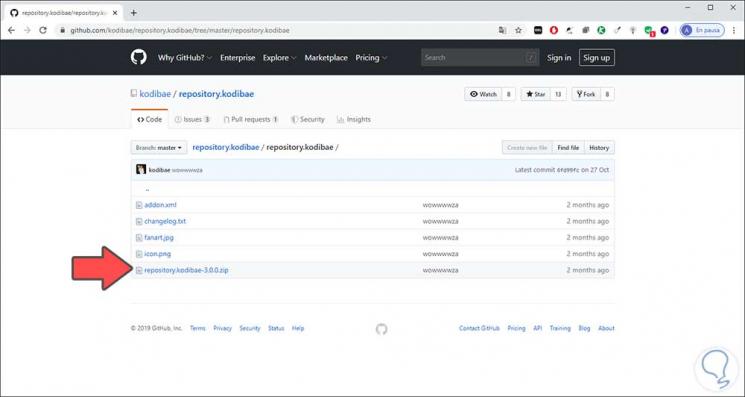
There we click on the Exodus .zip file. Next we will go to the following link:
Exodus Repositories
Step 8
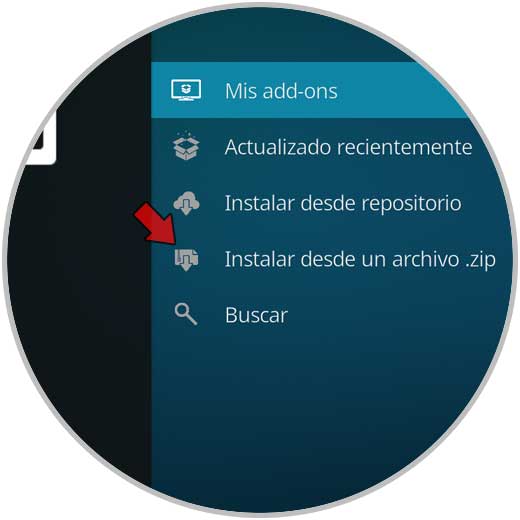
Once downloaded we will go to Kodi and from the “Add-ons†section we select the option “Install from a .zip fileâ€:
Step 9
Then we will locate the file we have downloaded from Exodus:
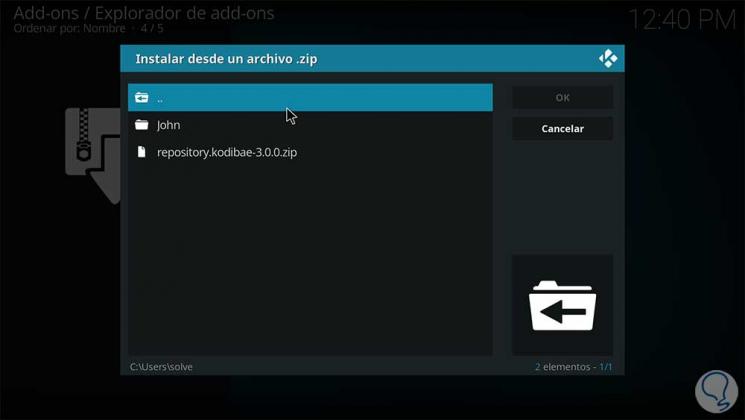
Step 10
We select it and it will automatically be installed in the Kodi repositories. The next step is to go back to Add-ons and this time select "Install from repository":
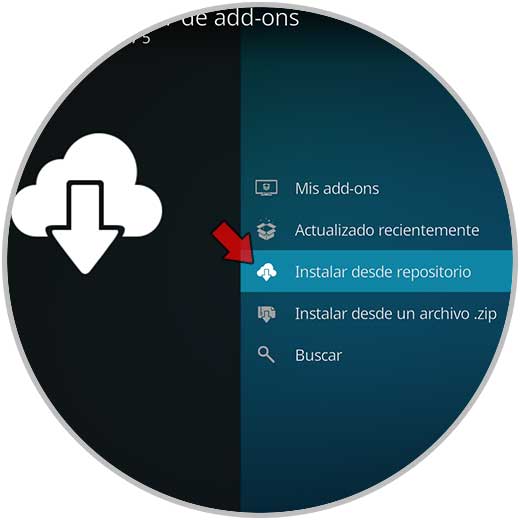
Step 11
In the next window we select the downloaded file. aNext
we select “video add-onsâ€:
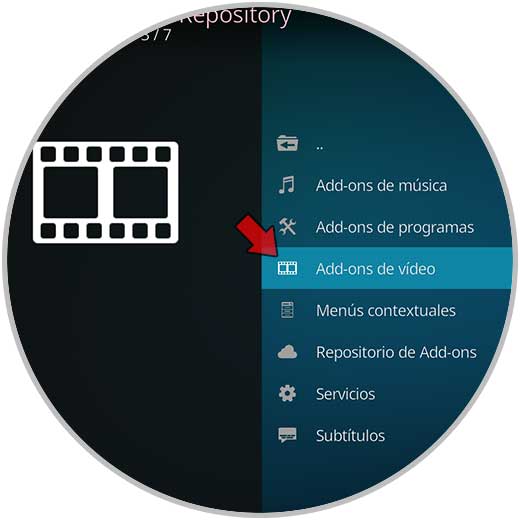
Step 13
In the displayed list we select Exodus:
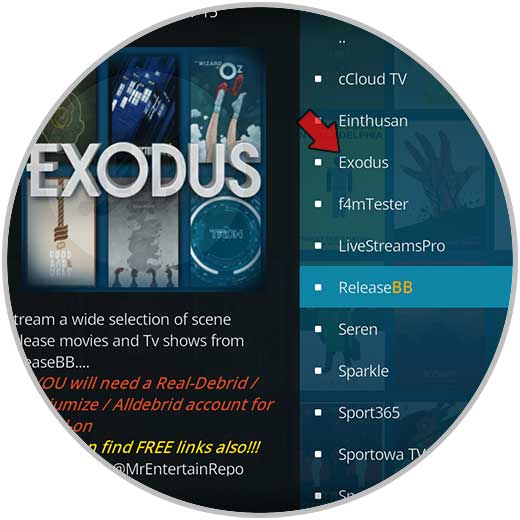
Step 14
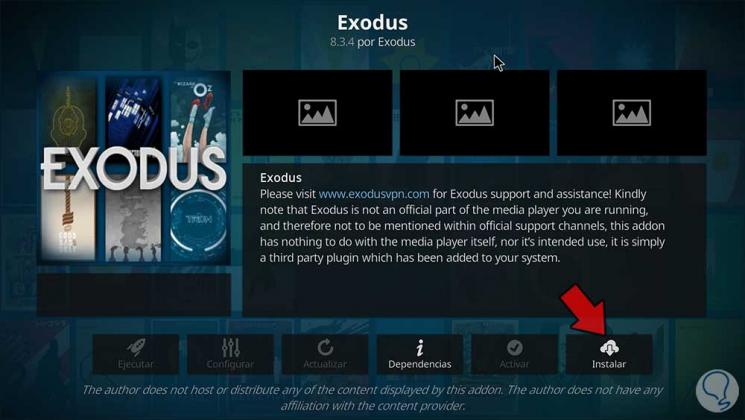
And in the next window we click on the "Install" button located at the bottom:
2. How to use a VPN to solve Exodus Kodi no Stream available
VPNs (Virtual Private Network) give us the opportunity to access and surf the web safely. However, something that can be vital in the transmission of videos in Kodi Exodus is that our ISP or Internet service provider has some type of restriction in the reception of these network packets affecting communication with the external network.
There the VPN is responsible for hiding our geographical position and using the location of another country to enable these services. To know more about the different VPN options available you can visit the following link:
VPN providers
We simply have to download the VPN and activate it so that the navigation is identified differently and thus allow Kodi Exodus to work correctly..

3. How to clear the cache in Exodus
As we download add-ons and more objects in Kodi Exodus, they are hosting cache memory so that the next access is much faster. Excessive use of this can cause a negative effect on the behavior of Exodus.
Step 1
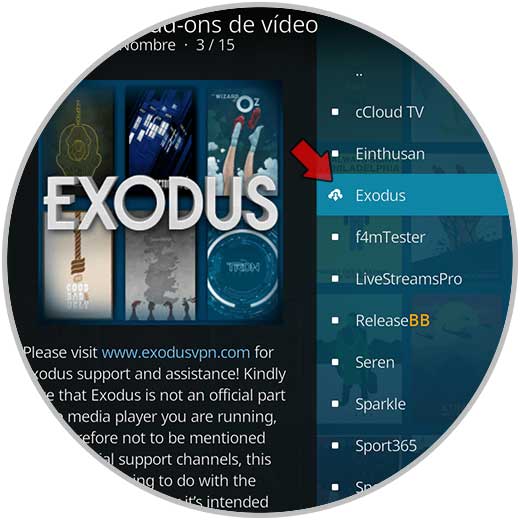
To clear the cache we must this process. We will go to video Add-ons / Add-ons. There we select Exodus
Step 2
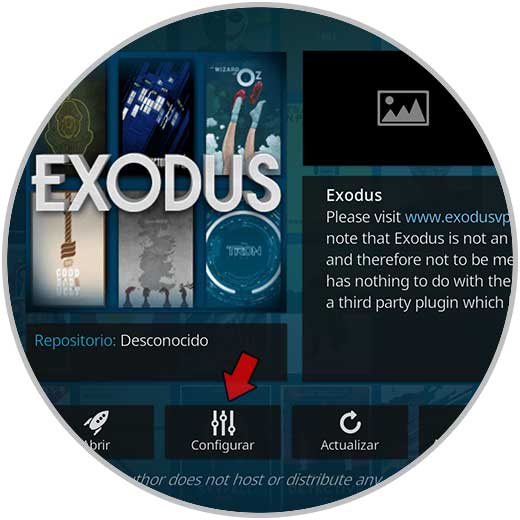
In the main window we select “Configureâ€:
Step 3
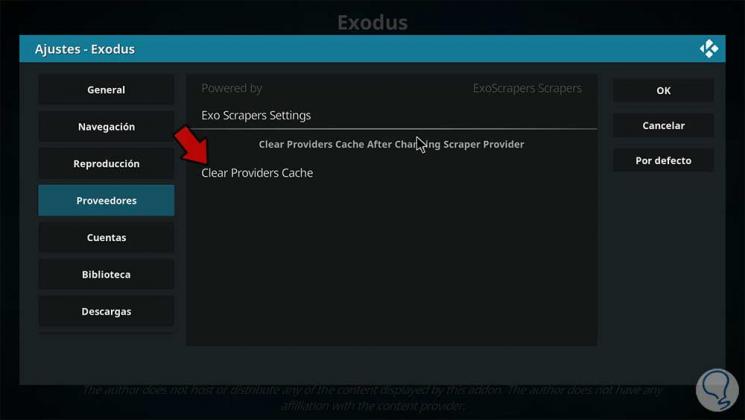
In the displayed window we go to the "Suppliers" section and click on the "Clear Providers Cache" line:
Step 4
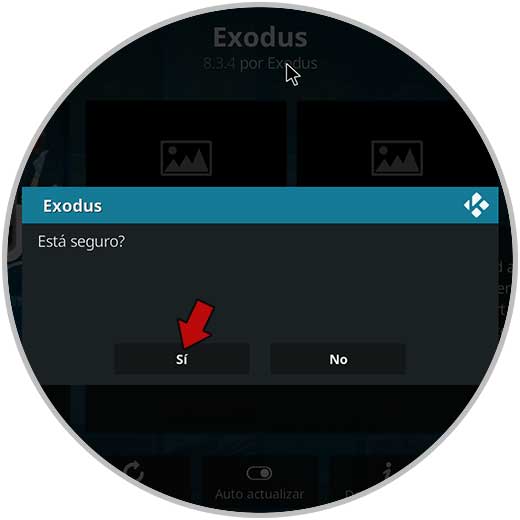
The following message will be displayed. We confirm the cleanliness of the cache by clicking Yes.
3. How to adjust the video settings in Kodi and delete temporary files
As we have mentioned, every time we watch a movie or any television program in Kodi, it saves a file on the device which, if it becomes large, has a negative effect on Exodus' behavior.
Step 1
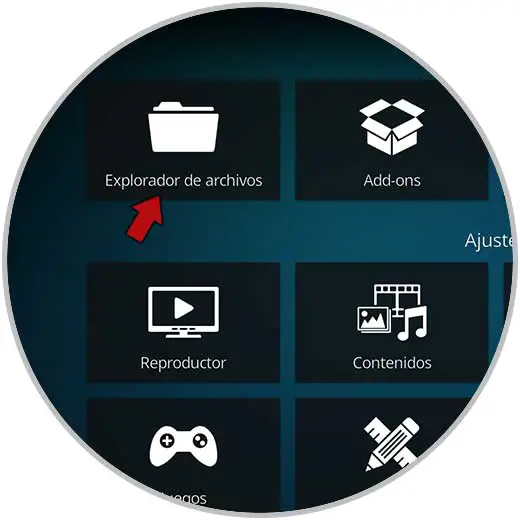
If we want to clear this type of cache, we go to Kodi / Settings and see the following. We click on "File Explorer"
Step 2
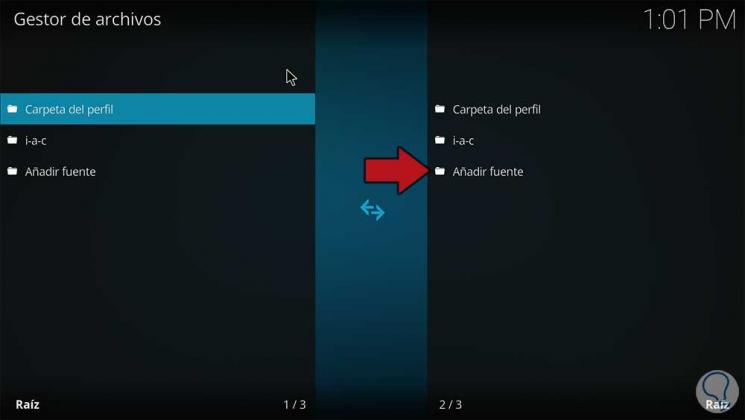
We click on "Add source" and we will see the following:
Step 3
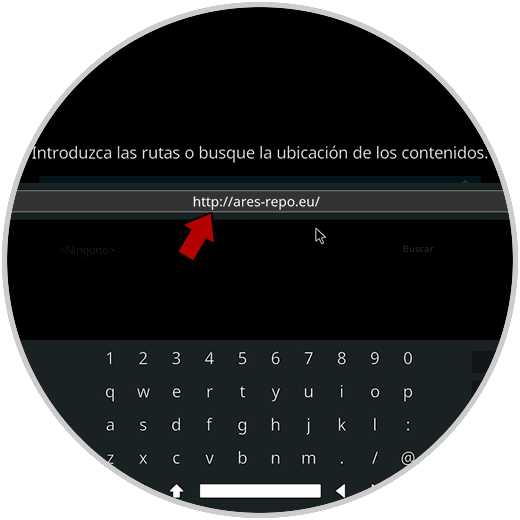
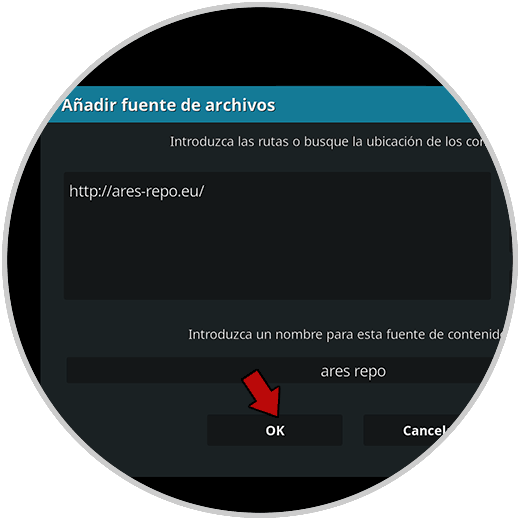
In the displayed window we enter the following URL:
http://ares-repo.eu/
Step 4
We click on PK and assign the name ares repo:
Step 5
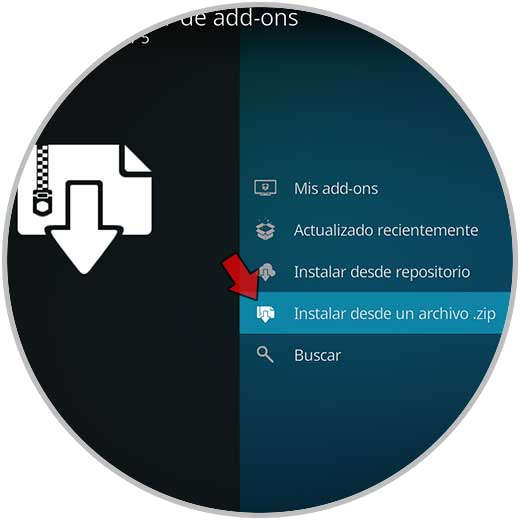
Click on OK and then we will go back and select “Install from a .zip fileâ€:
Step 6
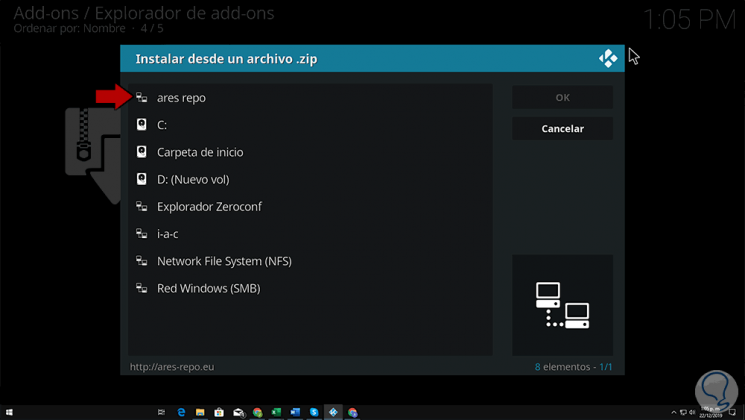
In the following window we select the name of the repository:
Step 7
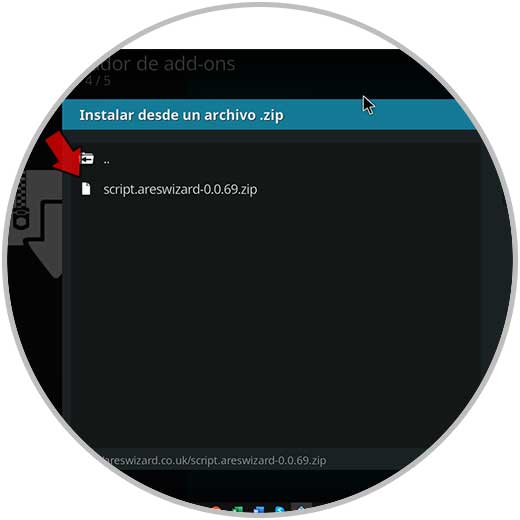
We click on it and then click on the available ZIP file. Click on Ok to confirm and then just access the add-in to run the wizard.
Step 8
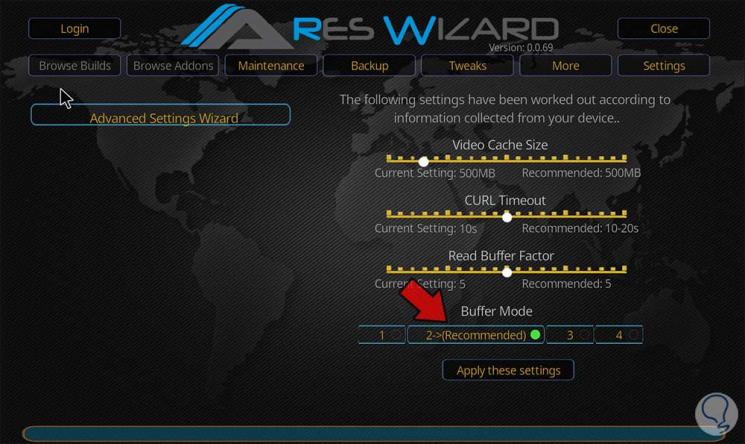
Once Ares Wizard is installed, we access it and go to the Tweaks tab and in the Advanced Settings Wizard we find the video cache options:
Step 9
At the bottom we can check various buffer modes being mode 2 recommended by Ares, the available modes are:
Mode 1
Kodi stores all Internet transmissions, including FTP transmissions.
Mode 2 (recommended)
Kodi stores everything, including local files.
Mode 3
Kodi buffers are only transmitted from the web.
Mode 4
This option disables buffering.
Now to clean the temporary files of Kodi Exodus, we go to the “Maintenance†tab and there we find the options:
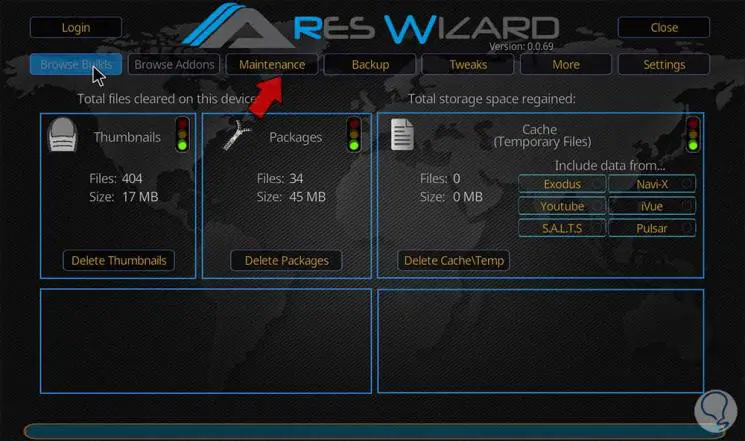
We click on each of them to perform the respective task.
4. How to update the graphic drivers of the Windows 10 system
This option allows you to update the graphics card drivers.
Step 1
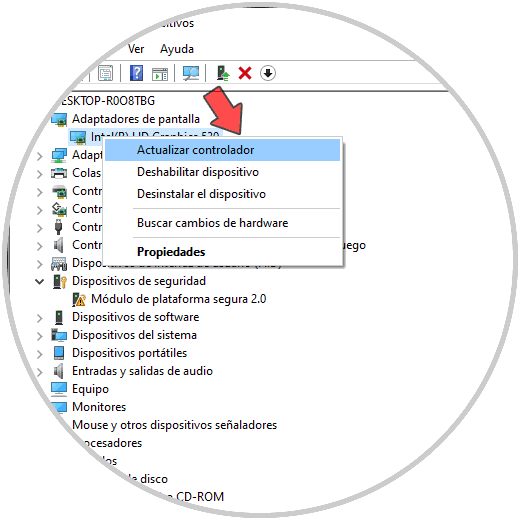
To do this we will go to the Device Manager in Windows 10 by right clicking on the Start menu and then selecting the Administrator. After this we go to the “Display adapters†line and select “Update driverâ€:
Step 2
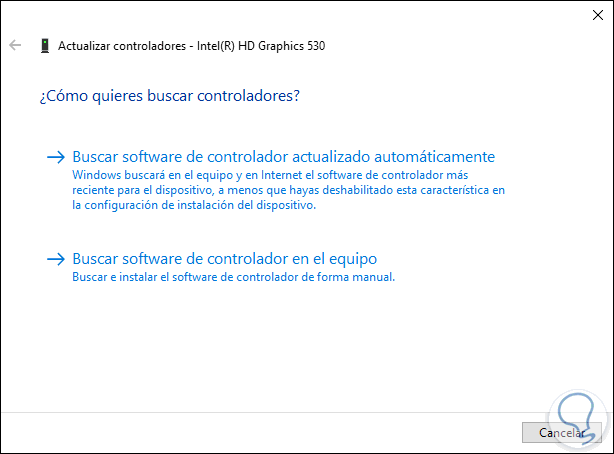
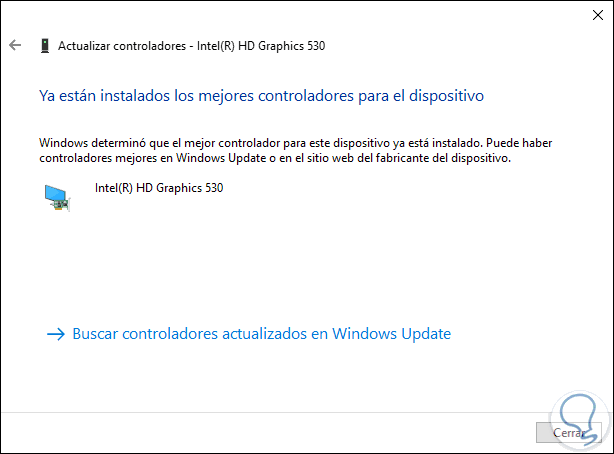
Once this is done, it will be possible to update them manually or automatically:
Step 3
The objective of this is to look for the latest drivers available for the graphics card since an outdating can affect the way Exodus runs.
5. How to modify Streaming times in Exodus
This action allows you to define the Exodus search times since, if the transmission time is too short, errors will be generated.
Step 1
For this configuration, we will go to Add-on, Video Add-on / Exodus:
Step 2
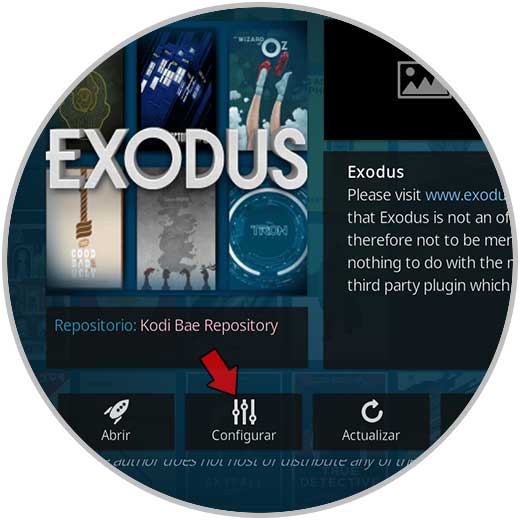
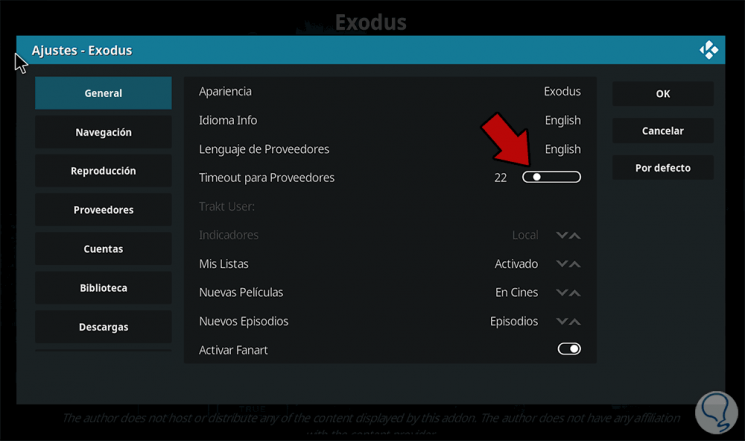
We click on “Configure†and then in the “General†section we go to the “Timeout for Suppliers†line and set a value between 20 to 35 on the slider. We click on Ok to save the changes.
6. How to change the time on the device used to fix Kodi errors
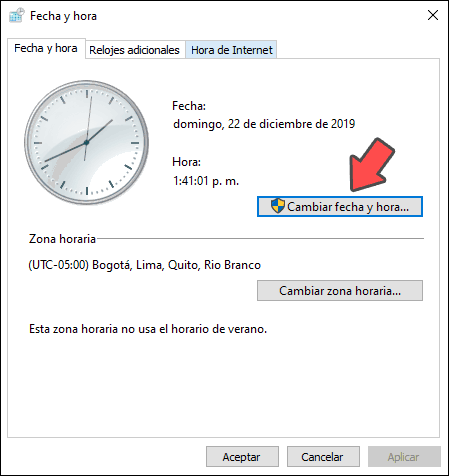
It is normal that if the date or time of the device where we are seeing Kodi is not correct, this type of circumstances will be generated.
Step 1
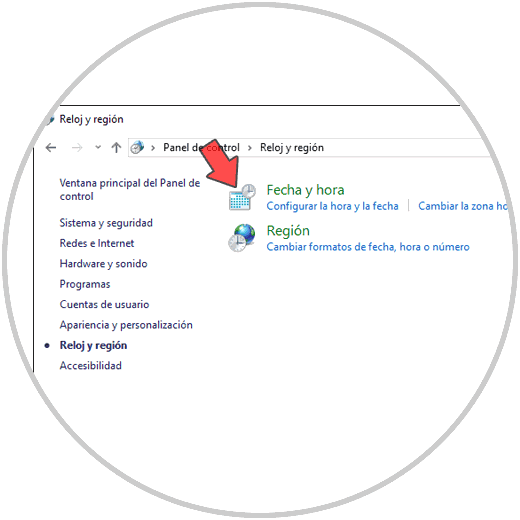
If we use Windows, for example, we can go to the following path:
Step 2
We click on the Date and time line and in the pop-up window we specify the appropriate date and time:
With the proposals that TechnoWikis has given you, it will be possible to correct the Exodus error in Kodi and thus allow all videos to be viewed as expected.