There are some configurations integrated in the system that allow an integral, or improved, operation of both the hardware and specific services of the system and one of these configurations is the VRAM (Video RAM). The VRAM in Windows 10 works hand in hand with the GPU (Graphics Unit) since in the VRAM the data needed by the GPU is housed to work correctly in the system, that is, in the VRAM textures and textures will be loaded models that the GPU will use and process in order to create the image that we will see on our screen. Hence the importance that VRAM has a good allocated space since otherwise you will have to resort to hard disk drives affecting other storage tasks in Windows 10..
Something to keep in mind is that the VRAM is soldered directly to the graphics card so it has a default value assigned by the manufacturer of the graphics card, but we can logically increase it from the system configuration, so a VRAM with Good allocated space will allow a better representation of the graphics and everything that involves images.
TechnoWikis will explain some ways to know with certainty the VRAM assigned in Windows 10..
To keep up, remember to subscribe to our YouTube channel! SUBSCRIBE
1. Know my VRAM in Windows 10 from Settings
Step 1
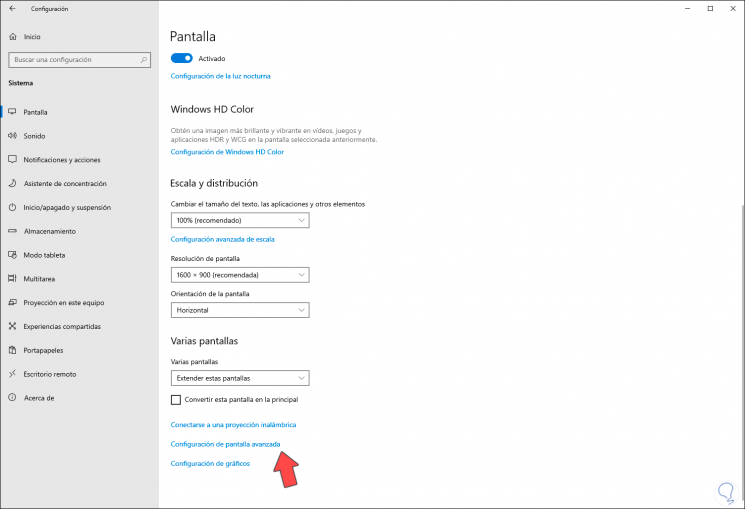
This first step involves accessing the properties of the screen and for this we have two options that are:
- In the Start search box, or using Cortana, enter the term "screen" and select the respective function.
- From the Start / Settings / System / Display path
Step 2
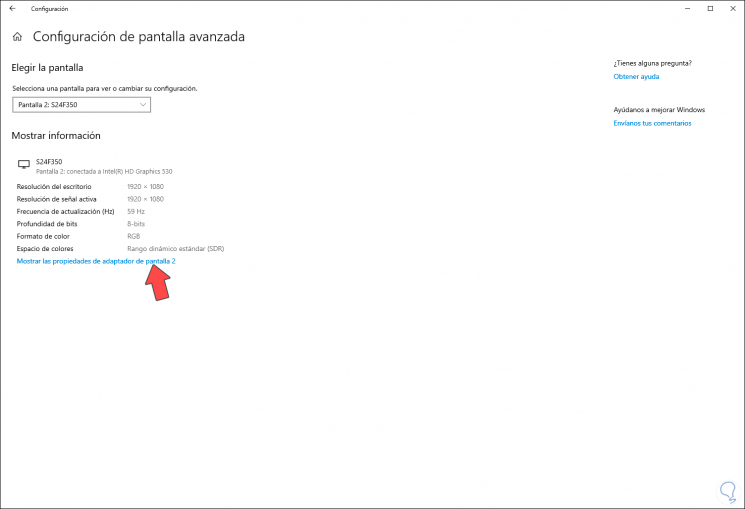
There we click on the “Advanced screen settings†line and the following will be displayed:
Step 3
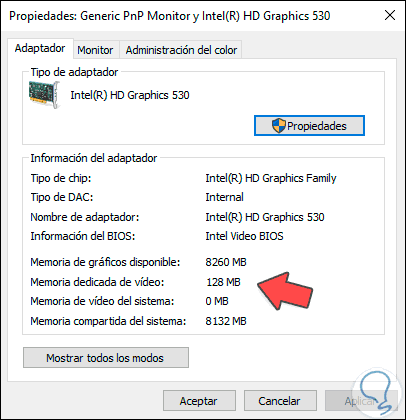
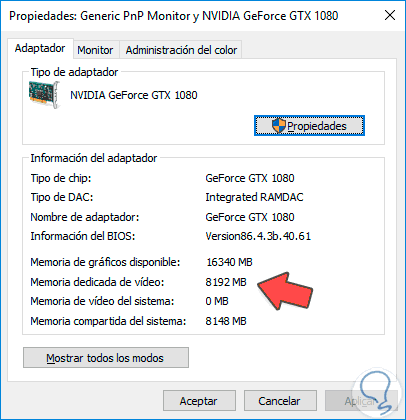
If you have several monitors, we can select them from the “Select a screen to view or change their settings†field, here we must click on the option “Show screen adapter properties†and in the pop-up window we go to the “ Adapter â€and in the“ Dedicated video memory â€line we will see the amount of RAM allocated to this function:
Step 4
Depending on the graph we have, these VRAM values ​​will vary according to the dedicated memory we have.
2. Know my VRAM in Windows 10 with GPU-Z
Step 1
GPU-Z is a free utility with which we have a simple mechanism to collect and observe in detail various aspects of the system such as:
- Name and number of the processor.
- Type of memory, size, times and specifications of the module.
- Real-time measurement of the internal frequency of each active core, as well as the memory frequency and much more.
Step 2
Your download is available at the following link:
GPU-Z
Step 3
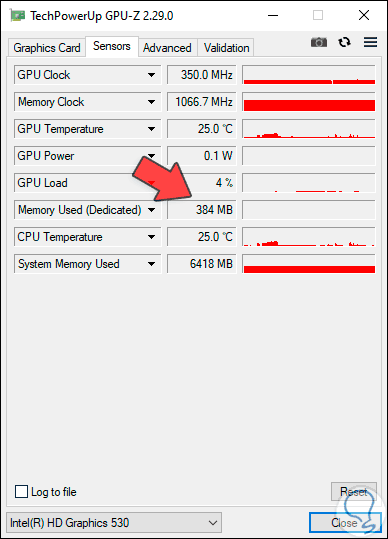
Once executed we will observe all the graphic details of the card and there we find the VRAM memory in the Sensors tab, field “Memory used (Dedicated)â€:
3. Know my VRAM in Windows 10 with Dxdiag
This is a mechanism with which we can know in detail many aspects of computer hardware.
Step 1
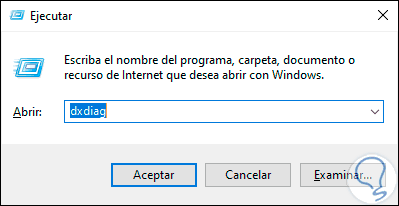
To do this we combine the following keys and execute dxdiag:
+ R
Step 2
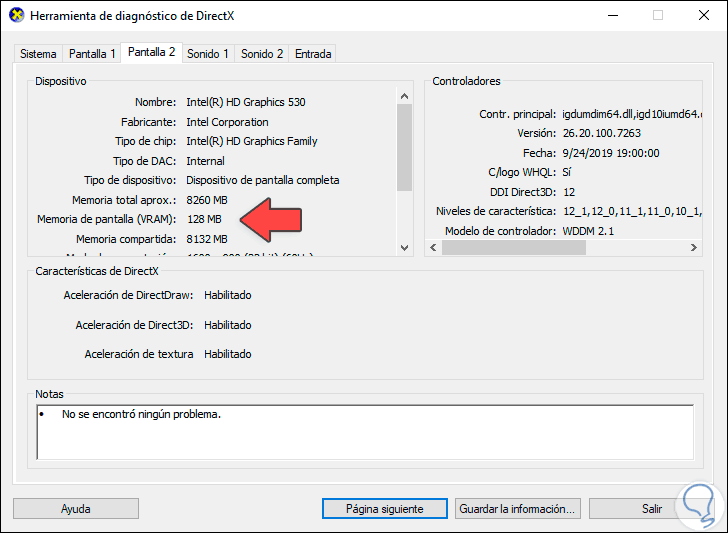
Press Enter and then we will go to the desired monitor tab and there we will find the line “Screen memory (VRAM)†where it displays these details:
With any of these options we can know in detail the VRAM installed in our equipment and manage it in a much more direct way knowing the importance that it has for the tasks of graphic deployment, it will always be a good idea to acquire powerful graphic cards if your work or Use requires constant graphics.