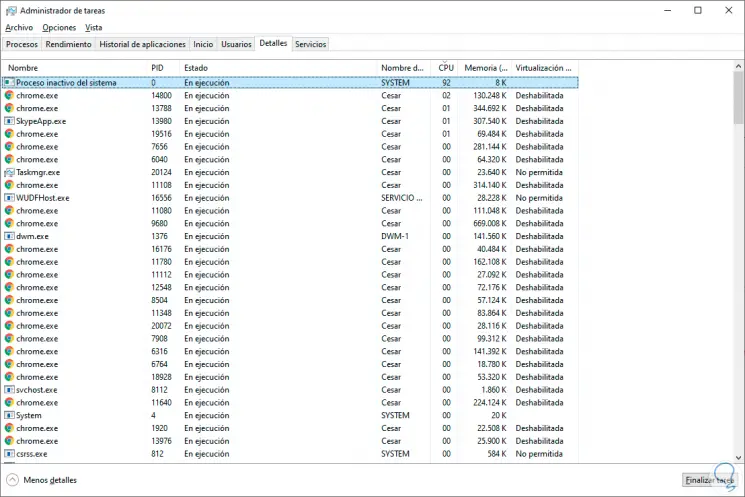
Being developed based on services and processes, it is normal that Windows 10 sometimes presents anomalies or failures that ultimately affect either an individual application or program or the whole system in general, and incidentally affects our daily work . This is due to various causes ranging from virus presence to poor configuration, but one of the most common is the inactive process of the system which increases the use of the CPU (Processor) to 99% and we can notice it when listening to the fan its maximum power since the CPU overheating must be avoided and if we access the Task Manager we will see something similar to this in the "Details" tab:
But the question arises, what is the inactive process of the system ?, TechnoWikis will give you the answer. This is a process that works in the background and has the task of telling us in real time the percentage of time that the processor is idle, although we know that the processor is the central axis where most of the actions in Windows 10 pass , so This becomes a single thread which is executed on each available processor and measures or counts the processor time when the operating system is not performing any other task with the other threads.
If in your case a high CPU consumption appears because of this process, TechnoWikis has for you a series of solutions that will help you correct this and allow the CPU to work properly.
1. Check the WmiPrvSE.exe service for CPU 99 Windows 10 error
It is a process called Windows 10 Administration Instrumentation and its mission is to detect problems in the network, the problem is that this process integrates many more threads within itself and frequent use or overload can simply bring consequences of high consumption CPU
To validate this we can access the Task Manager and see what processes are currently running, if we do not see a process that takes high resources then the cause may be the WmiPrvSE.exe service .
Step 1
To apply a solution to this service, we will combine the following keys and execute the "services.msc" command.
+ R
services.msc
Step 2
Then, in the services window, we locate the service called "Windows Management Instrumentation" and we will right click on it to select the "Restart" option. This will allow your processes to be updated. 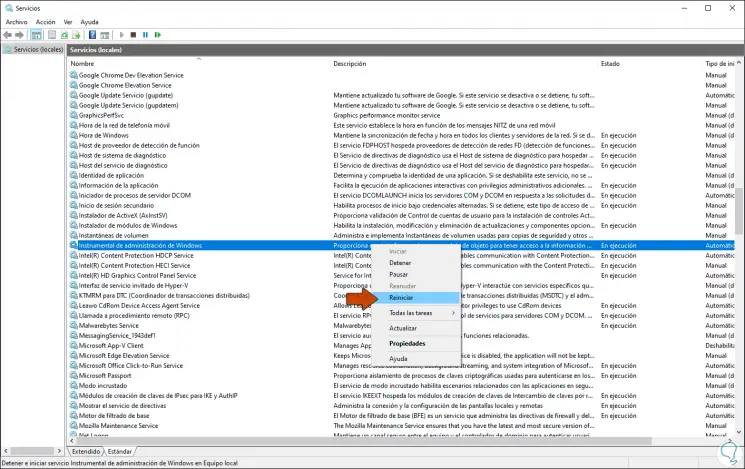
2. Check the antivirus for CPU 99 error Windows 10
On many occasions we have seen that antivirus software, whether integrated in Windows 10 or a third party software, is the cause for high CPU consumption and may be due to reasons such as:
- Constant update of the antivirus database
- Detection of reliable applications but which are taken as threats
We suggest our free antivirus collection if you don't have one yet
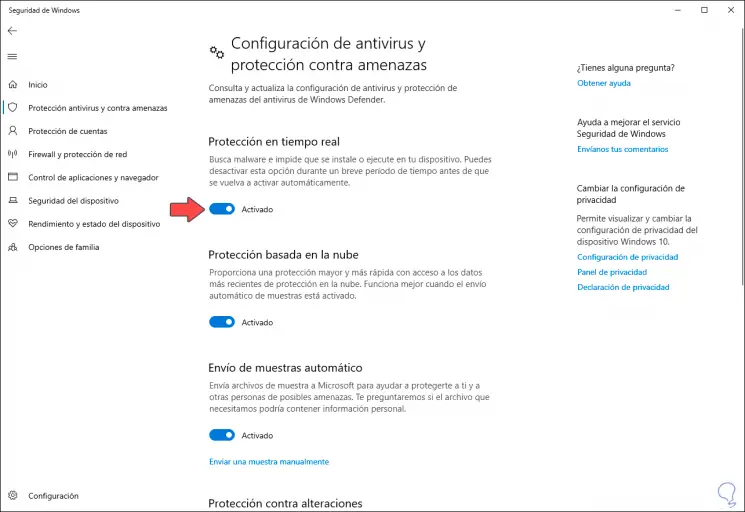
To update, the antivirus is responsible for accessing various global databases (which are updated daily) and download all the news, but this process involves the use of more services in Windows 10 affecting CPU consumption, if we want to discard this option, we can temporarily disable the antivirus to see if it is the cause of the error or not:
3. Disable third-party processes for CPU 99 error Windows 10
As we mentioned at the beginning, Windows 10 is a process system and therefore the developers create their programs and applications with a series of processes that allow them to be compatible with the system and carry out the process for which they were created, but the excessive use of processes It can mean that the CPU becomes saturated with work by increasing its usage percentage to 99%.
A practical option is to disable non-Microsoft processes and validate if the root of high CPU usage originates there.
Step 1
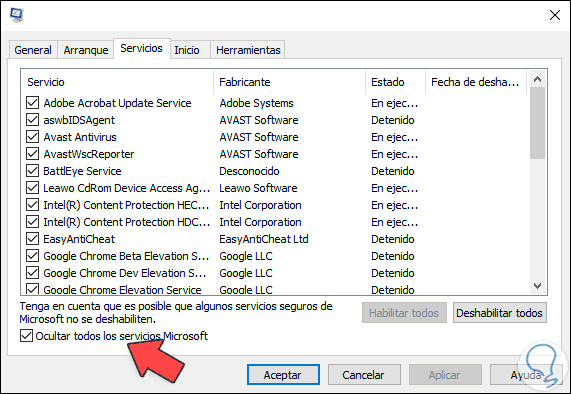
For this we combine the following keys and execute the "msconfig" command:
+ R

Step 2
In the window that will be displayed we go to the "Services" tab and there we activate the "Hide all Microsoft services" box in order to leave only third-party services. After this we click on the "Disable all" button and proceed to restart the computer to validate that the CPU works normally.
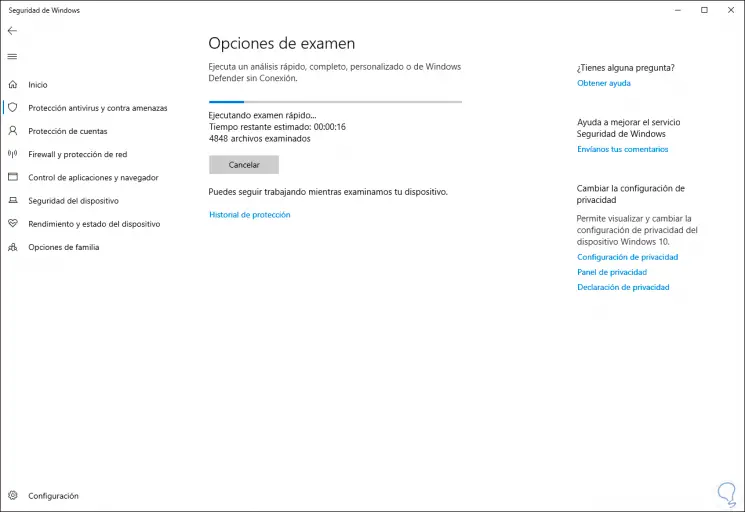
4. Search virus for CPU 99 error Windows 10
There are many types of viruses and some of them simply have the task of increasing the use of computer resources specifically of the CPU.
We know that viruses can be installed on Windows 10 in various ways. We suggest our free antivirus collection if you don't have one yet
In this case, it is best to run a system scan for viruses:
5. Check and update drivers for CPU 99 error Windows 10
The drivers have been created to allow the use of a device in Windows 10 with full compatibility and performance features, but a failed driver may involve excessive CPU usage.
Step 1
We verify this by accessing the Device Manager and there we will analyze which is the faulty controller, once detected we right click on it and select "Disable device": 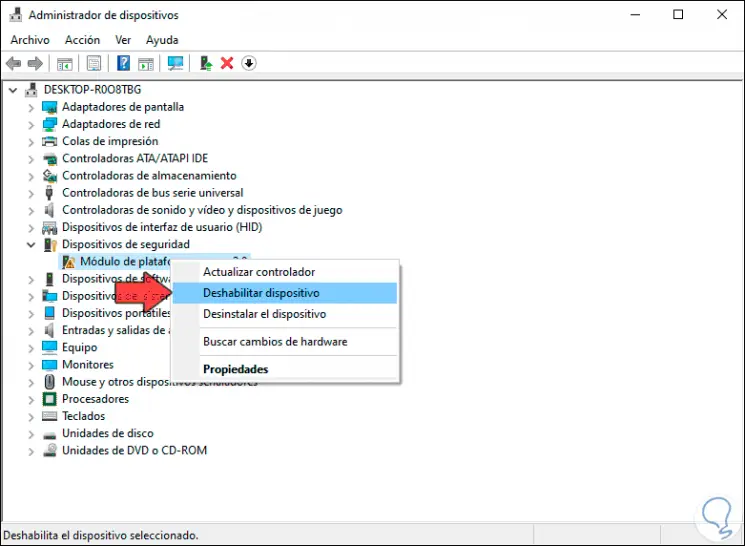
Step 2
The following window will be displayed. There we validate the action by clicking Yes.

Step 3
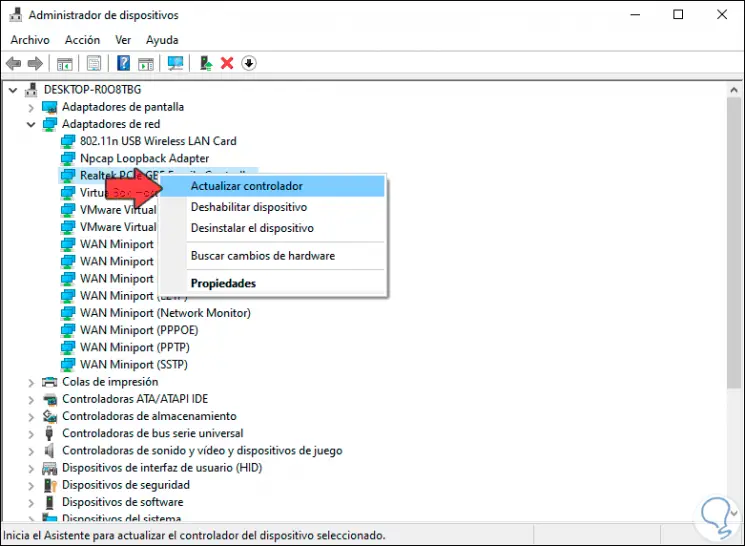
Continuing with the drivers, another cause for them to cause a high CPU usage is the outdating of these, we can update them so that these drivers take their correct parameters and avoid using the CPU to the fullest.
To do this, we right click on the driver to update and select the option "Update driver":
Step 4
After this we can update the controller either manually or automatically. When updating the controller we can see the status of the CPU to measure its levels of use.

6. Perform a disk cleanup for CPU 99 error Windows 10
One of the causes of a high use of PCU is linked to the space on the hard disk, if it is very full the reading and writing processes will take more resources to respond in the correct way and this affects the use of CPU.
Step 1
To clean the hard disk we must go to File Explorer , right click on drive C (where Windows is installed) and select "Properties": 
Step 2
In the open window we click on the "Free space" option:

Step 3
After this we can select what kind of objects have to be removed in the process of cleaning the disk:

We can see that the solutions are integral and each one of them looks for the processor to work with the normal levels of use in the system.