On October 25, 2001, we received the Windows XP operating system for the first time and it has been one of the most used systems by millions of people thanks to its simplicity of use but at the same time robust to execute processes , be compatible with various programs and in general everything that implies having an effective system. Therefore it has been listed as one of the most traditional systems developed by Microsoft and obviously in the year 2020, Windows XP has lost all the support and warranty from Microsoft, but the incredible thing is that it is still used in various types of environment..
Windows XP advantages
Maybe not as the default system on your PC, but it is ideal in situations like:
- Execution of old games and programs.
- Ideal to be the system of many industrial machines.
- Functional for users who do not have basic hardware.
TechnoWikis will explain today how you can install Windows XP in VirtualBox on a Windows 10 operating system and in this way you can use this classic system to run certain types of applications, games or simply to bring good memories.
1. How to install Windows XP on VirtualBox
Step 1
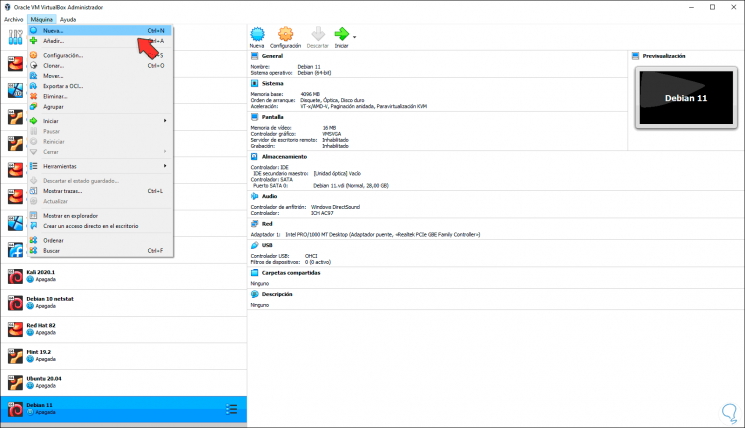
To create our virtual machine in VirtualBox we have options such as:
- From the Machine / New menu
- From the New button on the center panel
Note
If you do not have VirtualBox you can download the latest version in the following link:
Virtualbox
Step 2
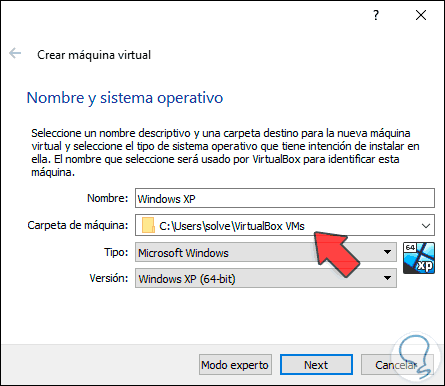
The following window will be displayed where we will enter the name of the virtual machine and assign the 64-bit edition:
Step 3
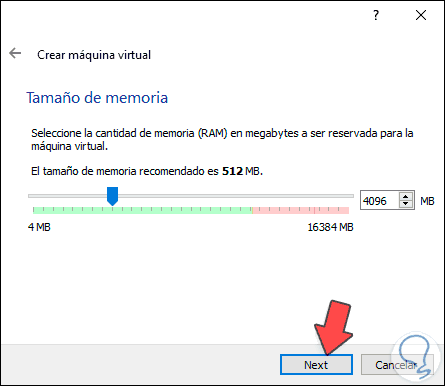
In the following window we allocate RAM, Windows XP allows from 512 MB to 3 GB in the 32-bit edition or 5 GB in the 64-bit edition:
Step 4
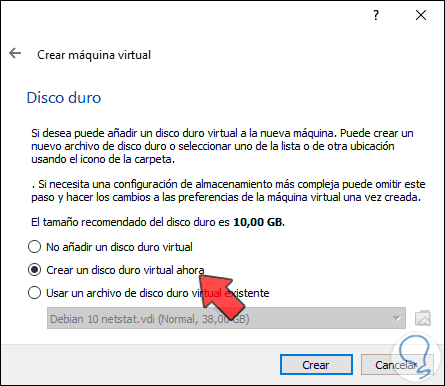
In the next window we select the option to create the virtual hard disk:
Step 5
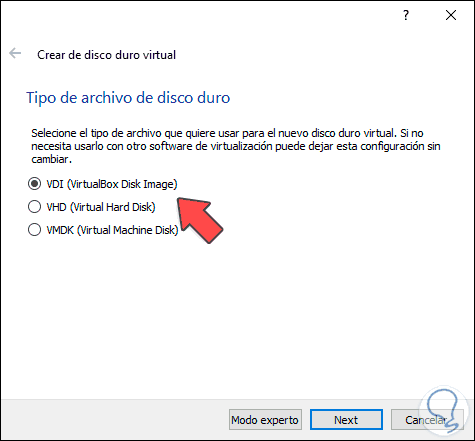
Next, we define the type of virtual hard disk to create:
Step 6
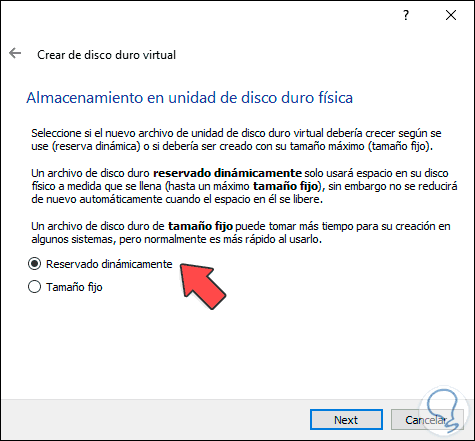
We click Next and now we specify how the space will be managed, either with a fixed size or a dynamic one (which grows as the information is saved):
Step 7
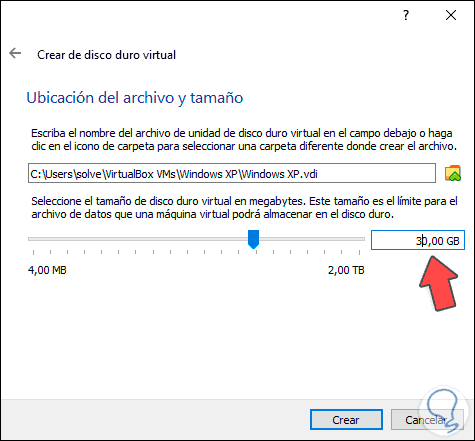
In the next window we assign the virtual hard disk size and its location in Windows 10:
Step 8
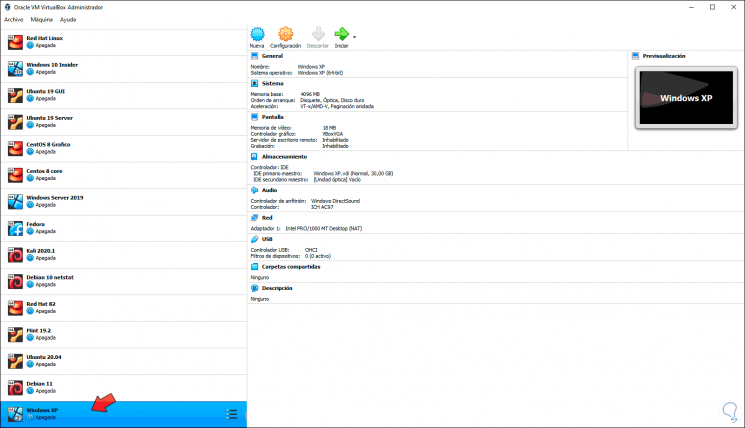
We click on “Create†and we will see our machine ready to be configured or started:

Login Join up!