When we create a folder in Windows 10 it can be hosted in the root of the drive or in another folder already created, in this case the root folder assumes the name of Directory and the folder created within it will be called Subdirectory. Normally we know the path where these folders are, but we have the possibility of exporting the structure of these folders to a text file with which the administration tasks will be something much simpler to perform since we will have the entire structure much more visible thanks to see a directory tree windows 10..
When it comes to controlling the structure of a database, it is quite useful to have a tool with which at a glance we see a Windows 10 tree or files that we have. When we have few resources it is simple, but when we have a more complex configuration to be able to see tree of folders and files is quite useful. TechnoWikis will explain in a practical way how to make a Windows 10 folder tree and thus manage the directories in a much more dynamic way.
We also leave you the video tutorial with the necessary steps to be able to create, make or view a folder tree in Windows 10..
To keep up, remember to subscribe to our YouTube channel! SUBSCRIBE
1. How to view the directory tree in Windows 10
The tree command allows us to graphically display the structure of folders and files of a specific drive or path. This saves us having to be looking for a complete structure and being able to visualize in a moment how a specific chain is organized. For data organization issues it is quite comfortable.
Step 1
The structure of the tree command is as follows:
TREE [unit:] [path] [/ F] [/ A]
There are two parameters as we see that we can use with the tree command:
/F
It shows the files that contain the folders of our listed tree.
/TO
use the ASCII code to replace the use of extended characters when creating the directory tree.
Step 2
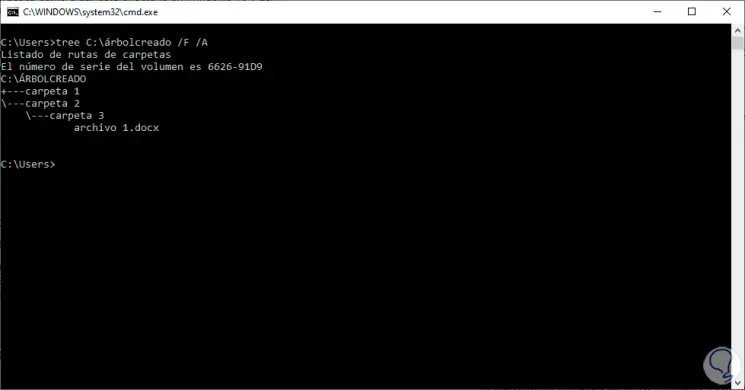
To see folder tree in Windows 10 we will use the tree command with the previous structure and we will see the following through CMD and thus print Windows 10 directory tree.
In this example it would be:
Tree C: \ tree created / F / A
2. How to make a folder tree in Windows 10
We may want to have the complete structure of our folder tree in a text file and for this we will do the following.
Step 1
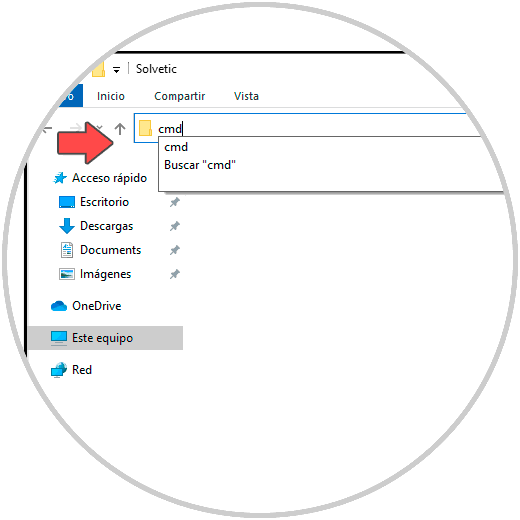
To give way to the export process we will go to the path where the desired folder is and in the address bar we enter CMD:
Step 2
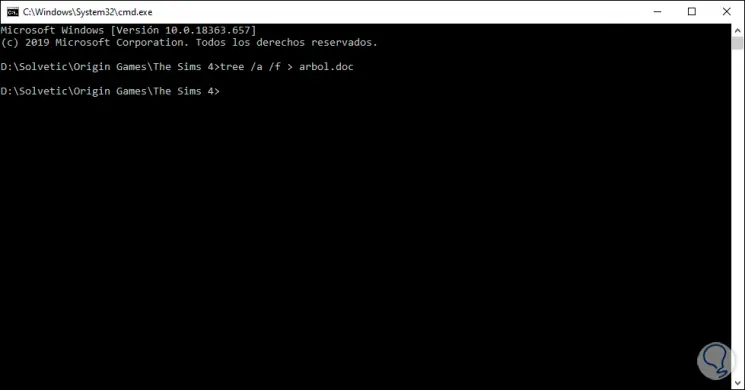
Press Enter and the command prompt console will be opened on that route, there we will execute the following. The command will be executed immediately
tree / a / f> arbol.doc
Step 3
If we do not want the directory tree to include files, we must delete the / f (files) parameter.
Tree / a arbol.doc
Note
The output file can be .doc or .txt if we wish.
Step 4
We will go to the desired folder and there we will see that this file has been created:

Step 5
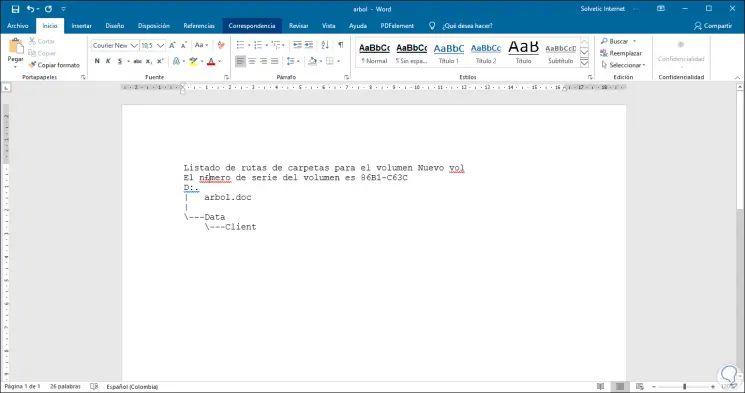
We will open this file to know the tree structure that has been generated:
3. Create a tree of files and folders Windows 10 with CMD path
Another way to create folder tree in Windows 10 is to directly use the path from CMD. Only having the indicated paths we can know how to make a Windows 10 folder tree.
Step 1
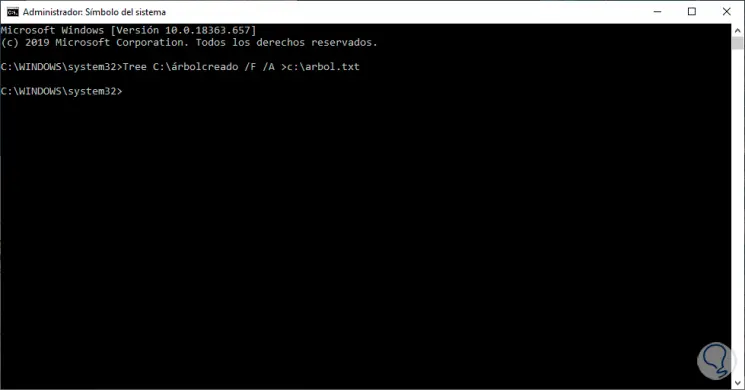
We open the Command Prompt as administrators. Next we will put the tree command followed by the structure that includes both the path of the folder to create your tree and the path of the tx or doc coument where we will save the directory tree:
TREE [folder path] / F / A> [document path]
In this example it would be: Tree C: \ tree created / F / A> c: \ tree.txt
Step 2
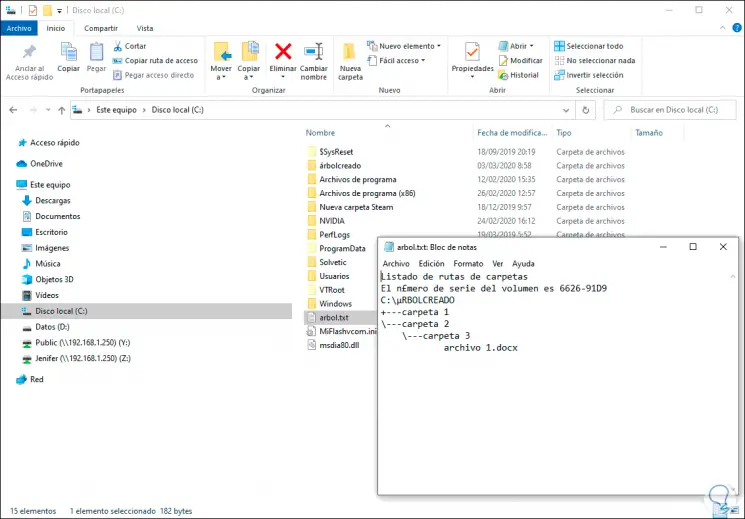
If we now enter our unit C we will see the document created and inside we will have the tree of files and folders created.
With this simple command we can see Windows 10 folder tree and create directory tree in Windows 10 and thus know the structure of our folders in Windows 10.