Teamwork is a key piece in any organization that seeks to carry out projects and get ahead, so it is essential that operating systems have these types of functions as they facilitate collaborative work between users. If you use Linux operating systems, in this specific case Ubuntu 20.04, you should know that you have NFS (Network File Share) to facilitate this task..
NFS has been developed as a protocol thanks to which it will be possible to share directories and files with other Linux users on a local network, if we were to use Windows computers we should use Samba, but NFS is ideal for working between Linux networks.
Basically, NFS should be used only on a local network since, as we know, the data that is addressed on the network is not encrypted and access permissions are only granted based on the client's IP address . The NFS server is part of the Linux kernel and it works with the / etc / exports directory, which lists the directories available on the network . In addition to this, for each NFS shared space, only the permissions must be provided for the computers that we indicate..
With this tutorial you will learn how to install and configure your NFS server in Ubuntu 20.04 and thus share files or elements between users on the local network.
We will see the process on both the client and server computers..
Server computer: System update
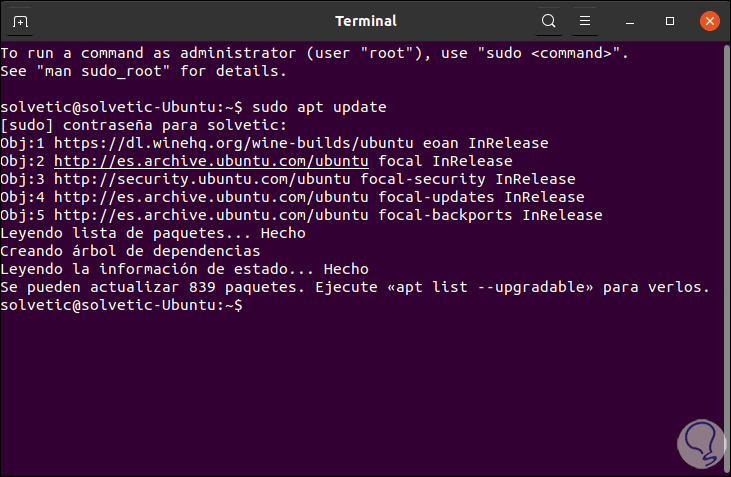
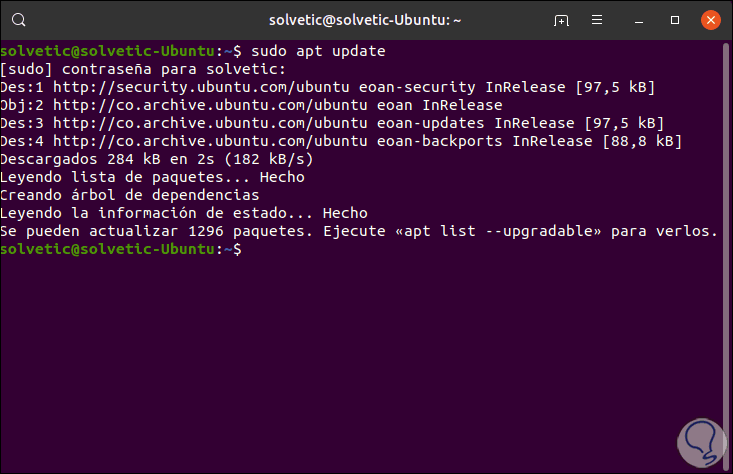
The first step to take will be to update the system packages, for this we access the console and execute the following:
sudo apt update
Server computer
1. How to install Ubuntu NFS server
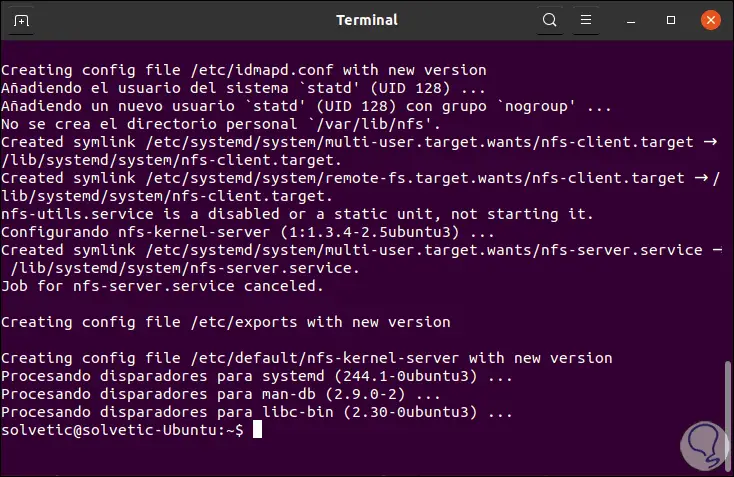
Once the system is updated we are going to install NFS which is integrated in the nfs-kernel-server package inside which we find additional packages like nfs-common and rpcbind that act directly in the configuration and use of the sharing tasks.
Step 1
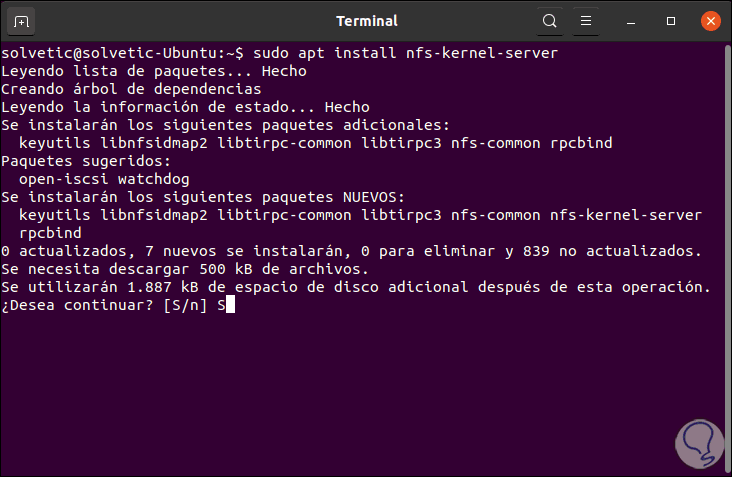
There we execute the following command:
sudo apt install nfs-kernel-server
Step 2
We enter the letter S to confirm the download and installation of NFS in Ubuntu 20.04:
2. How to create NFS Ubuntu export directory
Now we are going to create the export directory which is a directory that contains the objects that will be shared between the client systems. Let's create the directory indicating the name of the NFS mount directory:
sudo mkdir -p / mnt / nfs_share
Now we remove the restriction on the directory permissions so that all users have access:
sudo chown -R nobody: nogroup / mnt / nfs_share /
Then we provide read, write and execute privileges to all objects within the created directory:
sudo chmod 777 / mnt / nfs_share /

3. How to generate shared NFS access to client systems
Step 1
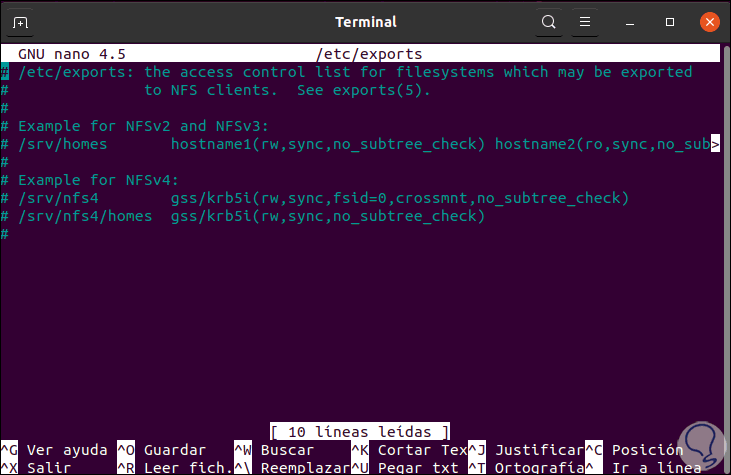
The permissions to access the NFS server are specified in the / etc / exports file, we access it with the preferred editor:
sudo nano / etc / exports
Step 2
There it will be possible to grant access to a single client, multiple clients or to indicate a complete subnet. If there are few users, it is ideal to provide access to the entire subnet, in this case we enter:
/ mnt / nfs_share 192.168.0.0/24(rw,sync,no_subtree_check)
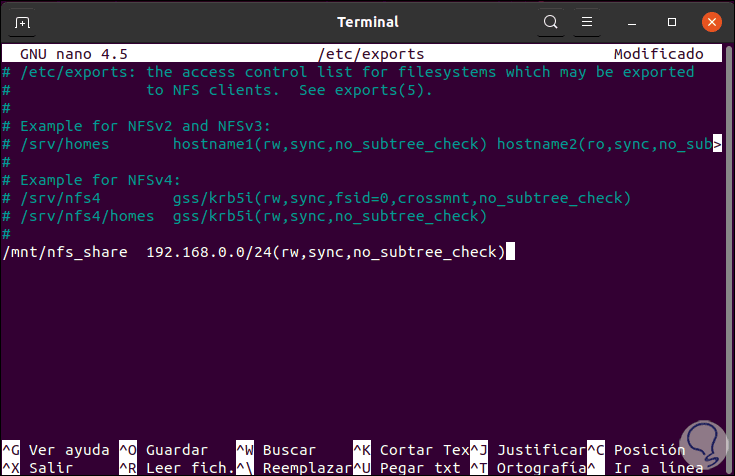
Step 3
The values ​​we have entered have been:
Requires changes to be written to hard drive before they are applied
Eliminate the subtree check
No_subtree_check [
/ panelplain]
We save the changes with the Ctrl + O keys and exit the editor with the Ctrl + X keys.
Step 4
If we wanted to grant access to a single client, enter the following syntax:
/ mnt / nfs_share Client_IP (re, sync, no_subtree_check)
For various clients we enter:
/ mnt / nfs_share Client_IP_1 (re, sync, no_subtree_check) / mnt / nfs_share Client_2_IP (re, sync, no_subtree_check)
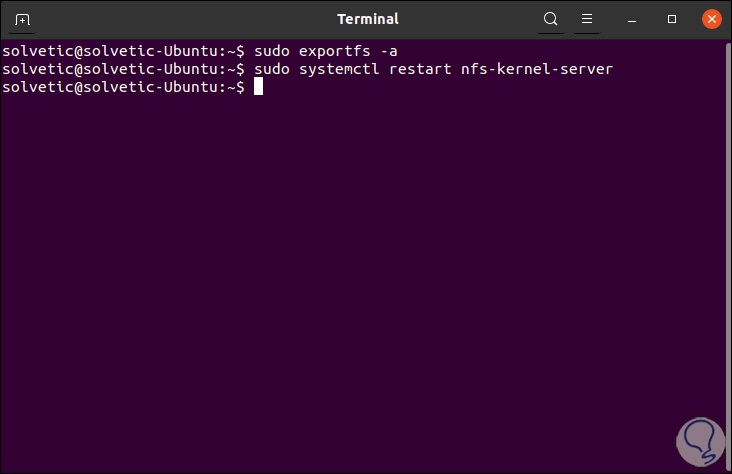
4. Export NFS shared directory
Once the accesses to the client computers have been granted, we must export the shared NFS directory and restart the NFS kernel server to apply the changes, in this case we execute the following:
sudo exportfs -a sudo systemctl restart nfs-kernel-server
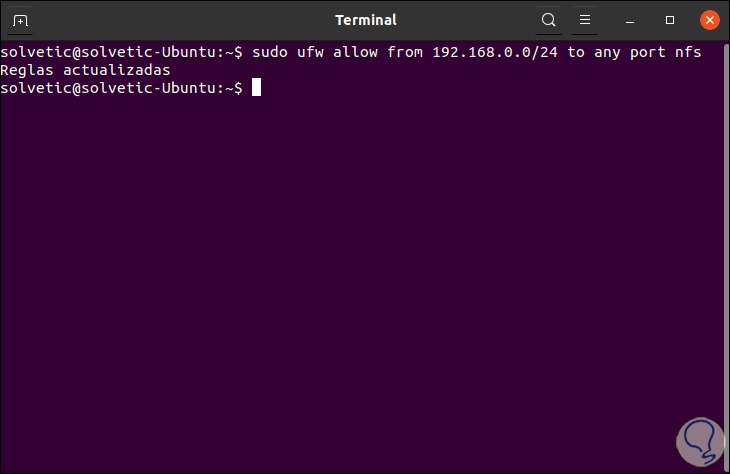
5 . Allow access to NFS from the Firewall
We know that one of the functions of the Firewall is to manage incoming and outgoing connections to the network, so we must enable access for client computers in Ubuntu, for this we enter the following:
sudo ufw allow from 192.168.0.0/24 to any port nfs
Note
This allows access to the subnet.
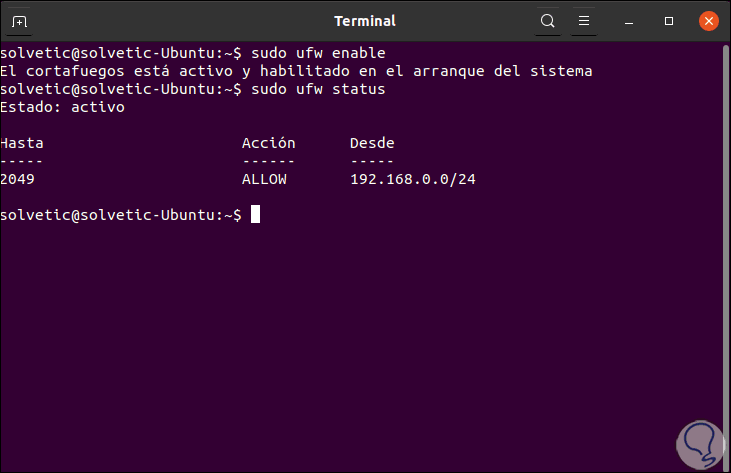
We enable the Firewall (if it is not) and validate its status by checking that the port used is 2049:
Client team
It is time to configure the client computer to access NFS, in this case we will use Ubuntu 19.10.
[panelplain = '6'] How to update the NFS client computer system
6. How to update the NFS client computer system
Step 1
The first step to take will be to update the system packages:
sudo apt update
Step 2
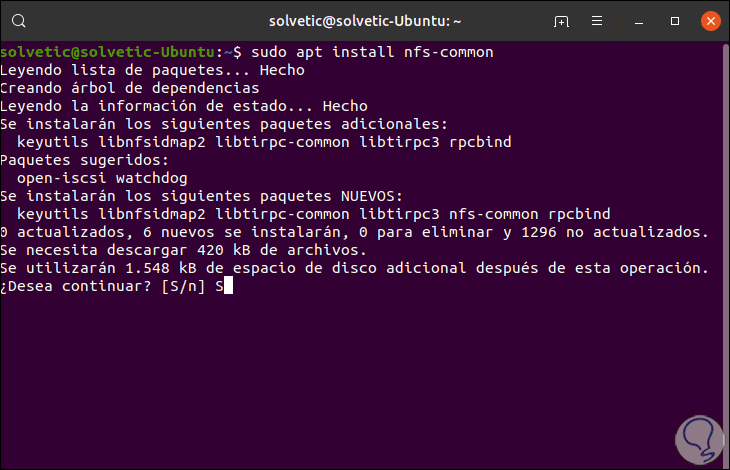
After this we will install the nfs-common packages with the following command:
sudo apt install nfs-common
Step 3
We enter the letter S to accept the download and installation of the packages.
7. How to create NFS mount point on the client
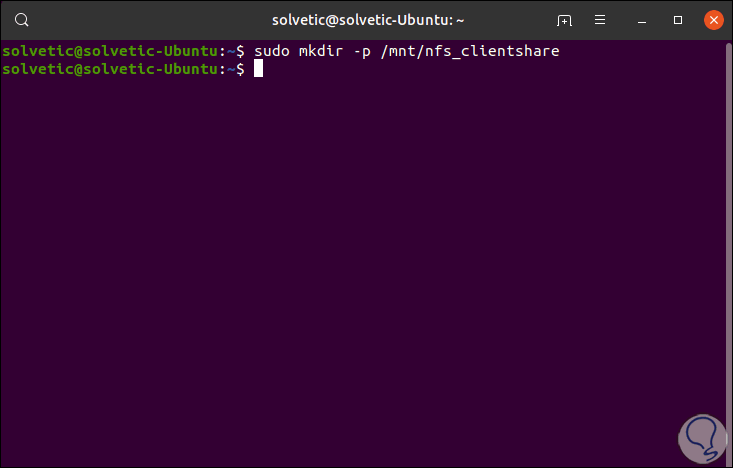
We are going to create a mount point in which the NFS share will be mounted from the main NFS server, for this we execute:
sudo mkdir -p / mnt / nfs_clientshare
8. Mounting NFS Share on the client system
This step involves mounting the NFS share that is being shared on the NFS server, this allows access to the shared directory.
Step 1
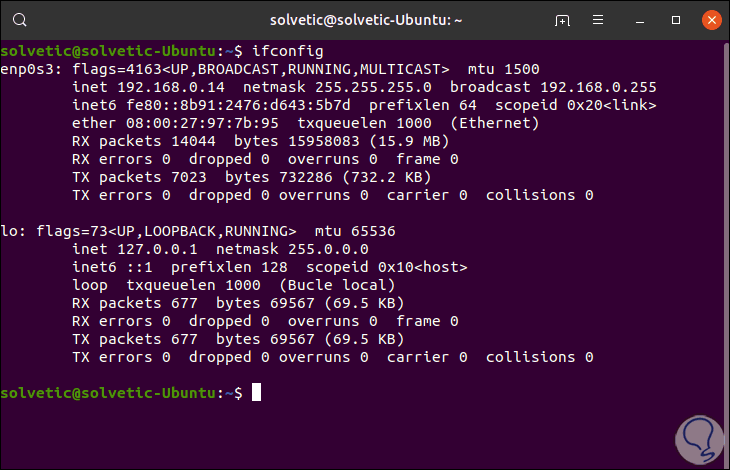
Before that we will know the client's IP with the command "ifconfig":
Step 2
If we don't have ifconfig we can install it with the command:
sudo apt install net-tools
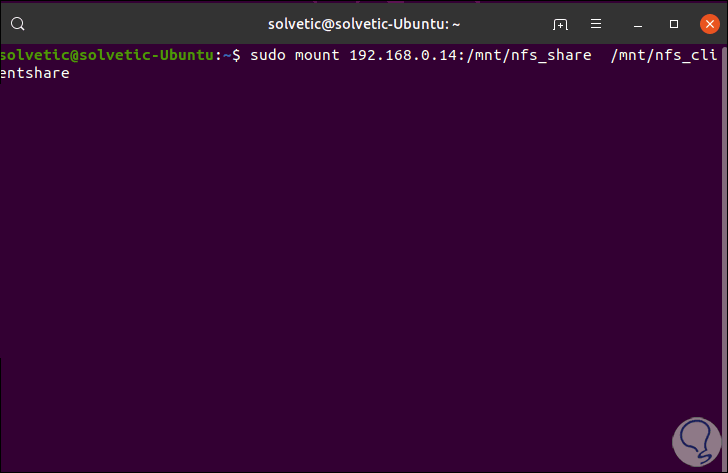
We are going to use the IP to mount the directory:
sudo mount 192.168.0.14:/mnt/nfs_share / mnt / nfs_clientshare
Step 3
You may see the following error:

Step 4
If this is your case TechnoWikis has the solution for you, just run each of the following lines in their order:
sudo systemctl is-enabled nfs-common sudo systemctl enable nfs-common file /lib/systemd/system/nfs-common.service sudo rm /lib/systemd/system/nfs-common.service sudo systemctl daemon-reload sudo systemctl status nfs-common sudo systemctl start nfs-common sudo systemctl status nfs-common sudo systemctl enable nfs-common

Step 5
Now we can associate the IP address. Test NFS connectivity on the client computer
Step 6
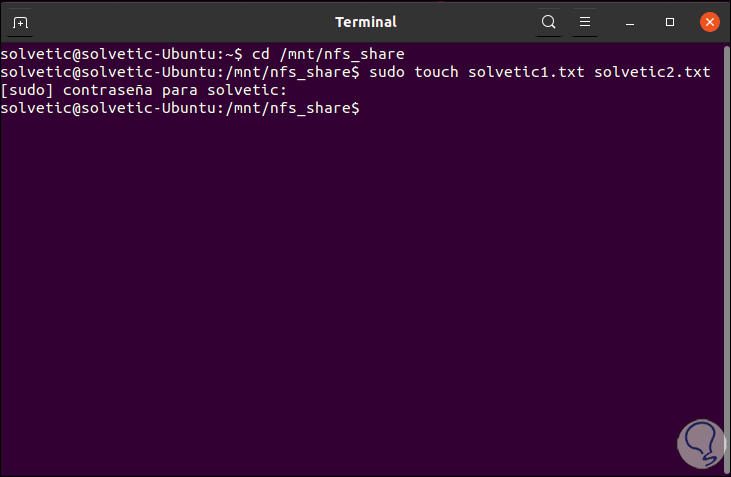
We are going to check that the NFS configuration is correct, for this we are going to create files in the shared NFS directory located on the server:
cd / mnt / nfs_share / sudo solvetic1.txt solvetic2.txt
Step 7
Now we go to the client computer and check the existence of these files:
ls -l / mnt / nfs_clientshare /
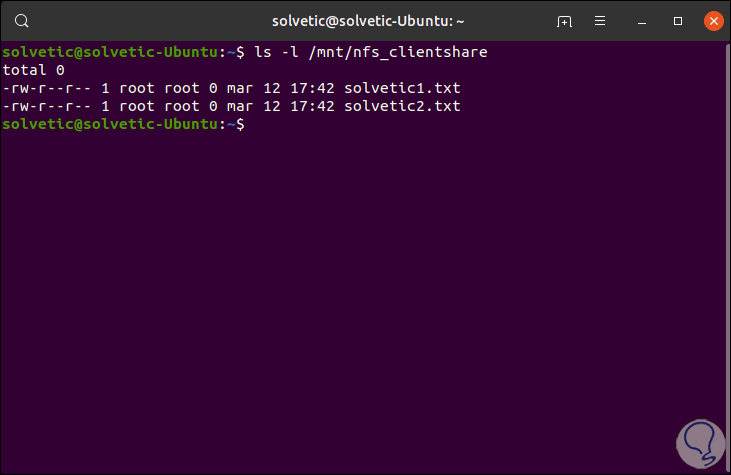
With this we have verified that NFS has been installed and configured correctly in Ubuntu 20.04.