The number of options that mobile phones offer us today is increasing as the possibility of connecting to the network has made it possible to download applications of all kinds on devices. Thanks to them we have the possibility to connect to our email, social networks , play different games, or have apps for sports, cooking, traveling, etc..
We also use our smartphones to surf the net for information or to spend an entertaining time reading content, news, etc. That is why the connection becomes an almost essential element. But in addition to being able to connect ourselves, we have the possibility of turning our mobile into a WiFi access point so that other devices can connect to our network.
This can be very useful to connect, for example, our laptop or other device that needs a connection and does not have one at that time. That is why below we show you how to configure WiFi zone to share internet [url = "" "] Redmi Note 9S [/ url] and how to activate it..
1. How to configure WiFi zone to share internet Redmi Note 9S
To configure your mobile as a WiFi access point, the steps you must follow are the following.
Step 1
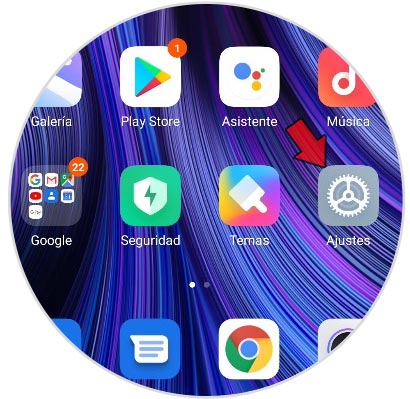
The first thing you should do is enter "Settings" from the main apps screen.
Step 2
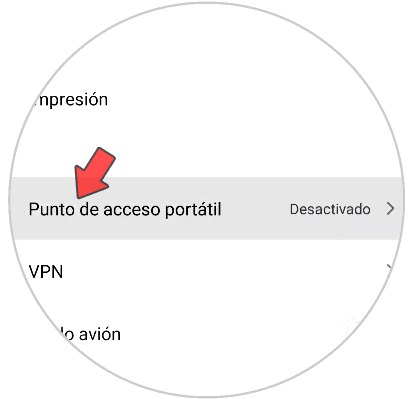
The next thing you should do is enter the section that says "Connection and sharing"

Step 3
Now you must select "Portable access point".
Step 4
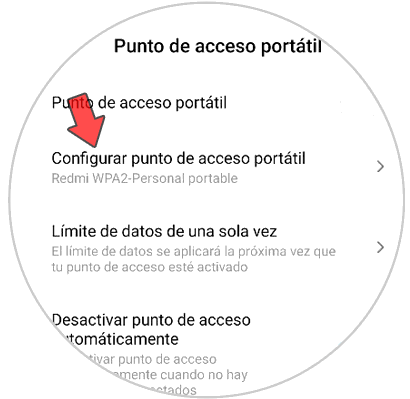
Among the available options, you have to select "Configure portable access point".
Step 5
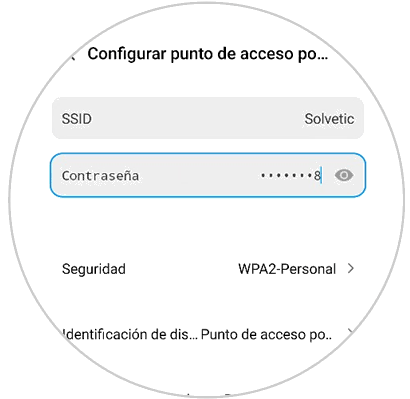
You will see a pop-up window in which you have to write the name of the WiFi network you want to share. It is usually written in an area identified as "SSID". It is important that you set a password for it.
2. How to activate internet sharing on Redmi Note 9S
In the previous procedure the customization of the WiFi network was established, now you must proceed to turn on said network by doing the following:
Step 1
The first thing is to enter the "Settings" of the phone
Step 2
The next thing to do is enter "Connect and share"
Step 3
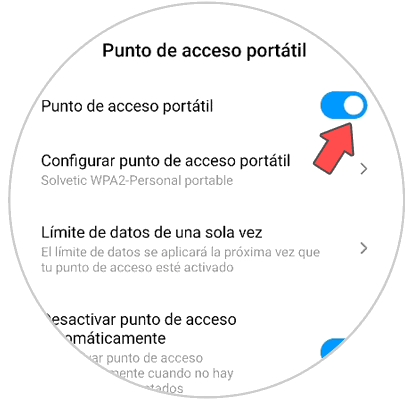
Then enter "Portable Access Point".
Step 4
In the new window you will have to activate the "Portable access point" tab so that the WiFi access point is visible.
It is important to highlight that all those devices that are around must place the password that was previously configured for this network, and thus be able to enjoy the shared internet signal.
Remember that now it will work from now on as a router or WiFi transmission antenna..