Definitely the phones do not stop surprising us because they have so many functionalities that often we do not know all of them. There is no doubt that one of the main configurations that we do when we buy a phone, is to connect them to a WiFi network or activate the data connection, so that in this way we can connect to the Internet and use all the functions it offers..
It is possible that on some occasion we have run into the need to connect another device such as a laptop or another phone and have not found an available network. We can solve this by converting Xiaomi Redmi Note 7 into a WiFi hotspot, so that any other device can be connected to our phone.
To be able to do this procedure, it is necessary to comply with a series of measures, which are explicit in the following video attached to the bottom part or, failing that, carefully read the following lines..
To stay up to date, remember to subscribe to our YouTube channel! SUBSCRIBE
1. How to set up WiFi zone to share internet Xiaomi Redmi Note 7
In this technique we will give you all the guidelines to be able to make this particular configuration. It is necessary to faithfully comply with the steps mentioned below, it is the way to do it from your mobile.
Step 1
Search on the screen or in the main menu, a gear icon, belonging to the "Settings" option.
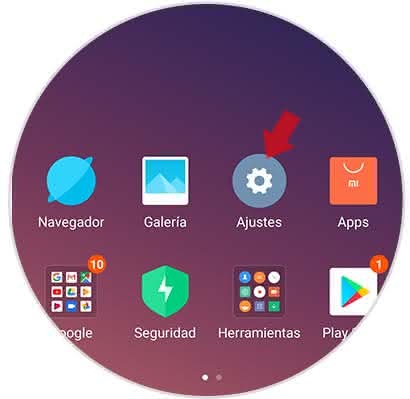
Step 2
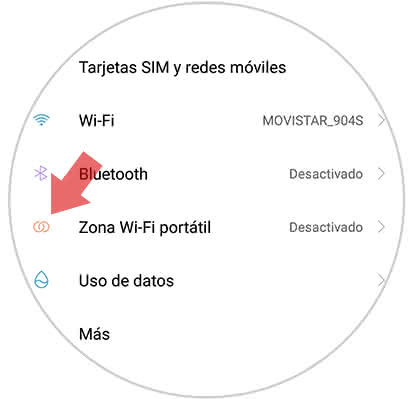
Once inside this section, we will see a menu that different alternatives. However, within the first options is a so-called "Portable WiFi Zone". What we must do, is to select it, by pressing the screen where your determined entry is.
Step 3
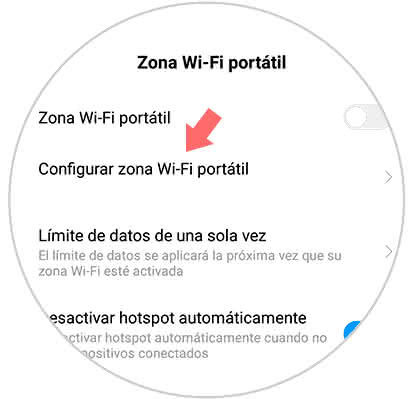
Immediately a box will open, which will again show a list of the available alternatives directly related to this entry, but what you should do is avoid the "Portable WiFi zone configuration", click on the screen to continue with the process.
Step 4
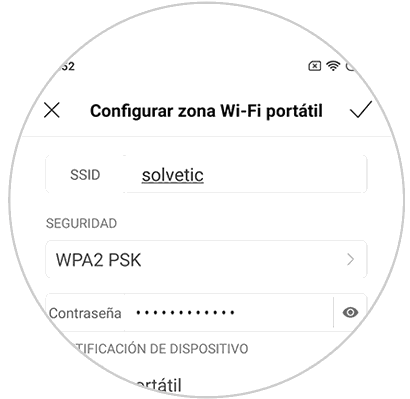
We will see a new quarter in which we will have the opportunity to write the name that our WiFi network will have, which will be shared. This you can do it where it says "SSID or Name". Also, by having the same characteristics as a conventional network, you can protect it by assigning a password, and placing it in the entry called "Password".
Finally, you just have to press where it says "Accept" that is in the upper part of the right side of the screen, to save all those determined changes.
2. How to activate Internet sharing in Xiaomi Redmi Note 7
In the aforementioned technique, the modification and personalization of this service was worked on, in order to be able to turn it on later. In this case, we will detail all the steps that must be fulfilled in order for this option to be activated:
Step 1
Look on the screen for the nut icon related to the "Settings" option, click on it to enter this new entry.

Step 2
Once inside this new entry, we must go to the option called "Portable WiFi Zone" and select it.

Step 3
Immediately you will see that a new entry will open, which will appear in your options an alternative called "Portable WiFi Zone". What we must do, is to slide to the right side of the entrance, to be able to turn this option on the Xiaomi Note 7 mobile. You will see how a WiFi field will be created immediately, which can be exploited by any nearby device.
That is, if the other devices access the server and place the password (in case it was placed following the procedures of the aforementioned technique) you can obtain Internet from your mobile..
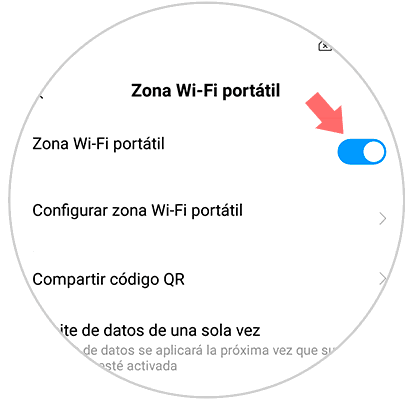
Finally, you just have to comply with these very simple techniques, so that you can turn on your phone, as if it were an antenna. This is another of the benefits, that this new version of Xiaomi Redmi Note 7 brings for you.