It is no secret to anyone that our mobile phone has become one of the most used devices since we have to use it to perform many daily tasks, to stay connected with other people , to remember any purchase that we can forget or just to entertain us while we play . We can even watch some videos using the internet or watch TV with some applications that we can download to the phone..
And it is that the actuality of smartphones can perform a lot of functions that years ago were unimaginable. The main problem we see in this type of case is that in most of the tasks that we can perform with our phone, we need to be connected to a network that offers us the Internet. For this, companies offer mobile data rates, but sometimes it is possible that these data are exhausted and there is no open or secure WiFi network to connect.
It is for this same reason that through this TechnoWikis tutorial we will teach you how to use the Android Xiaomi Redmi Note 6 Pro phone to share the Internet and be able to connect other devices to a secure and quality WiFi network..
To perform the procedure you must perform the steps that we will teach you by reading the tutorial and watching the video that we show you below.
To keep up, remember to subscribe to our YouTube channel! SUBSCRIBE
1. How to set up Wi-Fi zone to share internet Xiaomi Redmi Note 6 Pro
To be able to configure the Wi-Fi zone option and thus be able to share the Internet, through our Xiaomi Redmi Note 6 Pro phone, we must perform the following procedure that we will show you below.
Step 1
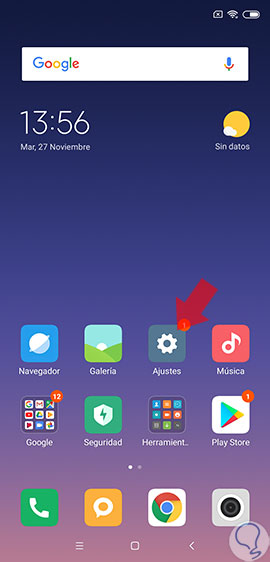
To start performing this procedure we must enter the "Settings" option. Usually we can find the settings icon on the main screen of our Xiaomi phone, in the icon represented by a nut or gear.
Step 2
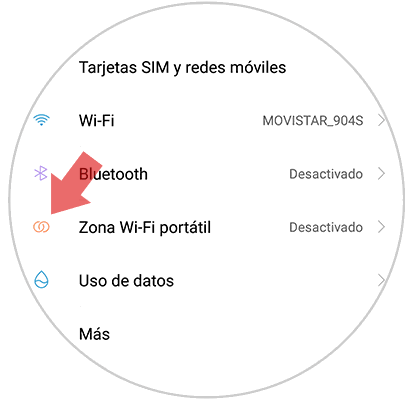
Now that we are in the settings window, we must scroll through its options to find what is called "Portable WiFi Zone". Simply select it by clicking on the option.
Step 3
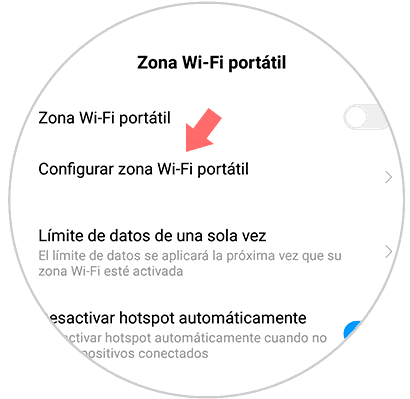
In the new window that will appear next, we must select from the available options what is called "Portable WiFi zone configuration" to continue performing the procedure.
Step 4
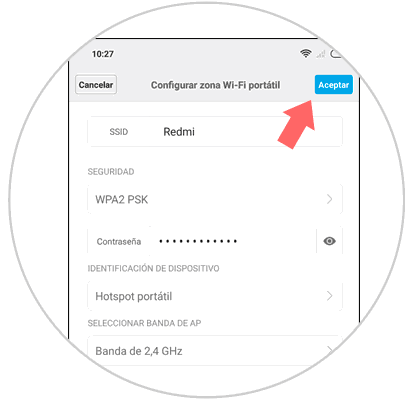
In this new window we have the possibility to write the name of the WiFi network that we will share in the action called "SSID or Name". In the case that we want to put a password to the WiFi network that we will create, we just have to add it in the tab called "Password". Now to continue we only have to select the option called "Accept" which is in the upper right part of the screen.
2. How to activate Internet sharing on Xiaomi Redmi Note 6 Pro
Step 1
The first thing we are going to do to perform procedures enter the option called "Settings" that is usually found on the main screen in the icon represented by a nut or gear on the screen.

Step 2
Now that we are in the settings window, we must scroll through the options and select the one that has the name "Portable WiFi Zone" to continue with the procedure.

Step 3
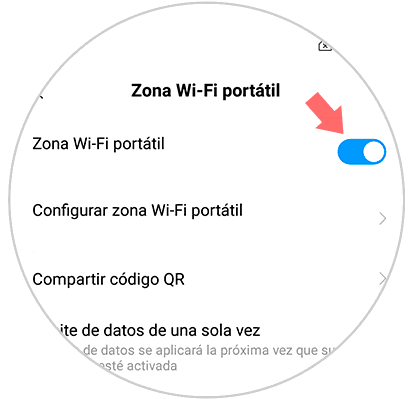
You can see that in this new window there is a small sliding tab just next to the name "Portable WiFi Zone". Simply activate this option on our Xiaomi Redmi Note 6 Pro phone and automatically on our device a WiFi network will be created in which other phones can connect by selecting the name to the internet by adding the password (in case we have added a password as explained in section 1 of this tutorial).
By performing these simple procedures we can use our Xiaomi Redmi Note 6 Pro phone to share a WiFi network..