Windows 10 includes a functionality through which it will be possible to share files, multimedia elements and printers with other users of the local network , this facilitates the interaction of these with this type of objects using secure forms of transfer..
Thanks to the sharing of folders and files we can access our information from other sites or share it with other users easily without having to be physically in the delivery. Today we will see how we can share folders in different ways from Windows 10.
There are several methods to obtain this information and TechnoWikis will explain them in detail through this tutorial..
To stay up to date, remember to subscribe to our YouTube channel! SUBSCRIBE
1. How to create shared folder in Windows 10
Step 1
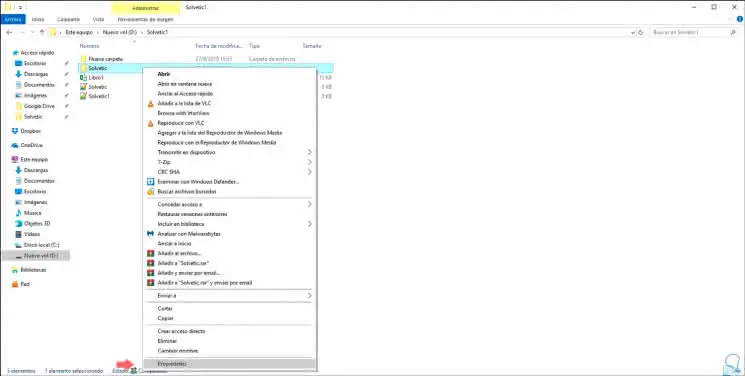
To share a folder in Windows 10, just right click on it and in the options displayed select the option "Properties":
Step 2
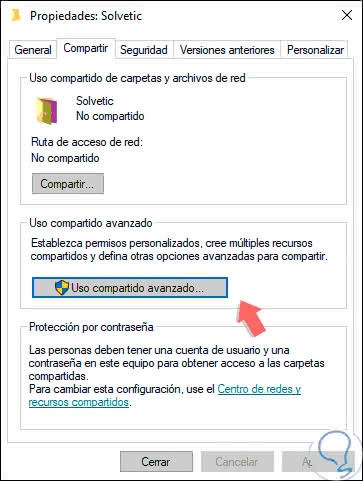
In the expanded window we will go to the "Share" tab and there we click on the button "Advanced sharing":
Step 3
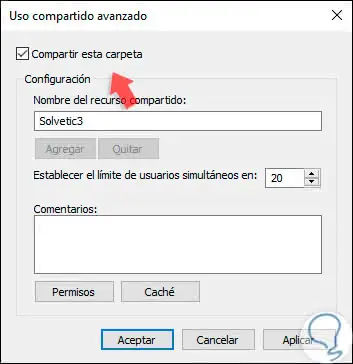
In the open window, activate the "Share this folder" box and proceed to assign the desired name for it. Click on Apply and Accept to save the changes. This is quite useful when multiple users must share information with each other but it is possible that the time will come when we forget which folders have been shared in Windows 10 and it will be necessary to obtain this information either by audit, support or control issues.
2. View shared folders through the Run command in Windows 10
This command is useful to access both system information and directories or the execution of programs and applications
Step 1
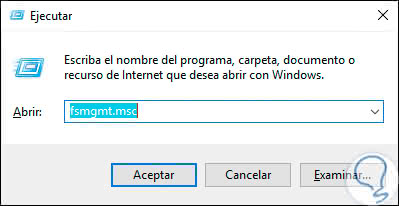
For its use we will combine the following keys and in the pop-up window we execute the following command:
+ R
fsmgmt.msc
Step 2
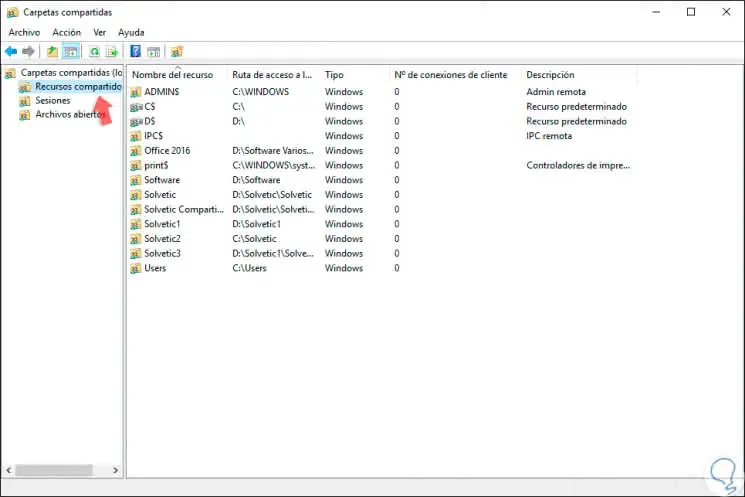
Press OK or Enter and this will display a window of the MMC console with the detailed information of our shared folders in Windows 10 in the "Shared resources" section:
Step 3
As we can see, information is obtained such as:
- Name of the shared resource
- Current location of that resource
- Description (if we have entered it)
3. View shared folders through CMD in Windows 10
The symbol of the system is the management console that has been present for decades in Windows operating systems and thanks to it we can perform hundreds of tasks in the system and see the shared folders is one of them.
Step 1
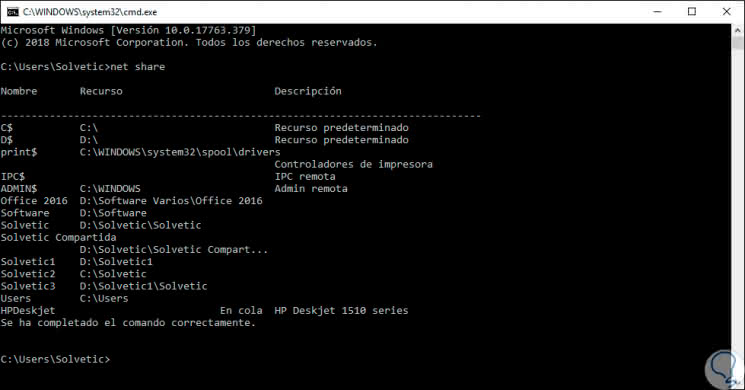
For this we access the command prompt using the CMD command, from Cortana or from the search box and in the deployed terminal we execute the following command:
net share
Step 2
As a result we will obtain the name of the shared resource as well as its route and description:
Step 3
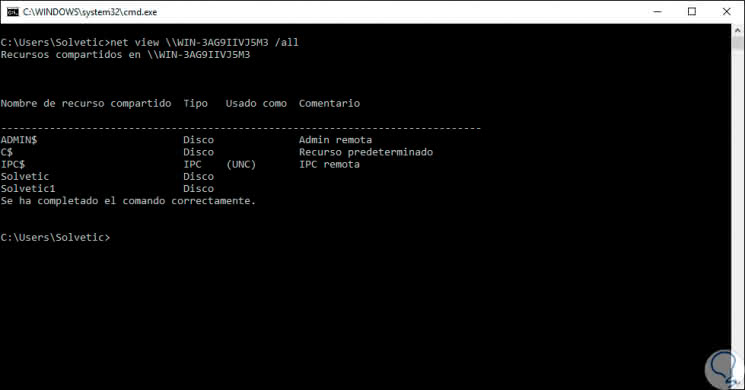
If we want to use the command prompt to view the shared folders on a remote computer, we will use the following syntax. These commands include the administrative shared resources, these will be possible to exclude them eliminating the argument / all in order to visualize only the shared users.
net view \\ team / all
4. View shared folders through Windows PowerShell in Windows 10
Windows PowerShell has been integrated in Windows 10 as a console that integrates hundreds of cmdlets for executing multiple administrative tasks and support in the system, access to the visualization of shared resources is one of them.
Step 1
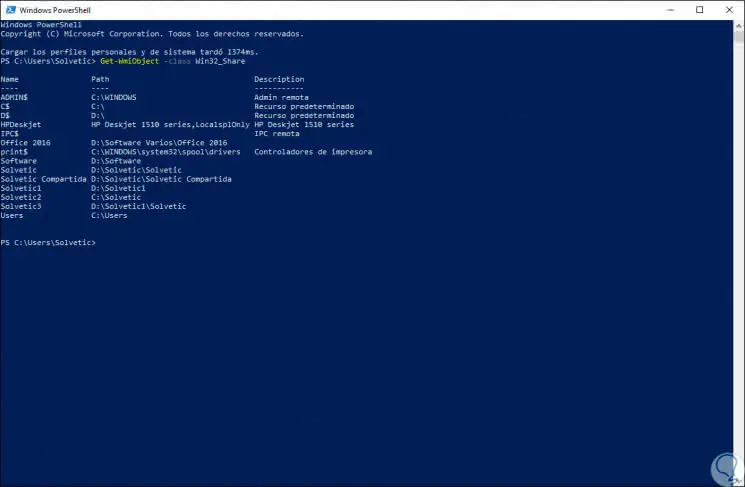
For this we open a new Windows PowerShell console and there we will execute the following cmdlet:
Get-WmiObject -class Win32_Share
5. View shared folders through File Explorer in Windows 10
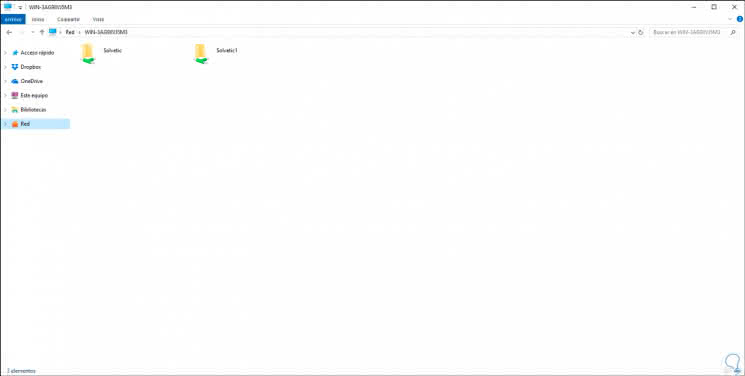
As an additional point, it is possible to access the shared resources of other computers through the Windows 10 File Explorer.
Step 1
To do this, simply go to the "Network" section and double-click on the active computer in the network:
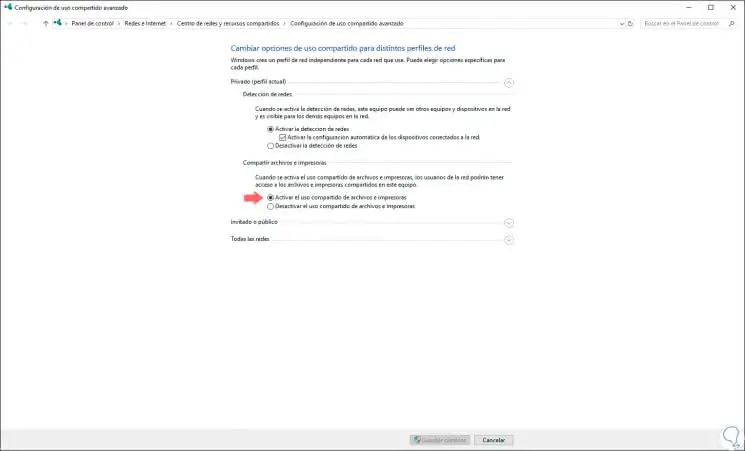
Step 2
For this process to work correctly we must go to the following route:
- Center network and sharing
- Advanced sharing settings
Step 3
There we must activate the following boxes:
- Activate network detection
- Activate file and printer sharing
With one of these practical methods it will be possible to visualize the shared folders in Windows 10 to take better control over them.