The amount of information and data that we store on our computer is increasing, since the possibility of downloading files and receiving new documents is really simple. That is why the printer is one of the most necessary hardware elements because thanks to it we can print and capture everything we do on the computer digitally such as files, images, etc..
In the case of a corporate environment, one of the best options for use is to share our printer so that it is available to more users on the local network and thus facilitate that they can print their jobs remotely on our printer, Thus, the shared printer will be visible in the shared resources of the network so that other users can install it locally and print as if it were next to them.
To achieve this we must activate the function " File and printer sharing in Windows 10" and now TechnoWikis will explain how to share a network printer in a simple way..
1. How to add shared printer in Windows 10
Step 1
To start this process we go to the "Start" / "Settings" menu where we will see the following:

Step 2
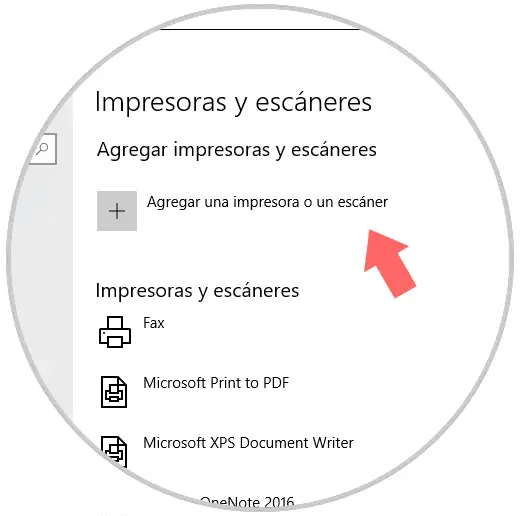
There we select the "Devices" category and in the new window we go to the "Printers and scanners" section:
Step 3
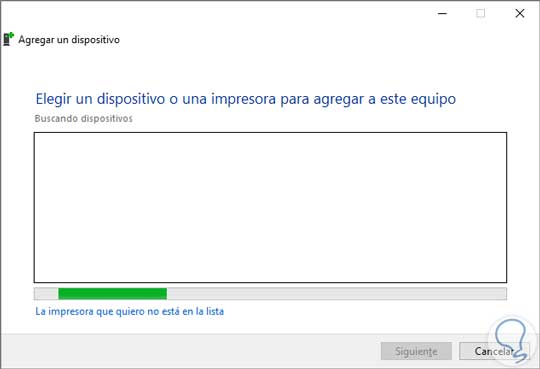
There we click on the option "Add a printer or a scanner" and after looking for the various options we will see the following:
Step 4
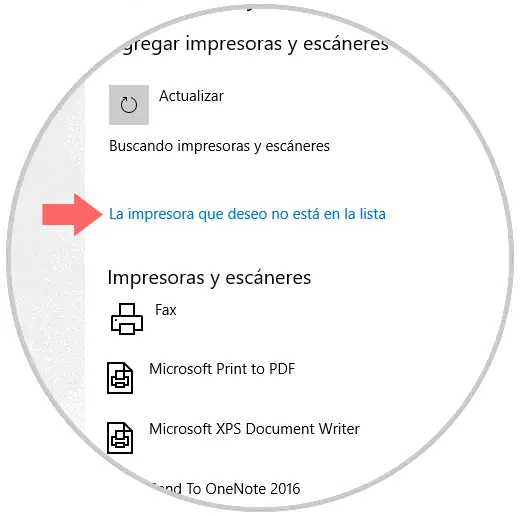
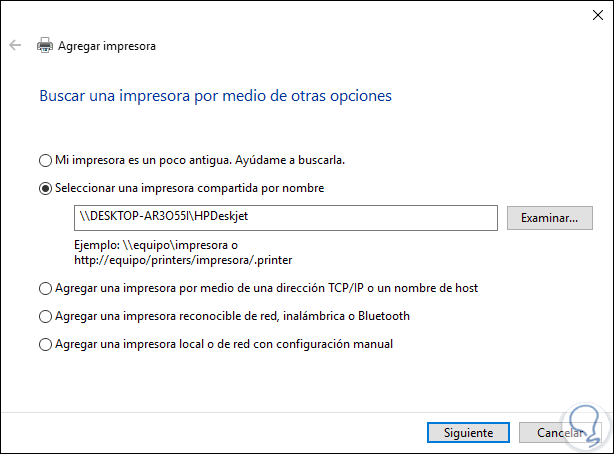
There we click on the line the printer is not in the list and in the window that will be displayed we activate the box "Select a shared printer by name" and there we have two options that are;
- Search the printer by name.
- Search for the printer by IP address.

Step 5
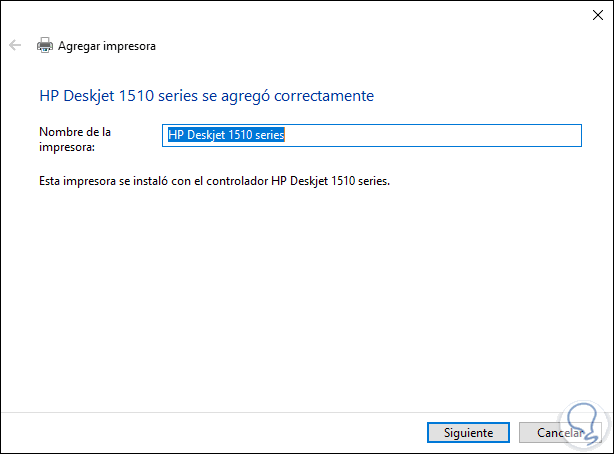
Click on "Next" and in the next window we can define the desired name for the shared printer:
Step 6
Again click on "Next" and thus confirm that the printer has been added correctly:
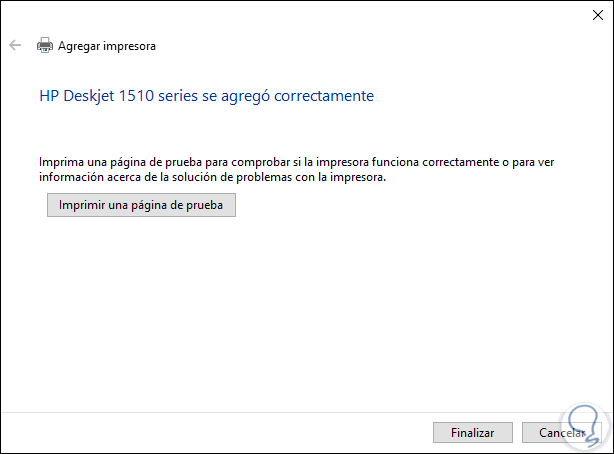
Step 7
There it will be possible to print a test page if we wish and click on the "Finish" button to close the wizard and in this way we will see that the shared printer has been added in Windows 10:
In this way we learned to add a shared printer in Windows 10 that we have in a shared network from another computer or server of the local network to which we are connected.
2. Connect a network printer in Windows 10, 8, 7
There is another way to configure our printer to be shared between different computers. These are the steps you must follow.
Step 1
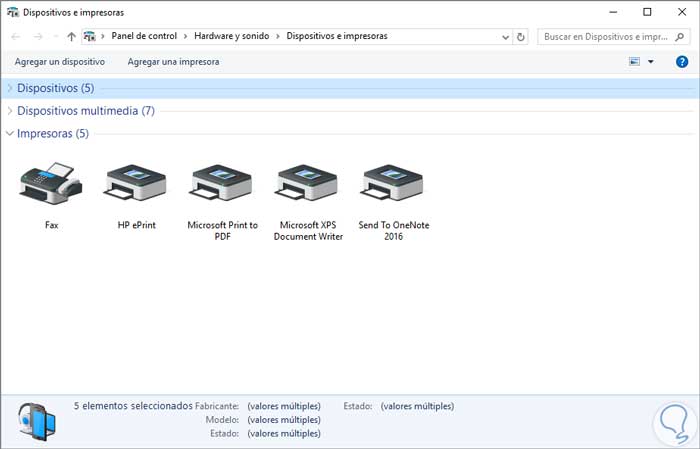
The first thing we must do is share our printer to provide access to other users. Once it has been shared, we have to go to the "Devices and printers" option and there we have to select "Add a printer"
Step 2
We will see a window unfold. In this window we will select the option “The printer I want is not in the listâ€.
Step 3
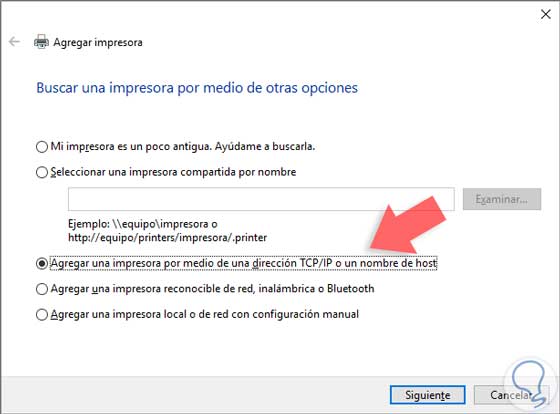
Next we will see different configuration options. In this example we will use the option "Add a printer using a TCP / IP address or host name"
My printer is a bit old. Help me find her
This option is the slowest, since Windows must perform a deep analysis on the network.
Select a shared printer by name
This option can be very useful and accurate in case we want to enter the exact route of the equipment. Failing that, we can use the Browse option to do a search across the network.
Add a printer using a TCP / IP address or host name
This option allows us to connect directly using the IP address of the equipment where the printer is connected. This information can be seen through the printer screen.
Add a recognizable network, wireless or Bluetooth printer
Using this option the system will search for devices that have this type of connection.
Add a local or network printer with manual configuration
From this option we will be able to configure the printer port, its brand, model, etc. It is recommended to use this option when any of the above does not yield any results.
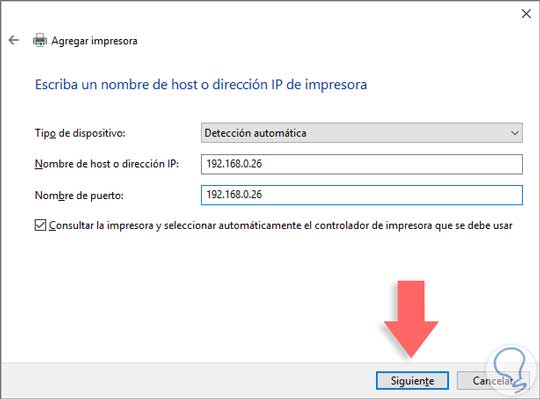
Step 4
Click Next and the next thing to do is enter the IP address of the device.
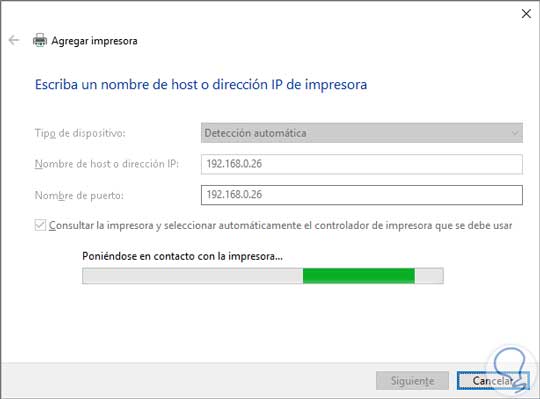
Step 5
Once we have clicked on "Next" we will see that a process of searching for the printer begins.
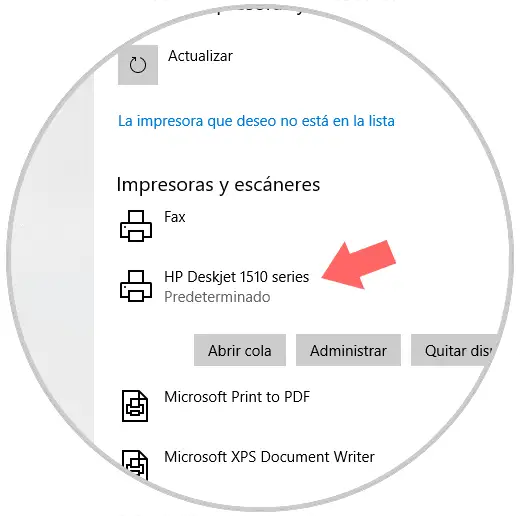
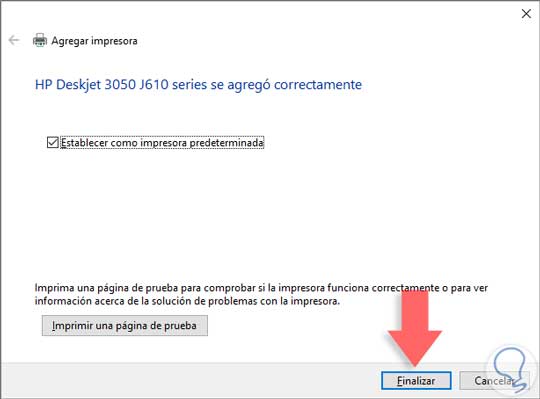
Step 6
When the printer has been located we will see that it is added correctly. In this new section we will be able to perform tests to validate the operation or set it as default. Click on finish to conclude the process.
Here we leave a video that explains how to add the shortcut of the printer that you have configured if you want to have it at hand:
To keep up, remember to subscribe to our YouTube channel! SUBSCRIBE
As we have seen, these are necessary and typical steps to use not only in homes but also in offices, since printers today, if you have several computers it is very useful to share them from another computer or have them connected directly to the network local cable or WiFi connection ..