The use of printers is something that will never go out of style in a world where progress is increasing and this is because printers have the mission of physically capturing everything we do in the operating system and its applications ..
We currently have printers in multiple designs, technologies and functions but all have the same purpose; It is therefore natural that we install more than one printer in our Windows 10 operating system. This is useful since they will be available there but it can also be a nuisance factor to have several printers and use only one because the others are no longer enabled. For this reason TechnoWikis will explain how we can remove a printer in Windows 10 using various practical methods.
1. How to remove a printer using the Configuration utility in Windows 10
"Configuration" is a tool from which it will be possible to centrally manage various aspects of the operating system in a simple way.
Step 1
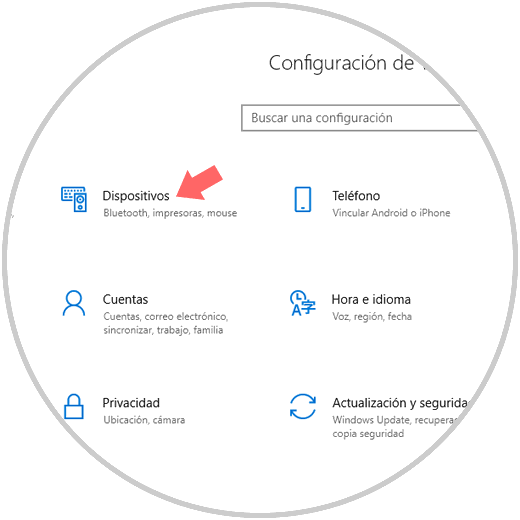
For this we will go to the "Start" menu and there we will choose the "Configuration" utility and the following will be displayed. There we go to the "Devices" category.
Step 2
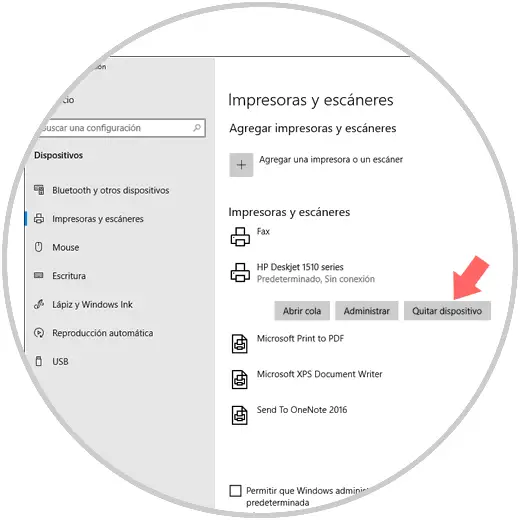
We will go to the "Printers and scanners" section. There, just click on the printer to be deleted and click on the "Remove device" button:
2. How to remove a printer using Control Panel in Windows 10
The control panel is another of the centralized management options that Windows 10 offers us and through which it will be possible to safely remove a printer.
Step 1
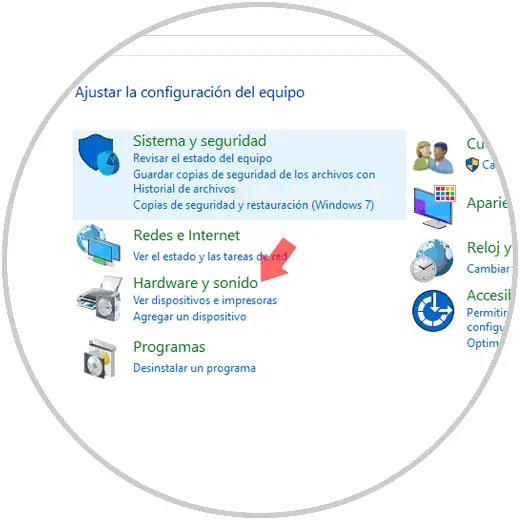
To use this method we will go to the control panel and see the following. There we click on the "Hardware and sound" line.
Step 2
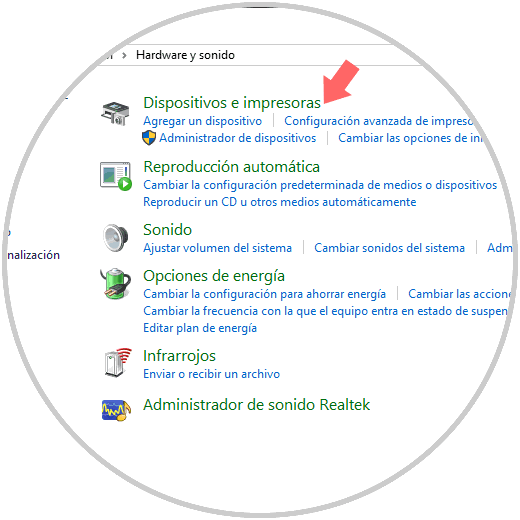
The following will be displayed. There we click on the "Devices and printers" line.
Step 3
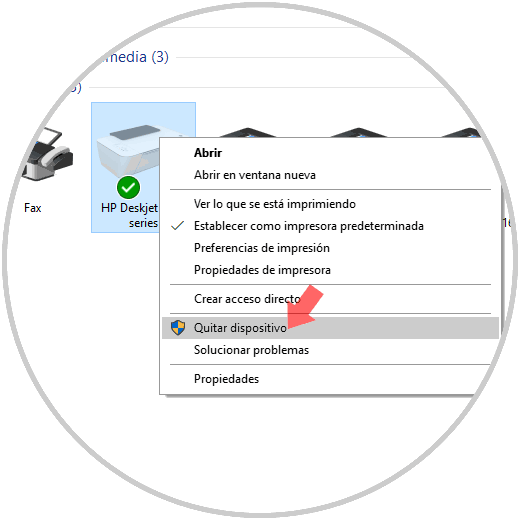
In the new window that will be displayed, we will right click on the printer to be removed and select the Remove device option:
3. How to delete a printer using the Windows 10 printer folder
This is a classic printer-level folder, which is hidden in Windows 10 and has a simple environment for managing printers connected to the system.
Step 1
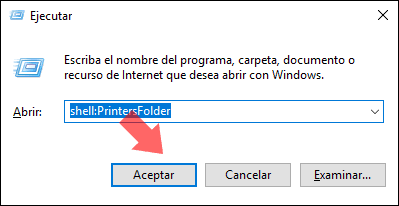
To access it we will use the key combination:
+ R
We execute the following line:
shell: PrintersFolder
Press "Enter" or "Accept."
Step 2
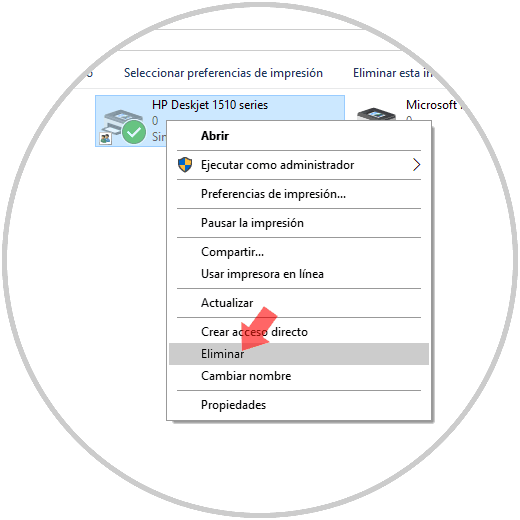
In the displayed window we will right click on the printer and select the "Delete" option:
4. How to remove a printer using Print Manager in Windows 10
The Windows 10 operating system includes the MMC Printer Management span-in (Microsoft Management Console), which offers various options to manage local and network printers, one of these options allows you to remove a printer.
Step 1
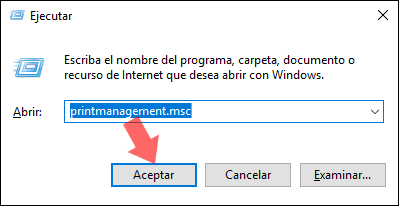
To access this administrator we will use the key combination:
+ R
We execute the following:
printmanagement.msc
Press "Enter" or "Accept."
Step 2
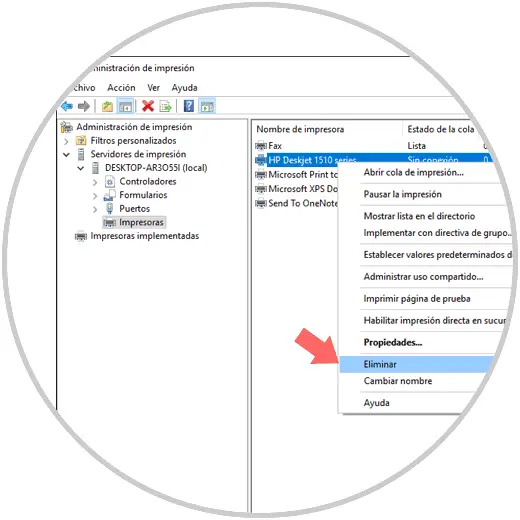
In the window that unfolds we will click on the line "Print servers", then on the name of our local team and select the "Printers" section, on the right side all printers will be displayed, there we will right click on the printer desired and select the option "Delete":
5. How to remove a printer using the device manager in Windows 10
The Device Manager is a central point where we can manage all the drivers of the devices connected to the system and perform various other tasks.
To access this "Administrator" we have the following options:
Option 1
Using the key combination:
+ R
Execute the command:
devmgmt.msc
And press "Enter"
Option 2
Right click on the "Start" menu, or use the keys:
+ X
In the displayed list select "Device Manager"
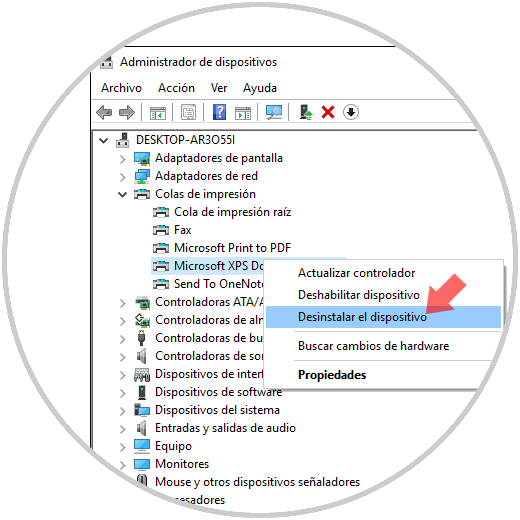
In the Windows 10 search box enter the term devices and there select the utility. In the deployed administrator, we will go to the "Print queues" section and there we will right click on the desired printer and select the option "Uninstall the device":
Step 2
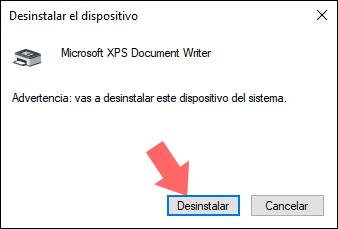
There the following message will be displayed. Click on the "Uninstall" button to complete the action.
6. How to remove a printer using PowerShell in Windows 10
This is an integrated management console in Windows 10, through which it will be possible to uninstall a printer safely.
Step 1
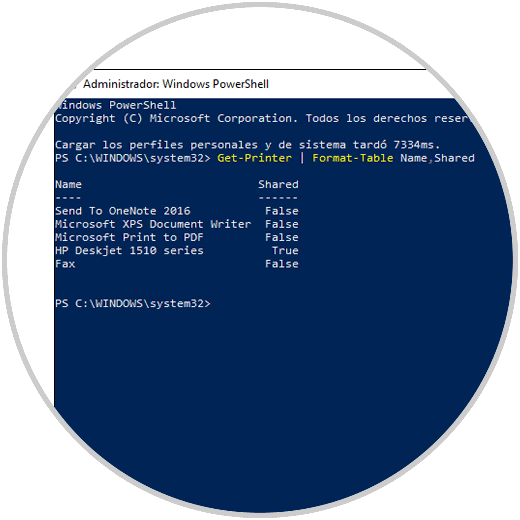
To do this, we will access Windows PowerShell as administrators and run the following cmdlet to list the current printers:
Get-Printer | Format-Table Name, Shared
Step 2
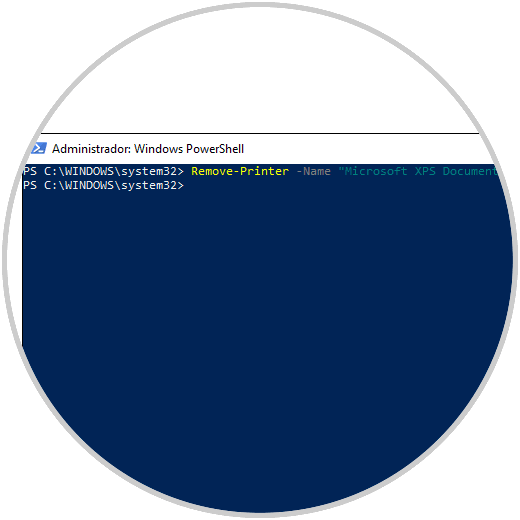
Then we must execute the following syntax to remove the selected printer:
Remove-Printer -Name "Printer"
7. How to remove a printer using printui.exe in Windows 10
Windows 10 integrates a special tool called printui.exe, which has been developed with the ability to manage printers using a command line, this facilitates management tasks when a printer is added or removed from a group of users through a login script or a scheduled event.
Step 1
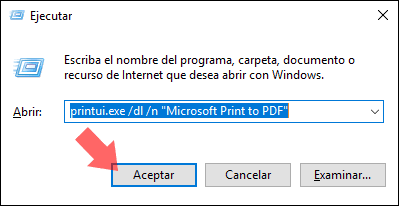
To remove a printer with this printui.exe command, we must execute the command as "Administrator" as follows. There we click "Accept."
printui.exe / dl / n "Microsoft Print to PDF"
Step 2
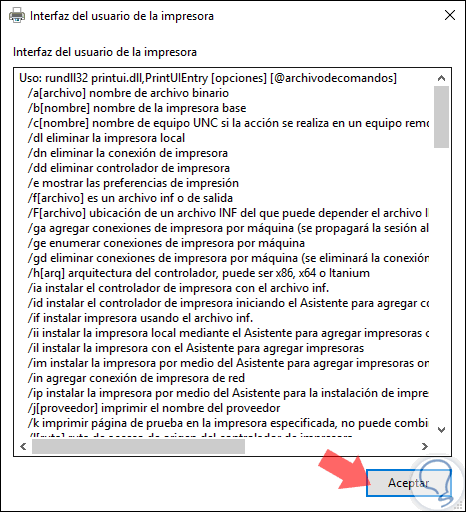
The command will be executed automatically, to access the help of this utility we can execute the following:
printui /?
We can see the various alternatives available in Windows 10 to remove a printer and thus only have the device that is necessary to use and not have elements that are no longer practical, so safely remove printers in Windows 10..