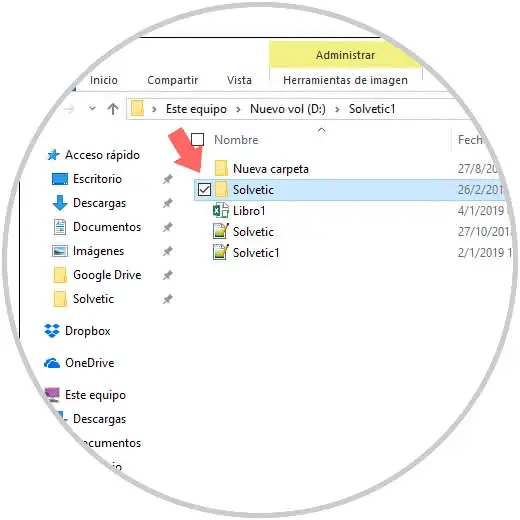
Windows 10 is a system that has been developed to allow us to customize much of your environment in a dynamic way with new colors, designs, themes and more, this makes the system acquire a personal touch according to the taste of each user. The problem is that many times the configuration we apply can cause an unexpected effect in other aspects of the system, one of these is the case that some icons in the new Windows 10 interface and its shortcuts on the desktop we see a green box in the lower left and this is a check box:
Although it is not something that affects the performance or general behavior of the system, it can cause an undesirable effect on the level of performance and use of the files. TechnoWikis will explain the way to eliminate this check box and thus enjoy even more of all the functionality of Windows 10. In Windows 10 we have some methods for this action, which we will analyze in detail..
1. Validate the settings of the folder options to remove the Windows 10 files selection box
Step 1
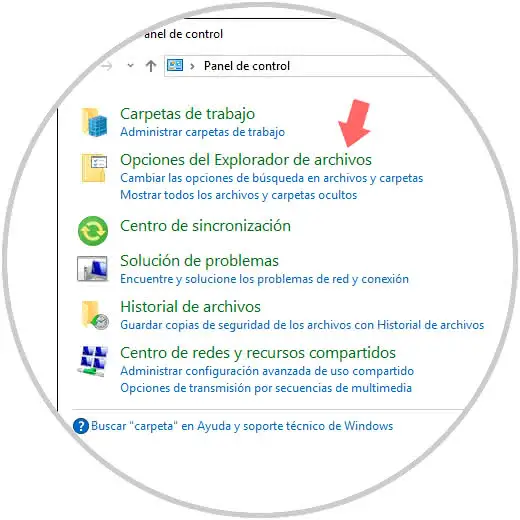
To use this method we can access the Control Panel and in the search box enter the term "folder" and in the displayed results select File Explorer Options:
Another way to access this option is directly from the Explorer, there we have two options that are:
- Go to the View / Options menu / Change folder and search options
- Go to the File / Options menu
Step 2
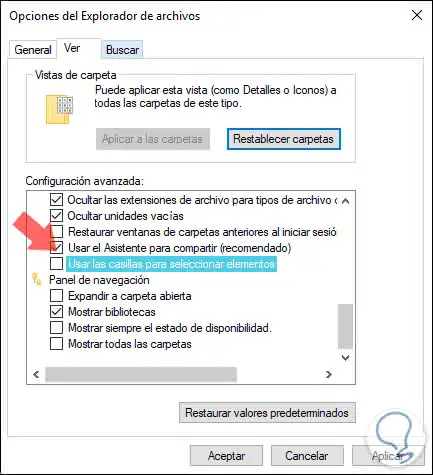
The following window will be displayed and there we should go to the View tab and in the lower part we deactivate the Use the boxes to select items box. Click on Apply and Accept to save the changes.
This should correct the error and be able to see the files or folders without that checkmark.
2. Correct the error by resetting the component store to remove the Windows 10 files selection box
The component store is linked to the WinSxS folder since it is where the Windows 10 components are housed, the function of this store is to support the functions necessary for the customization and updating of Windows and many of its parameters such as:
- Move systems through different editions of Windows.
- Enable or disable Windows features.
- Run Windows Update to install new versions of system components.
- Recover the operating system from boot errors and many more tasks.
Step 1
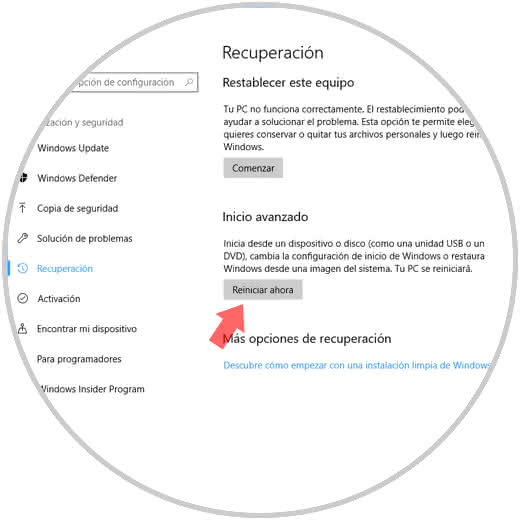
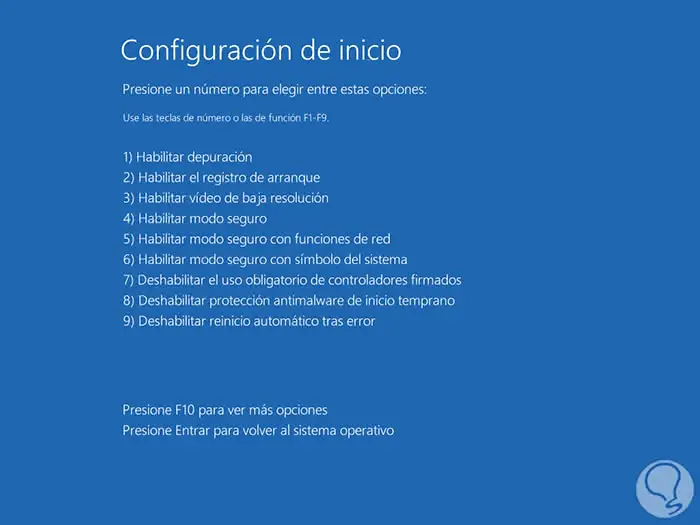
To execute the task of restoring the component store, we must access the system in safe mode, for this we go to the following route:
Step 2
There we click on the Restart Now button located in the Advanced Start section and the following will be displayed:
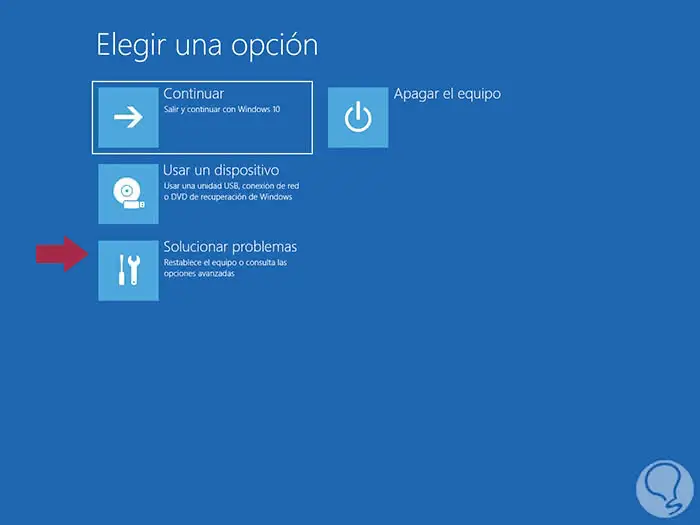
Step 3
There we select the Solve problems option and now we will see the following:
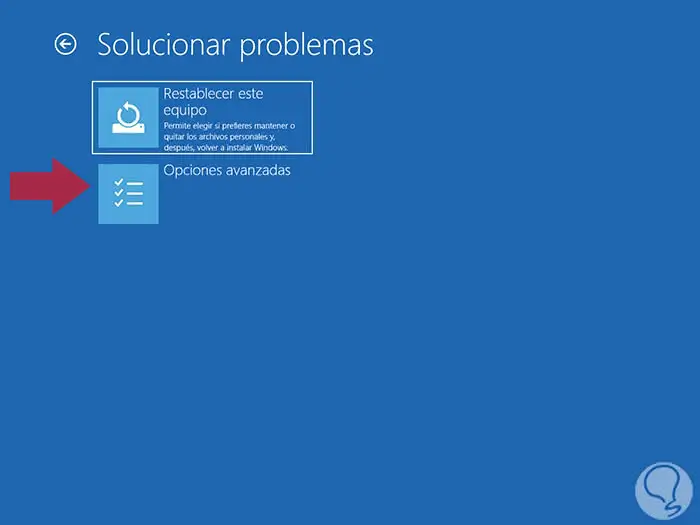
Step 4
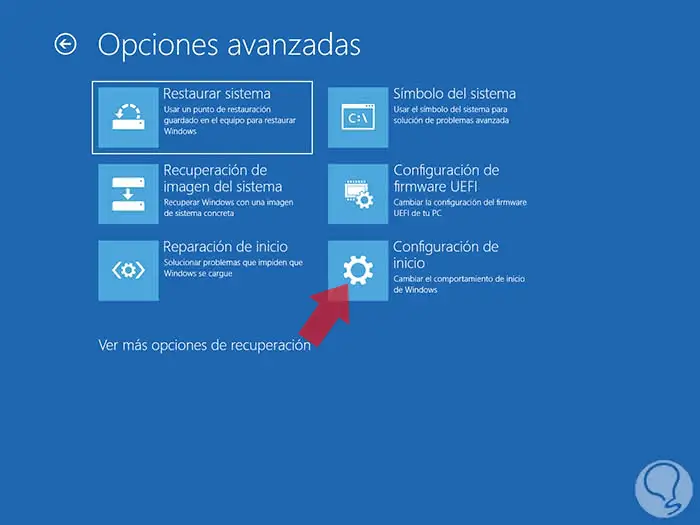
There we select Advanced options and in the next window we select the Start configuration option:
Step 5
The following window will be displayed:
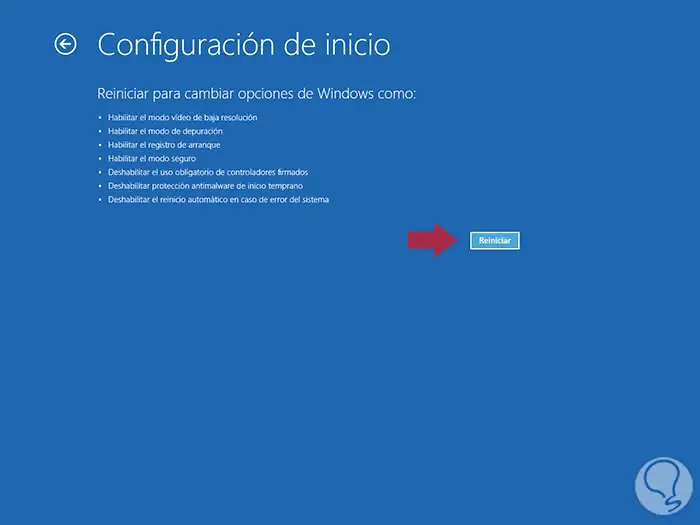
Step 6
There we click on the Restart button and then we define the type of safe mode to use:
- F4 key to enter normal safe mode
- F5 key to execute safe mode with network functions
- F6 key to execute the safe mode with functions of the command prompt (CMD)
Step 7
Once we log in we must run Windows PowerShell as administrators and there execute the following:
Dism.exe / Online / Cleanup-Image / RestoreHealth
DISM is a Windows utility designed to manage and manage everything related to operating system images:

Step 8
Once this process is finished we will access the command prompt as administrators and there we will execute the following:
sfc / scannow
The SFC command is responsible for analyzing and repairing the Windows 10 file system in case of detecting something in error.
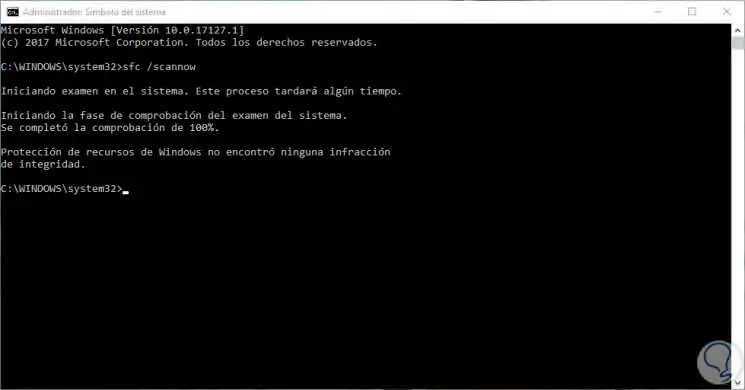
When the analysis is completed we can execute the following commands to finish the process:
Dism.exe / Online / Cleanup-Image / CheckHealth
Dism.exe / Online / Cleanup-Image / startComponentCleanup
With this method it will be possible to correct the error in the check box in Windows 10.
3. Check the item boxes in the Explorer to remove the Windows 10 files selection box
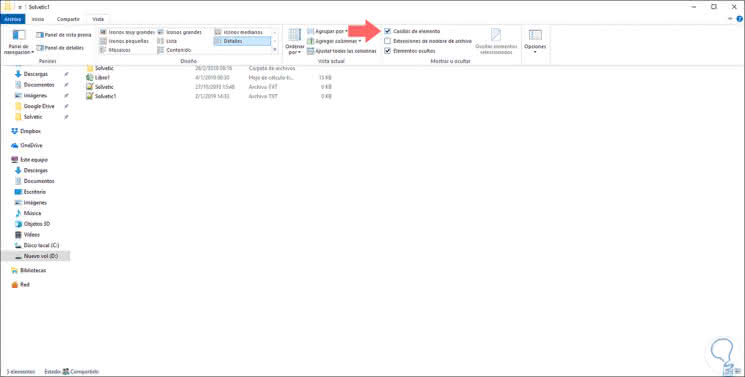
Another option by which we can see this box is that at some point we could activate the item box in the browser, to verify this and disable it if this is the case, we must go to Windows 10 File Explorer and there go to the menu View and in the Show or hide group check the status of the Element boxes option. If it is active, we must simply deactivate it to correct the error.
With some of these solutions we will give way to a better accessibility and vision of the elements in the Windows 10 interface..