The network security is one of the key points to keep in mind with each access to the Internet and this is because each click we give, every letter we enter and every website we visit, these are monitored in the background by third parties who use this data for advertising purposes and in other more delicate cases for extortion purposes. Obviously we cannot disappear because 99% of what we do must be on the network, but we can increase the security of our browsing and this is possible thanks to virtual private networks (Virtual Private Network VPN)..
Advantages of using a VPN network
The advantages of using a VPN network are:
- They have encryption that optimizes privacy in unreliable Wi-Fi networks and public access networks.
- Prevents you from leaving browsing history and more.
It is for these reasons that we will teach you how to install OpenVPN in Ubuntu 20.04 (server and desktop) to have an extra security alternative in Internet browsing processes.
What is OpenVPN
OpenVPN has been developed in order to allow the user to create a VPN network using the TCP and UDP transmission protocols, all VPN tunnels are protected with the OpenVPN protocol which has SSL / TLS authentication, certificates, credentials and multi-factor authentication. .
OpenVPN has a client-server architecture and can be installed on different systems such as Linux, Windows , macOS or on mobile operating systems such as Android, Windows Mobile and iOS. The OpenVPN access server is able to receive incoming VPN connections and therefore OpenVPN Connect clients can initiate the connection to the server..
VPN Features
The main features of OpenVPN are:
- Integrates a robust and scalable VPN server easy to configure and manage by the user
- It has a Cloud Application Marketplace for AWS, GCP, Azure and Oracle
- Compatible with virtual site-to-site access networks
- Allows you to configure specific access controls at both user and group level
- It has different authentication modes
- Centralized certificate management
- Use the split tunnels feature
Now we are going to learn how to install OpenVPN in Ubuntu 20.04 Server and after that connect from Ubuntu 20.04 Desktop.
1. How to install OpenVPN in Ubuntu 20.04 Server
The configuration of OpenVPN itself is a task that requires various parameters that for many can be complex. To avoid this, there is a script with which it will be possible to configure our OpenVPN server in a much more dynamic way. This script will automatically detect the private IP address of the server.
Step 1
To know it we are going to execute the following:
wget -qO - icanhazip .com

Step 2
Alternatively we can execute the following:
dig + short myip .opendns .com @ resolver1.opendns.com
Step 3
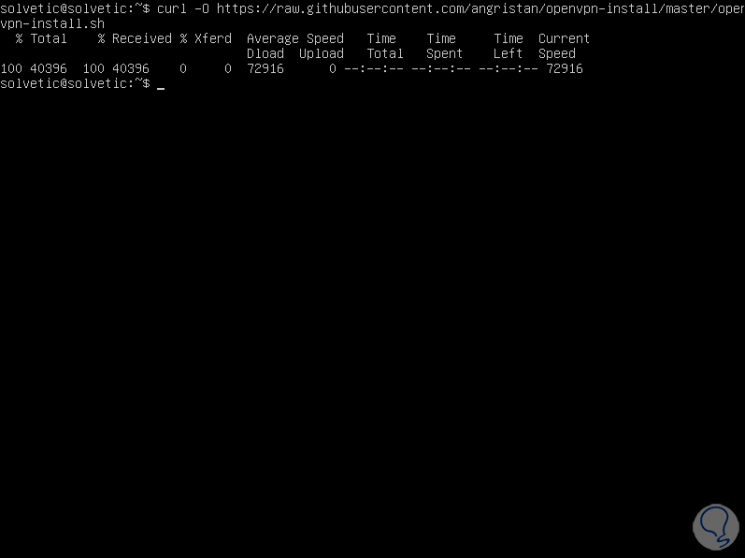
Now we are going to download the mentioned script using the CURL command as follows:
curl -O https: / /raw.githubusercontent.com/angristan /openvpn-install/master /openvpn-install.sh
Step 4
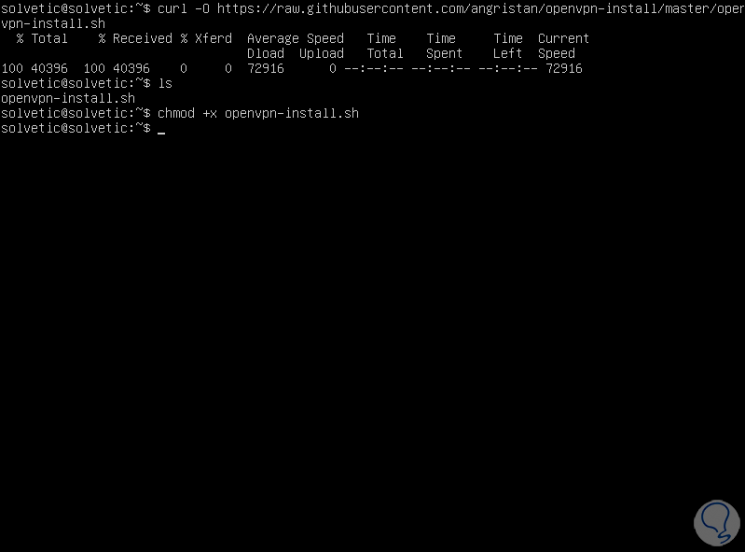
We will make this executable file with the following command:
chmod + x openvpn-install .sh
Step 5
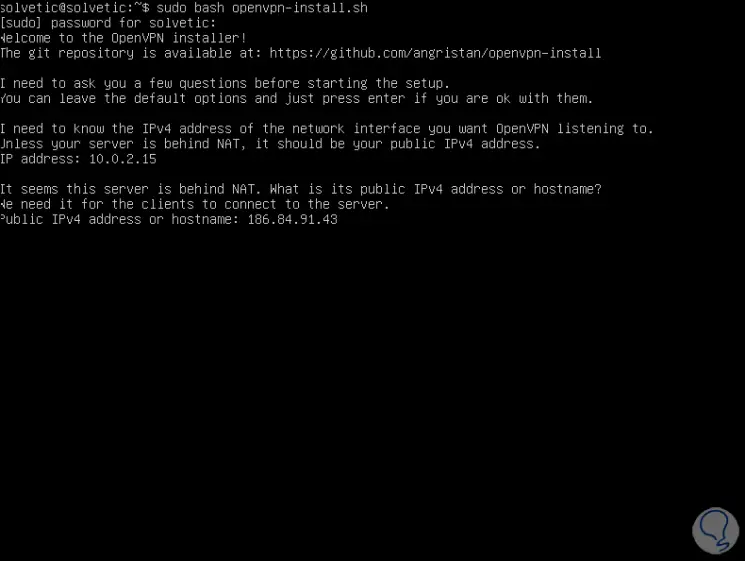
Once this is done, we execute the file with the following command:
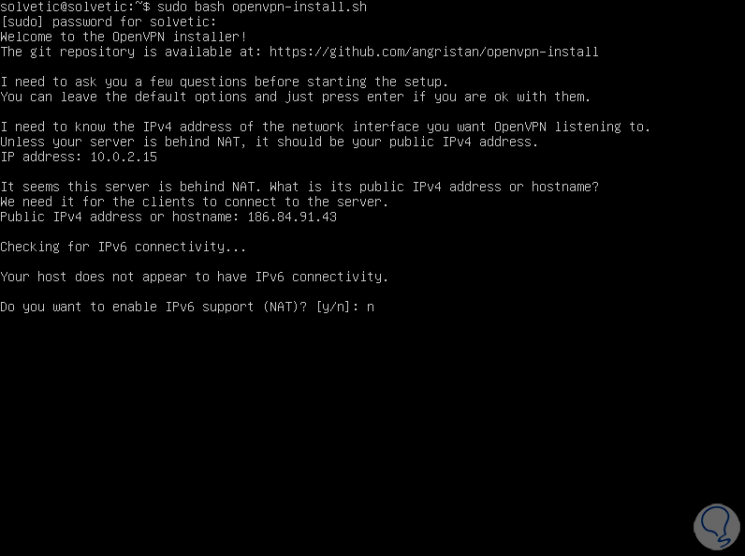
sudo bash openvpn-install .sh
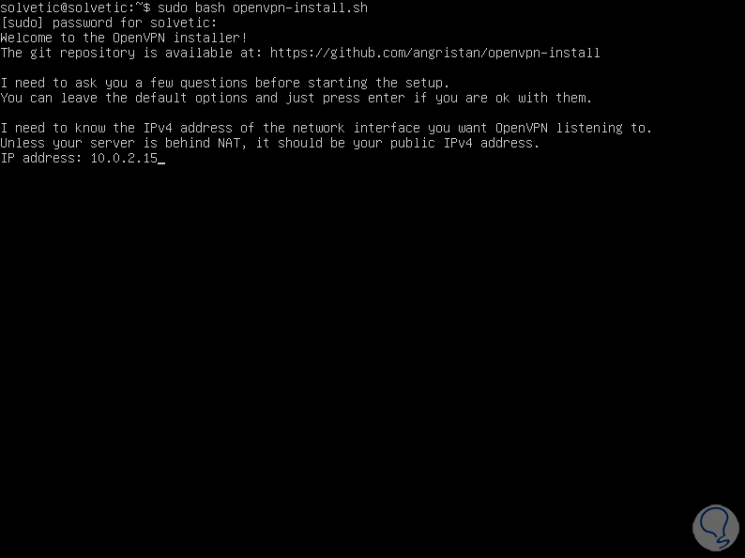
Step 6
First, we validate the IPv4 address to use, press Enter and then we must enter the public IP address of the Ubuntu 20.04 server:
Step 7
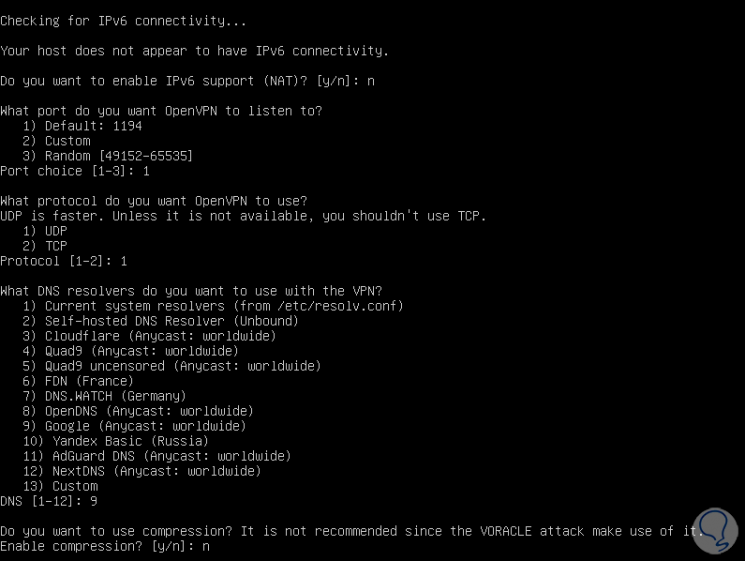
Press Enter and now we have some questions depending on the desired configuration, first of all, it asks if we want to enable IPv6 support:
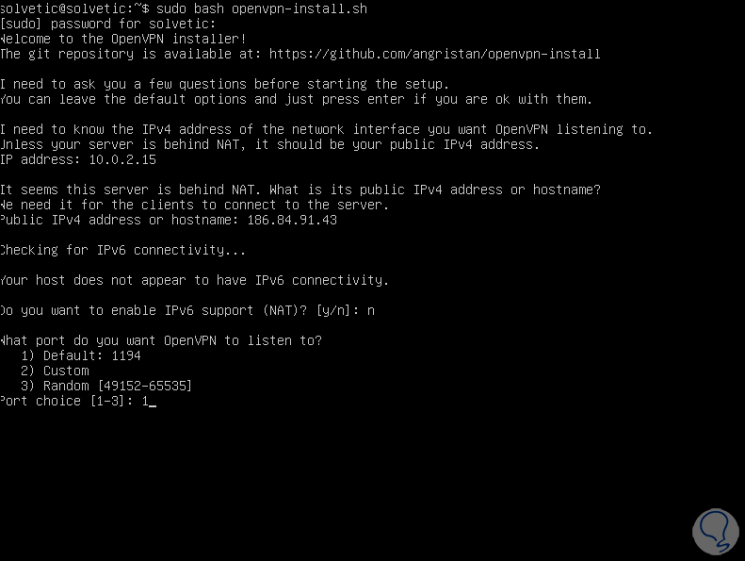
Step 8
After this we select through which port the OpenVPN communication will be heard:
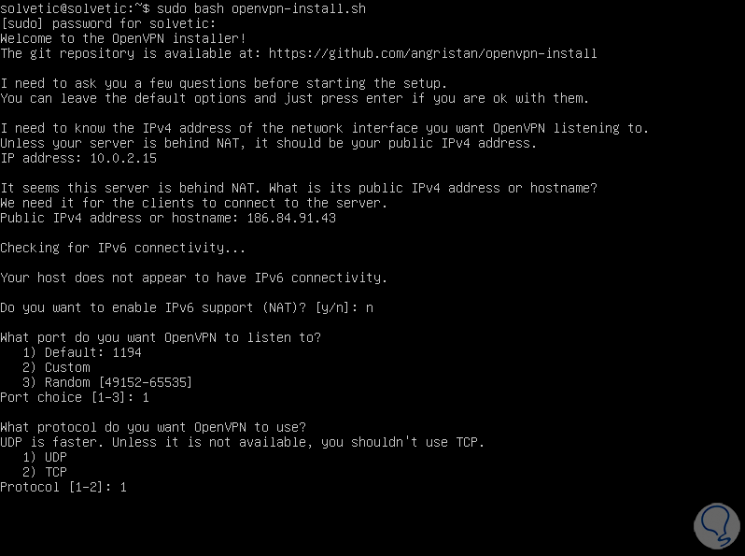
Step 9
We leave the default option and immediately define the protocol to use:
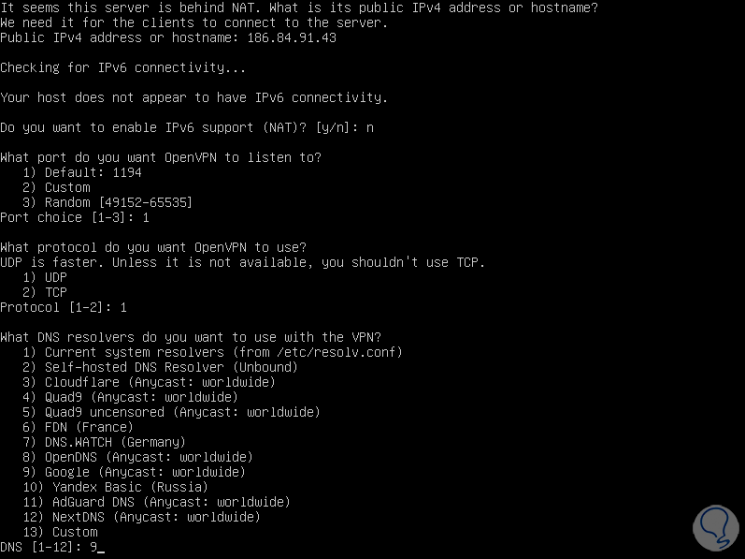
Step 10
After that we have a series of DNS options to use:
Step 11
We select the desired one and now we define if we will use compression in the files:
Step 12
Then you wonder if we want to customize the OpenVPN settings:
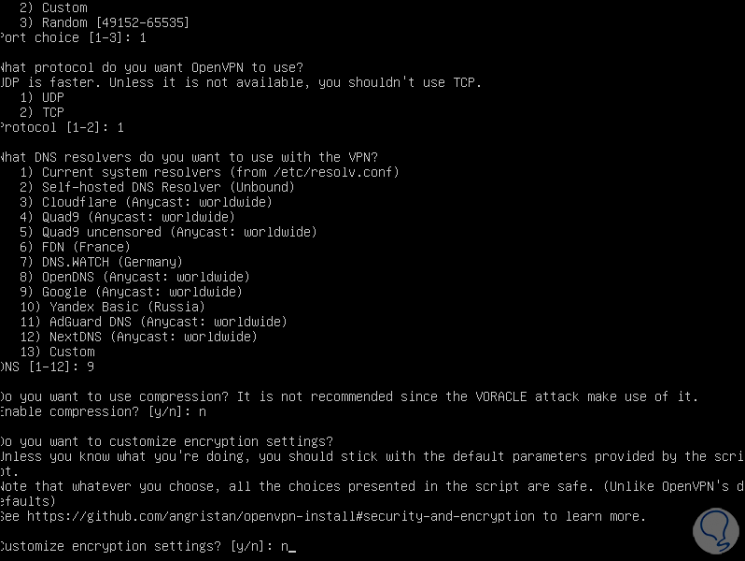
Step 13
Press Enter to proceed with the installation of the OpenVPN script:

Step 14
Then we will be asked to enter the client's name:
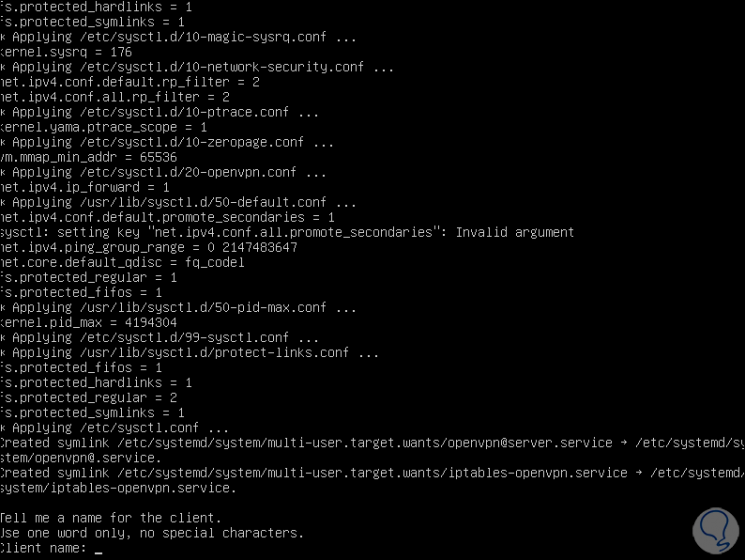
Step 15
Next we define the authentication method and we have reached the end of the installation of OpenVPN in Ubuntu 20.04 Server:
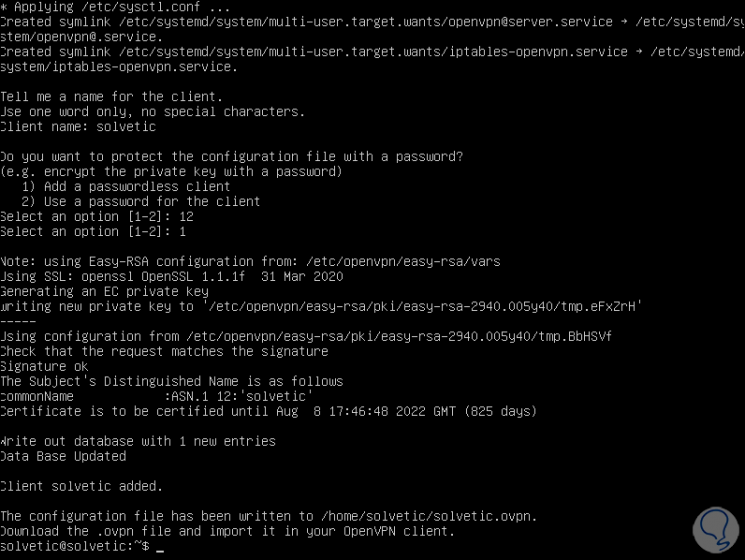
In the final part we find the path of the client configuration file in the working directory in which we are..
Step 16
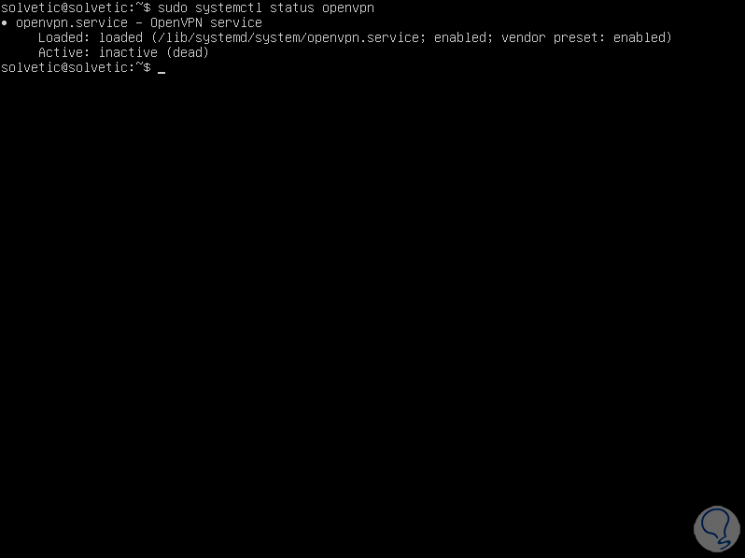
We confirm that the OpenVPN service is active with the following command:
sudo systemctl status openvpn
Step 17
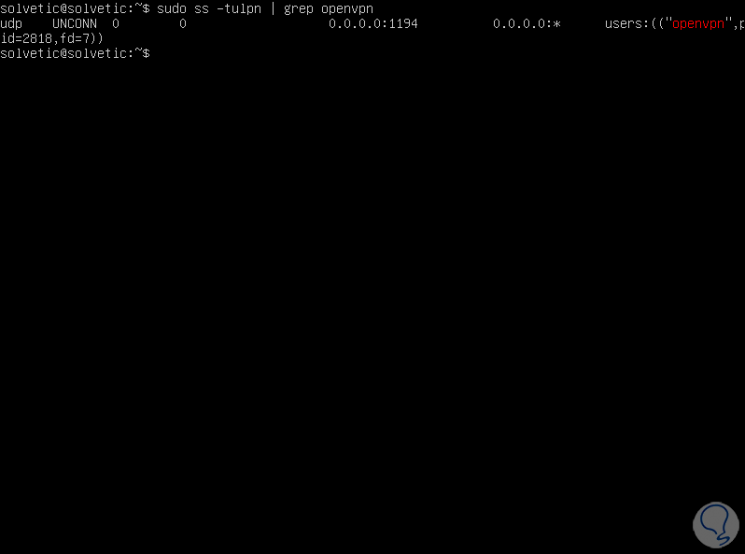
In addition to this, we validate that the OpenVPN daemon is listening on the port assigned in the script, for this we enter the following command:
sudo ss -tupln | grep openvpn
Step 18
With the command "ip add" we validate that a new interface has been created which will be the one that acts as a VPN with the computers:
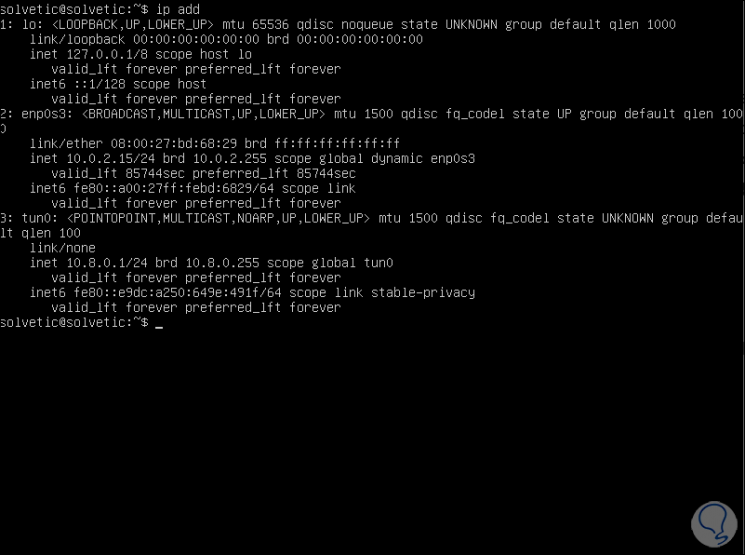
In this case it is interface 3 called POINTOPOINT.
2. How to configure OpenVPN in Ubuntu 20.04 Desktop
Step 1
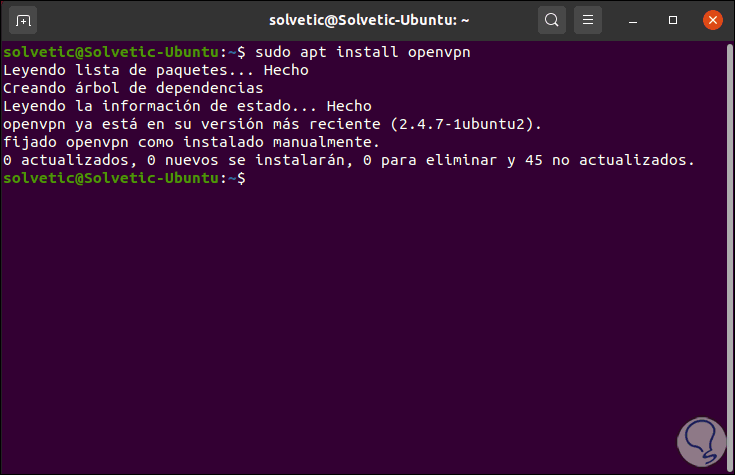
Now we go to the client and the first step will be to install OpenVPN with the following command, additional we can install it in other distributions like this:
sudo yum install openvpn (CentOS 8 / 7 / 6 ) sudo apt install openvpn (Ubuntu / Debian) sudo dnf install openvpn (Fedora 22 + / CentOS 8 )
Step 2
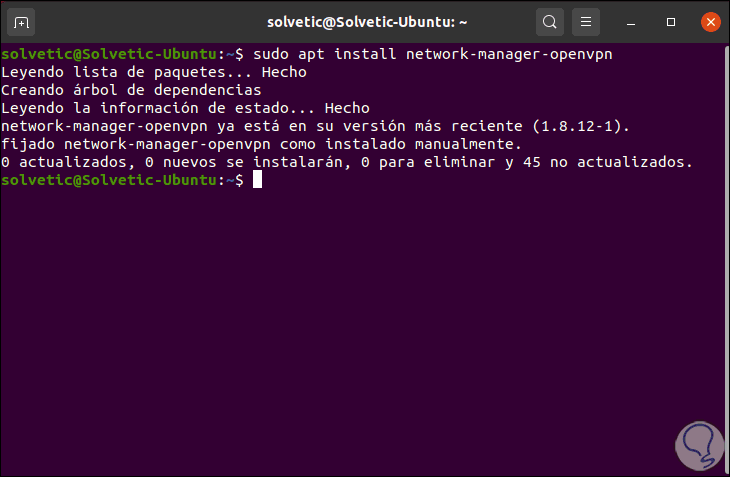
After that we are going to install the “network-manager-openvp” packages which allow us to manage the OpenVPN interface:
sudo yum install network-manager-openvpn (CentOS 7 / 8 / 6 ) sudo apt install network-manager-openvpn (Ubuntu / Debian) sudo dnf install network-manager-openvpn (Fedora 22 + / CentOS 8 )
Step 3
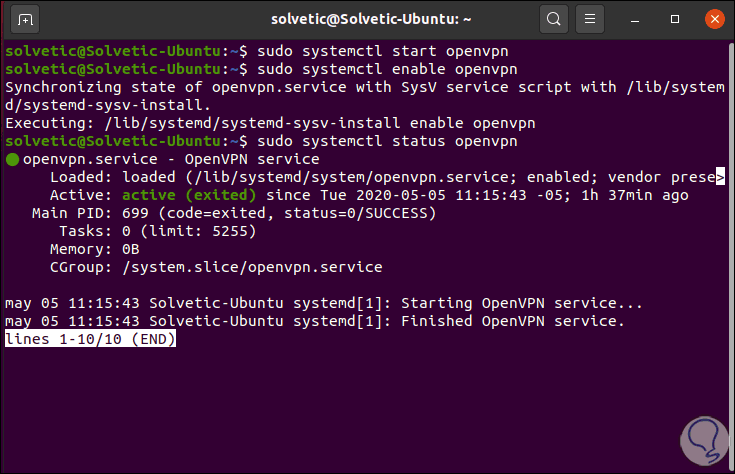
Now we are going to start, enable and view the status of the OpenVPN service:
sudo systemctl start openvpn sudo systemctl enble openvpn sudo systemctl status openvpn
Step 4
Next, we will import the OpenVPN configuration file into the Home directory like so:
cd ~ $ scp "user" @ "server IPv4" : / home / solvetic / solvetic.ovpn
As a result of this we will import the file into the Ubuntu 20.04 Home directory:

Step 5
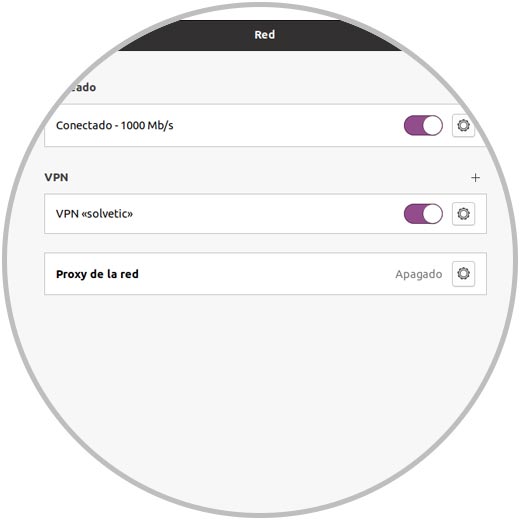
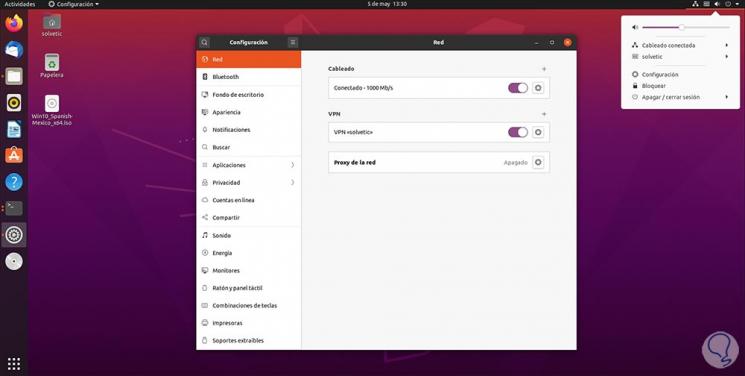
Now we go to the network configuration where we will see the following:
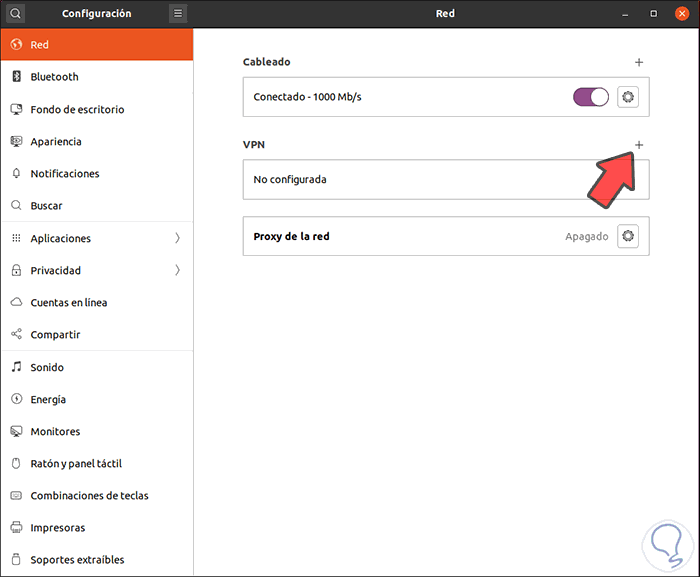
Step 6
We click on the + sign in the VPN section and the following will be displayed:
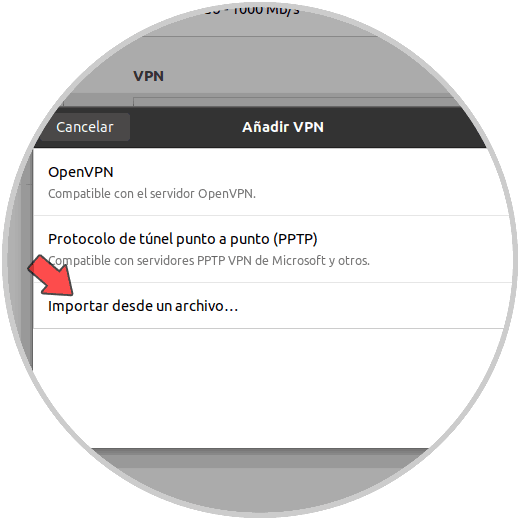
Step 7
We click on the option "Import from a file" and in the following window we go to the path where the configuration file has been imported:
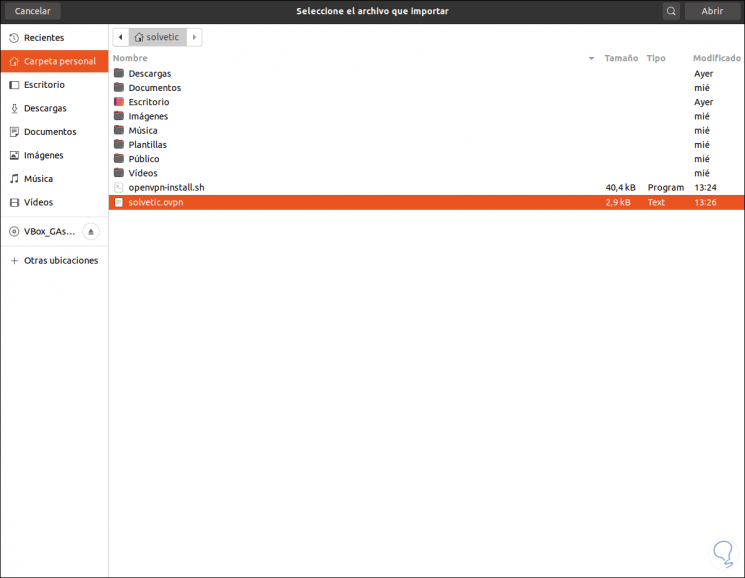
Step 8
Select it and click "Open", it will load all the OpenVPN server variables:
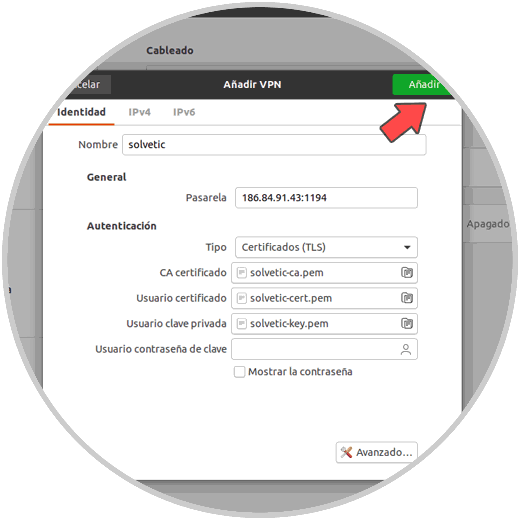
Step 9
We click "Add" to integrate it into the network and we will see this:
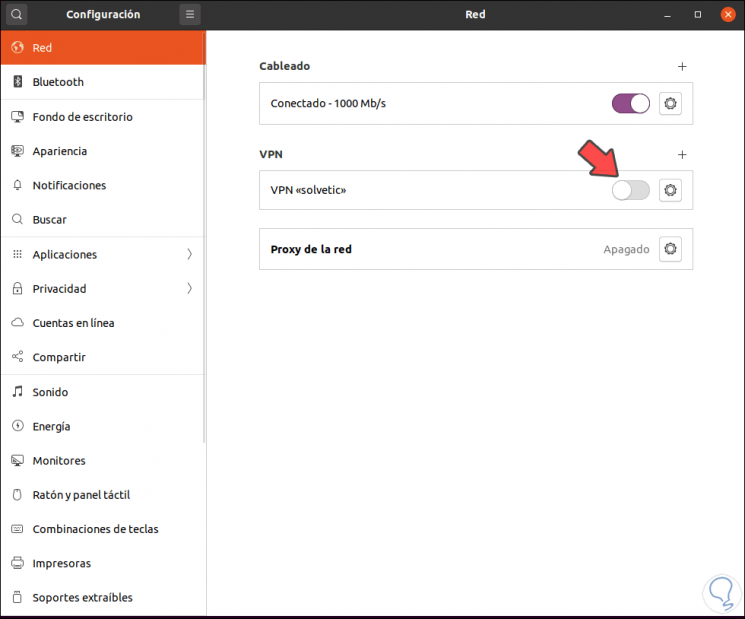
Step 10
We proceed to connect the VPN network by pressing on its switch and we must enter the administrator password:
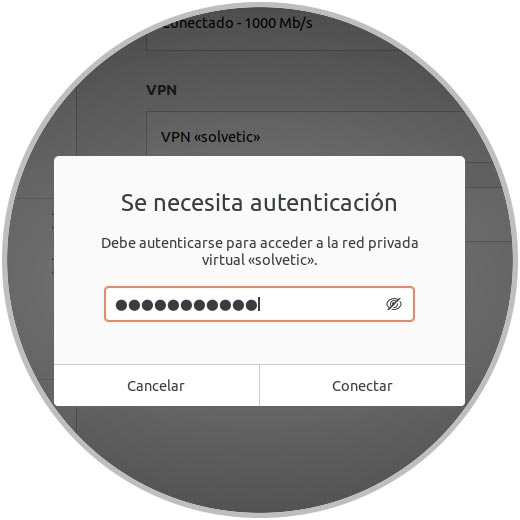
Step 11
We click Connect to proceed with this operation:
Step 12
We can validate the VPN connection from the top menu:
Step 13
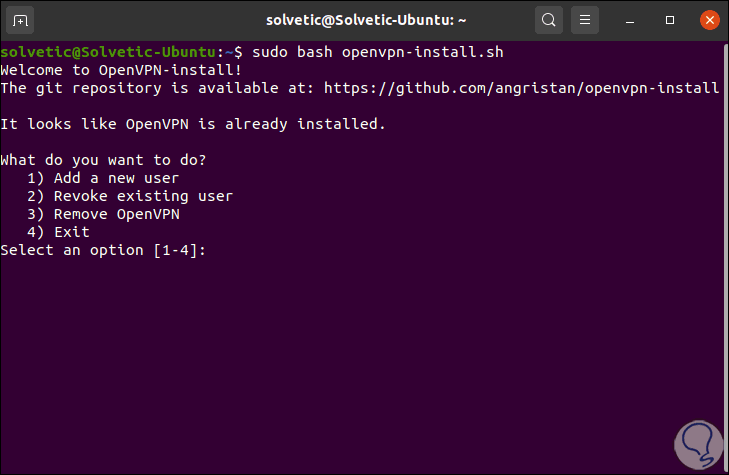
At the moment we want to apply any change or remove OpenVPN in Ubuntu 20.04 Server we will execute the following. There we select the desired option and follow the necessary steps.
sudo bash openvpn-install .sh
With TechnoWikis you have learned to install OpenVPN in Ubuntu 20.04 and thereby ensure web connectivity.