Instagram is an application for free use for the iPhone device, which allows you to take pictures from the cell phone by applying the application's own filters that achieve quite striking terminations,
Once the photograph is achieved, it can be shared by email and social networks.
With PhotoShop CS6 you can create the same effect without having the device, in addition the photos will have higher resolution and better quality.
The Instagram application currently has 15 effects, but in this tutorial you will see the Nashville effect.
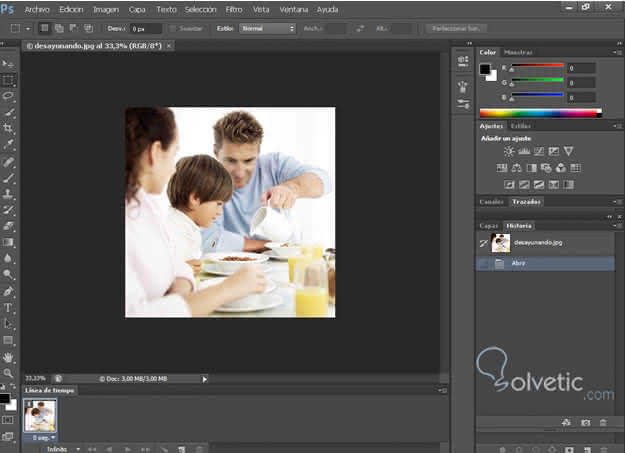
- The PhotoShop CS6 program starts and the image to which it will be given effect is loaded.
- Next, a new layer of levels will be created. For that you need to go to the menu layers> new adjustment layer> levels
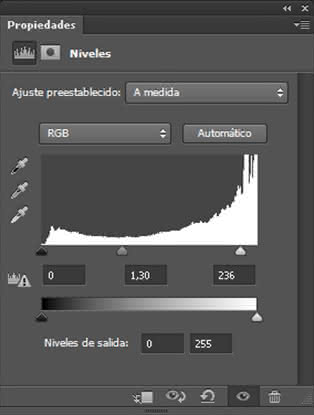
- Once created within the RGB channel place the following values ​​as you can see in the following image:
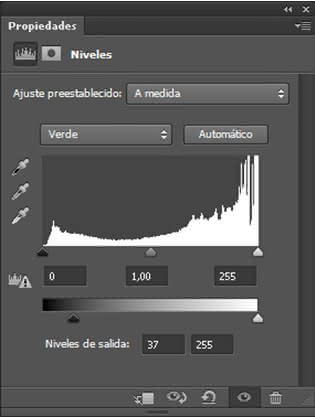
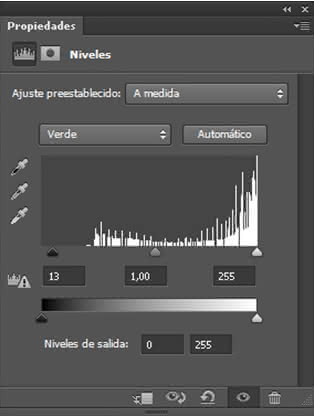
- Then in the green channel the following values:
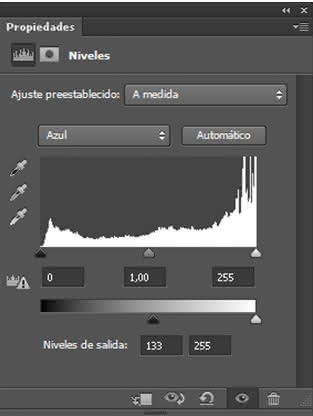
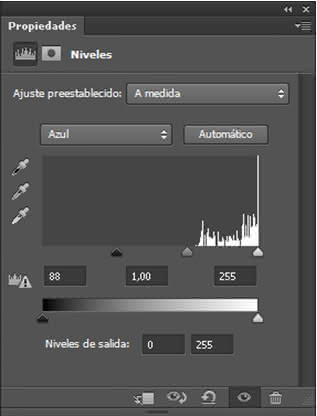
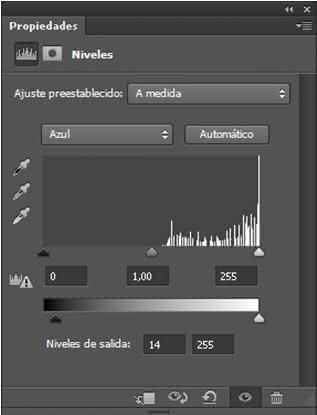
- In the blue channel the values:
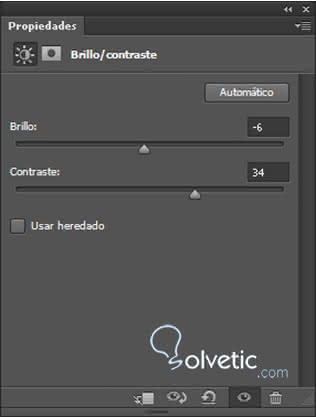
- Then you have to create a brightness / contrast layer: brightness +6 and contrast +51


- Create a second layer of levels and in the green channel the following values ​​are placed:
- For the channel of the blues:
- This is a sample of how the image is going:

- Then a second layer of brightness / contrast will be created with the values ​​that can be seen below:
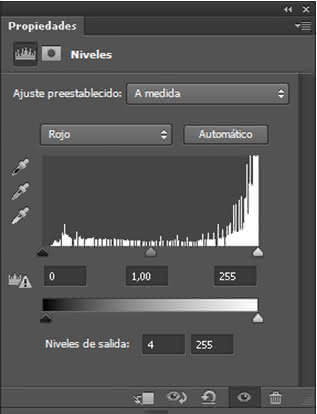
- Then a third layer of levels is created, the following output values ​​are for the red channel and for the blue channel:
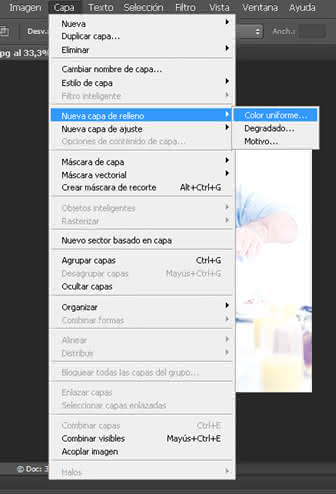
- Now a fill layer with uniform color will be created:
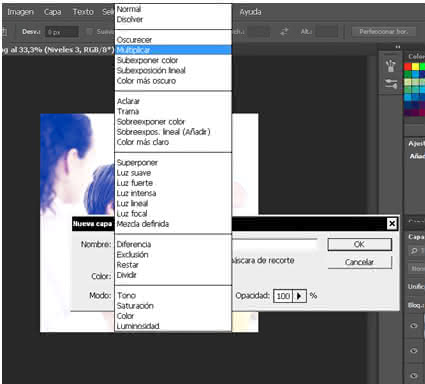
- In mode, select: multiply
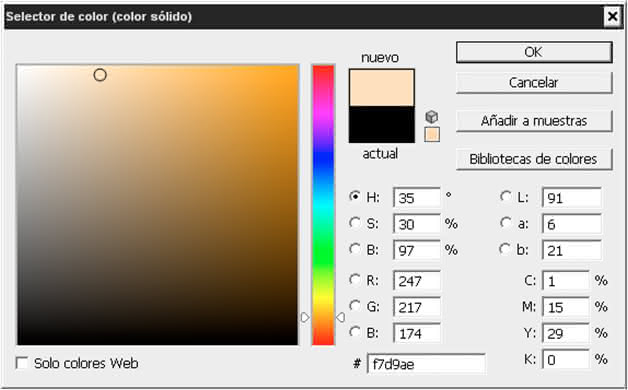
- In the color selector window is placed: RGB color with the values; 247/218/174.
- Finally, a frame will be placed on the photograph, but before it is going to combine the visible layers, to form a single layer:
- Subsequently the layer will be duplicated and the previous background layer will be erased.
- On the background copy a rectangular frame is created and a quick mask is applied by clicking on the letter Q, leaving the image in this way:

- Then a filter> distort> crystal is applied and the letter Q is clicked again to exit the fast mask mode. Then you have to go to the selection menu à invest, click on the delete key to see the following result:

The final result is the original photo converted with Instagram effect: