Photoshop is one of the favorite programs for graphic designers and photographers to make photo retouching and designs in general. His destiny is fixed in the treatment and manipulation of images. Photoshop stands out among graphic design programs and is one of the most used today..
Removing red eyes is one of the most used techniques and even more in the field of photography. This effect usually occurs when there is little light and we use the camera's Flash. At this time of low illumination our pupil is very open and the red color is the reflex effect produced by the blood vessels of the retina. When the pupil is open and receives the Flash it catches him off guard and hence the red effect because the light is reflected in the retina.
Hence, many cameras use a double Flash system to prepare the eye. Currently, digital cameras come with the option of not showing red eyes, but there are still some where red eyes remain in the photographs that we like the most..
Next you will learn how to use this technique using the Photoshop CS6 program. At the end of this tutorial you will also have the video explaining everything to you.
1. How to remove red eyes in Photoshop with corrective tool
Photoshop CS6, observing that red eyes appeared more and more frequently in photographs, designed a tool designed for that purpose, called nothing more nor less than the
red-eye brush tool. Next we will see the necessary steps to eliminate that uncomfortable red-eye effect in Photoshop.
Step 1
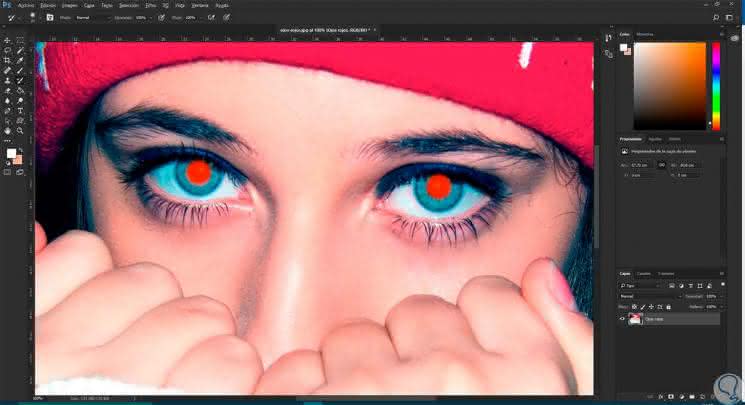
We open our image in
Photoshop and we approach the eye area with a zoom movement.
+ Barra espacio + clic Ctrl + Spacebar + click
Step 2
Now we will go to the tool palette and select
Red Eye Brush Tool. 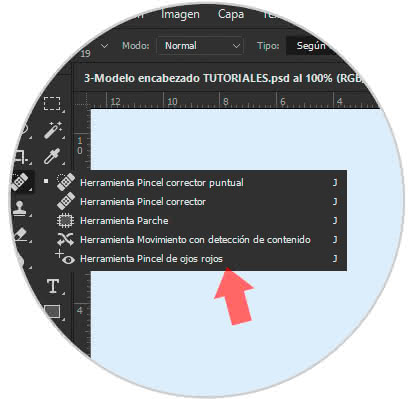
Step 3
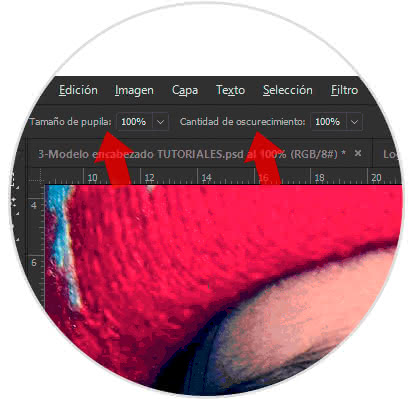
Now it is as easy as
clicking on each red
eye (the pupil) and you will see how the red color disappears from the photograph. You can
adjust the values at the top.
Step 4
As we see the result is evident,
goodbye red eyes with just one click and less than a minute.
2. How to remove red eyes in Photoshop with Channel Mixer
In addition to the automatic tool seen in the previous chapter, we also have a somewhat more technical but equally useful option.
Step 1
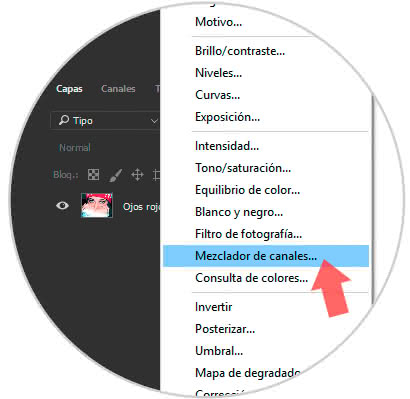
Once the image is opened in Photoshop, we create an
adjustment layer of the Channel Mixer from the bottom
. 
Step 2
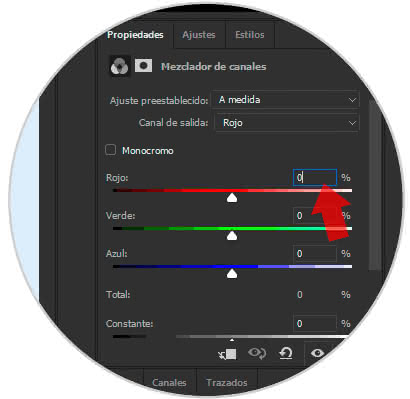
Now we will place a value for the
Red channel of 0 and blue and green to 50%. In the Output channel option, we must put these 3 values ​​for each channel: Red, blue and green. This way we avoid that the pupil of some color remains.
Step 3
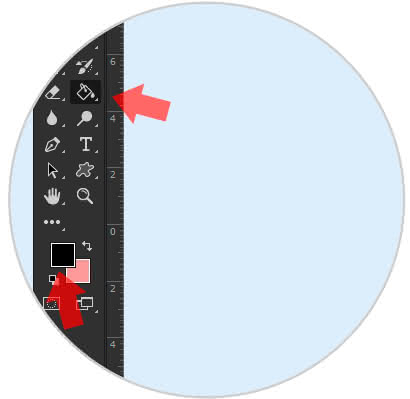
Select the
paint bucket tool with a
black color and color the image.
Step 4
You will see that the image seems to return to its normal state. Now select the Brush tool and set the
color White as the main one. 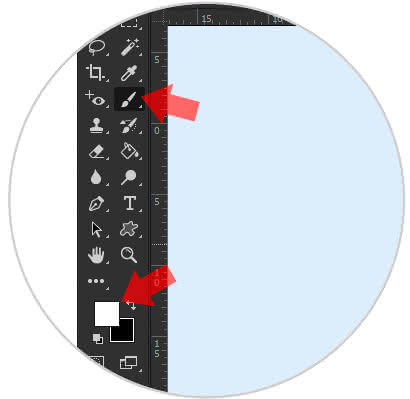
Step 5
Select a
Brush size similar to the one in the pupil and then paint it so that the black color appears and the red color disappears. When you finish you will see that the pupils return to their black or dark color.

This second option is somewhat more imprecise than the first, but it can also serve to eliminate this annoying effect. To see it more easily here is the video tutorial that will show you all the details.
To stay up to date, remember to subscribe to our YouTube channel! SUBSCRIBE
As we see these two options are different but the goal is the same: eliminate red eyes. The first stands out for its ease and speed, while the second is something more technical. In any case we will have an improvement in our images. To give another air to your photos here we leave a collection of tricks and effects for Photoshop with full video tutorials.