If we have a Mac, we will have realized that the Finder is an application that we use every day since it gives us access to all our files, folders and units as well as the necessary help to have all this information organized. Finder is our application responsible for managing the entire graphical interface of the operating system
In addition to all this, with this application we have the possibility to search apps, files, disks and folders in different ways. If we are clear about how it is used, what we can access and where, we will be able to handle our Mac in a much more effective way. The more shortcuts and tricks we know about our operating system , the easier and more comfortable our computer will be. It is likely that if we have not read any article about it or have seen another person use them, we may not know them..
When we know all the advantages and possibilities that applications offer us, we can take full advantage of all their functions and be more effective when we work with them. That is why then we will explain the different tabs available and that we can perform in each of them. In addition we will show a series of tricks focused on the Finder, so that you can also start using them as soon as possible and be an expert in the eyes of others.
1. How to organize Finder
Menu file
The first tab with which we are in the menu once we open the Finder is the File window. In this window we will be able to perform different functions. If we want to create a new window or open a new tab within the Finder we have to select the
File menu and choose the option
"New Finder window" or "New tab" 
Display
The display of the Finder is very important so that we are comfortable while working with it. The viewing options are varied. We can select if we want our documents to be seen in
icons, lists, columns or cover flow. To select this we can do it from the menu of the Finder at the top
"Visualization". 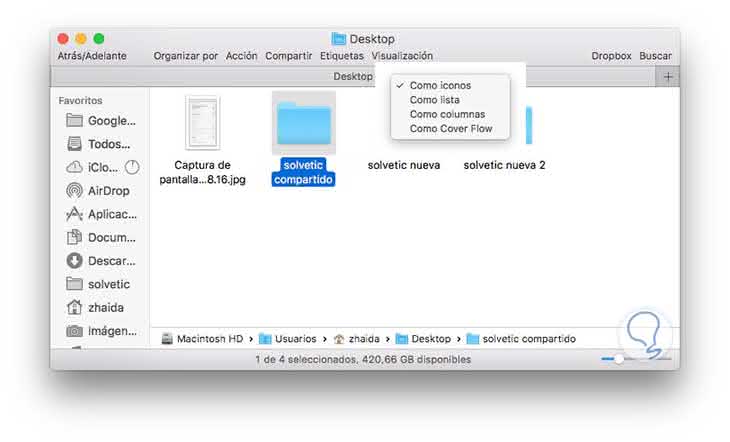
2. What to show in Finder
Show different bars
It is possible that what we are looking for is to customize our Finder in terms of the preferences that is what we see in the main tab. In order to select this, we have to go to the display section of the main menu and choose from the available options. As we can see in the image, we have options to
show tabs, route, status, tools ... 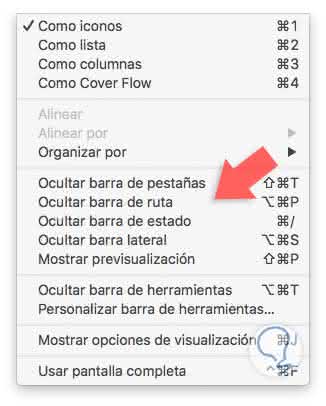
Show user folder
In the sidebar of the Finder we will have access to different folders of the system. By default, the OS X system includes some of these folders, but this selection is not always the one that interests us. It is possible to customize this list so that we include or remove from the list the folders that we select.
In order to make a selection of these folders we have to go to the preferences of the Finder in the top menu. Within the preferences, we have to select the "Sidebar" tab
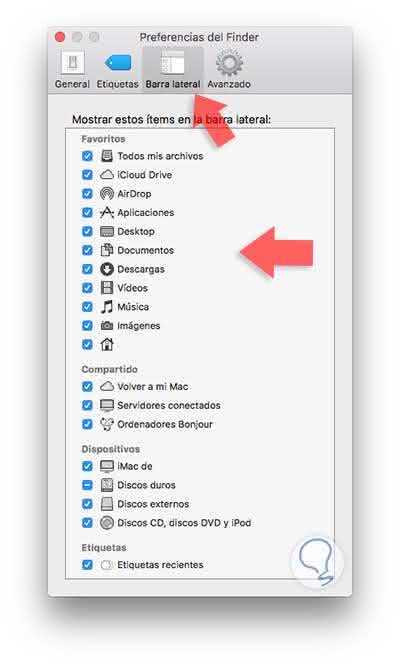
Here we will be able to select all those items that we want the Finder to show us. Once selected, we can find them in the sidebar in the favorites section. This section can be hidden or selected to be displayed..
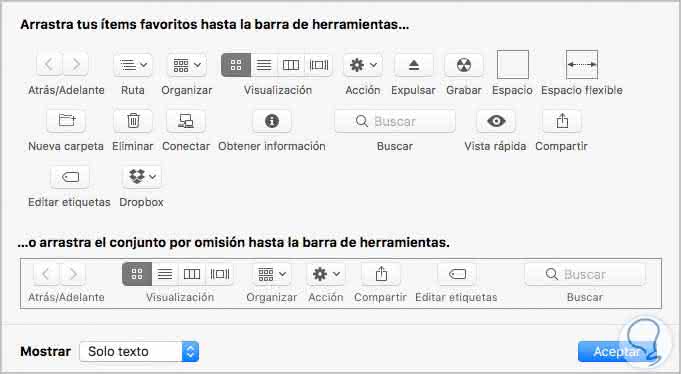
3. Customize tools and show hidden files
Customize toolbar
If we want to customize the Finder toolbar, we can do it so that in this way we have a quick access to the features that we usually use the most. By default the system itself includes the most common, but in the case of interest we can change them.
For this process we must open the main window of the Finder and select "Display" in the main menu "Customize toolbar".
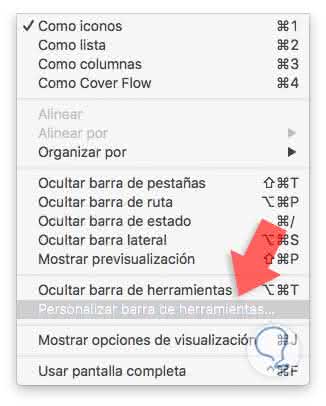
In this window, all the tools that we have available will appear. All we have to do is drag those that interest us to the toolbar.
Show hidden files
If we want to show the files that are hidden or invisible on our Mac, we have to resort to the System Terminal. To access it, we have to go to the applications section of the system and select
"Applications" - "Utilities" - "Terminal". Once inside the terminal we have to write the following command:
defaults write com.apple.finder AppleShowAllFiles -bool YES && killall Finder
Once written, we will be able to see all these hidden files in our Finder
4. Group files and display information
Group files
If we want to group a series of files within the same folder, we have to select all those files which we want to be part of the folder and once selected, we press the right button of our mouse and select
"New folder with the selection" 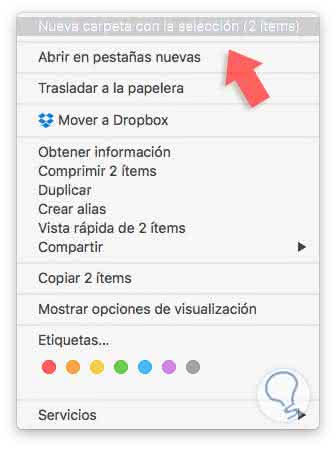
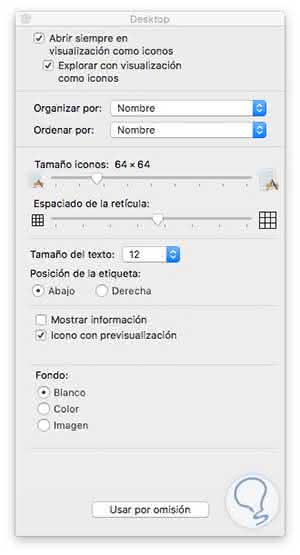
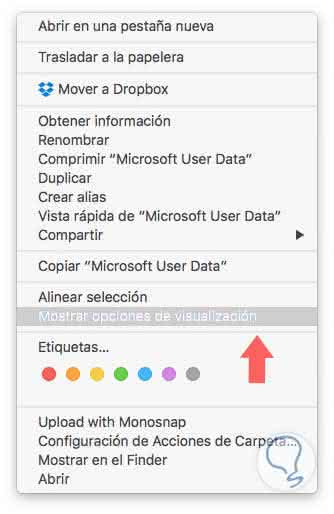
Show file and folder information
This option will allow us from the Finder itself to have access to all the information about a folder, the dimensions of an image, etc. This can be very interesting since we will be able to obtain information very quickly and easily.
To activate this option we would have to open one of the windows of the Finder and in an empty space of the window, we have to click with the right mouse button. In the drop-down menu, it is where we must select "Show display options".

Show file extensions
When we store files in our hard disk or SSD memory, in OS X by default we can not see the extensions of these files. If we want to configure our Mac to be able to see it, we can do it in a very simple way. The first thing we have to do is open the Finder menu and select
"Preferences" The next thing to do is select "Advanced" and activate the "Show file name extensions" checkbox. 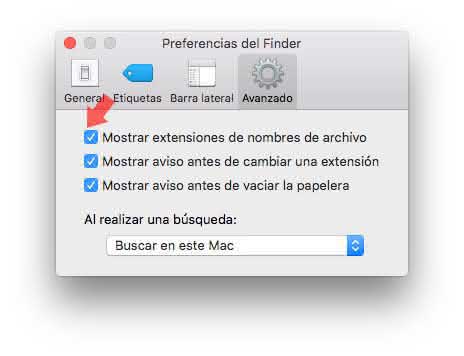
Show folder and file information
If we want to see how many files there are inside a folder, what is the dimension of an image or another type of information that can be very useful in certain moments, we can visualize it in a very easy way. This option will encourage us to be more productive and have the information within reach of a click.
If we want to know this information, we must select the folder or file in which we are interested. Click on the right mouse button, and select "Show display options"
Next we have to select "Show information". Optionally we can click on the "Default Settings" button and in this way this change will affect all the windows that are opened in the future within Finder..
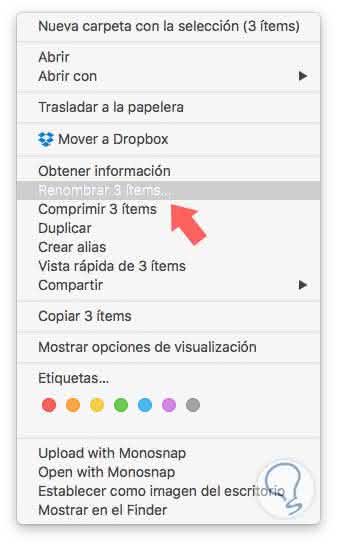
Rename X files at once
It is possible that we are doing some work or that we simply want to have a series of files with the same name to identify them in a simple way and not have to waste time in locating them. If we want to do this, we do not have to select the files one by one to rename them, since we can perform this process in just one step.
To do this we have to select all those files that interest us and press the right mouse button to select "Rename X items"
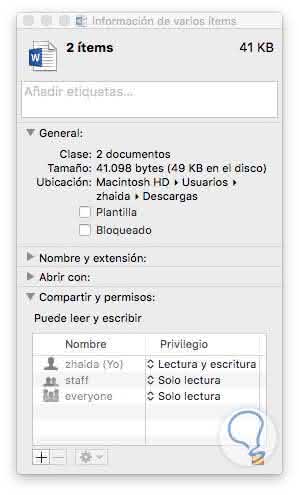
View information from several files at once
On many occasions we have found that we need to know information about several files at once, but we have not considered the possibility that we can obtain this information in one step. We have the option to press the
"Cmd + I" command and in this way we will open as many windows as we have selected items. This can be a chaos, if we have selected a large number of windows. To avoid this, we have the possibility to open in a single window, the information of all the selected files.
To carry out this process, the first thing we must do is select the files and press the right button of the mouse. With the pull-down menu open, we have to press "alt" and the "Get information" tab will be converted to "Show inspector" . We have to select this option and then a single window will appear with all the information.
Create smart folder
Another of the tools offered by Finder is the possibility of creating smart folders so that in this way we can store in them all those files that follow the pattern that we indicate. They will be updated automatically, which will facilitate the work.
To create one of these folders we have to go to the File section and select "Smart Folder". Once the window is opened, we must select the "+" that we can find in the top right to be able to include in this way the search attributes for that folder.

5. Useful keyboard shortcuts in Finder
Open Finder
If we want to open the
Finder in a quick way we can use its keyboard shortcut to avoid having to go to the icon of the application. For this we have to press the following command
+ shift + h Cmd + shift + h
Delete a file
If we want to send a file to the trash can also do it through keyboard shortcuts. The command that we must use is the following
+ delete Cmd + delete
Empty trash
+ shift + delete Cmd + shift + delete
Add file to sidebar
Many times we need to constantly use files, documents or folders. If so, against more at hand and easy to find we have this, but it will be easier to take advantage of time in this regard. For this we have the possibility to select said file and place it in the sidebar of the Finder.
We have the option to use the following command while we have selected the file / s chosen and will automatically be placed in the sidebar.
+ ctrl + t Cmd + ctrl + t