Excel 2016 is one of the most powerful data management tools we find today and thanks to its multiple functions we can perform countless tasks on the data supplied regardless of the type that they are..
Many of us when we work with Excel 2016 we are faced with situations that can complicate the work, nothing is perfect, since on several occasions the data provided does not come in a consistent order or the way the file was edited is not correct.
This happens frequently when we work with user names since they leave them in a single cell and for organizational or function issues , for example dynamic tables, it will be necessary that in a cell it is the name and in another the last name..
This tutorial today will analyze how we can divide a cell automatically because it would be an unnecessary waste of resources and time manually.
How to divide or separate name with full last names in columns with Excel 2016
Step 1
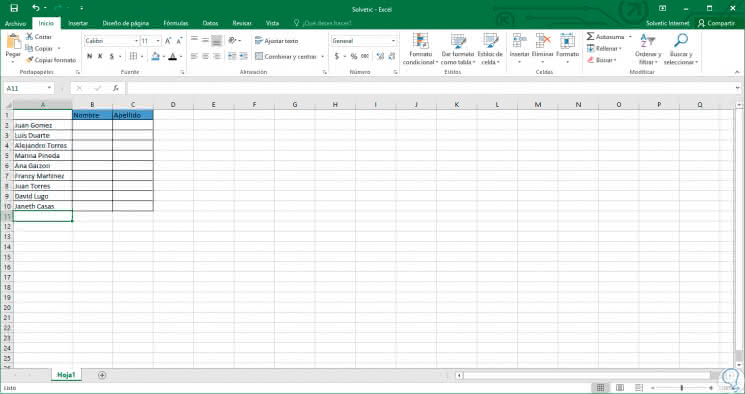
We have the following information:
Step 2
Our goal is for the user's name to be in the Name column and the last name in the Name column.
First we will select the range of cells to edit and we go to the
Data tab,
Data Tools group and there we select the
Text button
in columns: 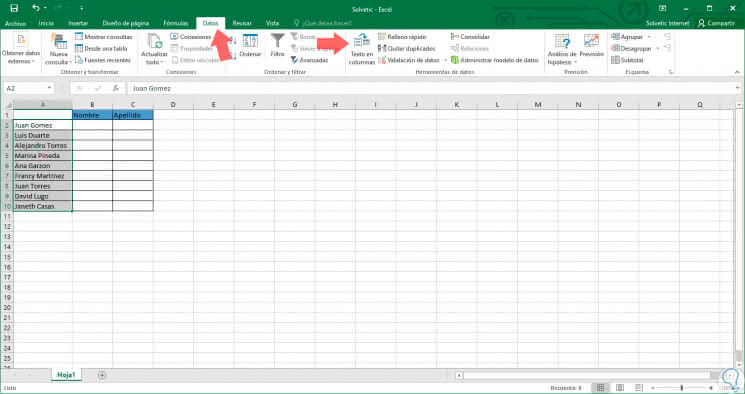
Step 3
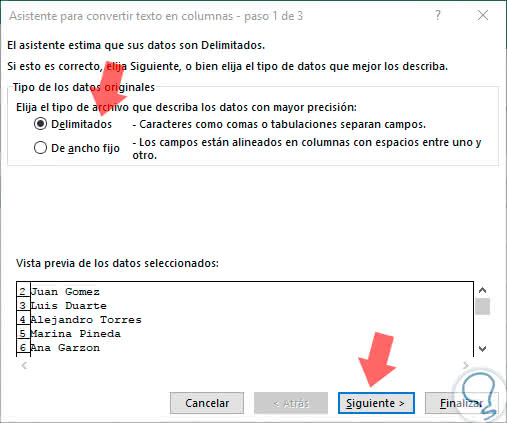
Pressing on said option will display the following:
Step 4
There we activate the
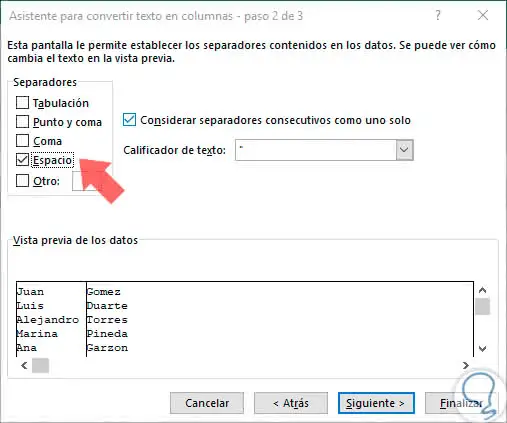
Delimited box and click Next. In the next window we must define the separator of the cell content, in this case we select
Space but we can find cells that inside the data are separated by commas, semicolons or other symbols.
Step 5
We can see in the preview how was the final result of our process. We press Next again and in a new window we must indicate the destination where the process will be created:
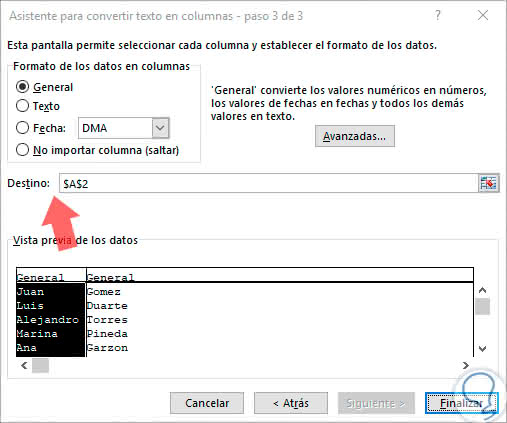
Step 6
There we can click on the right button to select the range where the result will be established:
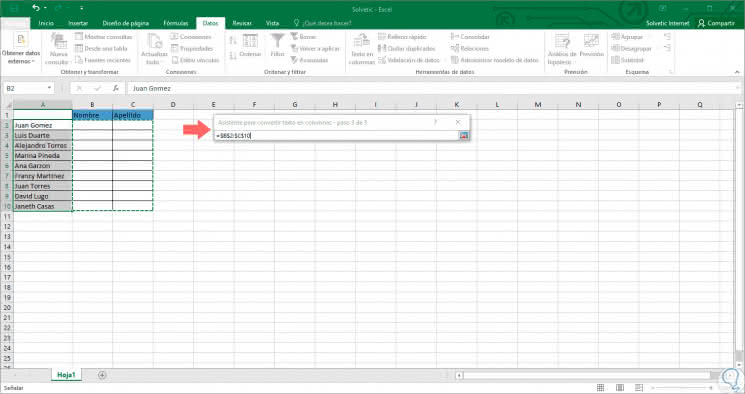
Step 7
We can also enter it
manually . Press again on the final button and in the window that opens click on
Finish . We can see the desired result:
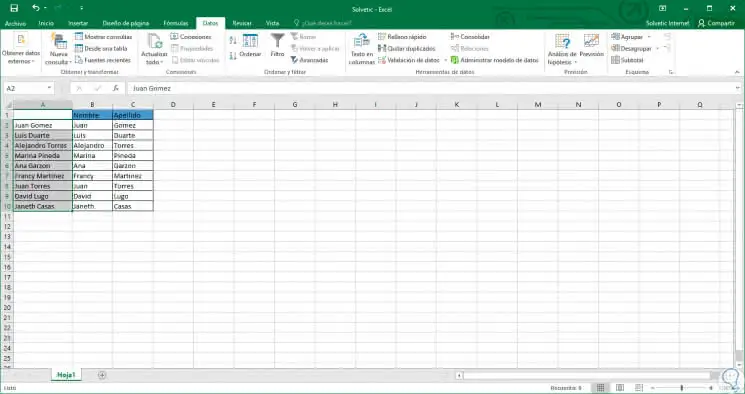
If you have any questions, take a look at the video with all the steps described for pdoer didivir a full name in columns with surnames in Excel 2016..
To stay up to date, remember to subscribe to our YouTube channel! SUBSCRIBE
Now we can simply delete the source content and work with the new data structure. In this way Excel 2016 simplifies our data management tasks. Here we also offer you more information on how to divide complete names and order the cells by Excel 2016 color.