Microsoft Excel is one of the most complete applications for the entire process of large amounts of data, whether numerical, text or date. This management is possible thanks to the number of functions and formulas that are integrated by default within Excel with which the task is simplified and the possibility of errors is reduced. There are hundreds of actions that we can perform in the cells of an active Excel 2016 or 2019 sheet. One of them is to place the text in one or more cells and divide it into several cells thanks to the wizard designed to convert text into Excel columns ..
This is ideal if we have data that we have to separate and do it manually would take a lot of time.
TechnoWikis will explain how to perform this process in a comprehensive and functional way in Excel 2019.
Note
This same process applies to Excel 2016.
To keep up, remember to subscribe to our YouTube channel! SUBSCRIBE
How to separate text into columns in Microsoft Excel 2019, 2016
Step 1
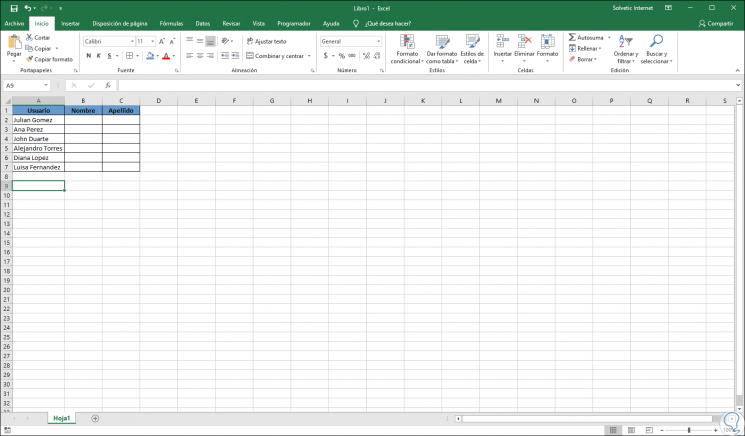
For this example we have the following data. Our goal is to separate the full names and assign them in the First and Last Name columns.
Step 2
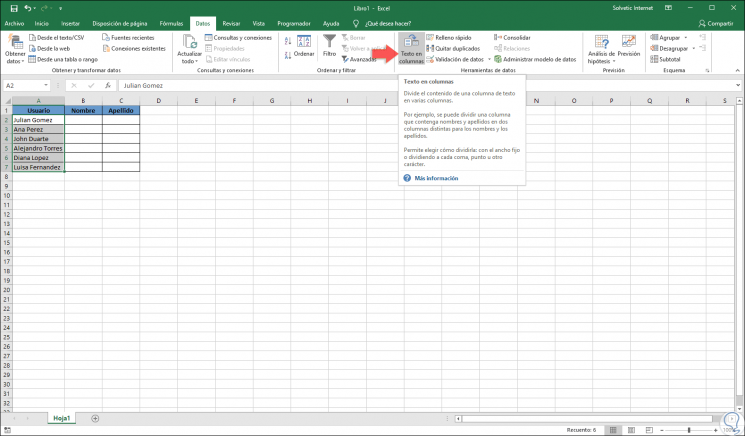
To achieve this, we will select the cell or column that contains the text we want to divide. After this we go to the “Data†menu and in the “Data Tools†group we locate the “Text in columns†option:
Step 3
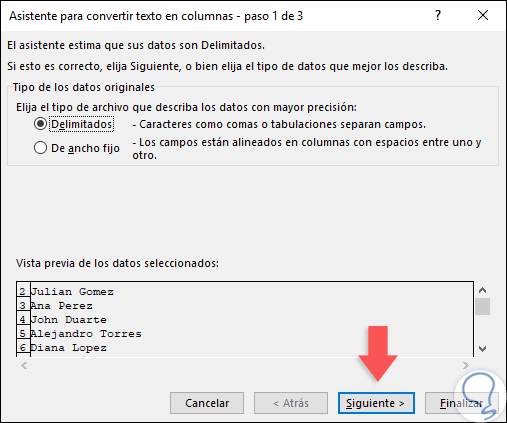
There the following wizard will be displayed to convert text into columns, there we will select the “Delimited†box and click Next:
Step 4
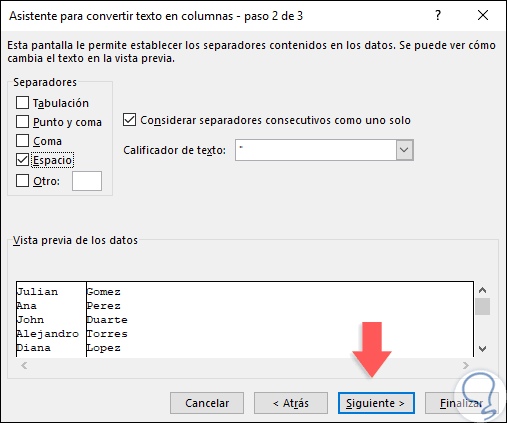
In the next window we will select the delimiters for the data to be divided, independent of the selected one, we can see a preview of them in the “Data preview†window:
Step 5
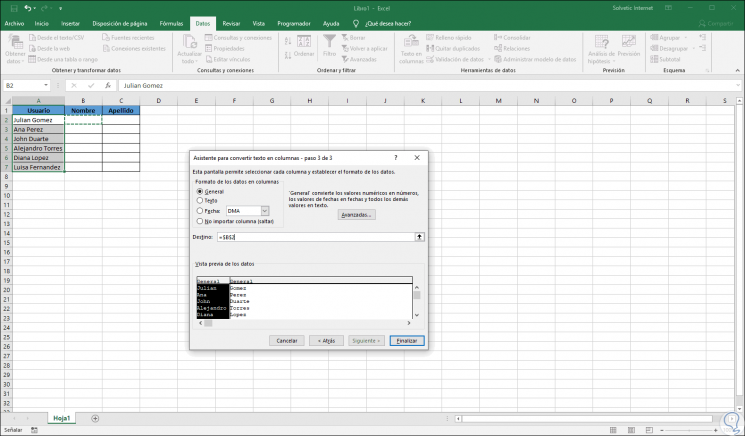
There we click on Next and now we define the column data format or we can also leave the default option of Excel 2016/2019:
Step 6
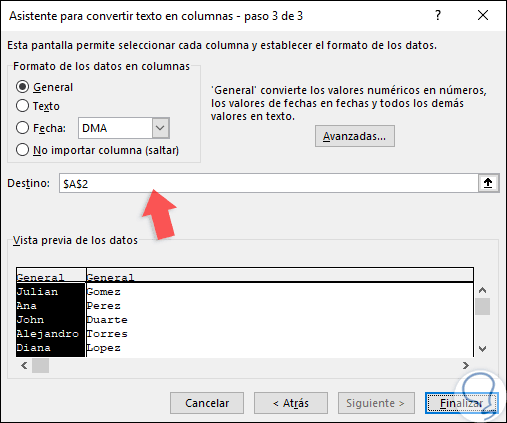
Now, in the "Destination" field we will select the cell where the data will be hosted, in this case B2:
Step 7
Click on "Finish" to complete the task and the result was as follows:
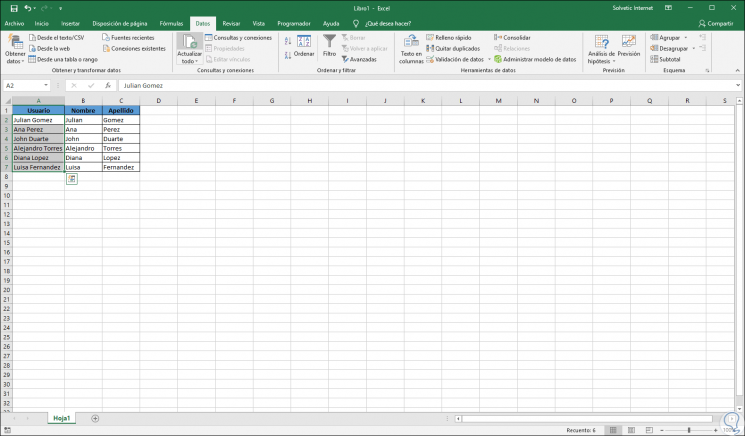
It will be that simple to use the integrated Excel wizard to divide text into columns and simplify our data management tasks..