Microsoft Word is the graphics editing option integrated in the Office suite, currently in the 2019 version, with which we have the necessary tools to work the text in a professional and complete way since each of the functions and options is ideal for a work dedicated to the text and content that we enter into it. Being a very complete text editor, the different options that we have within our reach allow us to create content that is then easy to layout as well as customize..
One of the options for a complete presentation of the text in Microsoft Word is the use of columns which allow us to divide the text into sections and this will result in a much more dynamic aspect of the data to be displayed. Thanks to this division of content into columns , we can create more journalistic styles even advertising style with which you can adjust your text as you prefer based on two columns. From there, as we believe the columns we can adjust and customize s by spacing, content size, distance ... All this we will see in the following chapters to create this column design.
Microsoft Word , both 2016 and 2019, allows us to set up to 3 columns in a file and TechnoWikis will explain how to do it simply..
1. Add two columns in Microsoft Word 2019 or Word 2016
Step 1
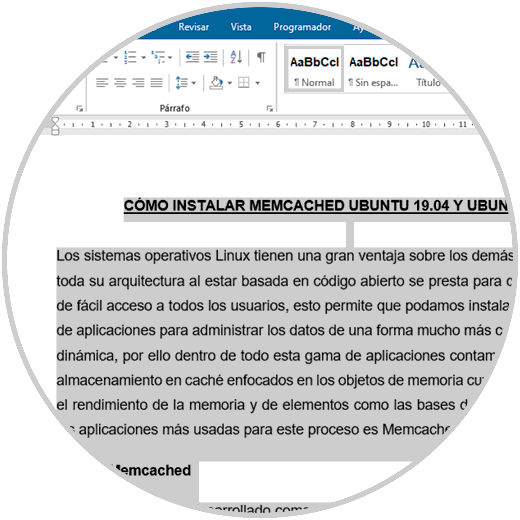
To start this process we must type the content of the document and after that we proceed to select it:
Note
If we wish to select the entire contents of the document, we must use the following key combination:
+ O Ctrl + O
Step 2
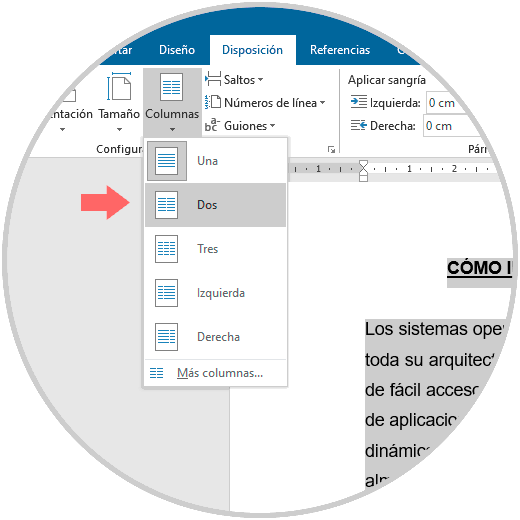
Once the text is selected we go to the “Layout†menu and in the “Page Setup†group we find the “Columns†section, we click on it and in the displayed options we select “Twoâ€:
Step 3
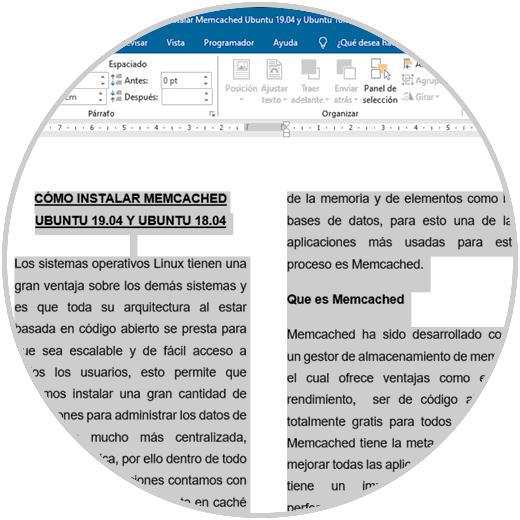
By clicking there we can see that the selected text will now be distributed in two columns in the Microsoft Word 2016 or 2019 document. From this moment all the text entered will be distributed between both columns.
2. Add three columns in Microsoft Word 2019 or Word 2016
Step 1
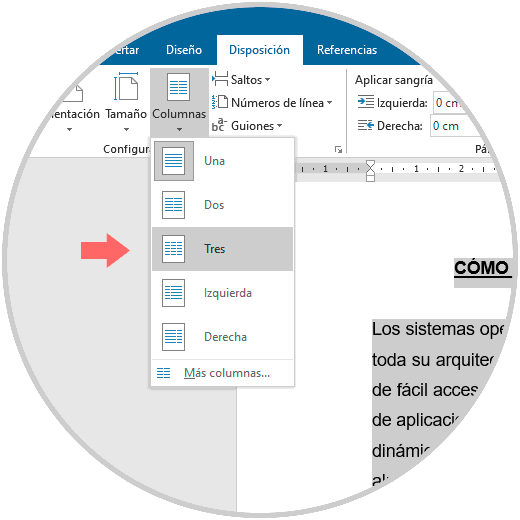
If the text worked is ideal for a much more dynamic representation we can add three columns in the Microsoft Word document, for this we select the text and in the “Page Setup†group of the “Layout†menu we click on Columns and there we select “Three ":
Step 2
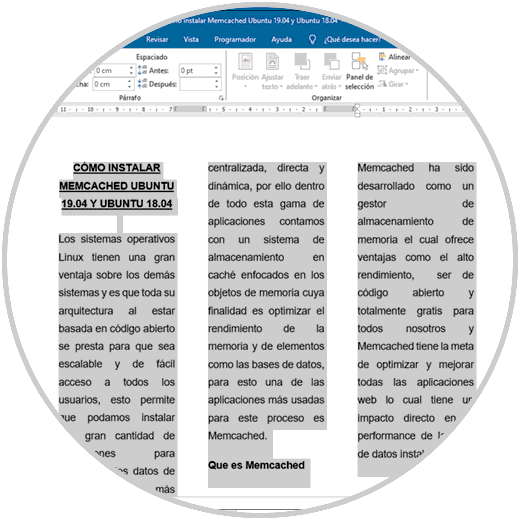
The result of this operation will be the following. From here we can work the text as we see fit.
3. Customize columns in Microsoft Word 2019 or Word 2016
Microsoft Word allows us to customize the way the columns will be distributed in the document
Step 1
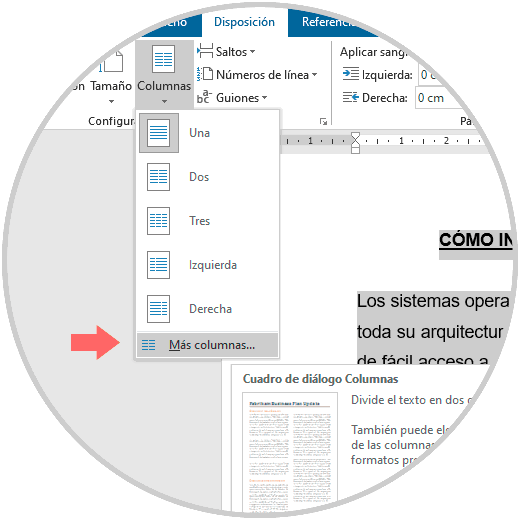
For this we select the option “More columns†in the alternatives displayed:
Step 2
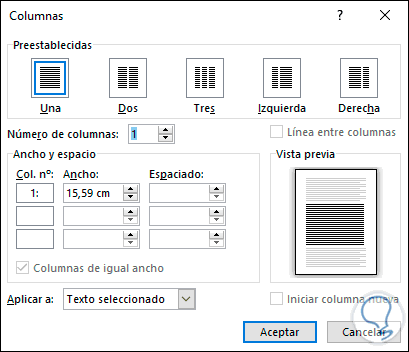
As a result, the following pop-up window will be displayed where we can define aspects such as:
- Number of columns to add to the document
- Width and spacing between them
- Area where the columns will be applied
Step 3
In Preview we can see how the columns will be applied in the Microsoft Word 2016 or 2019 document.
4. Edit columns in Microsoft Word 2019 or Word 2016
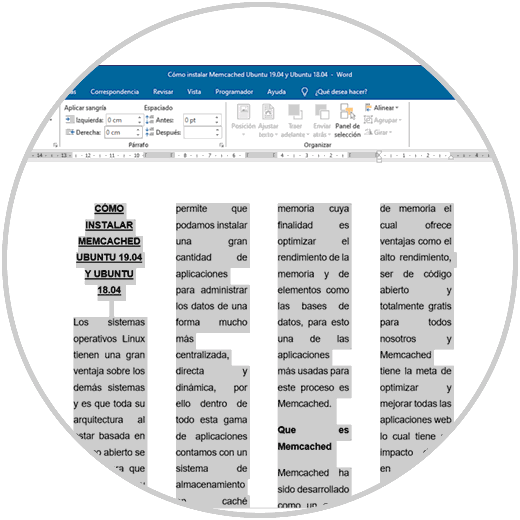
There are some basic aspects that we can do in Word associated with the columns, one of these is to define where the column will start, this will be possible thanks to the column breaks.
Step 1
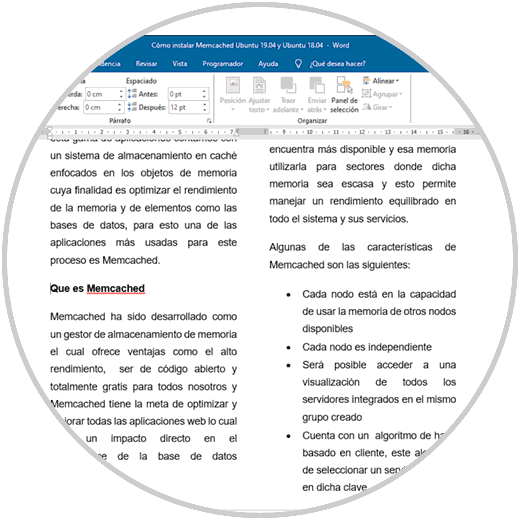
For use we will place the cursor in the area where the following column will start:
Note
In this example we have located it at the beginning of the line "What is Memcached".
Step 2
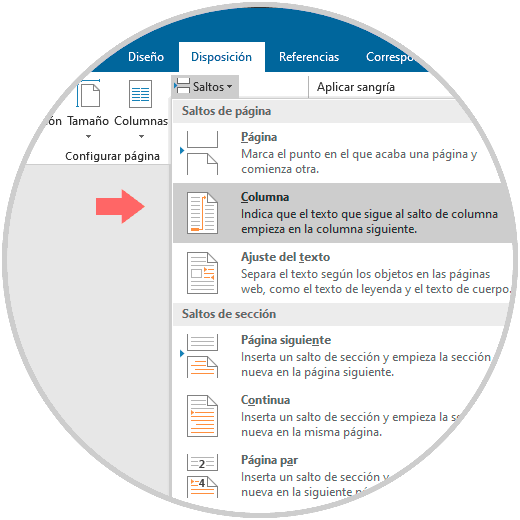
Now we go to the “Layout†menu and in the “Page Setup†group we click on the “Jumps†option and there we select “Columnâ€:
Step 3
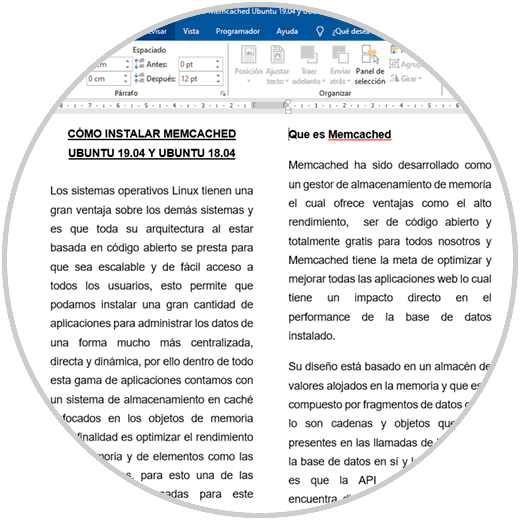
Once we select this option we will see that the second column starts from where we have located the cursor:
You have learned to insert columns in Microsoft Word to better manage the registered text and thus offer a professional visualization.