Excel 2019 is part of the Office suite and is widely known for its functions and integrated formulas with which data management becomes a simple task, but at the same time complete and totally dynamic, so it is essential to know the options To work with the data in a much more complete way and one of many options is to freeze the columns or rows of the spreadsheet to have a clearer perspective of the data worked..
Thanks to being able to block rows and columns, we will be preventing the information from being modified unintentionally generating possible problems. In Excel we usually work with formulas and linked data so if we change some type of information it will end up influencing another. Therefore, if we are managing large databases of data, it is best to block those elements with which we are not going to work.
Next, we also leave you the video with which to follow the necessary steps to block rows and columns in Excel 2019..
1. How to freeze a row in Excel 2019
To keep up, remember to subscribe to our YouTube channel! SUBSCRIBE
Step 1
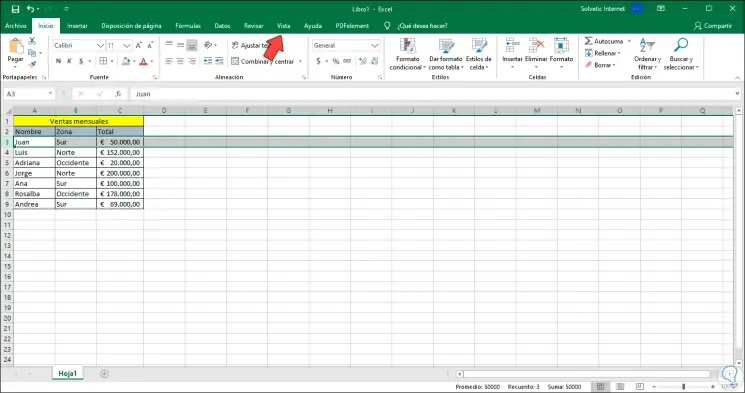
To freeze a row in Excel 2019 we must select the row that is located just below the row, or from the rows, which we want to freeze or block, for example, here we have selected row 3:
Step 2
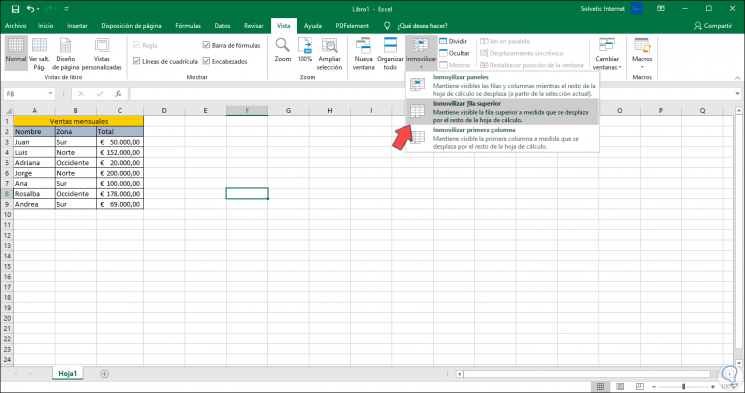
After that we will go to the View menu, group “Windows†and there we will select the option “Freeze†and a series of options will be displayed:
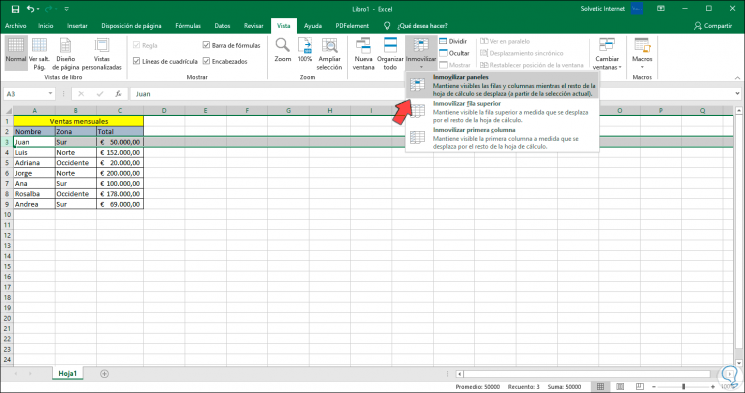
Step 3
For our special case we will select “Freeze panels†which freeze the defined rows and columns. If you see in detail, rows 1 and 2 remain visible.

2. How to freeze a column in Excel 2019
Step 1
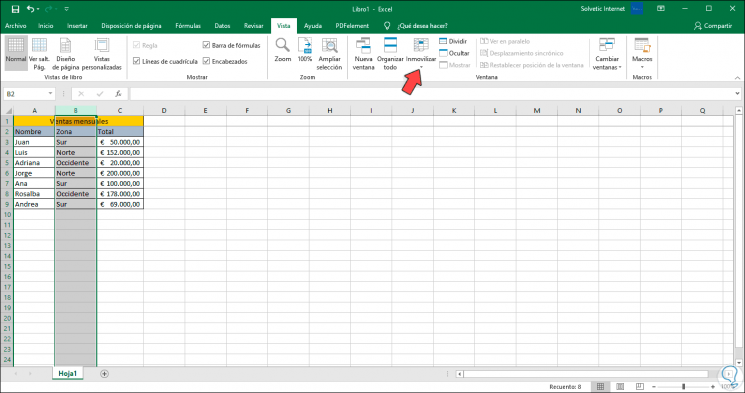
To freeze a column in Excel 2019 we must select the column to be locked, for example, if we want to block column A we must select column B. After that we go back to the View menu, Window group and in the Freeze this option Once we select Freeze panels.
Step 2
As a result of this, column A will be motionless:
Step 3
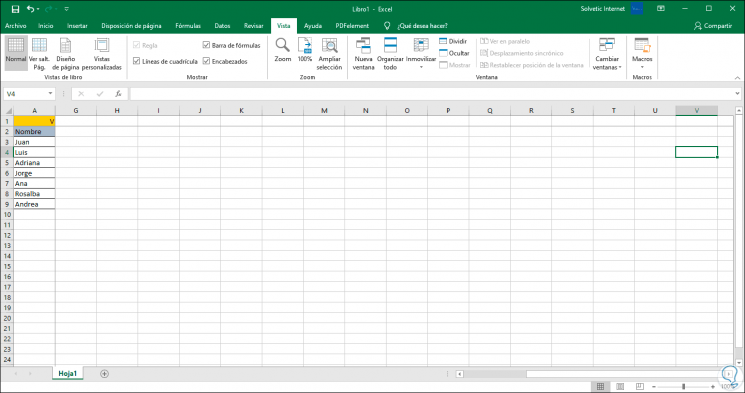
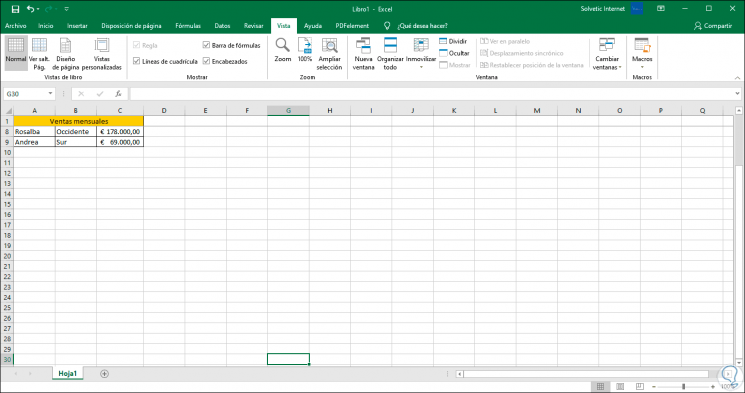
We can see that we have the options “Freeze upper row†which blocks only row 1 of the spreadsheet:
Step 5
The result of this operation is as follows. In the case of the “Freeze first column†option, the result will be identical to the one previously performed in Block a column.
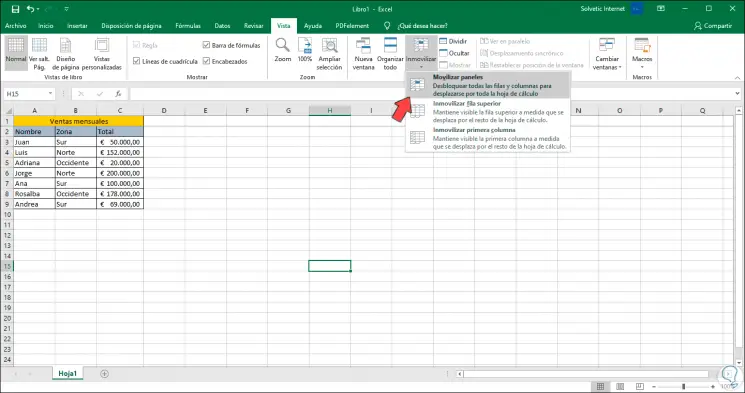
3. How to unlock rows and columns in Excel 2019
When we consider that it is not necessary to block the rows or columns, we must go back to Vista / Freeze and this time select the option “Mobilize panelsâ€. This will make both rows and columns active in the spreadsheet.
4. Extra option: Split sheet in Excel 2019
Excel 2019 gives us a series of ideal options to improve data work and one of these is to access a new window within the current workbook. We leave you such a video tutorial to be able to divide or duplicate a sheet in Excel 2019
To keep up, remember to subscribe to our YouTube channel! SUBSCRIBE
Step 1
For this option we will go to the View menu, Window group and find the option “New windowâ€:
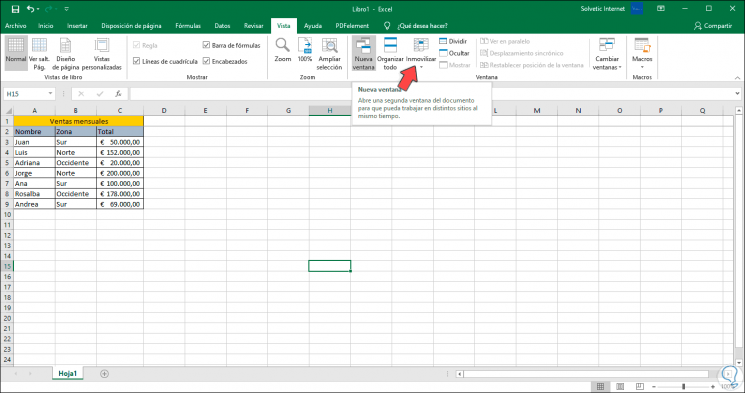
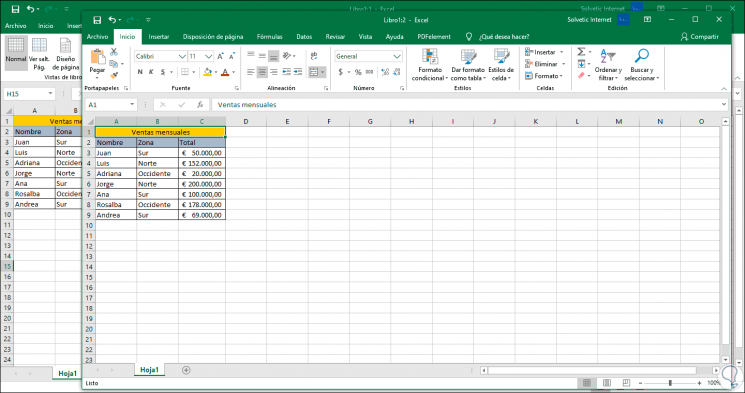
Step 2
This will open a new window with the same data as the original window. This new window has the syntax of name Book: 2 and the original becomes Book: 1. In addition, we have the Split option which, as the name implies, offers the possibility of dividing the current sheet into multiple panels separately.
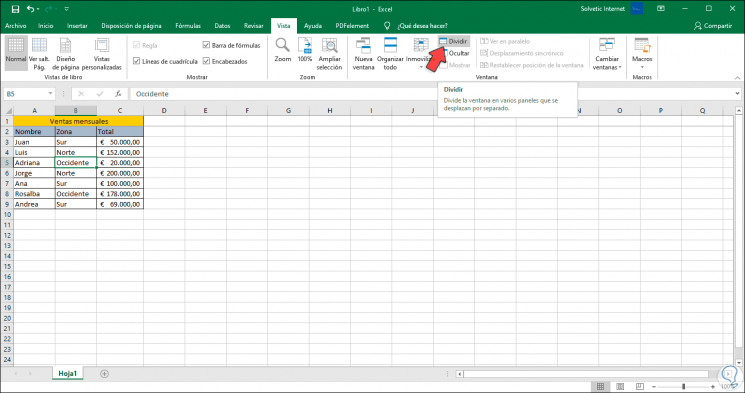
Step 3
To do this we must select the cell where the start of the division will start and then go to the View menu, Window group and there we will select the Split option:
Step 4
As a result, we will have panels with the data to work:

With this simple process it will be possible to freeze panels, rows and columns in Excel 2019 to have full control of the data represented there without confusion or management problems. In addition, it is ideal for improving the work perspective in the current spreadsheet.