For none of us who are in the IT world it is a secret that Microsoft Office has the highest percentage in office applications in the world and this is that thanks to Word, Excel Access, PowerPoint, and so on, we have a suite full of useful functions and features that will make working with each type of data as versatile and complete as possible and in a world like today, this is essential as more professional and comprehensive results are required..
When we name Excel many people get worse, it shouldn't be that way, although, although it is true that some functions or formulas can become a little monster for us, in general Microsoft Excel gives us the basic and advanced tools for each date, number, text or image is managed correctly.
When we delete or delete a cell in rows or columns we will also be deleting them in addition to their content. But sometimes we just want to remove the content they contain and not also visibly remove part of the grid. It is normal that during data management we need to work with them and also eliminate them, but we do not always find the best way to do it . Another option that we can find is that among all our data cells without content or empty are located and annoy us in the final result. This usually occurs between data separations that we leave space cells that we do not finally use..
So far everything is clear with Excel, but there is a small detail in which we can fail and therefore an error is generated at the time of making certain calculations and that is when empty cells are handled:
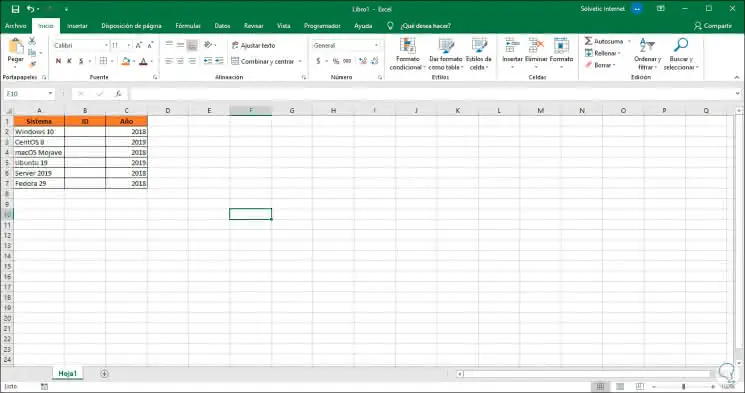
While it is true that we can select empty cells , right click on them and select Delete to delete these cells and that they are not an error factor, it is not always possible to do it since some cells may be linked to these:
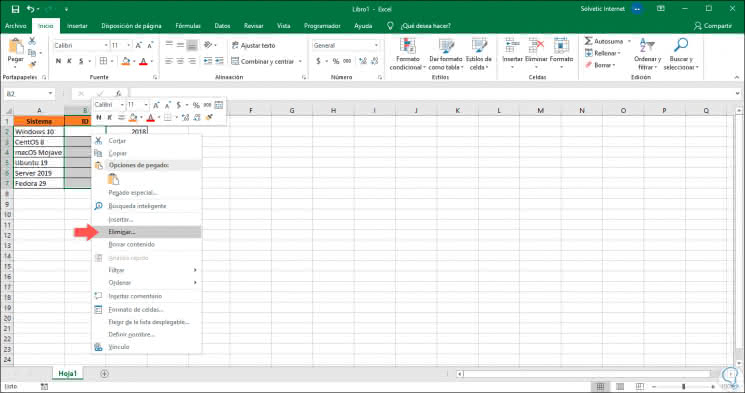
Now, although it does not have related cells, it is a more complex process to select cell by cell for deletion, but for that there is TechnoWikis, to explain you much simpler methods of carrying out the deletion of empty rows or columns in Microsoft Excel 2019.
To keep up, remember to subscribe to our YouTube channel! SUBSCRIBE
How to delete empty rows or columns in Excel 2019
Step 1
The first step to take is to select the entire range of data where the empty cells are located:
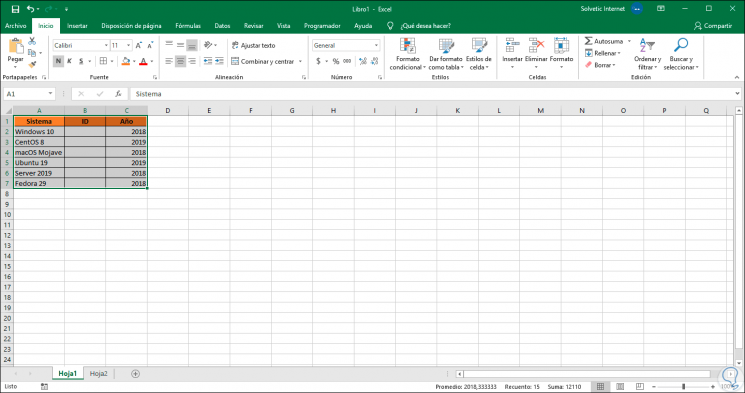
Step 2
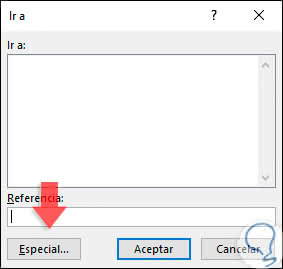
Now we press the F5 key and the following pop-up window will be displayed:
F5
Step 3
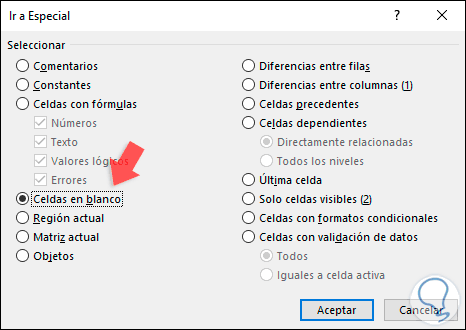
There we click on the "Special" button and in the new window displayed we will activate the "Blank cells" box:
Step 4
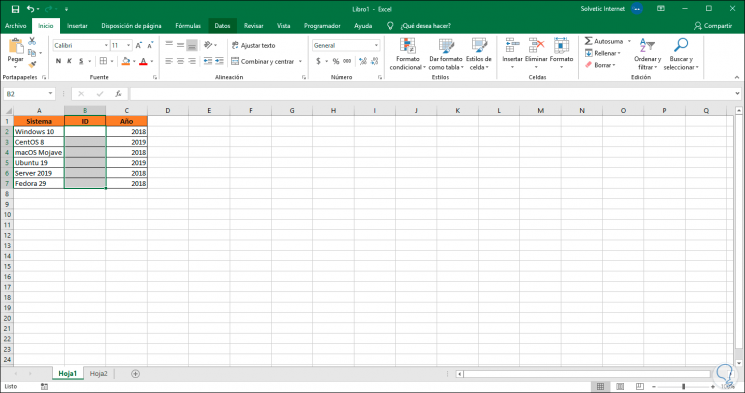
Click OK and this process selects all blank cells in the selected range:
Step 5
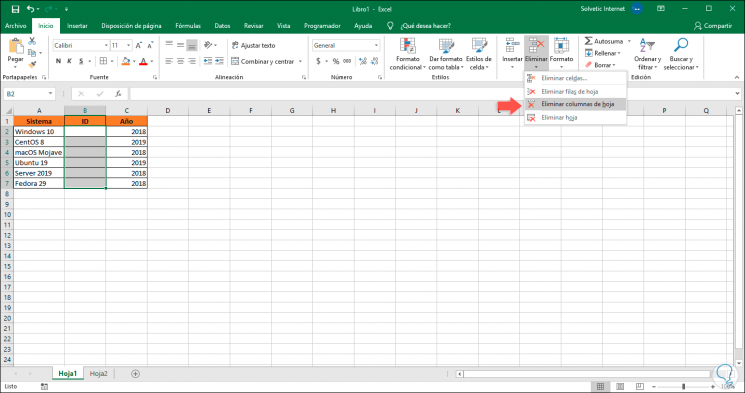
Now we will go to the Start menu and in the “Cells†group we click on the “Delete†button and there we select the appropriate option according to the case, “Delete sheet rows†or “Delete sheet columnsâ€:
Step 6
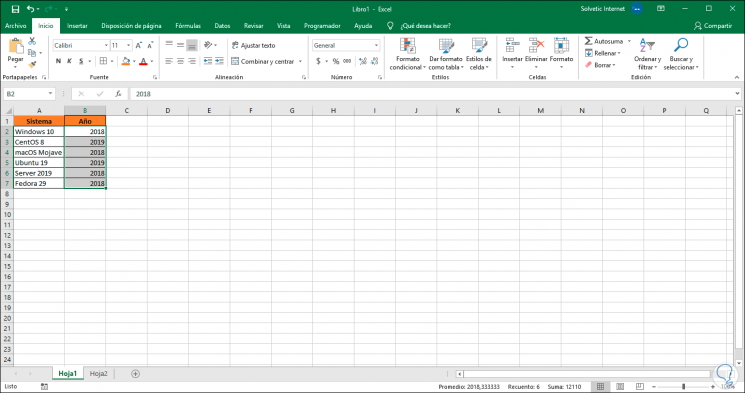
In this case we select the option or "Remove sheet columns" and we will see that the blank cells have been deleted:
This method is much more practical when handling higher volume data and performing the process manually would take much longer, not counting the possibilities of error that may be present affecting the delicate values ​​of the spreadsheet on which we are working ..
When we work data we can find certain cells or columns that we left blank at first but that later break with the structure we have created. So with this tutorial you can delete empty columns or cells without worrying that the rest of the sheet will be removed.