Fedora makes available to its users daily images that aim to know the news that will come in the following editions of the system and that is why we currently have the Fedora 33 Rawhide ISO image which is available to test in different environments such as Workstation , Server, Mate desktop, XFCE and many more..
This download is available at the following link:
Fedora 33 Rawhide
Without a doubt, the main advantage of this is the possibility of knowing in advance each of the new functions and features, but TechnoWikis advises you to create this in a virtual environment since it is still a test system that is updated with certain frequency and that is prone to errors.
Fedora 33 improvements
Some of the improvements in Fedora 33 are:
- Security enhancements in Apache HTTP Server, Postfix, Sendmail and more packages
- New updates in package management
- Greater interaction with kernel modules and constant kernel updates
- java-11-openjdk added as system JDK
- ELN Buildroot and Compose
- Buildroot Non Modular Modules
- Glibc-headers packages have been removed
- Services are now restarted at the end of the rpm transaction
- System-resolved improvements
As we mentioned, to get to know Fedora 33 thoroughly we recommend installing it in a virtual environment and what better way to do it on one of the most popular platforms such as VirtualBox which you can download at the following link:
VirtualBox
TechnoWikis will explain how to install Fedora 33 in VirtualBox and discover its news. In this way you will be able to get the new updates of a Linux distribution, without having to install it directly on your computer. Therefore, the steps you must follow to do this are as follows..
1. How to install Fedora 33 in VirtualBox
Step 1
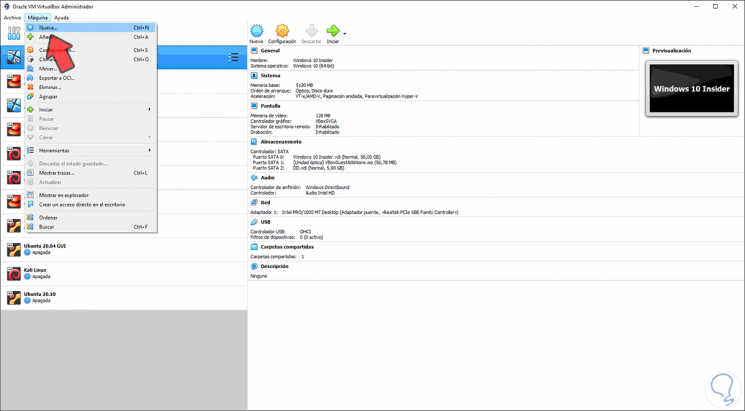
For this we open VirtualBox and create the machine with one of the following options:
- Using the key combination Ctrl + N
- From the Machine menu and select the New option
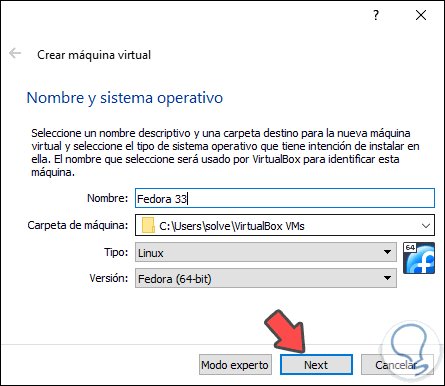
Step 2
In the displayed window we will assign the following:
- Name of the virtual machine to create
- Location where the virtual machine will be
- Type of operating system to use, we select Linux
- System version to use, we select Fedora (64-bit)
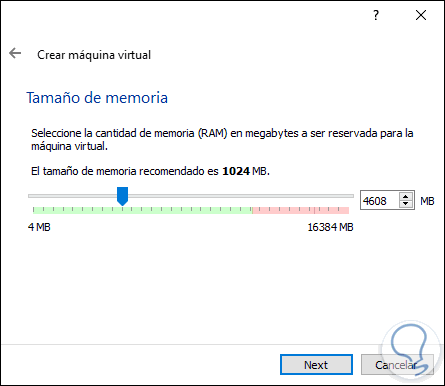
Step 3
We click Next and allocate the amount of RAM for the virtual machine:
Step 4
In the next window we are going to configure the hard drives, the available options are:
- Do not add a virtual hard disk: allows you to add the hard disk after the Fedora 33 virtual machine is launched
- Create a virtual hard disk now: it is the default value, it allows the hard disk and its size to be adjusted based on the operating system we have chosen
- Use an existing virtual hard disk file: as its name implies, we can make use of a disk in VHD or VDI or VMDK format that can be mounted in the Fedora 33 virtual machine

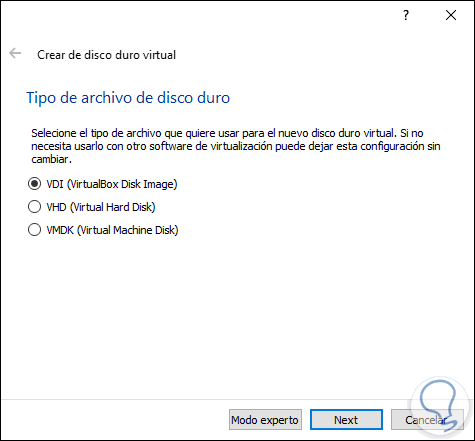
Step 5
We click on "Create" and we will select the type of hard disk to create:
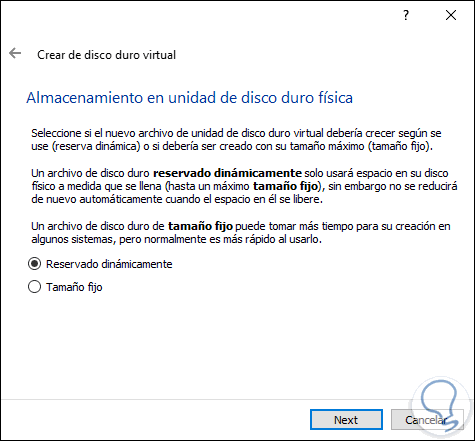
Step 6
Then we define how to use the disk, the options to use are:
- Dynamically reserved: here the space on the physical hard disk fills up as we enter data into the virtual machine, this space cannot be recovered later
- Fixed size: it is a size that does not vary and limits the use of data only up to the defined size
Step 7
Next, we establish:
- The path where the Fedora 33 virtual machine will be saved

Step 8
We click Create to finish the process.
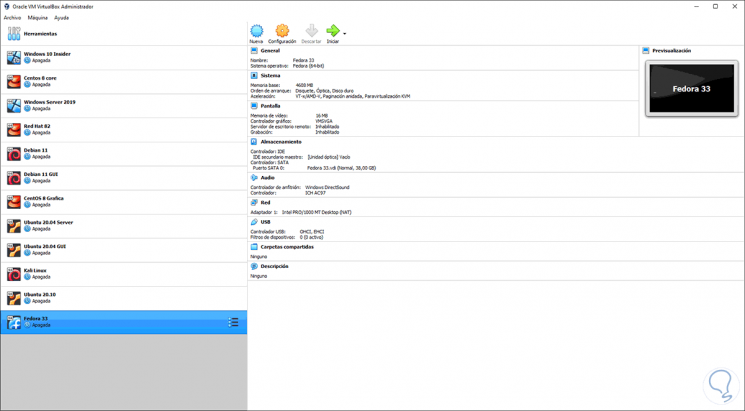
2 . Set machine to virtual Fedora 33
We can make some changes to the configuration of the virtual machine such as amount of memory to use, number of CPU cores, etc.
To do this we click on the "Configuration" button and one of the most used is to adjust the network parameters between the virtual machine and the physical equipment. For this we go to "Network" and there we select "Bridge adapter" and choose the current network card:
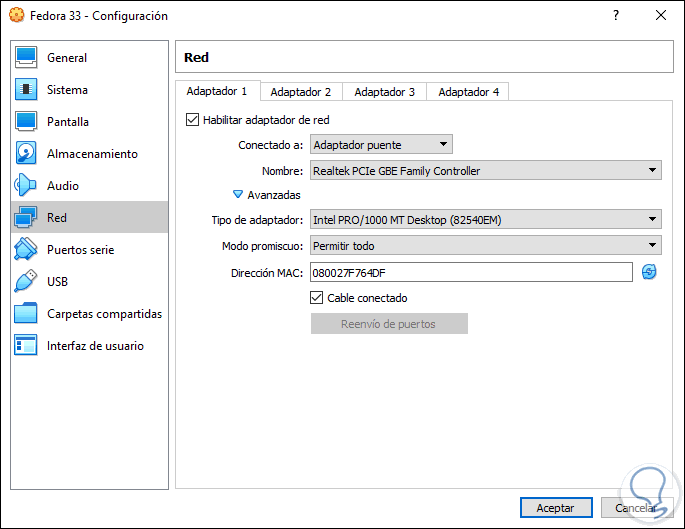
We click OK to save the changes.
3. Run Fedora 33 Virtual Machine
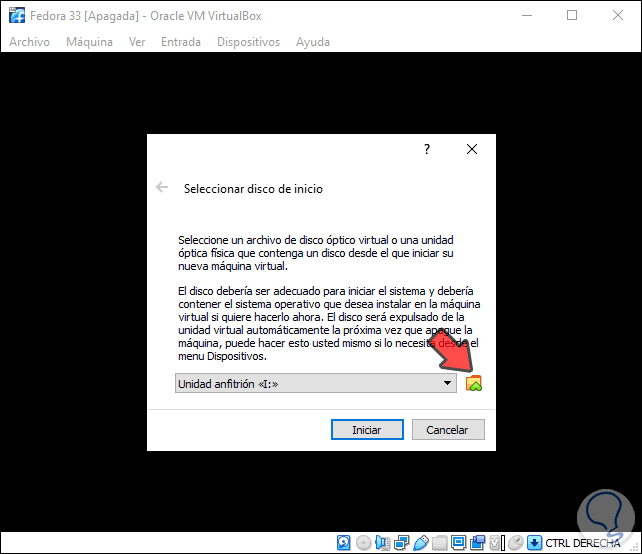
Step 1
We click on the "Start" button to start the virtual machine and we will see the following. We click on the folder icon to select the ISO image of fedora 33 that has been downloaded,
Step 2
In the following window we click on "Add":
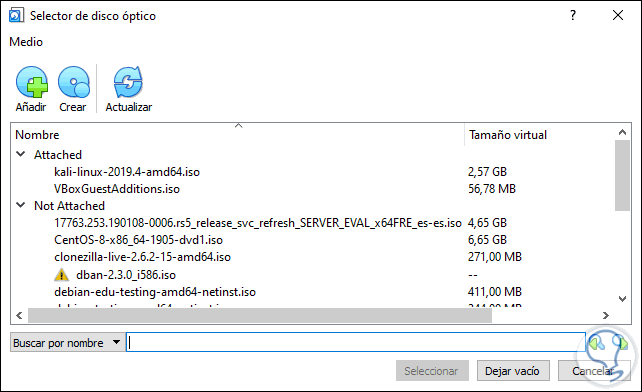
Step 3
We select the ISO:
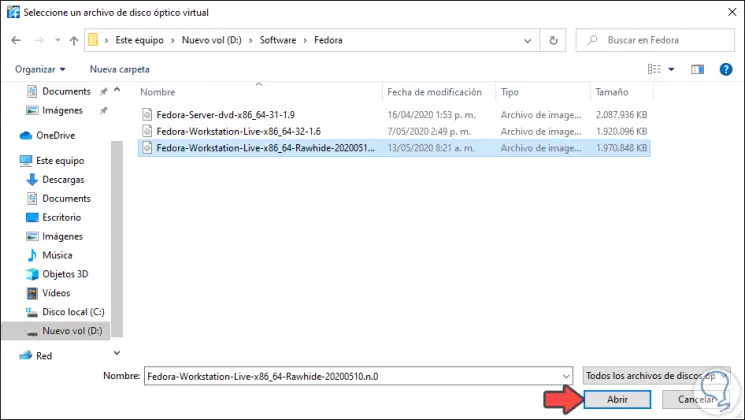
Step 4
We click Open and then we will observe the following:
[at 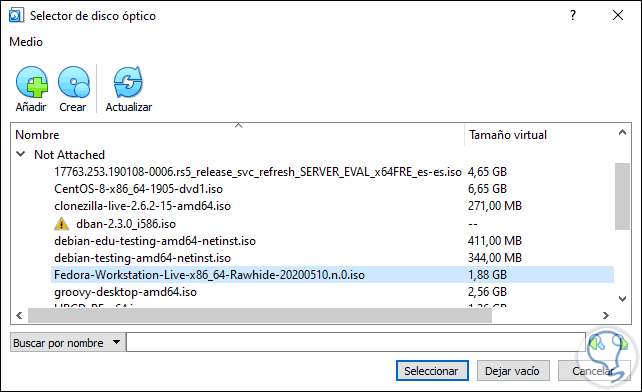
Step 5
We click "Select" to start the Fedora 33 installation process:
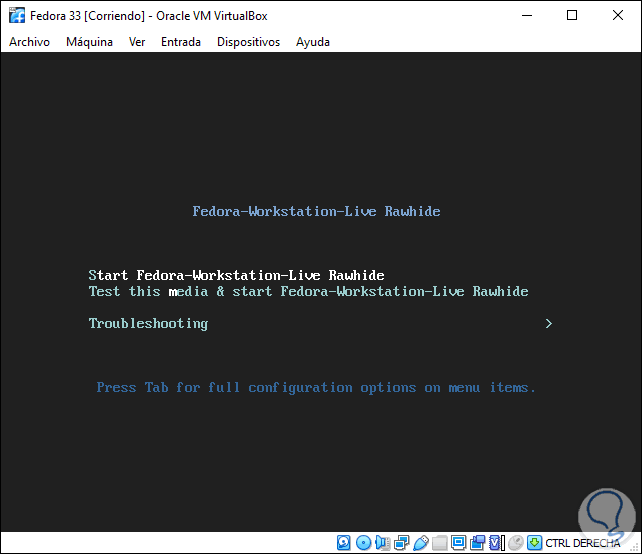
Step 6
In the initial window it will be possible:
- Start in Fedora 33 live mode
- Check equipment requirements
We select the first option to start the service load:
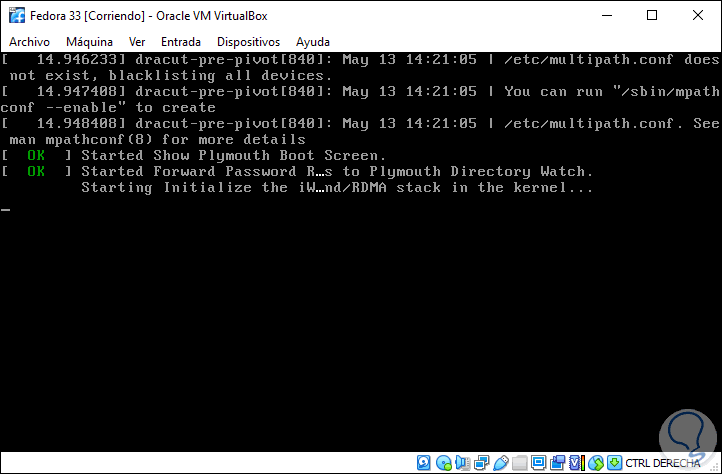
Step 7
After this we will see the following:
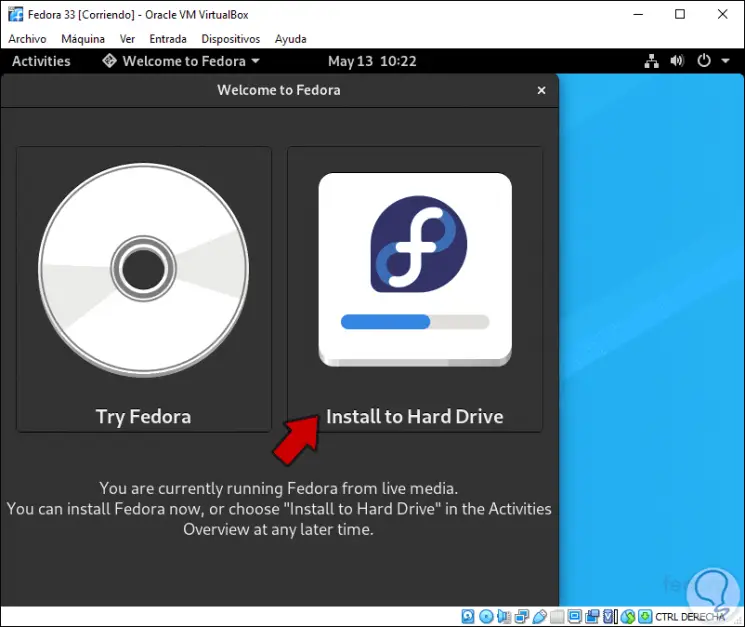
There we select the option "Install to Hard Drive" "since" Try Fedora "allows us to work, but all changes will be lost when logging out or turning off the computer..
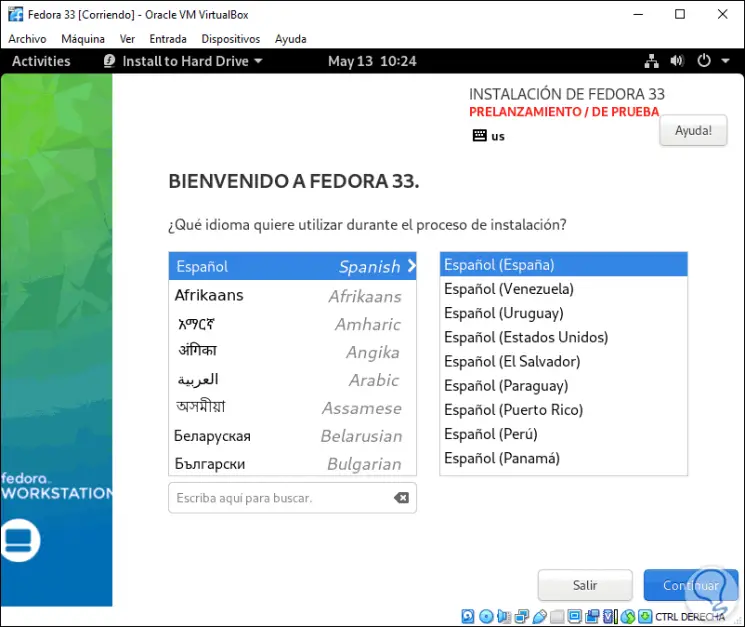
Step 8
We proceed to select the installation language:
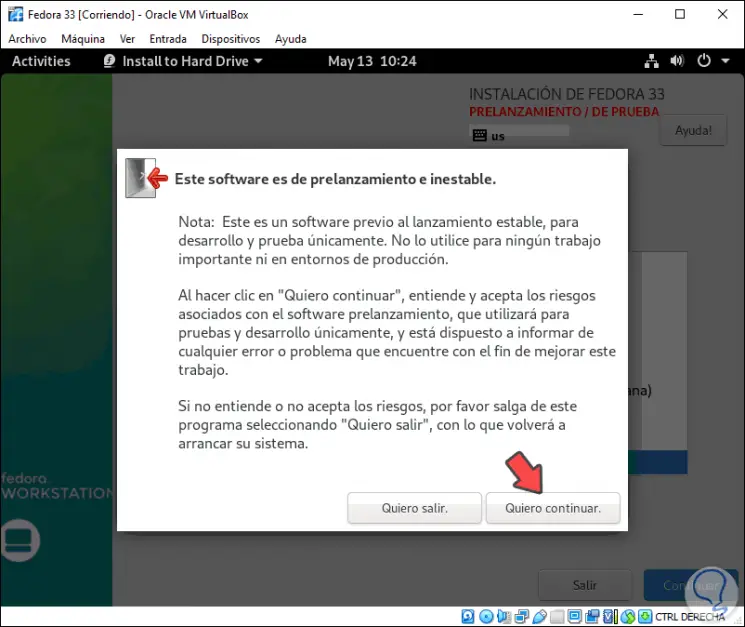
Note
At the top we can see that it is a test system.
Step 9
By clicking "Continue" we receive the following warning. We click on "I want to continue"
Step 10
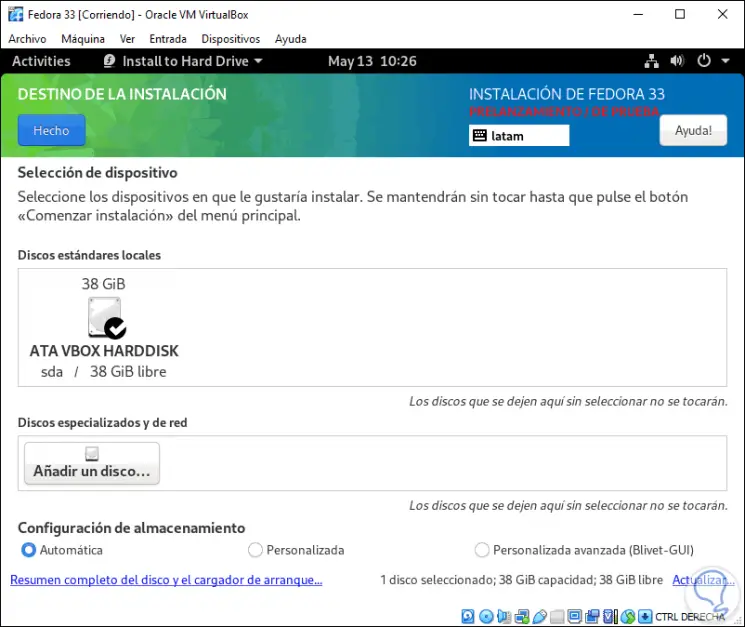
We will see the following. We select "Installation destination" to choose the hard disk where Fedora 33 will be installed:
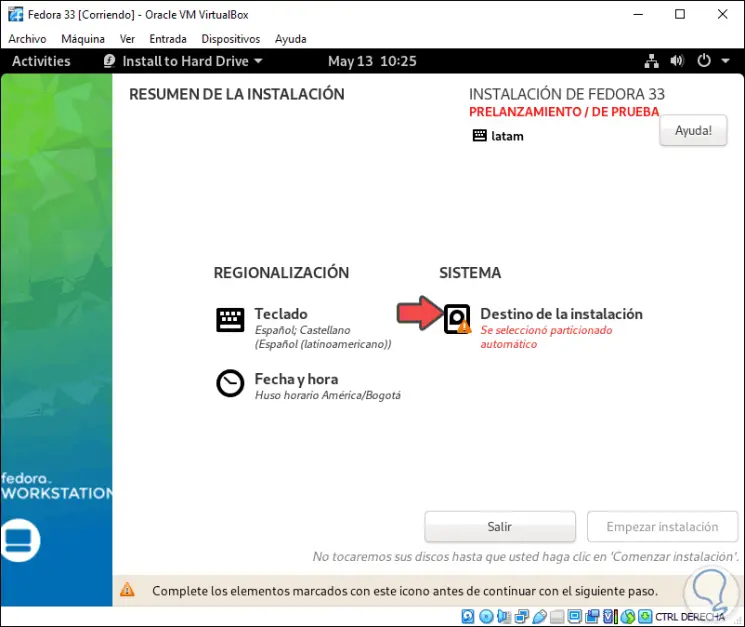
Step 11
There it will be possible to add disks, create partitions manually and more, once this is defined we click on "Done"
Step 12
We can see that we are ready to start the installation of Fedora 33:

Step 13
We click on “Start installation” to proceed with this:
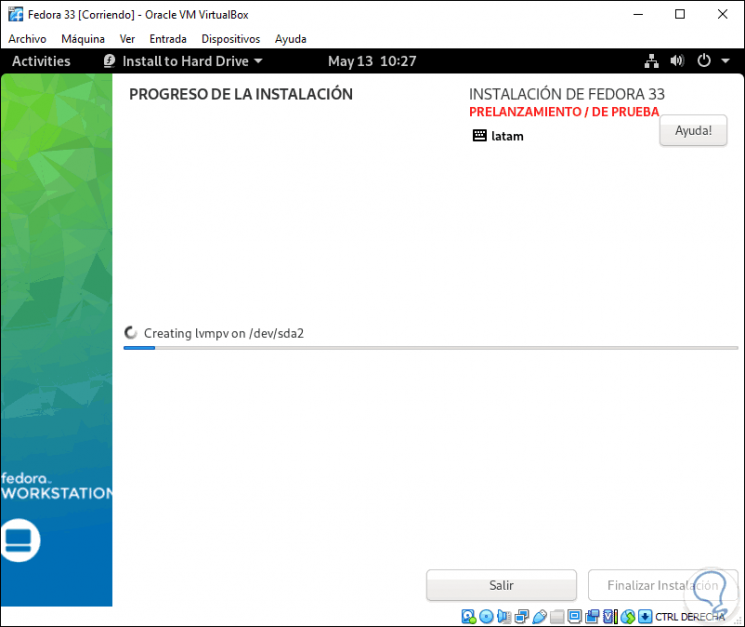
Step 14
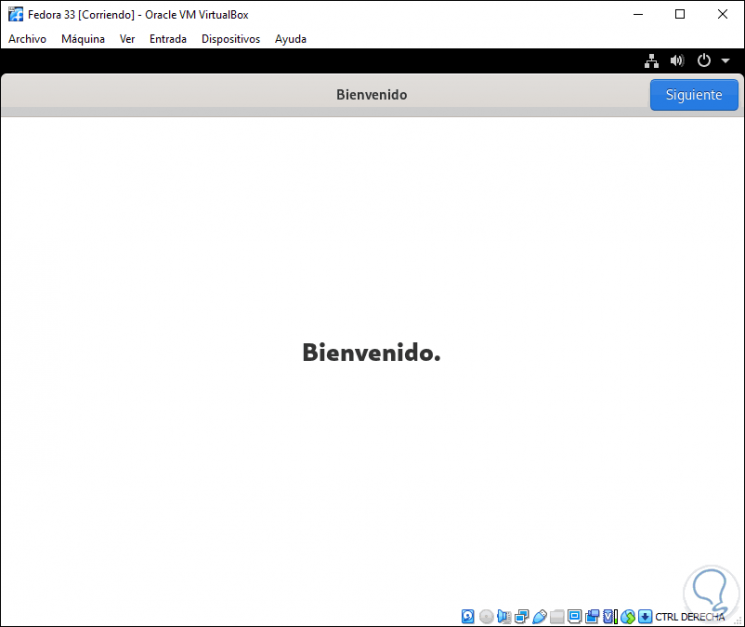
When this ends we will see the following:

We click "Finish installation" and after this we restart Fedora 33.
Step 15
At the time of access we will see the following:
Step 16
We click Next and define the privacy permissions:
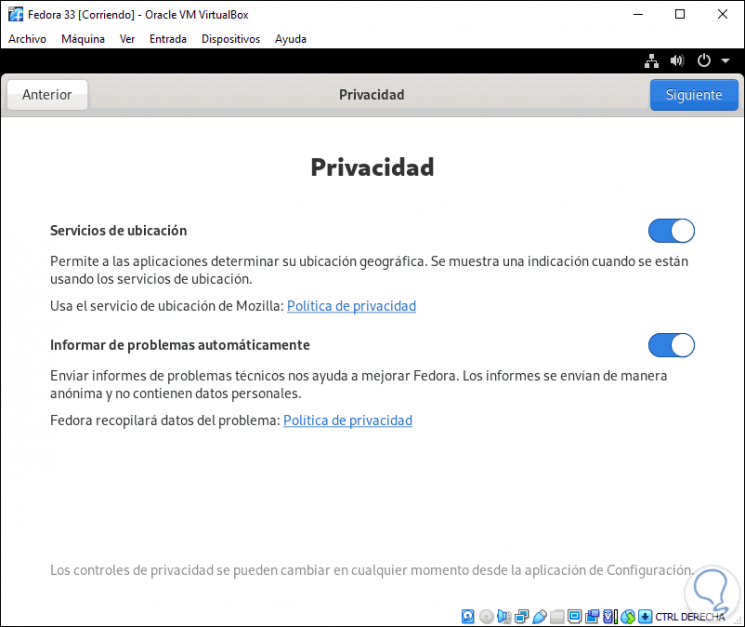
Step 17
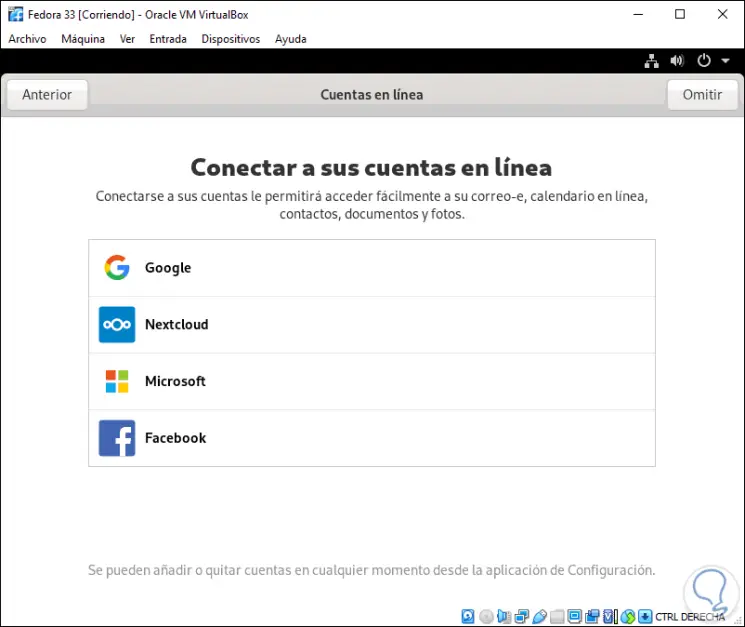
Then we can associate accounts:
Step 18
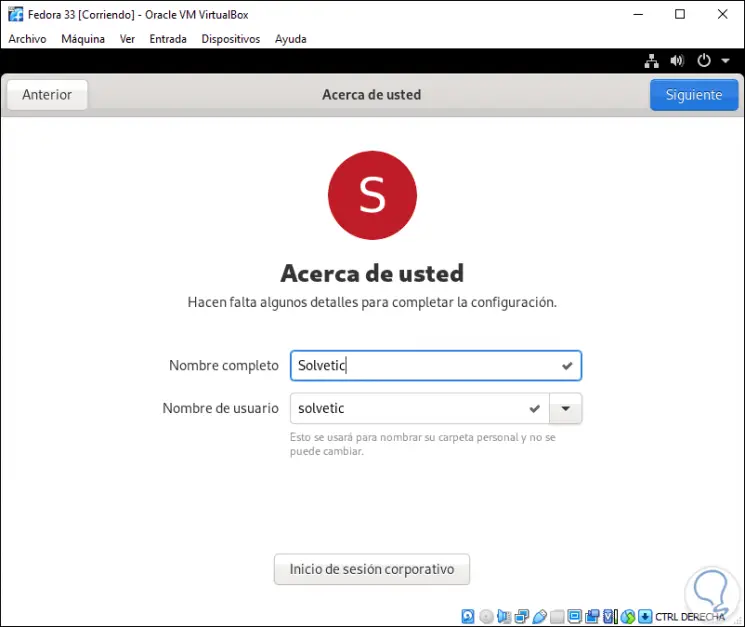
We enter the username:
Step 19
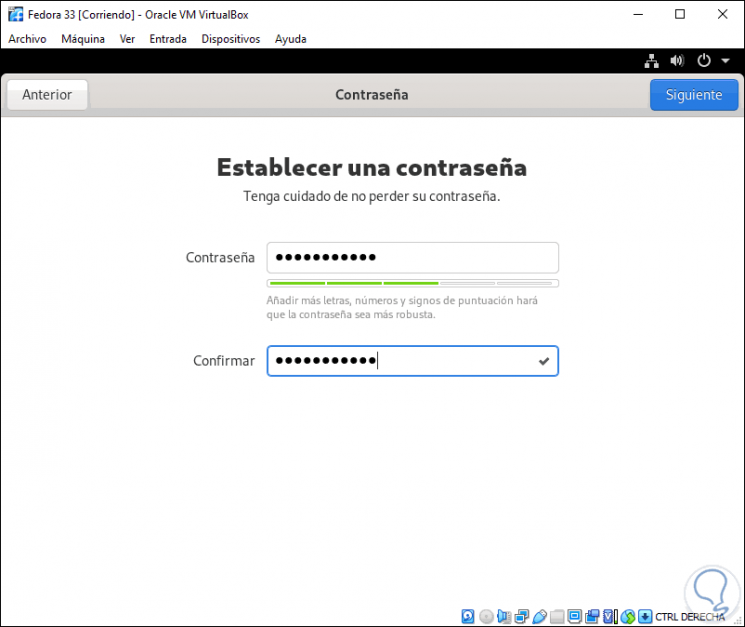
We assign the password:
Step 20
We see that the process has ended:
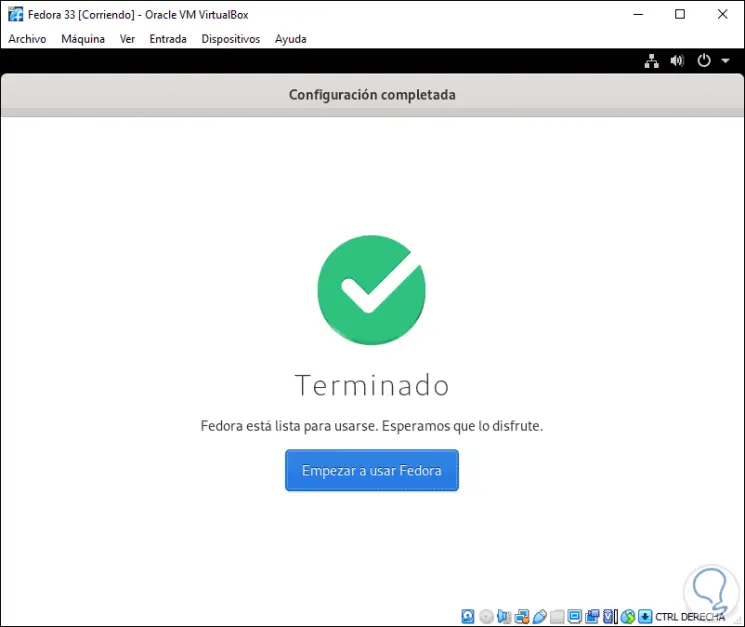
Step 21
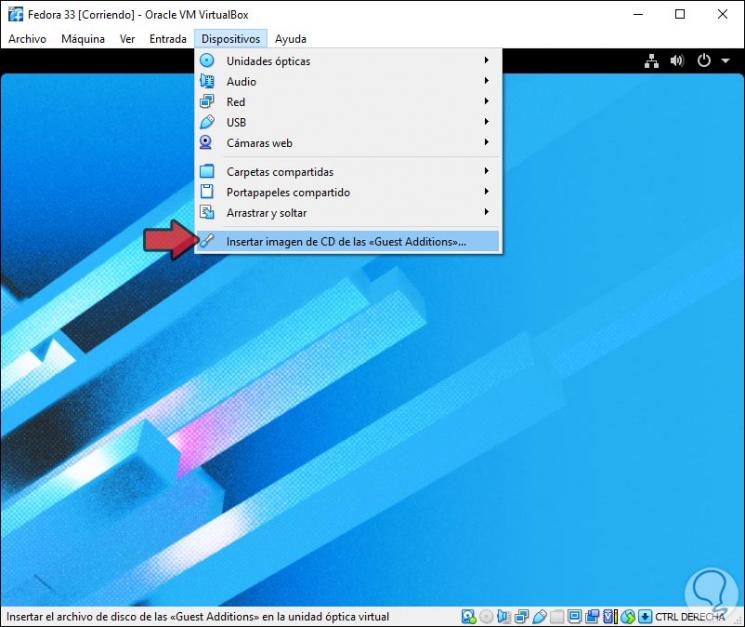
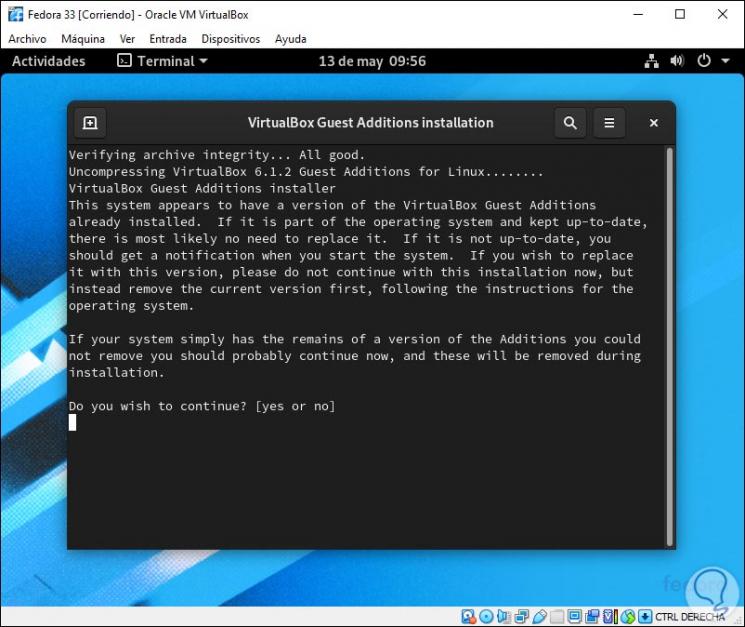
Finally, we must install the VirtualBox Guest Additions which allow a better interaction between the virtual machine and the physical one, for this we go to the Devices - Insert CD image of the << Guest Aditions >> ”menu:
Step 22
The following message will be displayed:
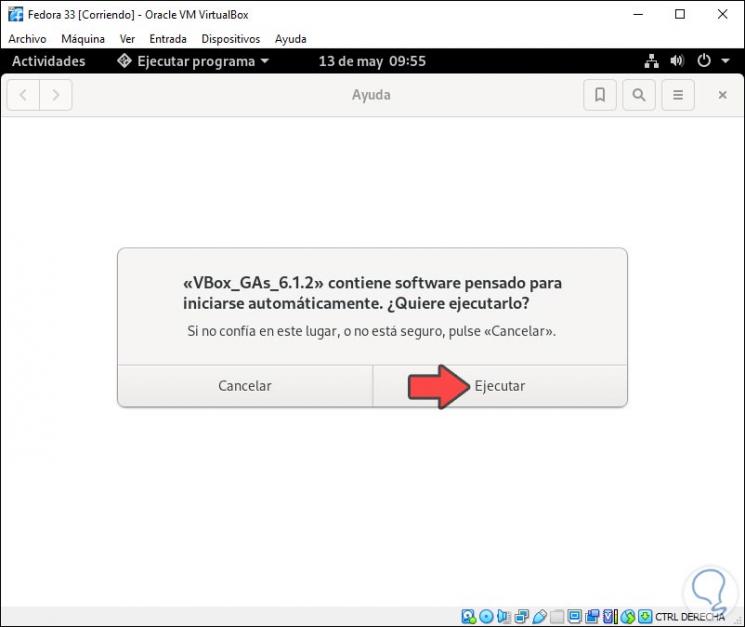
Step 23
We click "Run" and we must enter the administrator password:
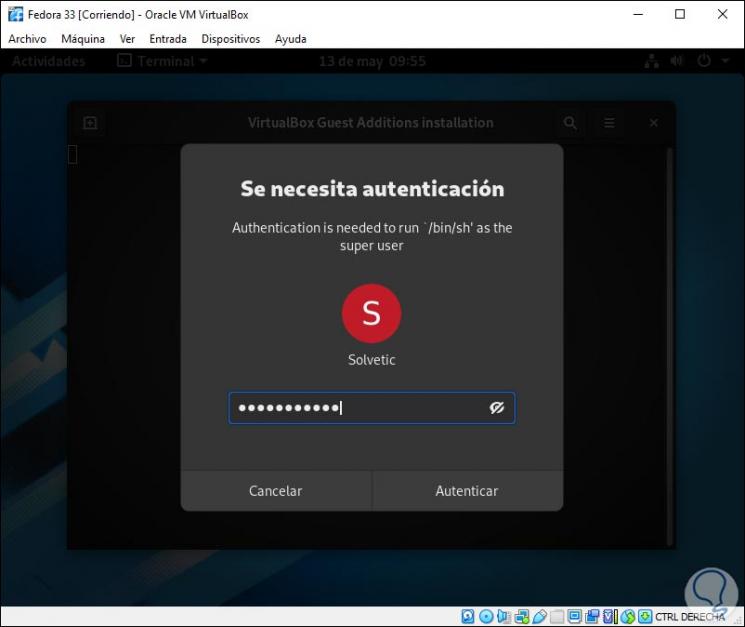
Step 24
This will launch the following window where we must confirm the action:
Step 25
When this ends we will see the following:
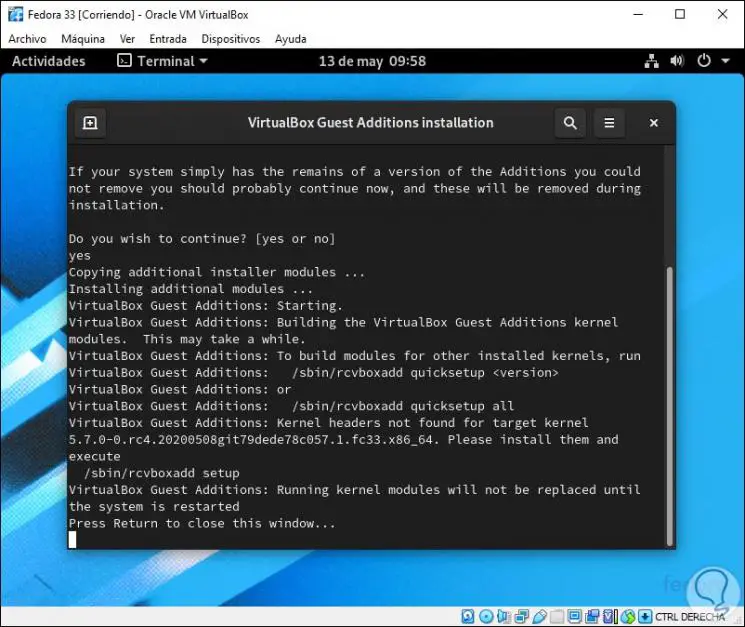
Step 26
We are ready to use Fedora 33 and see what's to come:
With TechnoWikis you have known how to download and install Fedora 33 in VirtualBox.