Our phone has become an indispensable day-to-day device for most of us, since directly from the palm of our hand we have the possibility of doing many things such as surfing the web, accessing our social networks , sending and receive information through different platforms etc. We can also download different applications depending on our needs..
One of the features that has become frequently used on mobile phones is the screenshots . Thanks to them we can capture what appears on our screen as an image, so we can send it to other people or keep it as a reminder of something. But in addition to the screenshots , we have the possibility of making recordings of what is seen on the screen of our mobile.
In the case of iPhone we have the possibility of using the integrated recording that it offers, in which we can select whether we want to carry out this recording with or without external sound. However, we must configure this, so we explain how to do it below..
To stay up to date, remember to subscribe to our YouTube channel! SUBSCRIBE
Step 1
The first thing we must do to access the iPhone recorder is access the control center.
Depending on the model we have, the way to access it is as follows.
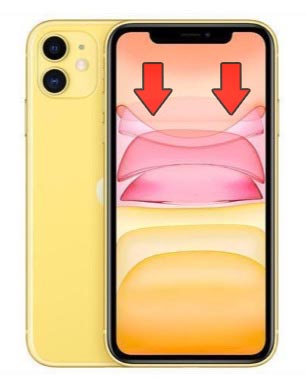
IPhone X or later control panel
You should slide the screen from the top down.
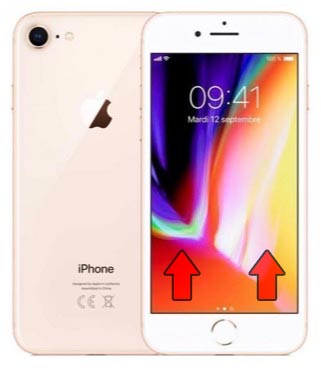
IPhone 8 or earlier control panel
You should slide the screen from the bottom up.
Step 2
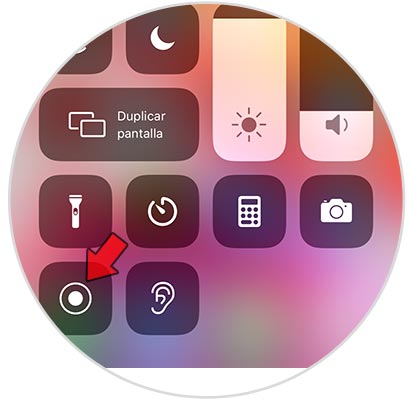
Now we have to hold down the record button.
Step 3
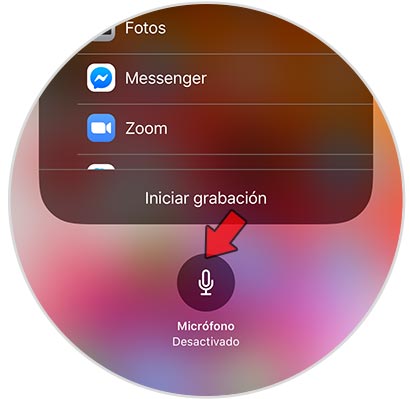
You will see a popup appear. In it you have to select the microphone at the bottom to enable or disable recording with external sound.
Step 4
You will see that it appears in red when it is activated.
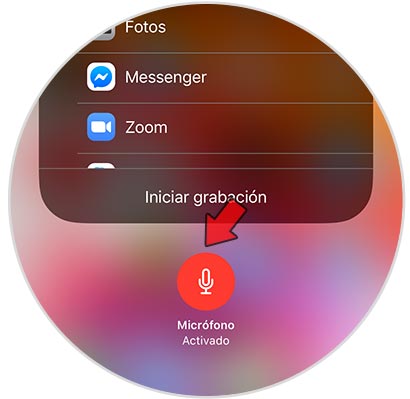
Now you can start recording on the iPhone screen, and all external sounds that occur during this recording will be recorded in the recorded video. In case you want to disable it, you must do the same and make sure that the microphone is deactivated..