The Windows 10 file explorer is the place from which we can manage and have access to the vast majority of the files stored on our computer. There are different ways to view the files in a folder, such as modes: very large icons, large icons, medium icons, small icons, list, details, tiles and content.

Related: How to view hidden Windows 10 system files
However, apart from these ways to view files within a folder in Task Explorer, there are also other ways to modify the display of these files. For example, you can sort the files and folders displayed within the File Explorer by name, date, type, size, and labels..
However, it should be noted that you can still customize the display of files much more within the folders of the Windows file explorer. For example, we can create groupings of files that have common characteristics, in this way you can group files within a folder of File Explorer.
This is precisely what we want to show you in this tutorial. Here you'll learn how to group files in a Windows 10 File Explorer folder:
How to group files in a folder in Windows 10 Explorer
- Open Windows 10 File Explorer and go to a folder where you have multiple files..
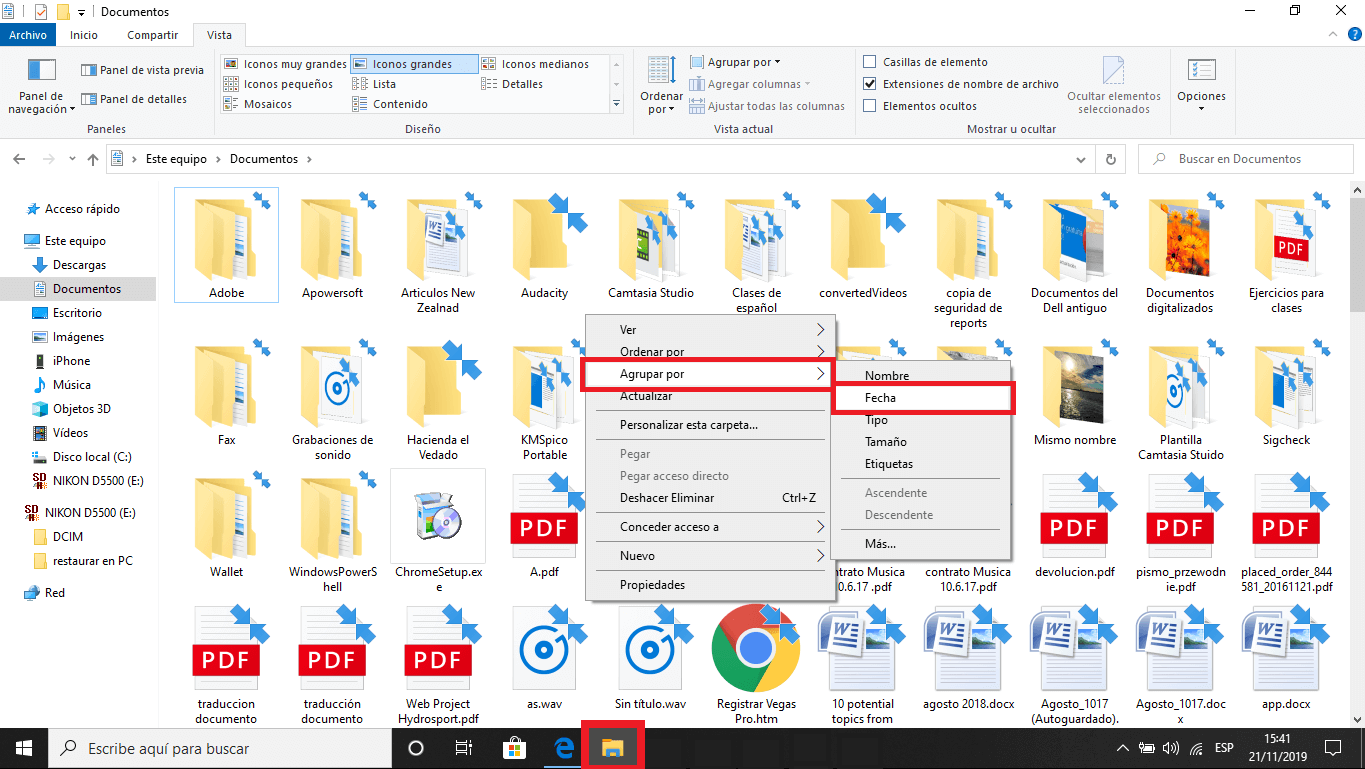
- Now in some blank space in the folder, you will have to right-click so that when the context menu is displayed you can go to: Group By
- This will reveal a series of file grouping options such as: Name, File, Type, Size and Labels.

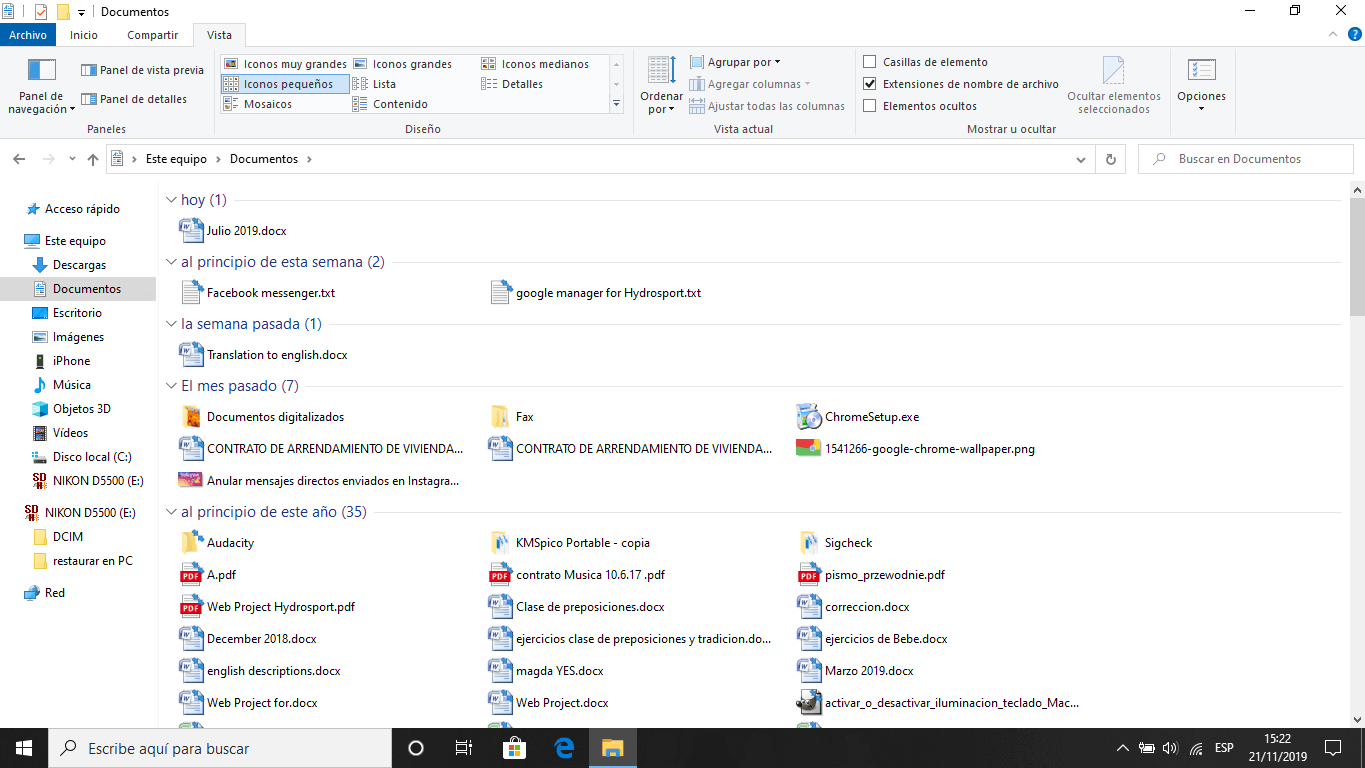
- By selecting any of these options you will see how the files will automatically be grouped according to the chosen criteria.

How to ungroup files from a folder from Windows 10 file explorer.
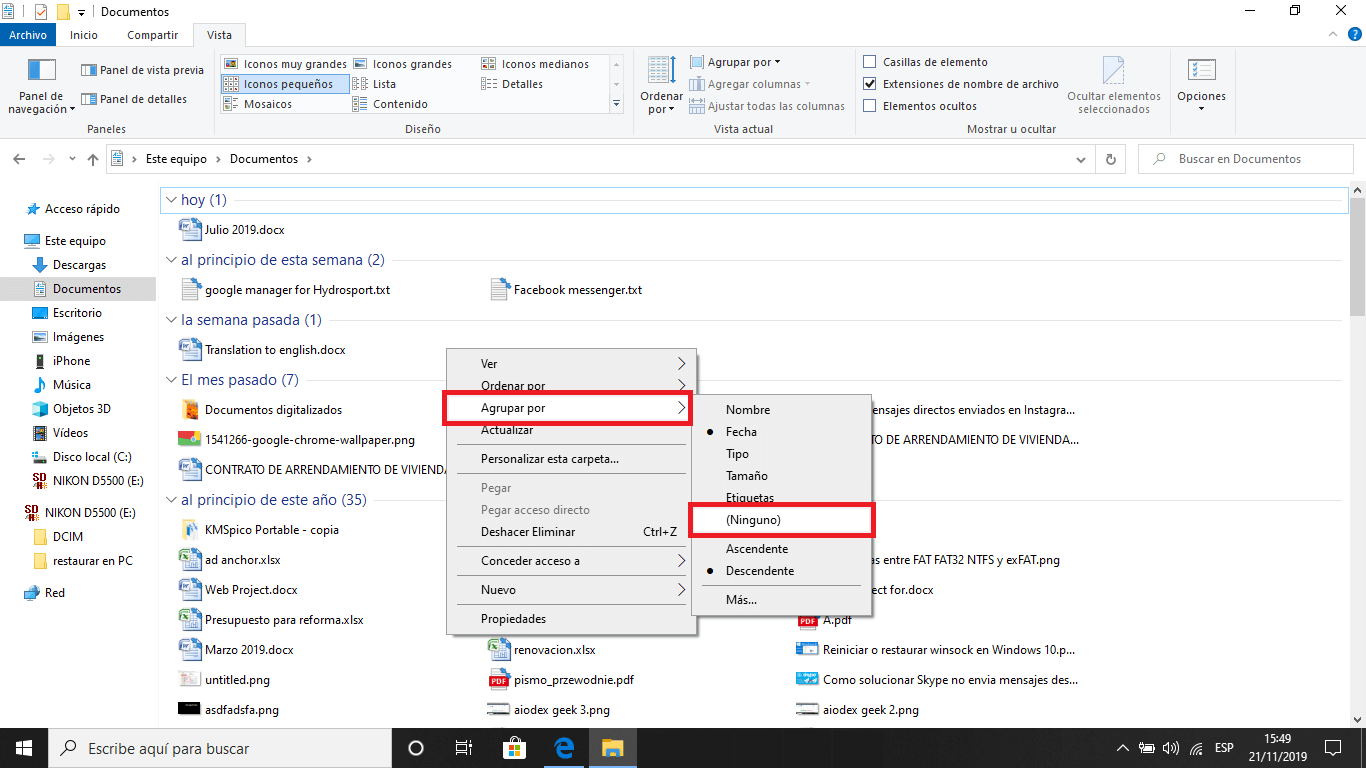
- To stop viewing grouped files in Windows file explorer, simply repeat the operation: Right click on an empty space in the folder..
- In the contextual menu, go to: Group by
- In this case we will have to click on the option: ( None )

- This will return the folder and file display to the default standard mode in Windows 10.