Hirens Boot PE (Preinstallation Environment) has been updated as a restored edition of Hiren's BootCD which is based on Windows 10 PE x64. This edition supports UEFI boot and requires only 2 GB of RAM to use..
The purpose of Hirens Boot PE in USB is to offer the user a series of utilities to correct and manage both the operating system and its services, when the computer starts with this version of Hirens Boot the graphic drivers will be automatically installed , sound, Wi-Fi and LAN card.
Hirens Boot PE is available for free download at the following link:
Hirens Boot PE
Hirens Boot PE
Some of the utilities that we will find are:
- Lazesoft Data Recovery v4.0.0.1
- ESET Online Scanner v2.0.22
- Malwarebytes Anti-Malware v2.2.1.1043
- HDD Low Level Format Tool v4.40
It is normal that to use Hirens Boot PE we download the ISO file and burn it to a DVD, but this time TechnoWikis will explain how to record Hirens Boot PE on a USB drive thanks to Rufus.
What is Rufus
Rufus has been developed as a lightweight tool thanks to which it is possible to format and create bootable USB drives in a simple but fully functional way. Rufus supports more than 15 languages and its free download is available at the following link:
Rufus
We also leave you the video tutorial to know how to install Hirens Boot PE in Rufus..
To stay up to date, remember to subscribe to our YouTube channel! SUBSCRIBE
How to create Hirens Boot USB with Rufus
Step 1
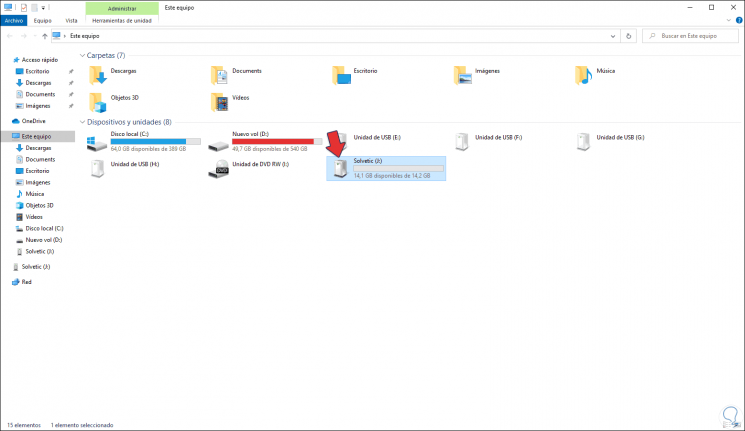
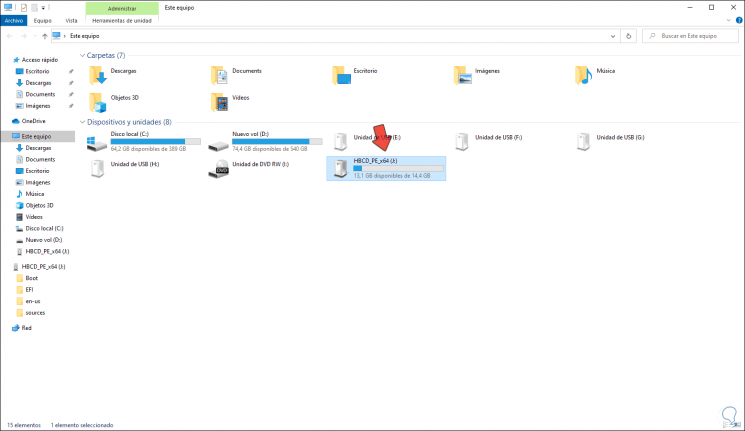
The first thing to do is determine the letter that has been assigned to the USB drive, for this we open the Windows 10 file explorer and in this case we will see that said letter is J:
Step 2
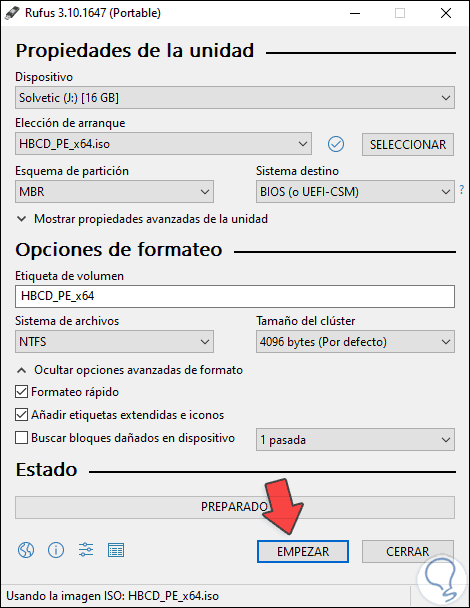
Now we run Rufus and in the displayed window we configure the following:
- In the "Device" field we select the USB to use
- In "Boot choice" we select "Disk or ISO Image", we click "SELECT" and we choose the ISO image of Hirens Boot that we have downloaded
- In the field "Partition scheme" we select "MBR"
- In "Destination system" we choose "BIOS (or UEFI-CSM)"
- In the field "Cluster size" we leave the default value
- In "File system" we select "NTFS"
Step 3
We have a section called "Advanced format options" where it will be possible:
- Apply a quick format to the USB
- Integrate extended labels and / or icons
- Find faulty blocks on USB drive
- Determine the number of passes (from 1 to 4) to check the integrity of the medium
Step 4
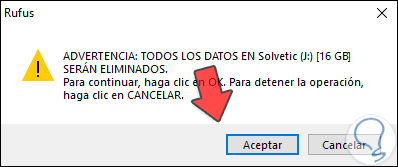
Once we define these steps we click on "START" and we will see the following warning:
Step 5
This indicates that the data on the USB will be deleted, we click "OK" to confirm this action:
Step 6
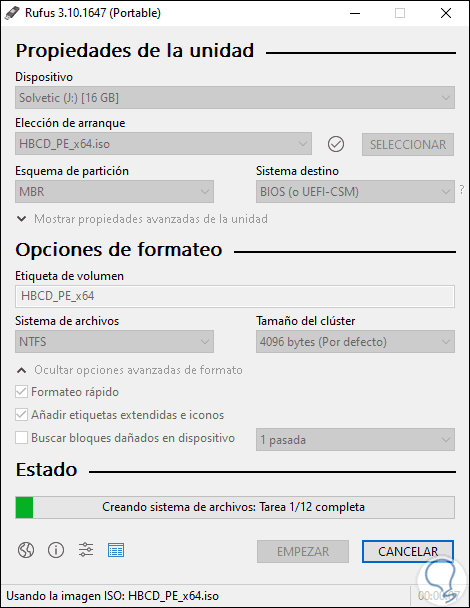
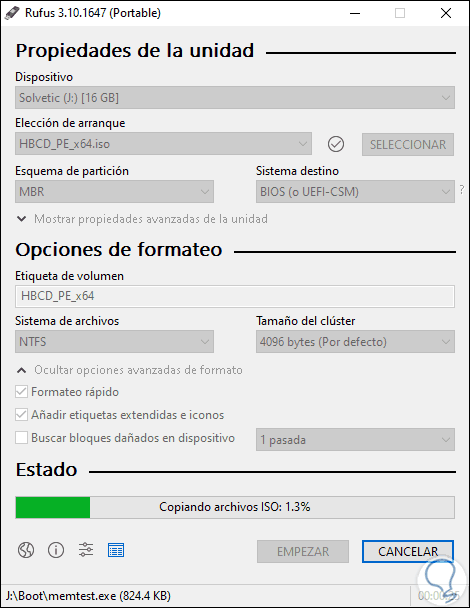
After creating the file system we proceed to copy the ISO:
Step 7
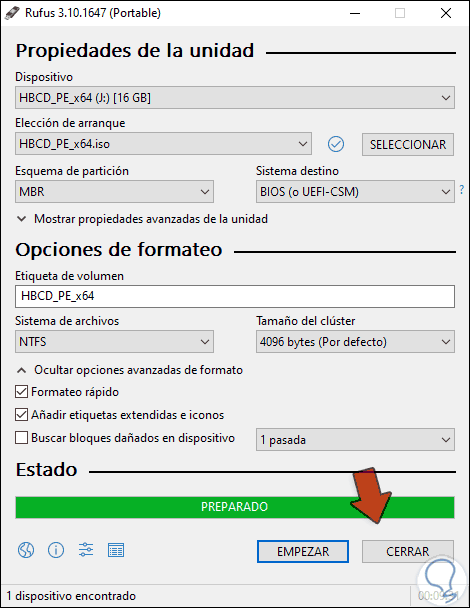
When this comes to an end we will see the following:
Step 8
We check that the unit has been recorded:
Step 9
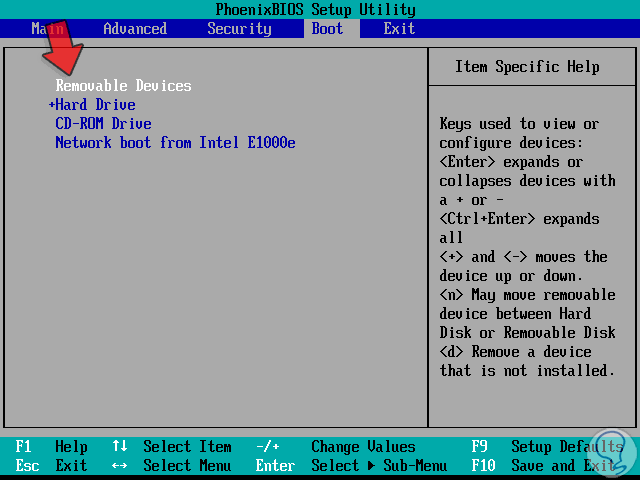
Now we simply have to go to the computer where we want to use Hirens Boot and access the BIOS or UEFI and configure the boot from the USB media in the Boot ***** tab:
With this, we will be ready to use this valuable utility that integrates many essential tools to work on various operating systems.