As technology advances, the possibilities that technological devices acquire are proportional to the facilities that they can bring us in different aspects of our lives..
In the case of Google , apart from its search engine, its Chrome browser or different services such as Drive or Gmail, there are few gadgets that the technology giant has launched, including among them its Google Pixel smartphones or different models of smart speakers. In the Google Nest Hub model, those of “The Great G†have decided to add a screen to their smart speaker, to add extra input in the interaction between the user and the device in addition to voice commands.
For these devices to work properly it is essential to connect them to a WiFi network, and for this reason in this tutorial by TechnoWikis we will explain how to do it step by step..
For this you will have to follow the steps that we indicate below:
To keep up, remember to subscribe to our YouTube channel! SUBSCRIBE
1. How to connect Google Nest Hub to WiFi when connecting mobile
When we initially set up Google Nest Hub, it is when we must select a WiFi network to connect to, which must always be the same as the one connected to the smartphone in which we have downloaded Google Home.
This connection is part of the initial configuration process of your Google Nest Hub, and in this tutorial you will be able to see the process step by step.
2. How to change WiFi network Google Nest Hub
This WiFi network that we have configured at first is the one that Google Nest Hub will use, but this does not mean that it is the definitive one or that it cannot be changed. If you want to change the WiFi network in your Google Nest Hub you have to follow the following steps:
Step 1
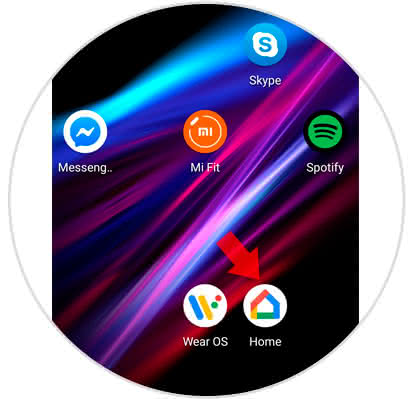
Enter the Google Home App, which is essential to start using your Google Nest Hub.
Step 2
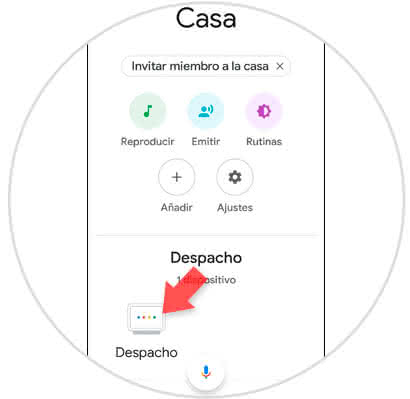
Once you enter, press on the device you have synchronized as Google Nest Hub. In this case, we have it synchronized as "Dispatch".
Step 3
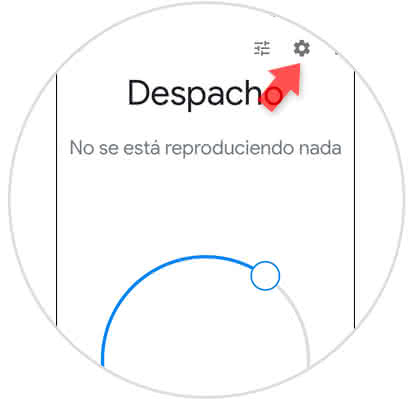
In the upper right corner of the screen, tap on “Settings†represented by a gear icon.
Step 4
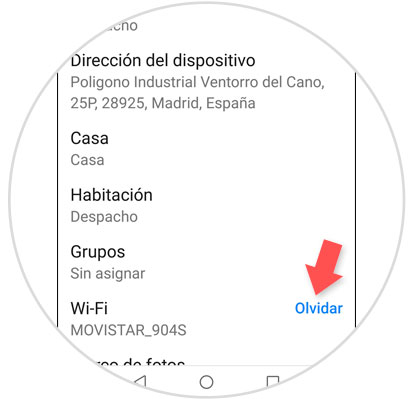
On the new screen, swipe to the Wi-Fi section and tap "Forget."
Step 5
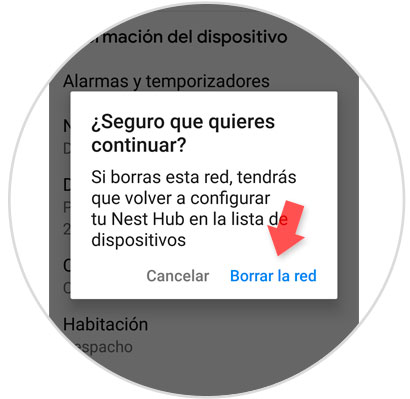
In the pop-up window, click on "Delete the network" to permanently delete it.
Step 6
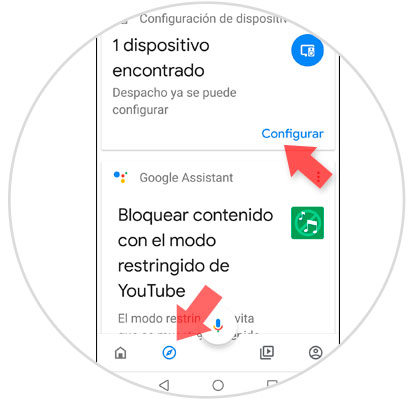
Now, in the bottom bar, touch the compass icon and at the top you will see the option “A device foundâ€. Press to configure the new network.
Step 7
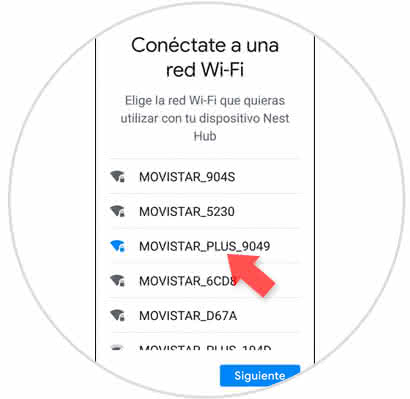
The connection process will begin. Press "Yes" if the code that appears matches. Now, select the new WiFi network you want to connect to and press "Next".
Step 8
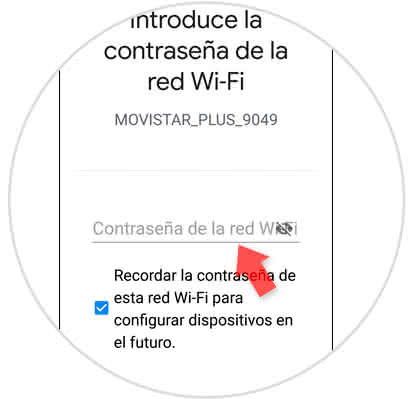
Enter the password, click on "Connect" and you are done.
Note
For everything to work properly, mobile and Google Nest Hub have to be connected to the same WiFi network.
It's that simple to set up and change the WiFi network in the Google Nest Hub..