Whenever we hear about a new update or version of our favorite operating systems , an expectation is created about what new features it will have but also what features will be eliminated. Well, if you like Ubuntu as we do, you know in detail on what date the next release will be, remember that the people of Ubuntu have assigned to each version of Ubuntu a codename of development and each of them is cataloged per year and release month, well, Ubuntu 19.10 will be released in October 2019 and its code name will be “Eoan Ermineâ€..
News
Although we officially do not know what new features Ubuntu 19.10 will have, we can anticipate the following in TechnoWikis:
- Performance and visual changes in the GNOME 3.34 interface
- Improvements in Yaru's default theme as it will now have support for Snap applications
- Guest session support on the login screen
- Fwupd available as a complement will be integrated
- Improvements in touch navigation
- In the Ubuntu 19.10 ISO image we will now find NVIDIA drivers
There is a point at which many users were anxious and it was the announcement of only using a system for 64-bit applications, well, in view of this concern, Ubuntu has decided to continue developing 32-bit i386 packages for both Ubuntu 19.10 and for Ubuntu 20.04 LTS.
TechnoWikis will explain how to upgrade your Ubuntu 19.04 system to Ubuntu 19.10 and also how to install from scratch. This process can be carried out in two different ways, both graphically and through the terminal and we will see each one of them..
1. How to upgrade to Ubuntu 19.10 graphically
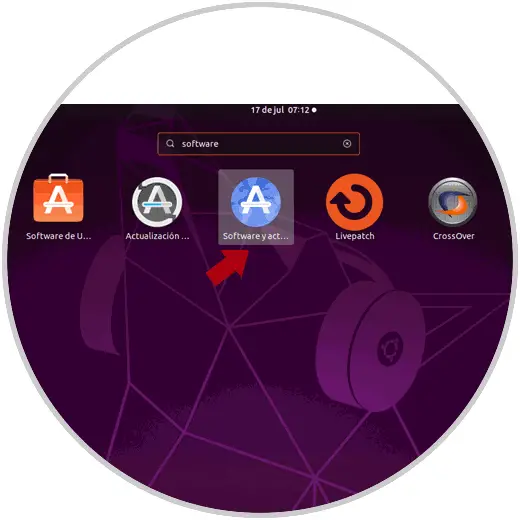
Step 1
The first step we will take will be to access the "Software and updates" option from Ubuntu Applications:
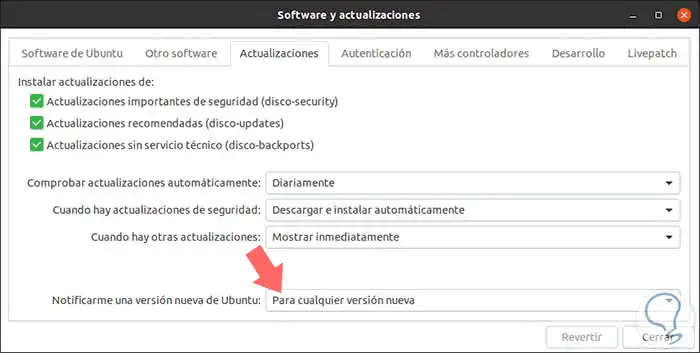
Step 2
In the window that will be displayed we go to the “Updates†tab and there we define the value “For any new version†in the line Notify me of a new new version of Ubuntu:
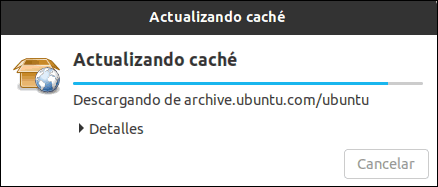
Step 3
Click on Close and it will automatically start a process to update the cache of the Ubuntu 19 repositories:
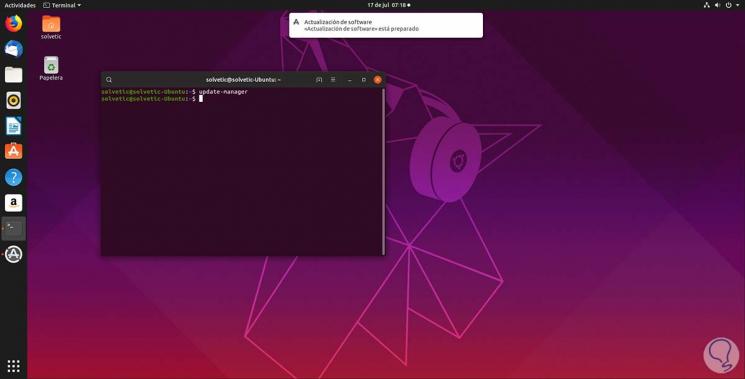
Step 4
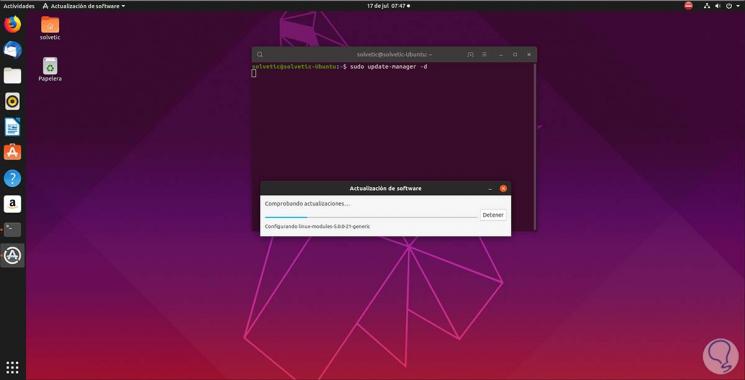
Once this process is done we access the terminal and there we execute the following order:
update-manager
Step 5
Note that the “Software update†function is activated immediately, which is responsible for downloading and checking the various updates available for the system:
Step 6
After this check we will see the following:
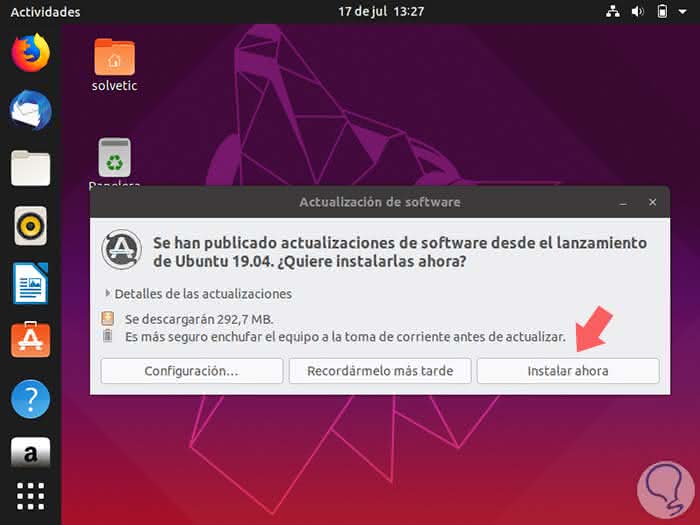
Step 7
As we can see, new updates have been detected, there we click on “Install now†and we can see the step by step of the different updates which includes updating the system to Ubuntu 19.10:
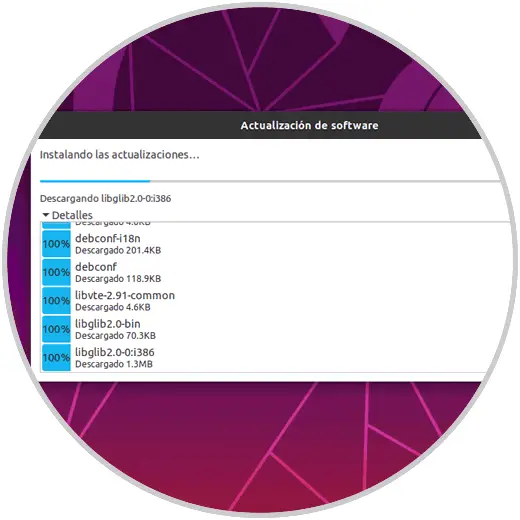
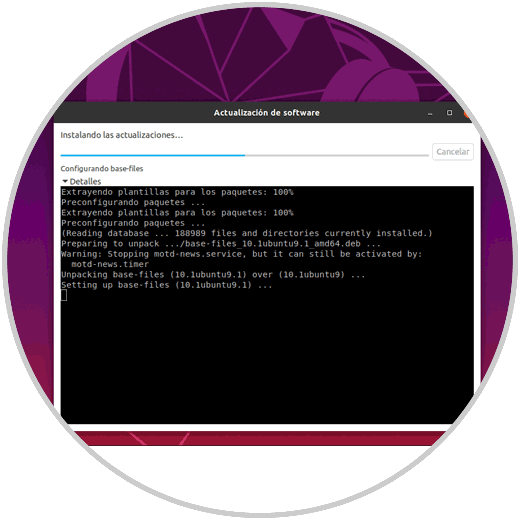
Step 8
After this process the terminal will be activated with the different update values ​​running:
Step 9
When this process is finished, we will see the following message:
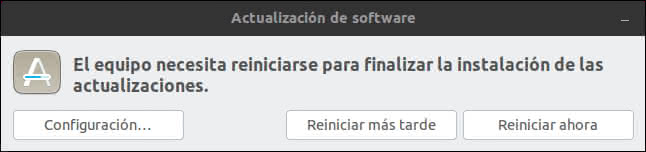
There we click on "Restart now" so that Ubuntu 19.04 continues with the process as we will see in the next section.
2. How to upgrade to Ubuntu 19.10 from the terminal
Step 1
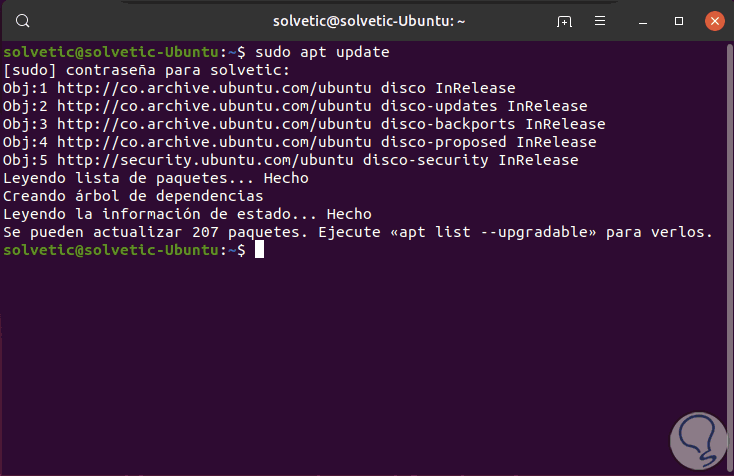
The next option available is through the terminal, for this we access the console and first update the system packages:
sudo apt update
Step 2
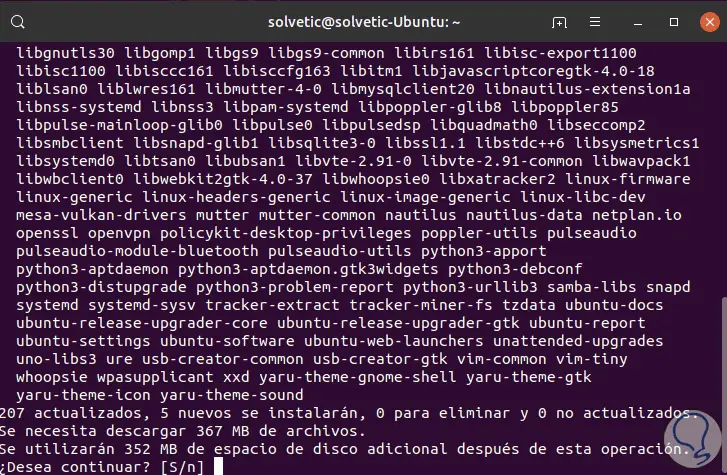
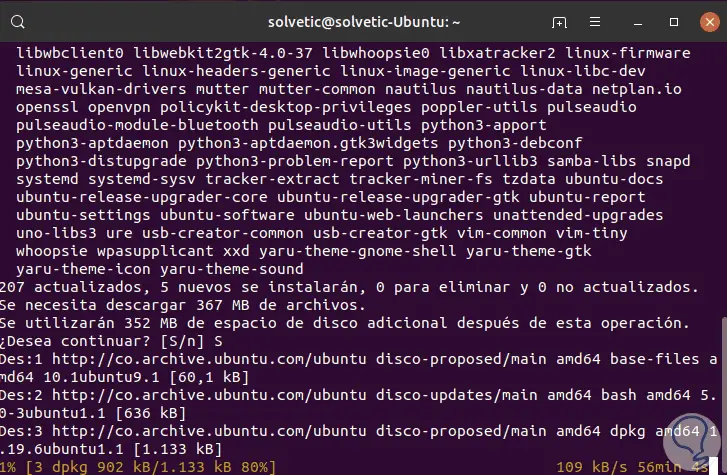
Next, we will upgrade these packages by running:
sudo apt upgrade
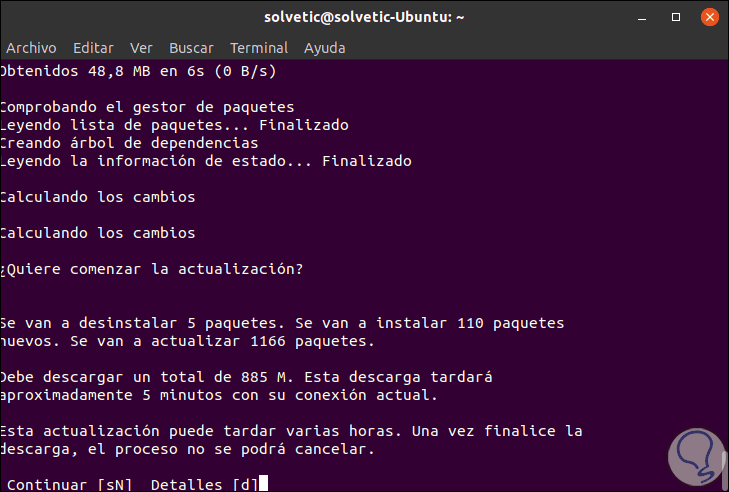
Step 3
There we enter the letter S to confirm the download and installation of the updates:
Step 4
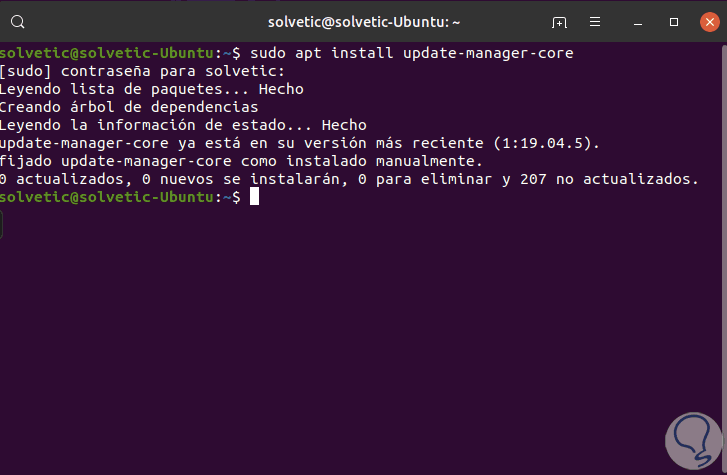
Once this process is finished, we will install the kernel administrator with the following command:
sudo apt install update-manager-core
Step 5
Now we will go to the release-upgrades file to make a small edition using the desired editor:
sudo nano / etc / update-manager / release-upgrades
Step 6
There we will set the value of the Prompt line from lts to normal:
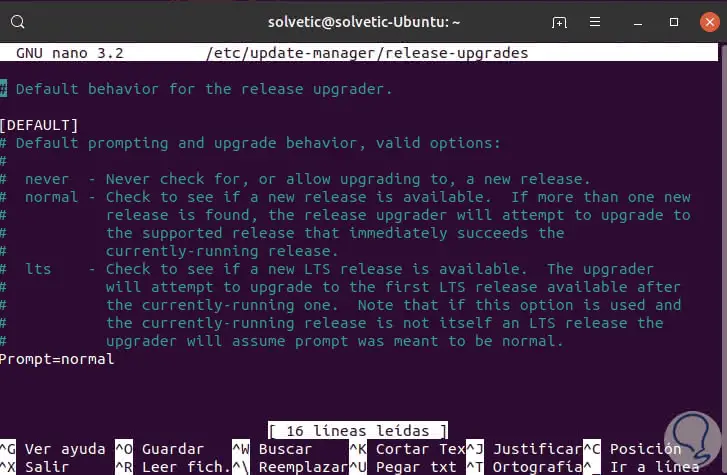
We save the changes with the Ctrl + O keys and exit the editor with the Ctrl + X keys..
Step 7
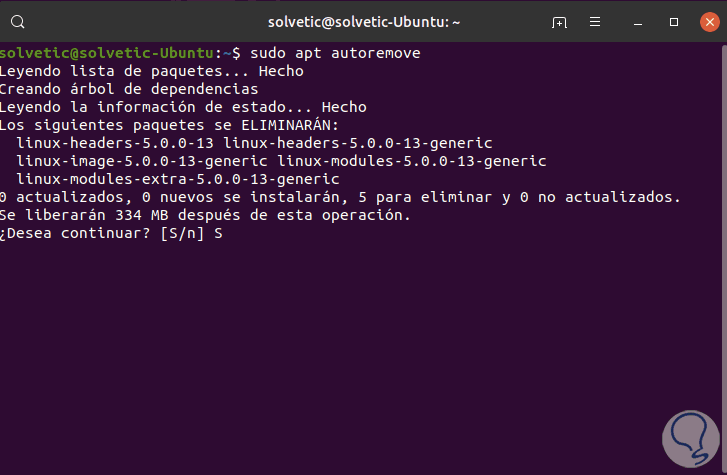
The next step will be to remove unnecessary packages, for this we execute:
sudo apt autoremove
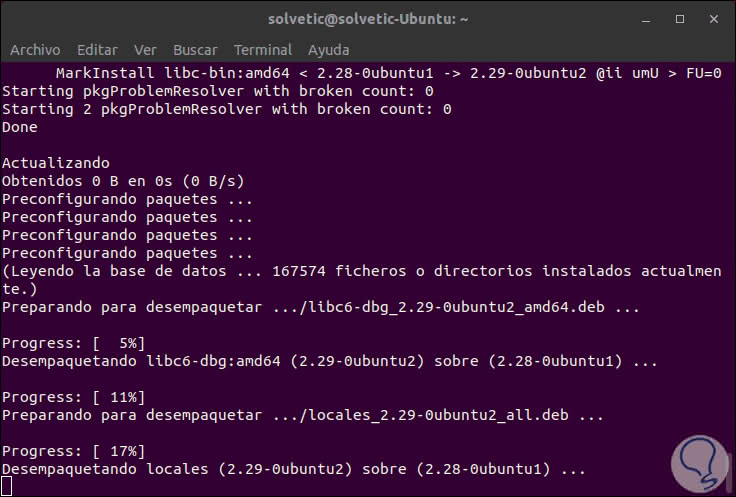
Step 8
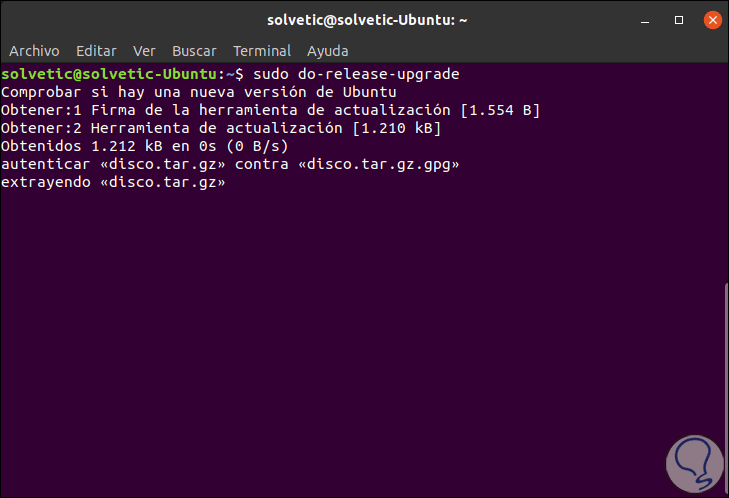
When this is finished, we will execute the following command:
sudo do-release-upgrade
This is responsible for analyzing and installing the available Ubuntu 19.10 update:
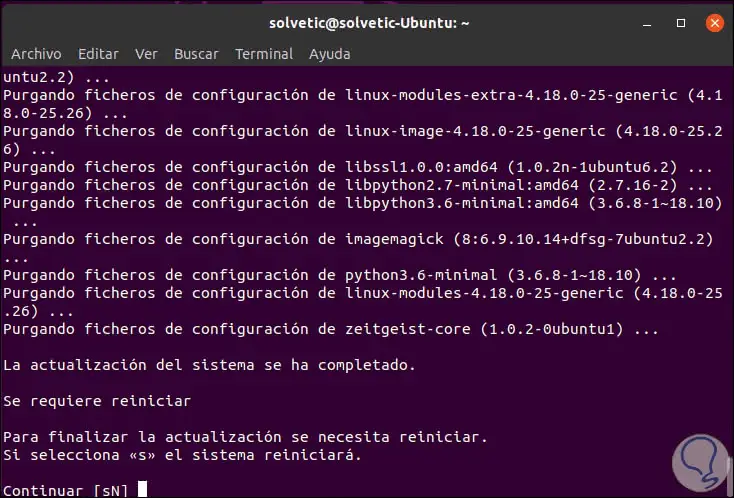
Step 9
After a period of time we will see the following message:
Step 11
There we accept the process by entering the letter s and from this moment the update to Ubuntu 19.10 will take place:
Step 12
This process can take between two to three hours and after that it will be necessary to restart the operating system to complete the action:
Step 13
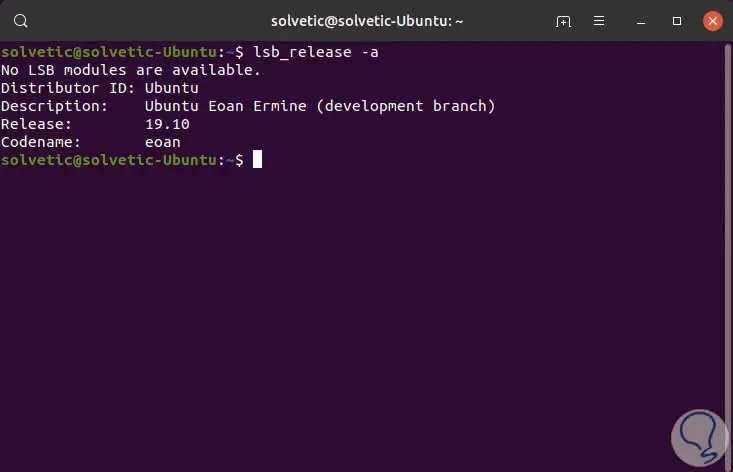
Enter the letter s and the system will reboot to complete the update process, once we access we can execute the following command to see if the updated version is correct:
lsb-release -a
Up to this point we have seen how to update Ubuntu 19.04 to Ubuntu 19.10 both graphically and through the terminal.
3. How to install Ubuntu 19.10 from scratch
Step 1
The other option we have is to perform a clean installation, that is, new, of Ubuntu 19.10, for this we must download the ISO image which is offered in beta (trial) version in the following link:
Ubuntu 19.10
There we will see the following:

Step 2
We will download the ISO image called “eoan-desktop-amd64.isoâ€.
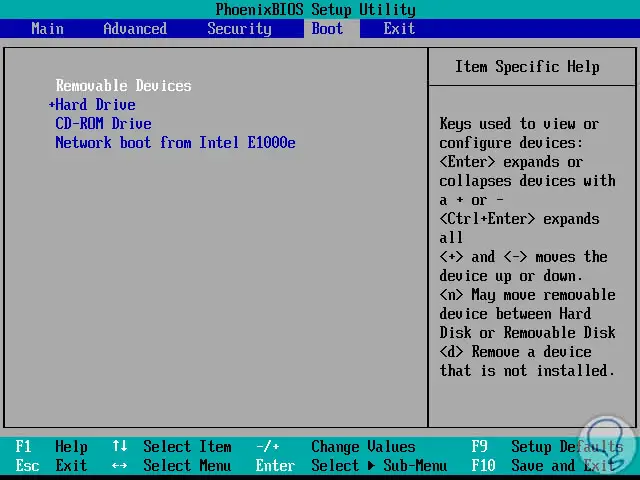
Once downloaded, we can save it to a DVD or create a bootable USB media and configure the device to boot from there like this:
- Removable Devices if we are using a USB media
- CD-ROM Drive if we use a DVD
Step 3
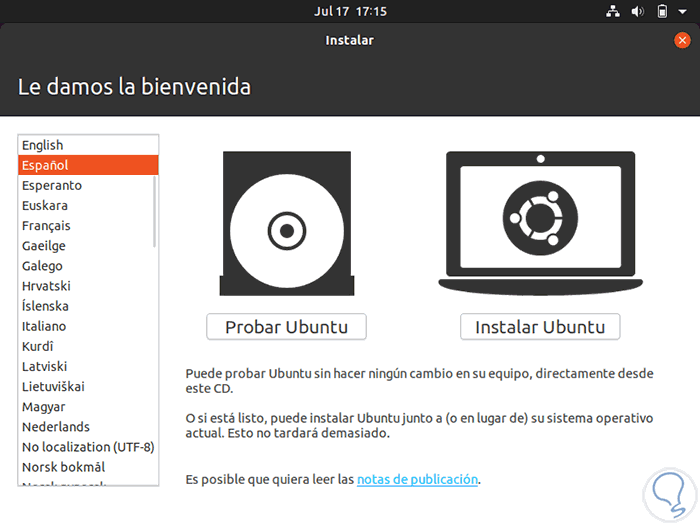
Now when the system initializes from there we will see the following window where we will select the installation language of Ubuntu 19.10:
Step 4
There we have two options that are:
Try Ubuntu
We can use this method live and know more about the system but everything we do there will be deleted when you log out
Install Ubuntu
This option installs Ubuntu 19.10 directly on the hard drive
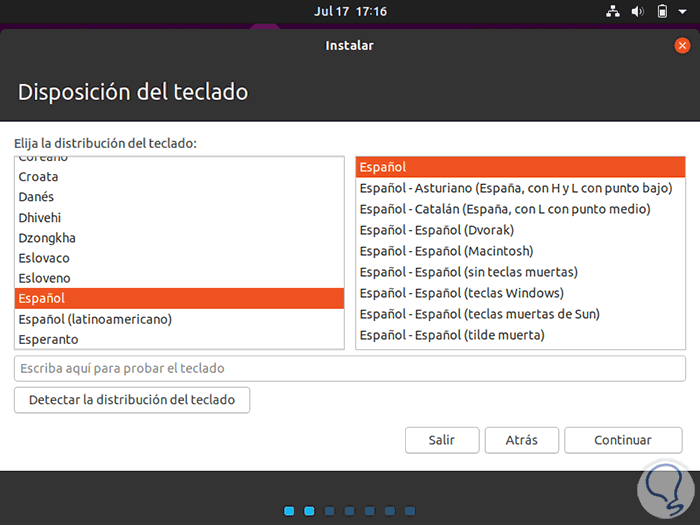
Select "Install Ubuntu" and in the next window we define the language to use on the keyboard:
Step 5
We click on Continue and we will see the following:

Step 6
There we activate the “Normal installation†box and at the bottom we can activate the options to download the available updates or third-party software during the process.
Select what we consider necessary and click Next to access the disk configuration:
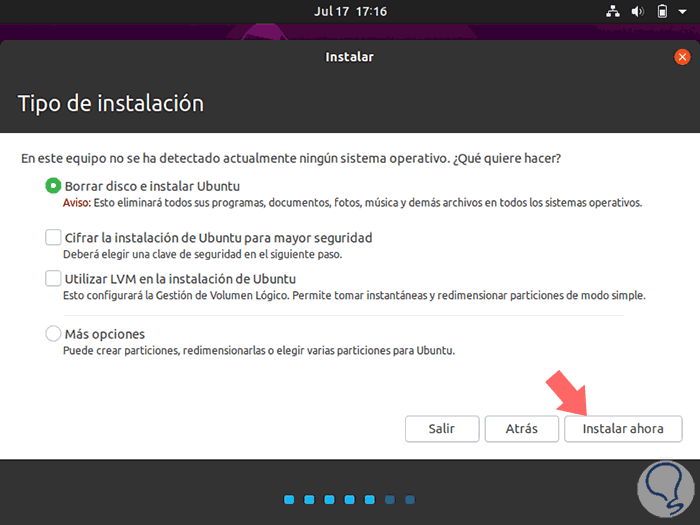
There it will be possible:
- Use the default wizard to create partitions and install Ubuntu
- Encrypt the Ubuntu installation which will require a password at each boot
- Make use of logical volume encryption (LVM) to increase some functionalities
- Use the More options option to create partitioning manually
Step 7
We have selected the default option and then we will see the following:

Step 8
In a warning message indicating that the data on the disk has to be erased, we click Continue and then define our geographical location:
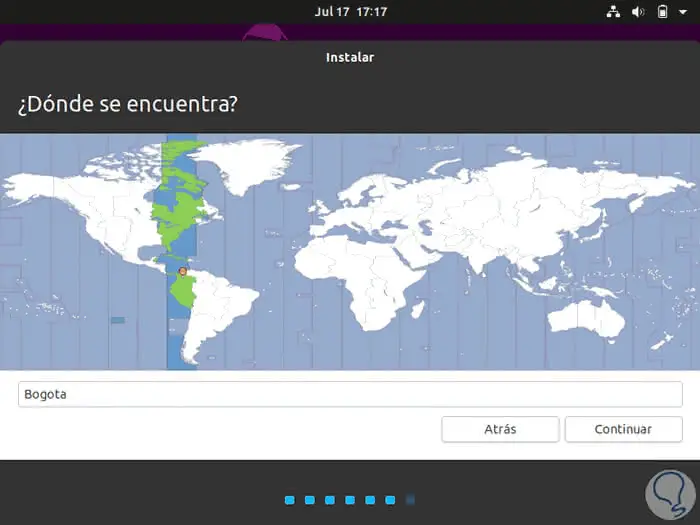
Step 9
If this is incorrect we can locate it directly on the map, click on Continue and now we will assign username and password:
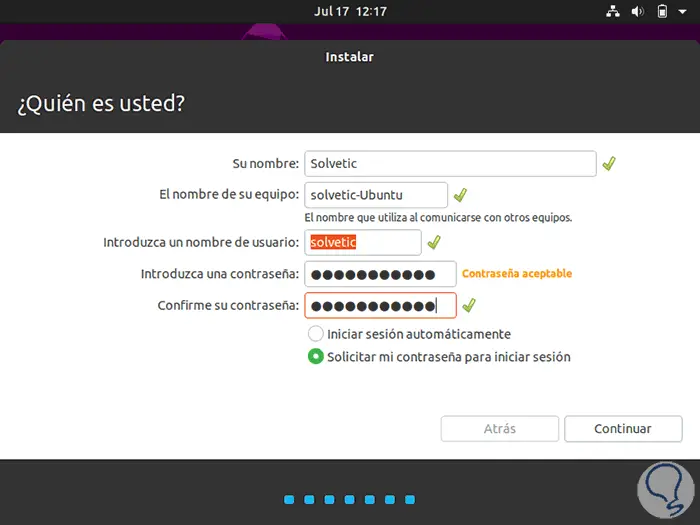
Step 10
When you have entered this data, click on Continue to give way to the Ubuntu 19.10 installation process:
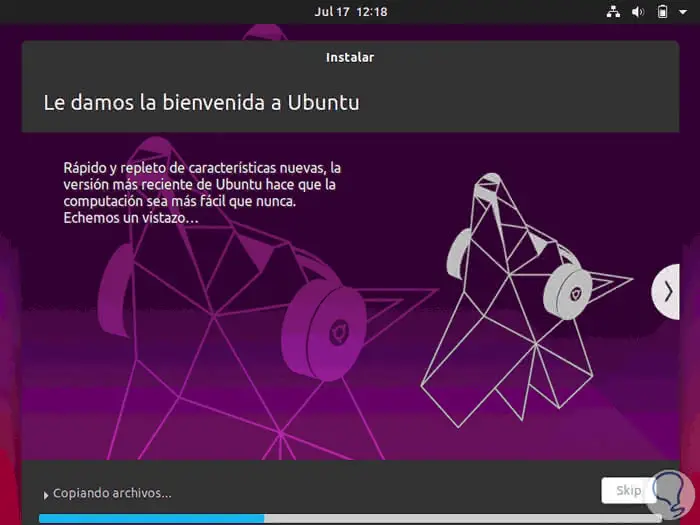
Step 11
When the process is finished it will be necessary to restart the computer:
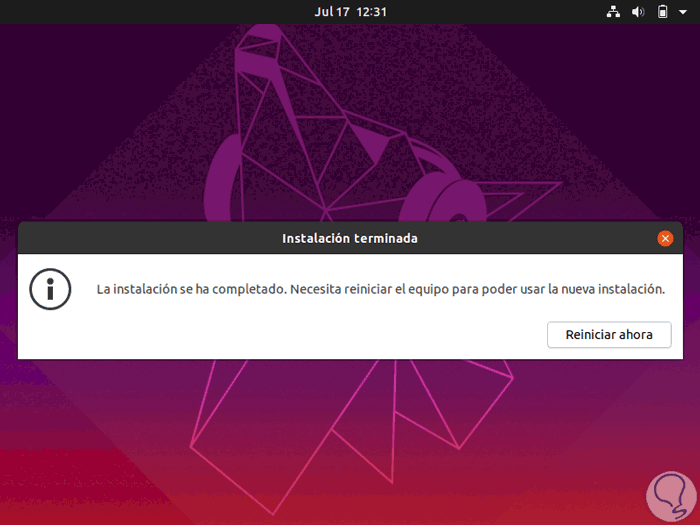
Step 12
We click on Restart now and when the services are loaded we will enter the configured username and password:
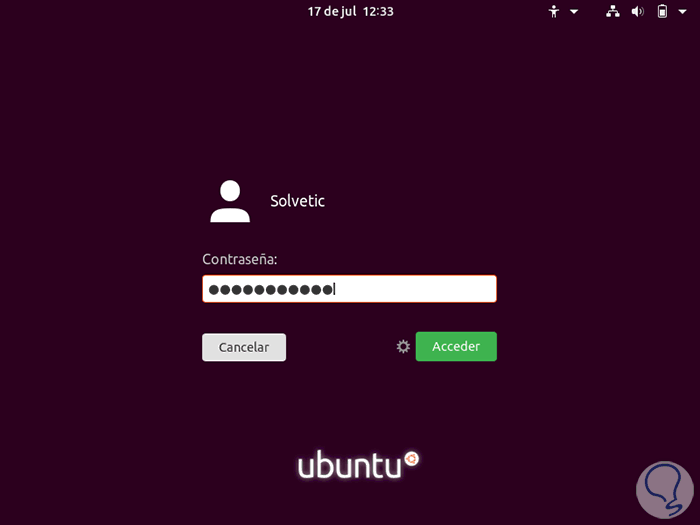
Step 13
When you log in we will see the following:
Step 14
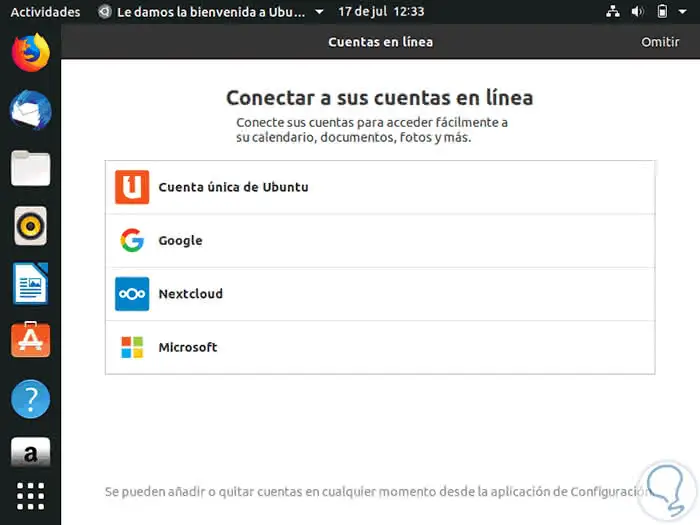
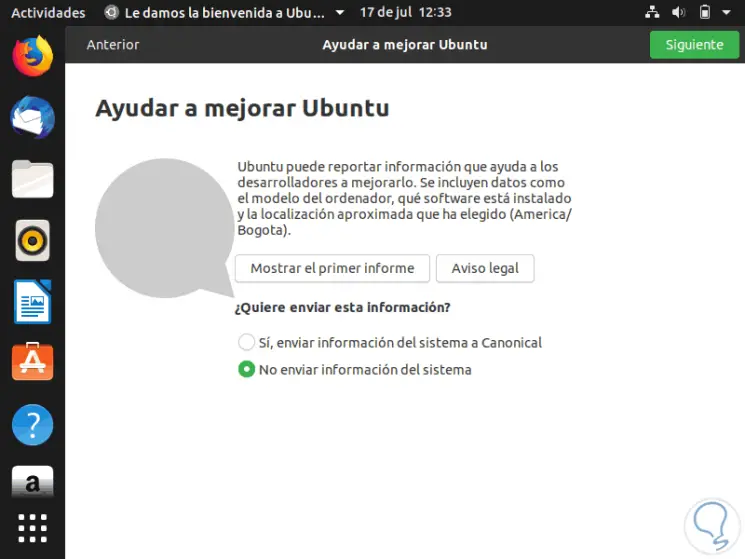
If we wish we can associate an account online and in the following window we can participate in the Ubuntu improvement program:
Step 15
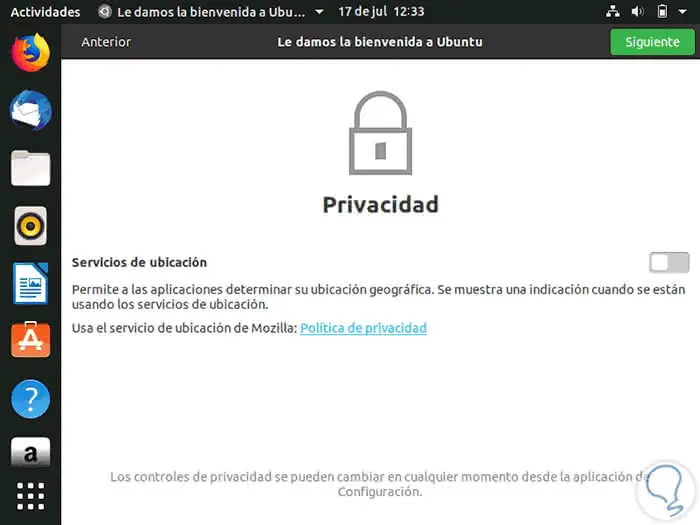
In the following window we configure privacy:
Step 16
Finally we will see this:
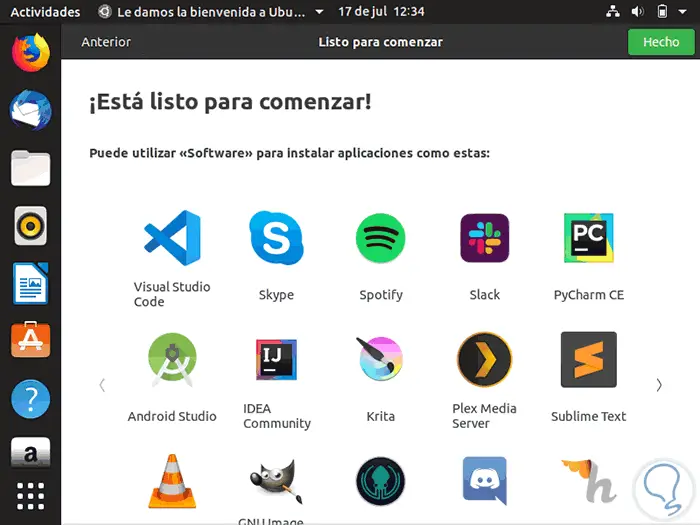
Step 17
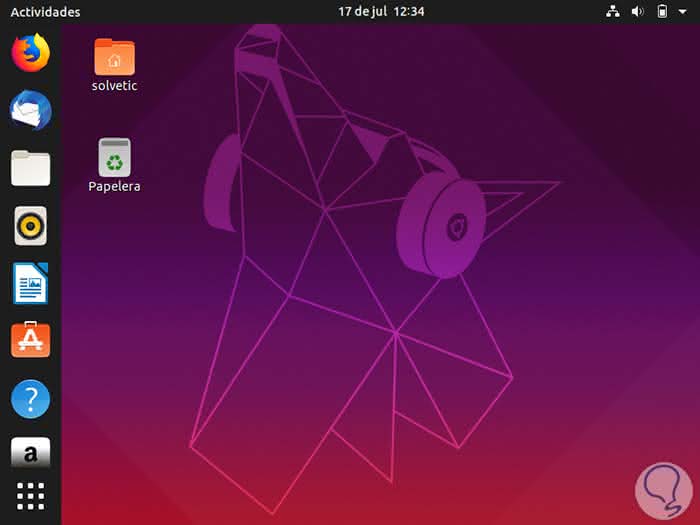
We click on the Done button and this will be the Ubuntu 19.10 environment:
Step 18
We can check the system from About:
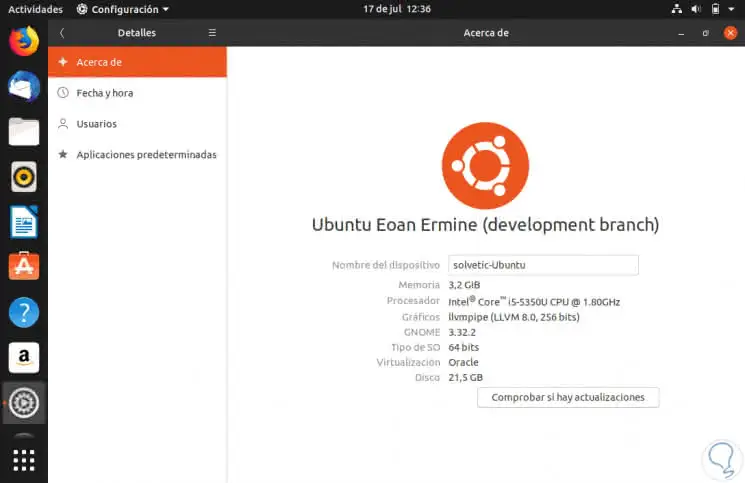
Step 19
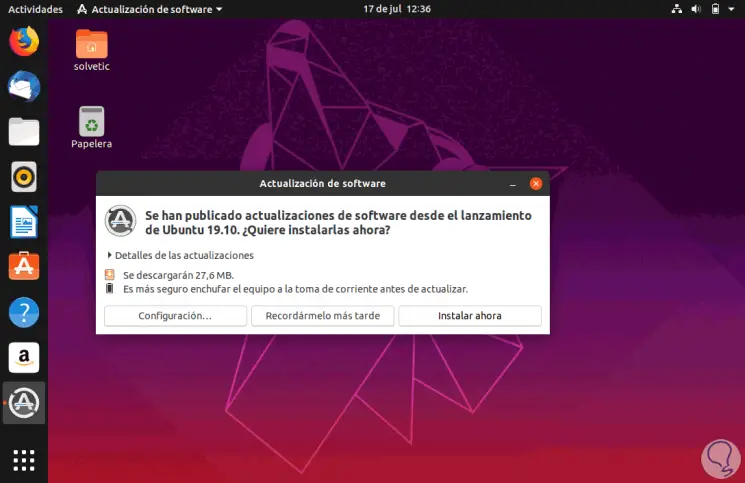
There we see that it is a trial version and we will automatically receive notifications about new available updates:
Ready!!!! You are ready to update or install Ubuntu 19.10 and learn more about this dynamic system thanks to TechnoWikis.