When we hear of a new update that is released by Microsoft we must be prepared to receive news, improvements and new features or features that help us to perform better within the operating system and its applications. Therefore, with the recent update of May (May Update) which was released recently we found a significant improvement in the Start menu (which we access every day) and is the option to directly search our files from there thanks to an improved Indexing system integrated in the Operating System..
First, with this new edition of Windows 10 we will notice in the taskbar that the search box and Cortana are on different sides (no longer together), the reason for this is that since May Update both Cortana and the Search Box They are becoming two features managed separately, this implies that the method and operation of searching for files, folders and the web presents some sensible improvements for the end user.
We must understand a little how the search works in Windows 10 . To start, when we go to the Start menu and perform the search, by default the Windows system will only apply the search in libraries (Documents, Images, Music and Videos) and on the desktop. Seen from this perspective, if you have a document in another location, such as D: \ TechnoWikis, the search will not cover that route resulting in the search not being complete..
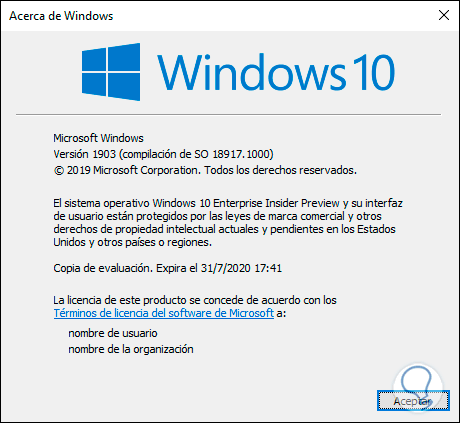
This new function is only available in Windows 10 May Update whose version is 1903, we can verify this by running the winver command:
Here you also have the video tutorial with all the steps to improve your file search in Windows 10.
To keep up, remember to subscribe to our YouTube channel! SUBSCRIBE
1. Search for files from the Start menu in Windows 10
Step 1
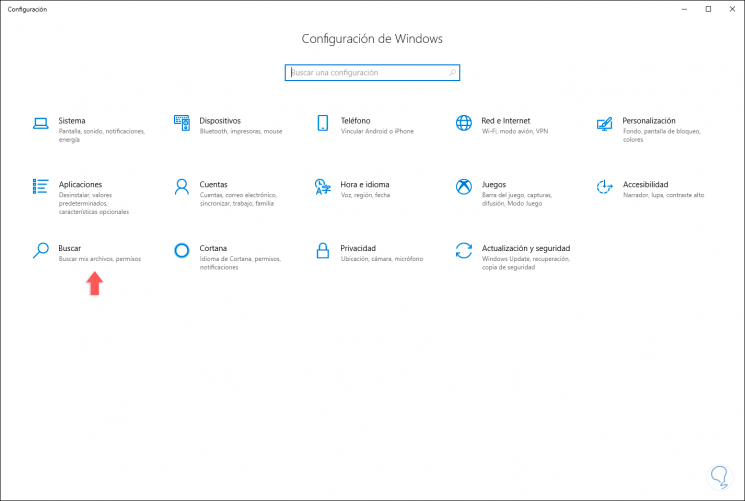
To carry out the search configuration process from the Start menu we must go to “Configuration†where we will see the following:
Step 2
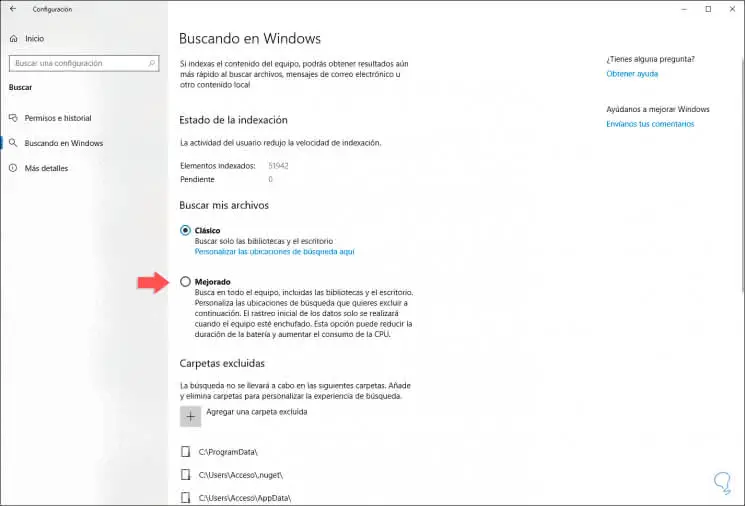
There we go to the Search category and in the new window we will see we go to the "Searching in Windows" section and there we will observe the following default value in the "Indexing Status" section:
Step 3
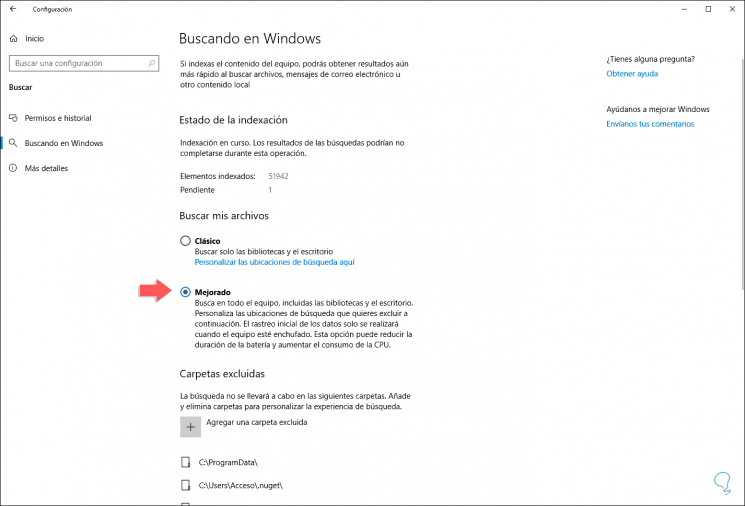
We see that the default value is "Classic" which only searches the libraries that we have mentioned and on the desktop, so that the search from Start is complete we must activate the "Improved" box which searches the entire team:
Step 4
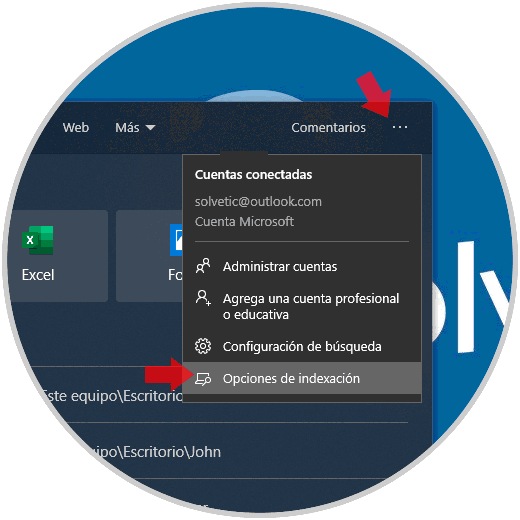
Another option to carry out this process is to click on the search box and then click on the upper right menu (three horizontal dots) and then select “Indexing optionsâ€. Then we activate the Enhanced box so that the search is complete in the whole team.
Step 5
From the displayed window it will be possible to manage and control the search indexer in Windows 10, this is a background process whose task is to create the list of files in which the search will be carried out in Windows 10. Thus, first instead, the operating system will go to that file to see if the term we are looking for is available there
This significantly improves the search worse, you should keep in mind that the search indexer will run continuously in the background which can directly affect the performance of the equipment and if we use a laptop the battery may be affected..
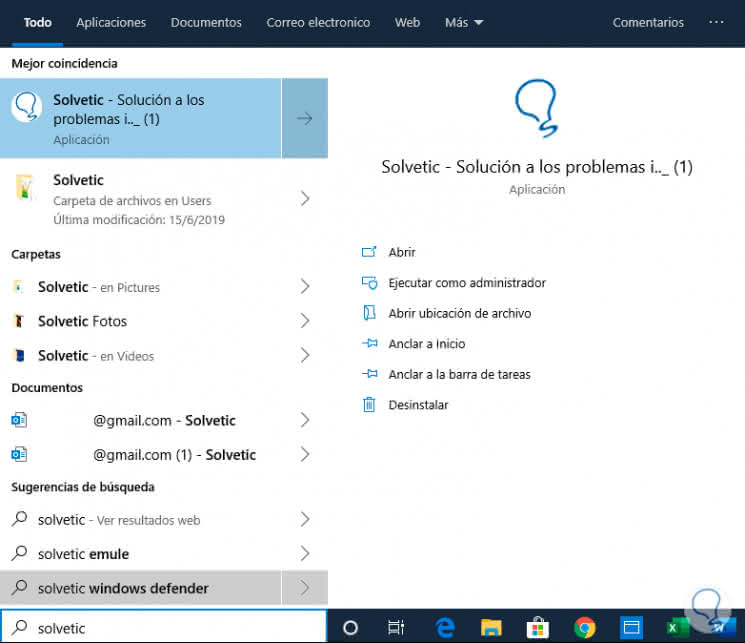
With the improved search mode the results will be much more complete and specific:
2. Search files with filters in Windows 10
As in TechnoWikis we like to explain the complete things and in detail, we are going to clarify some additional parameters of the search in Windows 10.
Step 1
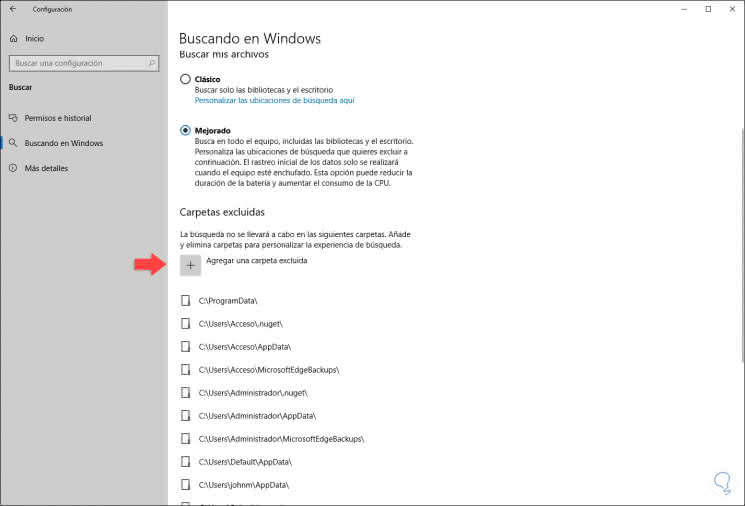
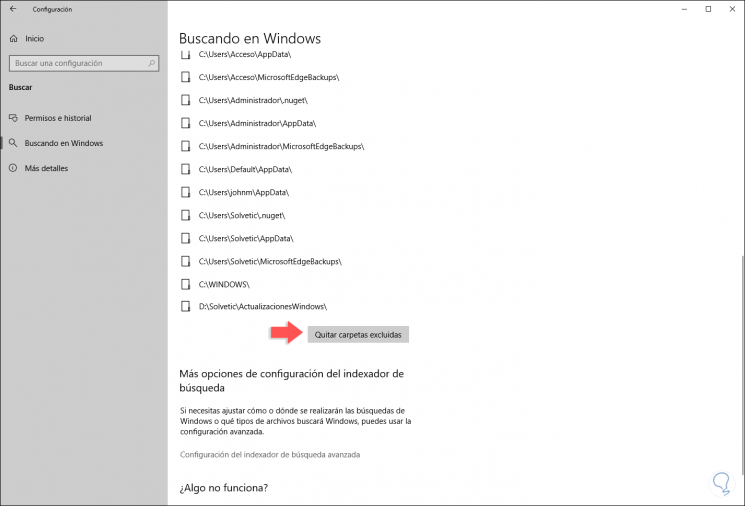
In the first place, since the improved mode analyzes all the equipment in search of the files, we can exclude specific folders where we know that the item to be searched for does not exist or will be available, for this we can go to the “Excluded folders†section and there give Click on the “Add an excluded folder†option:
Step 2
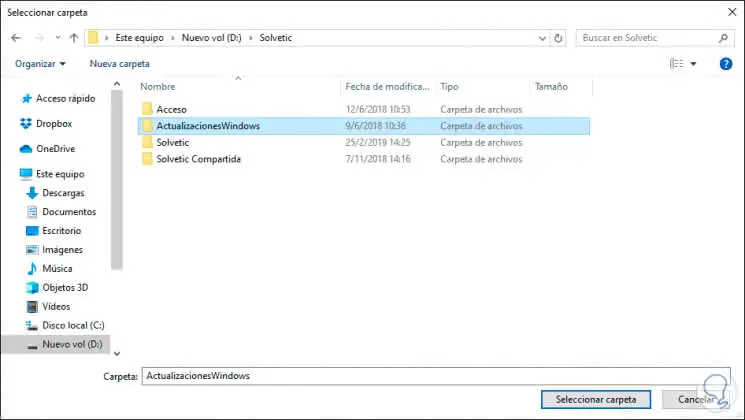
After this we simply select the desired folder and click on the "Select folder" button:
Note
By default Windows 10 already establishes a list of folders that will be excluded from the search.
Step 3
If at any time we want that folder to be integrated into the Windows 10 Start menu search, we must select it and click on the “Remove excluded folders†button:
3. Search files with restriction filters in Windows 10
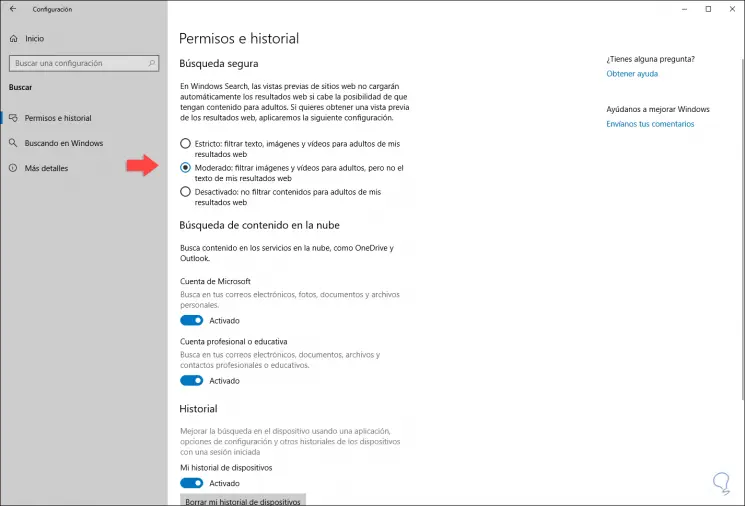
One of the most interesting variables in this new version of Windows 10 is the ability to filter the results based on a series of criteria in terms of content, through the section "Permissions and history" we find a category called "Safe search" which offers us three types of analysis.
At the bottom we are able to generate results even from our Microsoft account (Outlook or Hotmail) and associated corporate accounts.
Strict
This level restricts any result for adults.
Moderate
This level will filter both adult images and videos but not the associated web text.
disabled
It does not filter any results so that everything will be displayed.
4. Configure search indexing in Windows 10
Step 1
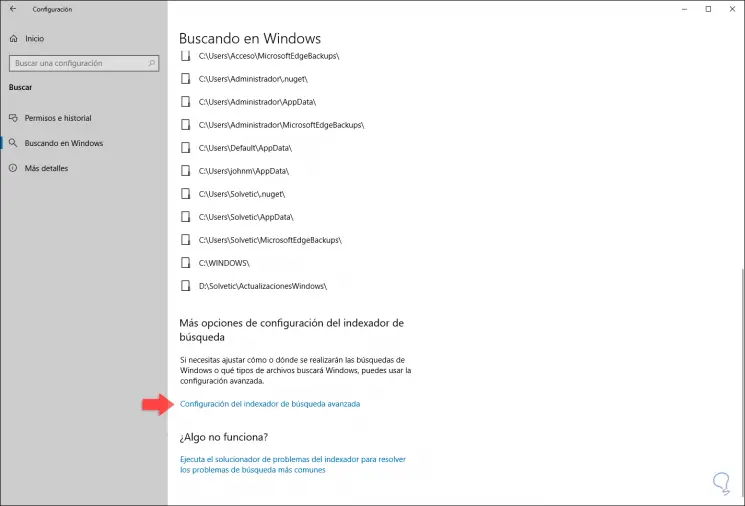
From the "Searching in Windows" section, at the bottom we will see the "Advanced search indexer settings" line:
Step 2
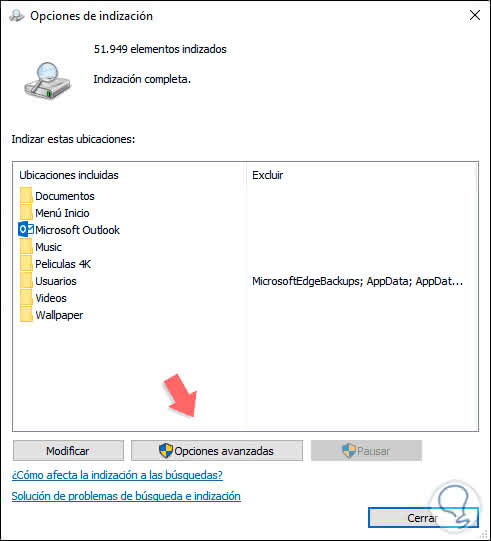
From there it will be possible to manage the different search variables where by default we will see the following. There we find the amount of items that have been indexed by Windows 10 as well as the locations from where they were taken.
Step 3
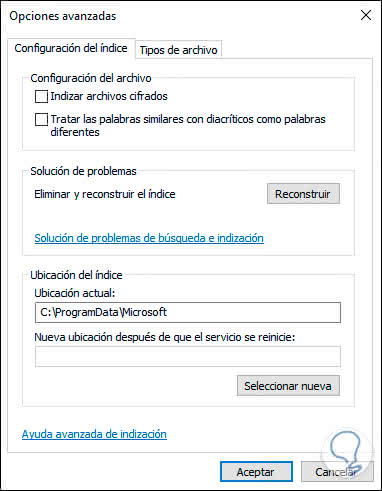
If we click on the "Advanced Options" button we will be able to perform actions such as:
- Use similar words or terms
- Rebuild the index if it fails
- Define the location on the index disk
Step 4
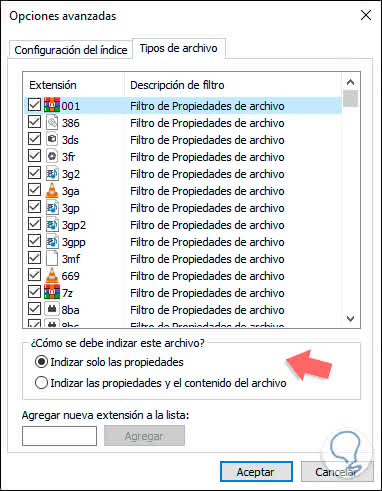
In the “File types†tab it will be possible to define the files by extension that will be integrated into the search.
Step 5
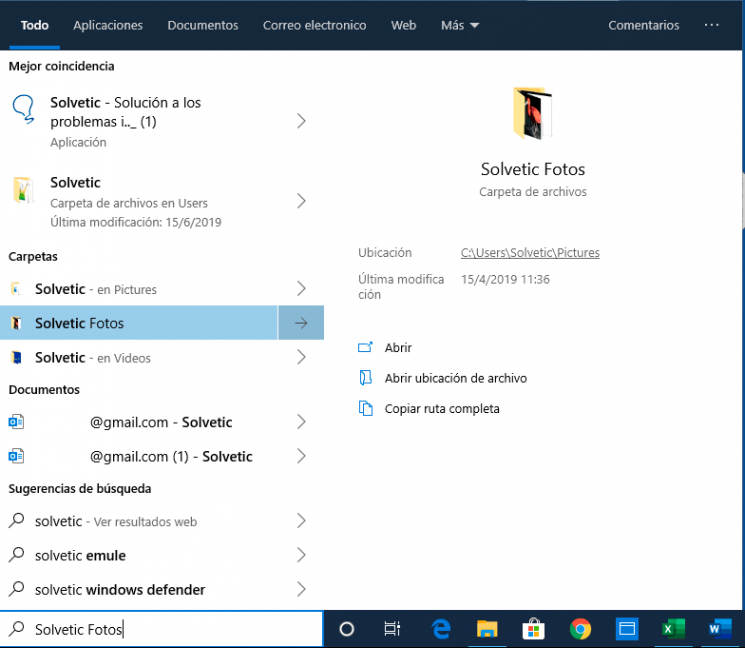
With the new search from the Start menu in Windows 10 we will access detailed results such as the location of the files, last access and more:
Step 6
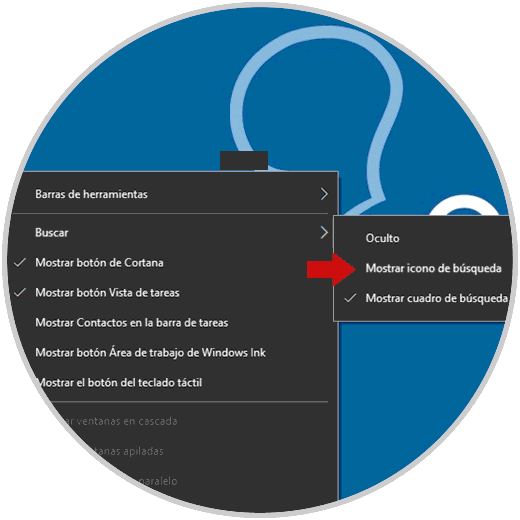
Finally, by right clicking on the search box, we go to the "Search" section and there we define the location of the box or if we want to hide it:
Thus, you can fully enjoy this new search feature in Windows 10.
There we find the amount of items that have been indexed by Windows 10 as well as the locations from where they were taken.