A high percentage of us like to listen to music, watch movies or access streaming platforms available on the network but sometimes we can find something special that we like and that is when we want to increase the volume at a certain moment that we like we detect , or we can hear, that the volume does not change and does not rise or rises very little not achieving the desired purpose. Then perhaps the question arises, why does this happen? This may be due to errors in the audio configuration or problems in the audio controller in your system ..
Below we show you different ways to correctly configure the volume in Windows 10 and solve different errors, in order to enjoy the expected sound.
To keep up, remember to subscribe to our YouTube channel! SUBSCRIBE
1. Troubleshoot volume icon disabled Windows 10
By default in Windows 10 the volume icon will always be visible in the taskbar at the far right, but if it is not visible we can activate it to have the power of the volume level at a click.
Step 1
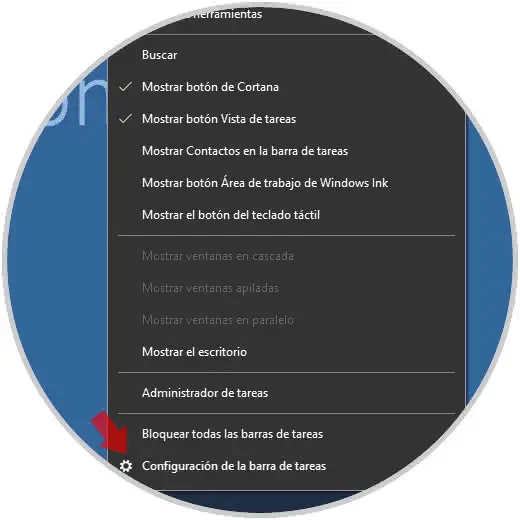
To perform this action we will right click on the taskbar and in the displayed list we select the option “Configuration of the taskbarâ€:
Step 2
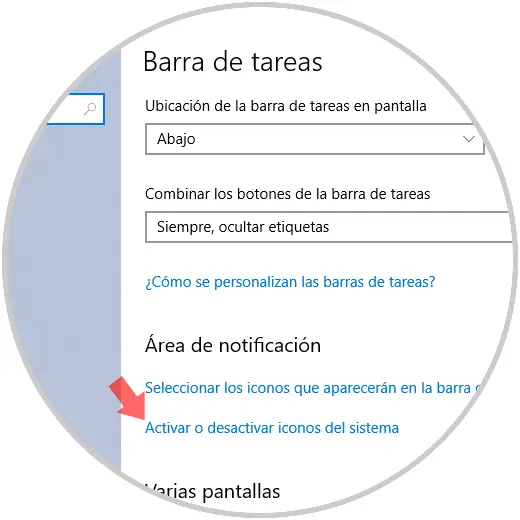
We will be redirected to the following window:
Step 3
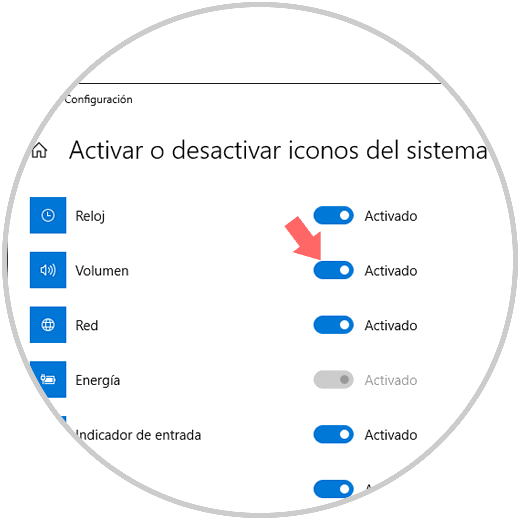
There we click on the “Activate or deactivate system icons†line and in the following window we must confirm that the Volume switch is in the Enabled option:
Step 4
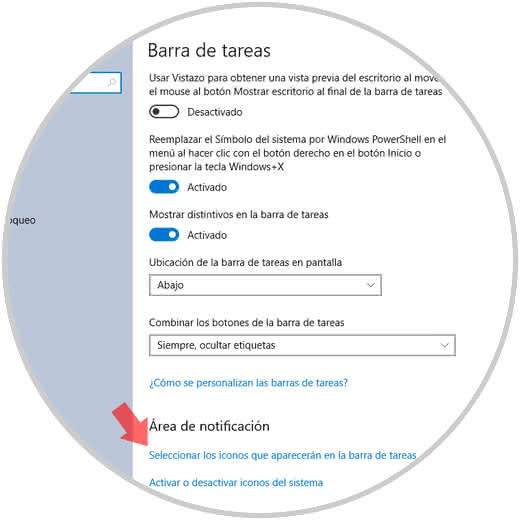
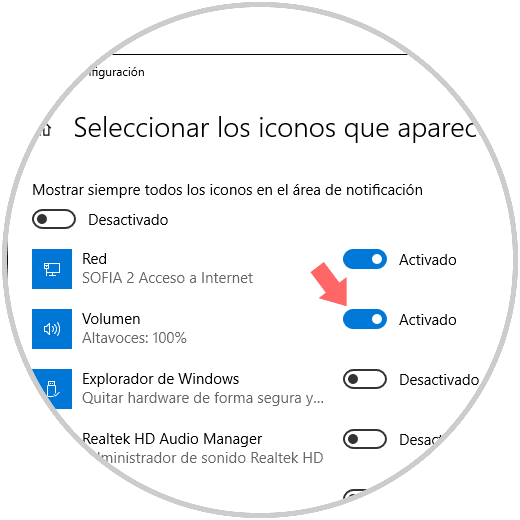
We go to the main menu and this time we click on the line “Select the icons that will appear on the taskbarâ€:
Step 5
By clicking there we must validate that the Volume option is active:
Step 6
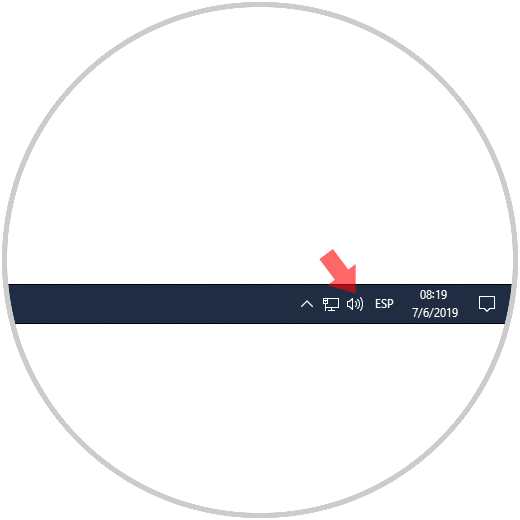
The objective of this method is to have the volume icon on the taskbar to manage the Windows 10 volume from there:
2. Configure Windows 10 sound from volume options
Windows 10 integrates some settings that allow us to set the audio levels as well as their sound parameters.
Step 1
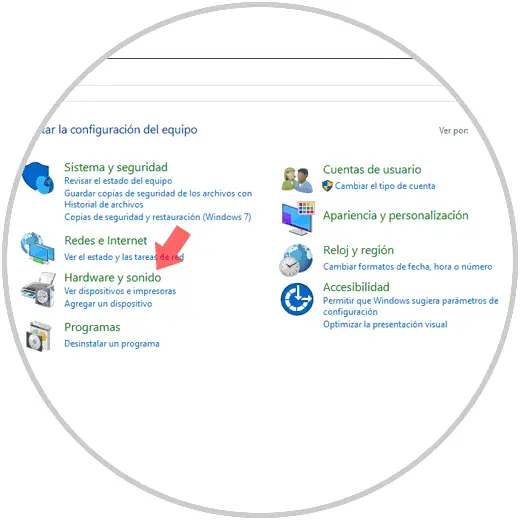
To use this method we access the Control Panel and there we find the Hardware and Sound option:
Step 2
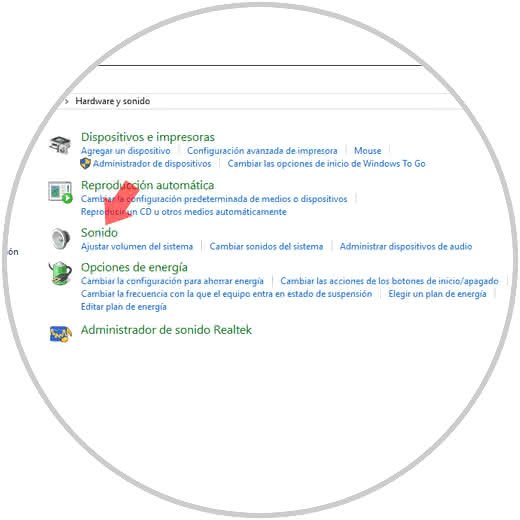
By clicking there we will see the following:
Step 3
We click on the Sound line and in the new pop-up window we go to the Communications tab and activate the “Do nothing†box:
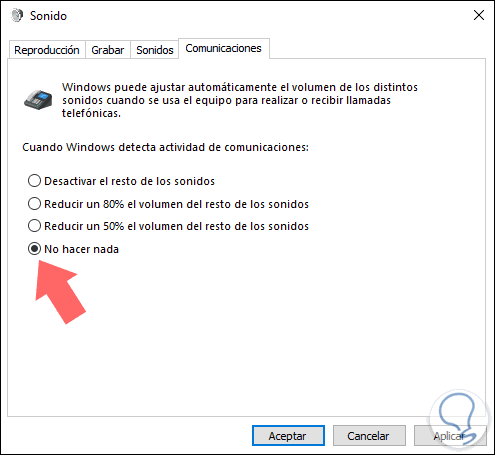
We can note that some of the options available there reduce the sound of the system.
Once we activate this box, click on the Apply button and then click on OK to confirm the changes..
3. Windows 10 sound settings
When we access a website to listen to music or watch movies, it is normal for this to integrate a function to manage the volume. For example, if you access YouTube you will have the volume bar at the bottom with a percentage between 0 and 100% for the volume level:

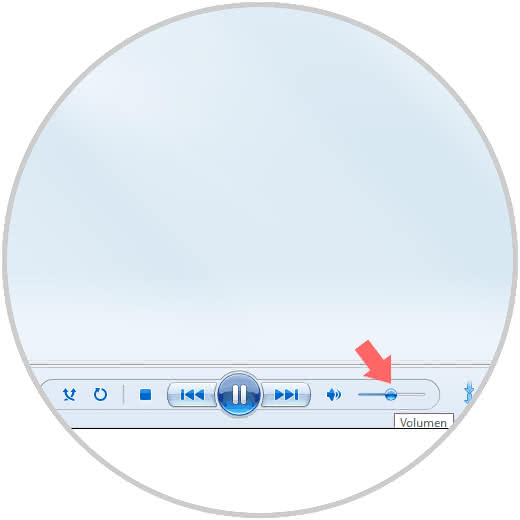
Similarly, when accessing audio or video applications we will have the option of volume management:
4. Check the individual sound levels Windows 10
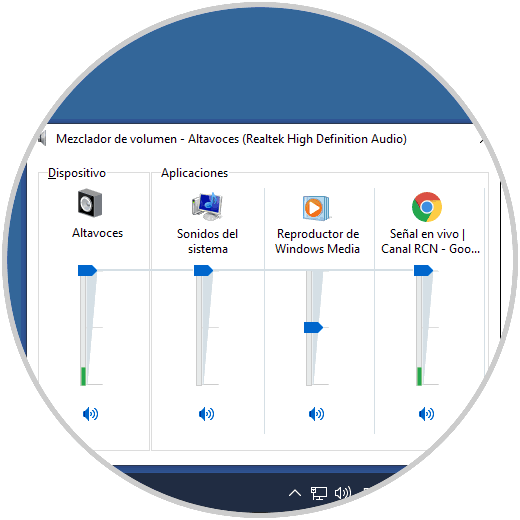
In Windows 10 we find an integrated function called “Volume Mixer†thanks to which each site or application that reproduces sound in the system is separated and we will be able to manage the volume individually. If your problem is a low volume, you can go to this option and check that the volume is correct.
Step 1
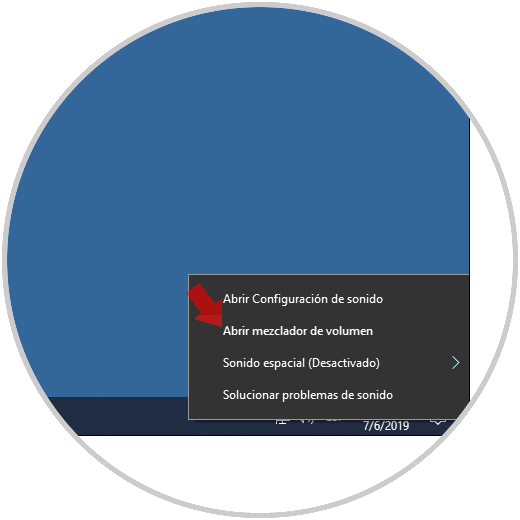
If we want to review this option, we will right click on the volume icon in the taskbar and there we select the option “Open volume mixerâ€:
Step 2
By clicking there, we will notice that it is possible to individually manage the real-time volume of each application or site:
5. How to use the enhanced audio function Windows 10
The improved audio allows you to optimize the audio levels of the system based on the capabilities of the connected controller as well as the Windows 10 functions.
Step 1
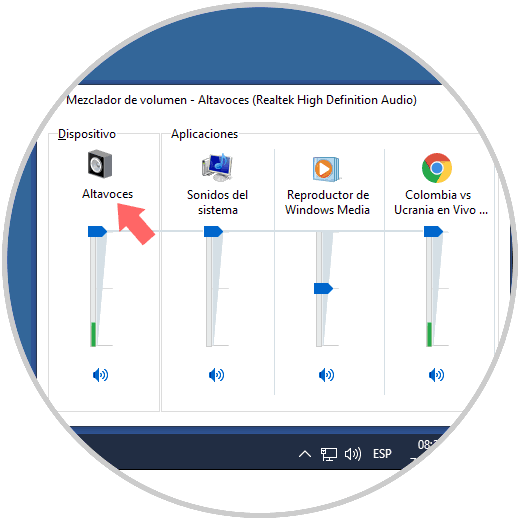
To use this option, we access the volume mixer again and in the options displayed we will see this:
Step 2
There we click on the device we want to edit, in this case we select Speakers, and the following window will be displayed where we will go to the Improvements tab and there we activate the “Sound equalization†box. Click on Apply and Accept to save the changes.
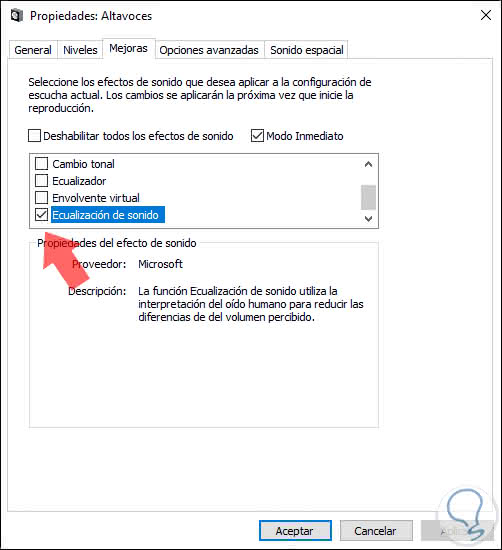
This option is responsible for leveling the audio and making the most of the available volume.
6. How to Activate the Windows 10 Sound Environment function
Normally the system and sites have a limit of 100% volume level. However, it is possible to increase these levels by more than 300 without the need for powerful consoles or power mixer.
Step 1
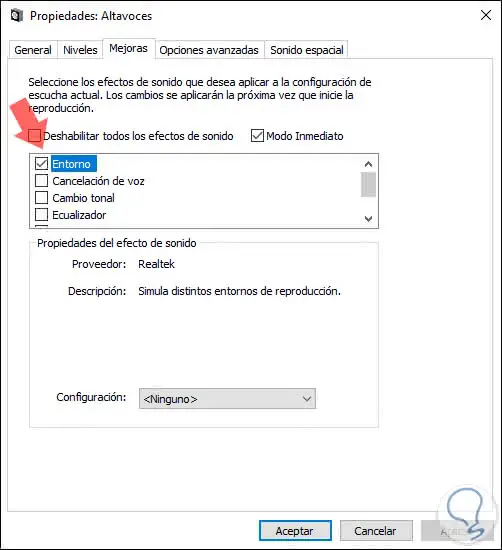
To use this option we must access the sound properties again by right clicking on the volume icon and selecting Open volume mixer, then we click on the selected device and in the window we will go to the Improvements tab and there we activate the box Environment:
Step 2
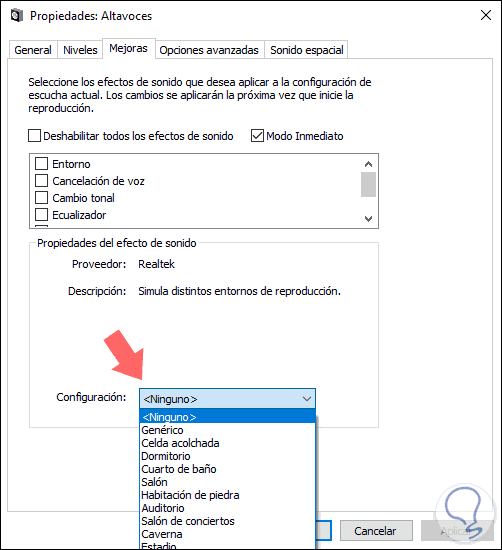
If we want to test different environments, since this function allows us to simulate environments, we can display the options in the Configuration field and there validate some of the available options:
7. How to add VLC to Windows 10 to increase volume
VLC is one of the most used media players for its various functions and features, some of them are:
VLC main features
- It has hardware decoding on most available platforms.
- At the audio level it is compatible with formats such as MPEG Layer 1/2, MP3 - MPEG Layer 3, AAC - MPEG-4 part3, Vorbis, AC3 - A / 52, E-AC-3, MLP / TrueHD> 3, DTS, WMA 1/2, WMA 3, FLAC, ALAC, Speex, Musepack / MPC, ATRAC 3, Wavpack, Mod, TrueAudio, APE, Real Audio, Alaw / µlaw, AMR (3GPP), MIDI, LPCM, ADPCM, QCELP, DV Audio, QDM2 / QDMC, MACE.
- If we use video it will be compatible with formats such as MPEG-1/2, DivX® (1/2/3/4/5/6), MPEG-4 ASP, XviD, 3ivX D4, H.261, H.263 / H. 263i, H.264 / MPEG-4 AVC, Cinepak, Theora, Dirac / VC-2, MJPEG (A / B), WMV 1/2, WMV 3 / WMV-9 / VC-1, Sorenson 1/3, DV , On2 VP3 / VP5 / VP6, Indeo Video v3 (IV32), Real Video (1/2/3/4).
If you want to download VLC you can visit the following link:
VLC
Step 1
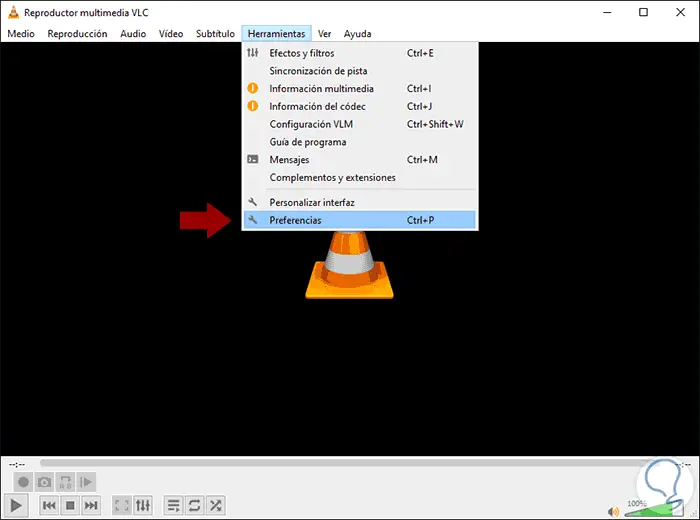
Now, to link VLC with Windows 10, we access the application and we will do it because VLC allows us to increase the volume level of the system by up to 300%, once we open VLC we go to the Tools menu and there we select Preferences, we can also use the Ctrl + P keys:
Step 2
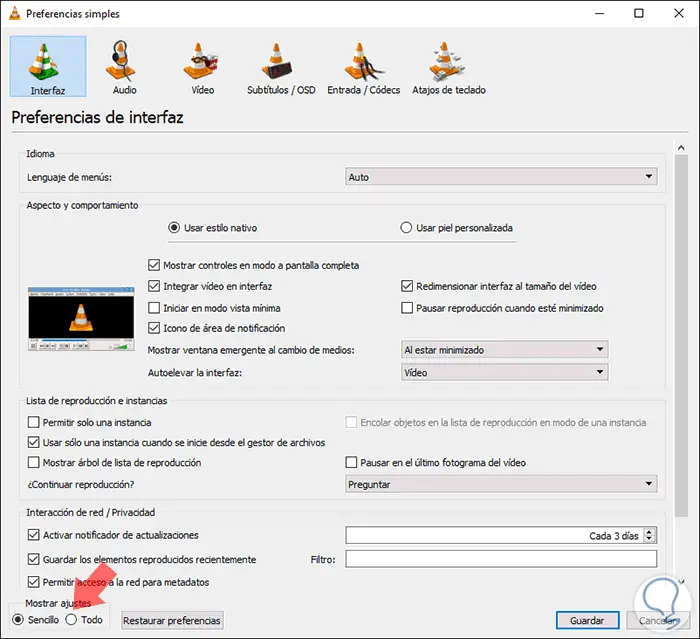
In the new window displayed, we will go to the bottom, section Show settings, where we will see this:
Step 3
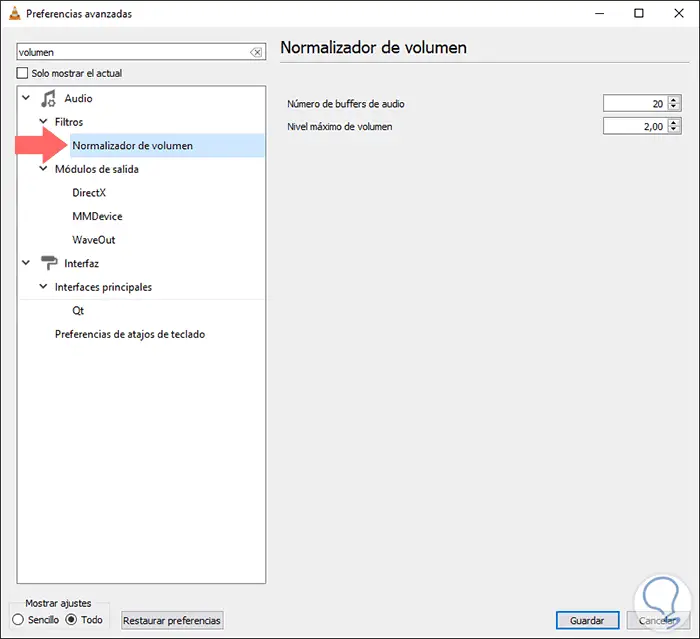
There we activate the All box and in the upper search field we enter the term Volume and select the Volume Normalizer line:
Step 4
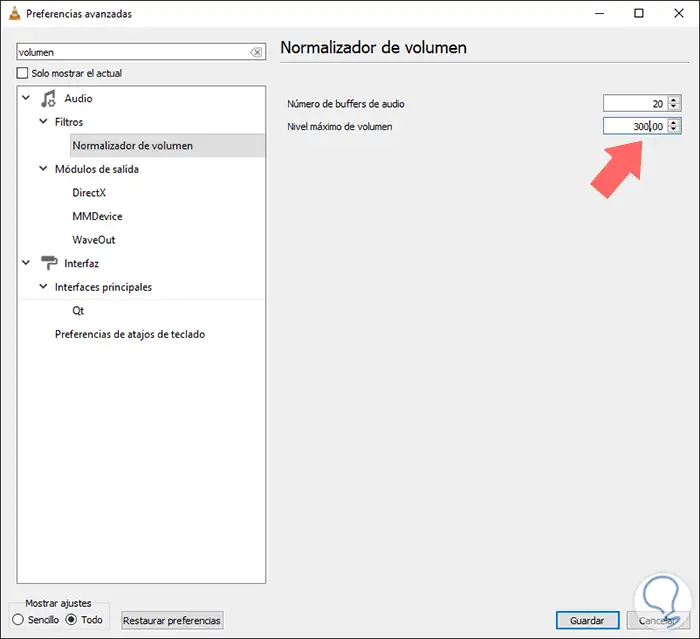
Now, in the "Maximum volume level" field, enter the value 300. Click on Save to apply the changes.
8. Add the Volume Booster extension in Google Chrome and increase Windows 10 volume
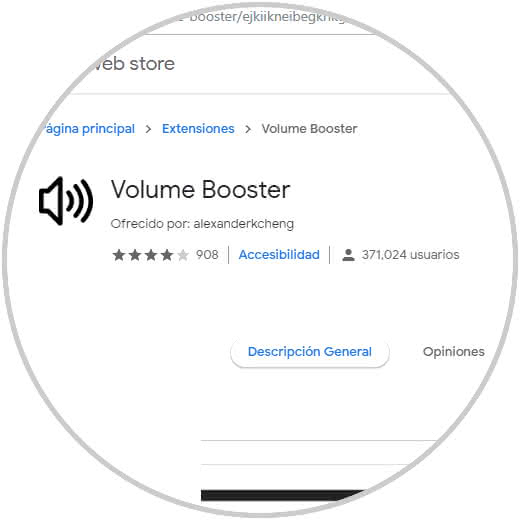
Google Chrome is one of the most used browsers today and the use of extensions will make it much more dynamic and extend its functionality. For this reason we have an extension called Volume Booster which is available at the following link:
Volume Booster
Step 1
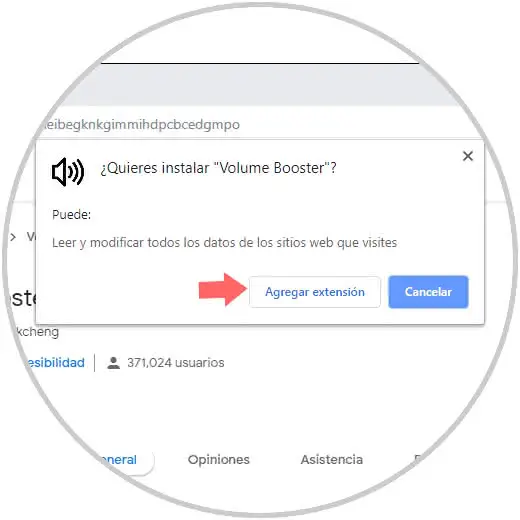
This extension can increase the sound level of Google Chrome up to 4 times, from where we access various audio applications, to install it we click on the Add to Chrome button and the following window will be displayed:
Step 2
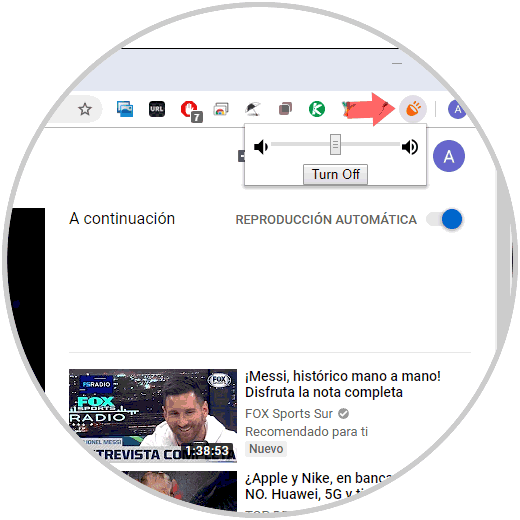
We click on Add extension to complete the process, now, when we access a place where sound is played, just click on the installed extension and move the slider to the desired point:
Some of the options that we have taught you will give you the guidelines to allow the volume in Windows 10 to be the one desired by each of us..