With the new launch announced by Apple at WWDC 2019 it was without a doubt the new operating system called macOS Catalina which has its version 10.15 and that being the successor of macOS Mojave must have several new functions or improvement of existing ones Well, some of the novelties of this new system are:
News macOS Catalina
- Use of the Sidecar function which will allow our iPad to act as a second monitor.
- Integration of Days, Months and Years in the Photos application.
- Use of Apple Music, Apple Podcasts and Apple TV applications (used in iOS) instead of the traditional iTunes.
- Combination of Voice Control with Siri commands for greater interaction.
- Time on screen is integrated as a new function with which it will be possible to manage our time in macOS Catalina.
- Option to block the device remotely.
- Gatekeeper security improvements at the app check level.
Devices for macOS Catalina
macOS Catalina requires the use of some special equipment such as:
- MacBook from 2015 onwards
- MacBook Air from 2012 onwards
- iMac Pro from 2017 onwards
- MacBook Pro from 2012 onwards
- Mac Pro from 2013 onwards
- Mac mini from 2012 onwards
You should not worry if you do not have any of these devices, we know how expensive they can be and instead TechnoWikis offers you the possibility to install and test macOS Catalina in a virtual environment that guarantees reliability, security, little use of resources and better integration with the physical equipment..
At the level of virtualization we can not ignore one of the best applications such as VirtualBox and has a large number of functions and features that will make the user experience something really new and functional.
TechnoWikis will explain step by step how you can virtualize macOS Catalina in VirtualBox and take a look at this new Apple system..
1. Download macOS Beta Catalina
Step 1
To correctly use the macOS Catalina installation process in VirtualBox we must register in the Apple developer program at the following link:
Download macOS Catalina
Step 2
There we find the beta version of macOS Catalina available for download which is like a virtual hard disk considering that we have two versions of the macOS Catalina image, an HFS version and an APFS version. It is important to clarify that VirtualBox only has support for an HFS partition and no APFS image is supported.
Once the image has been downloaded, we proceed to extract said image:
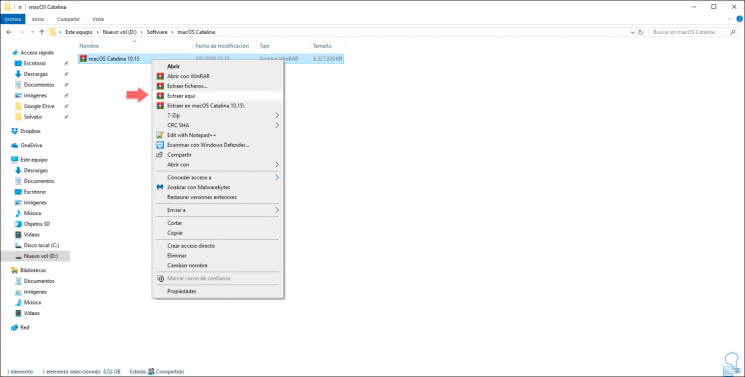
Step 3
One of the novelties of macOS Catalina will only support USB 3.0 so that for its correct operation in VirtualBox we must install the Extension Pack which with a set of utilities that allow VirtualBox to be more compatible with the multiple functions of macOS, this Extension Pack can be downloaded in the following link:
Extension Pack
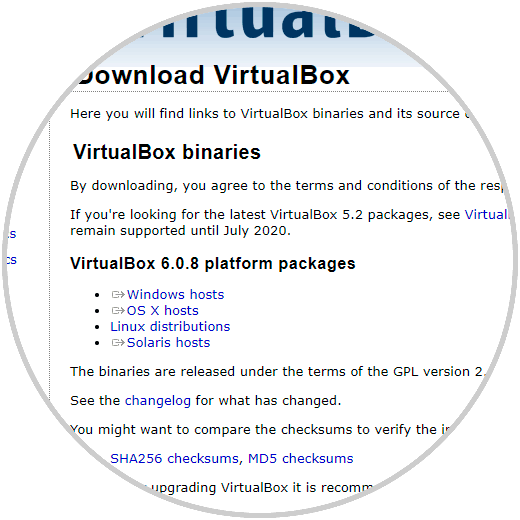
Step 4
There we click on the “All supported platforms†line to start downloading the package:

Step 5
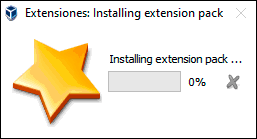
We save the executable and at the time of its execution we will see the following:
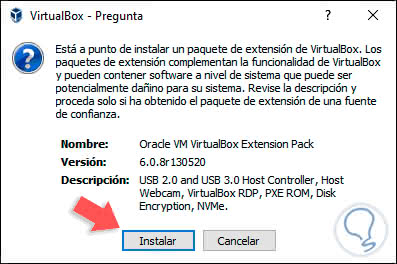
Step 6
We click on Install and then we must accept the license terms:
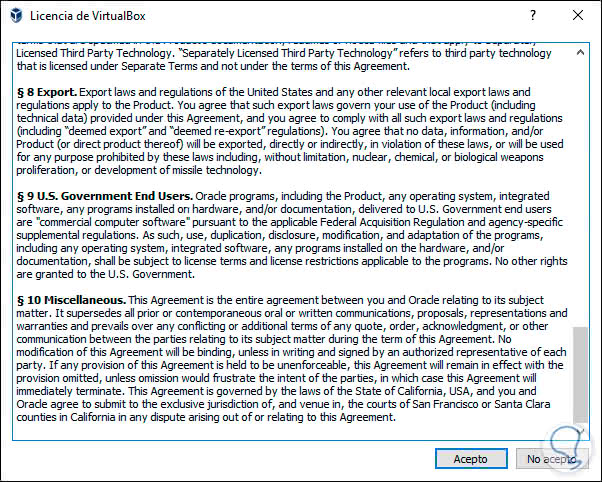
Step 7
Click on Accept to proceed with the installation of the Extension Pack in VirtualBox:
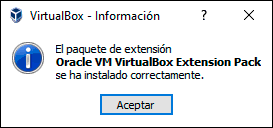
Step 8
Once this process is finished we will see the following. Click OK to exit the wizard and after this we will see how to create the macOS Catalina virtual machine in VirtualBox.
2. Create the virtual machine in VirtualBox for macOS Catalina in Windows 10
Step 1
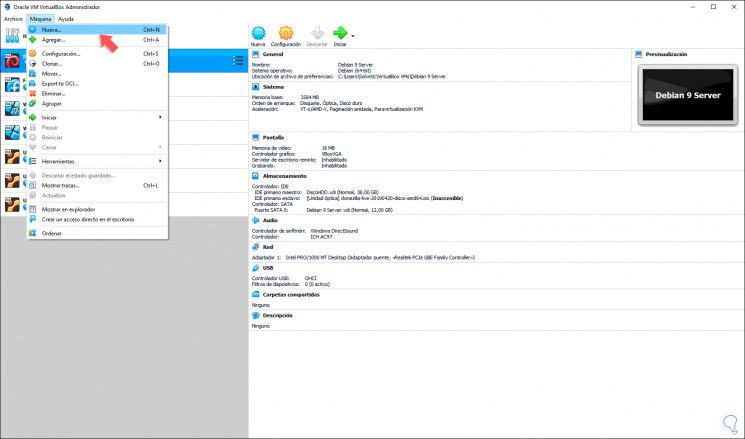
Once the Extension Pack is installed, we open VirtualBox and proceed to create our machine using one of the following ways:
- From the Machine / New menu
- By clicking on the New button
Step 2
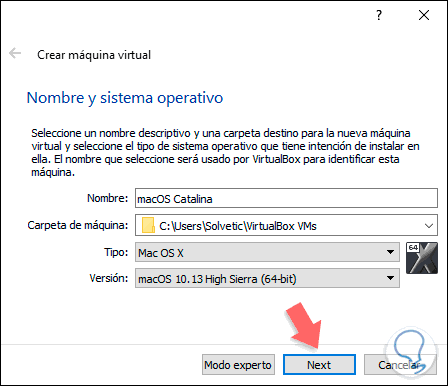
The following wizard will be displayed where we define the following:
- Location where it will be stored
- In the Type field we select Mac OS X
- In the Version field we select macOS 10.13 High Sierra (64-bit)
Step 3
We click Next and in the next window we define the RAM memory to use for the virtual machine:
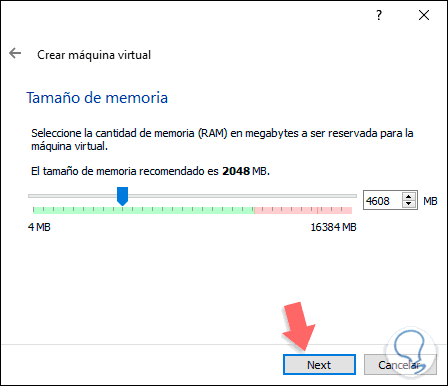
Step 4
In the next window we will select the macOS Catalina virtual hard disk that we have downloaded. To do this, we activate the “Use an existing virtual hard disk file†box, click on Browse and select the disk:
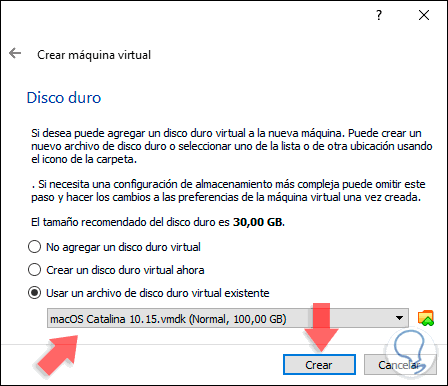
Step 5
Click on the "Create" button to configure the creation of our macOS Catalina virtual machine:
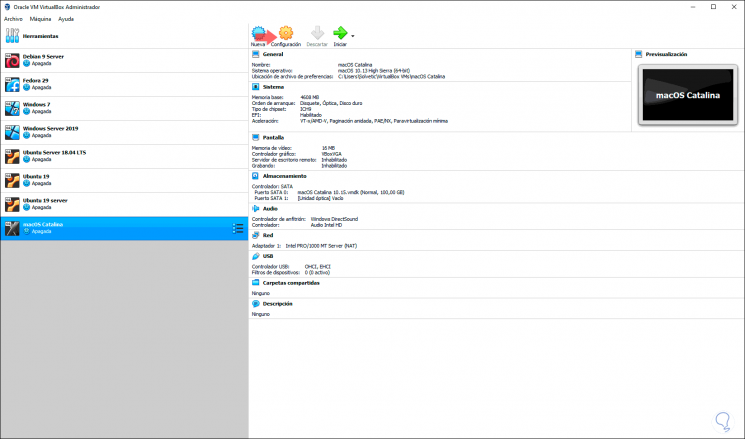
3. Configure the virtual machine in VirtualBox from macOS Catalina in Windows 10
Step 1
The next step will be to configure our virtual machine, for this we click on the “Configuration†button and there we define the following. In the System section we allocate at least 4 GB of RAM:
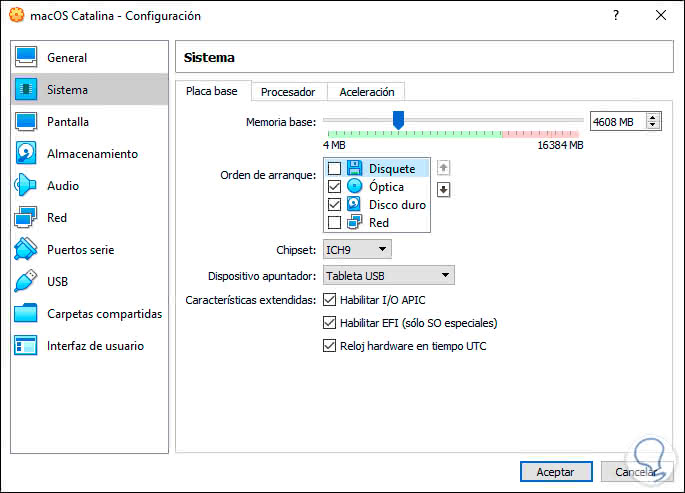
Note
It is important to uncheck the Diskette box.
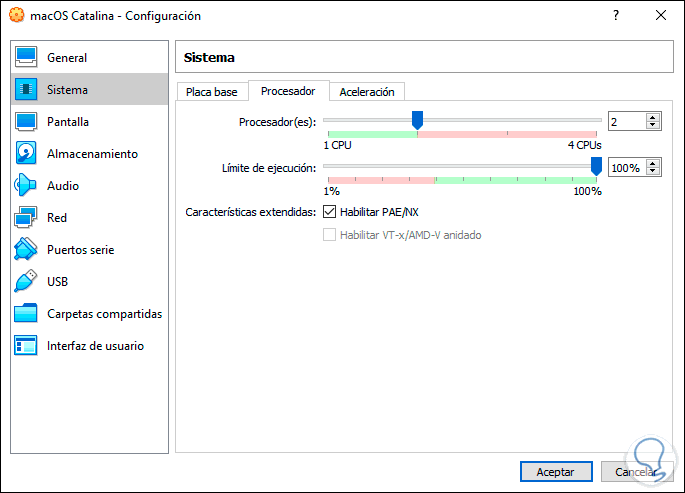
Step 2
Right there, in the “Processor†tab, we assign as much as possible two processors:
Step 3
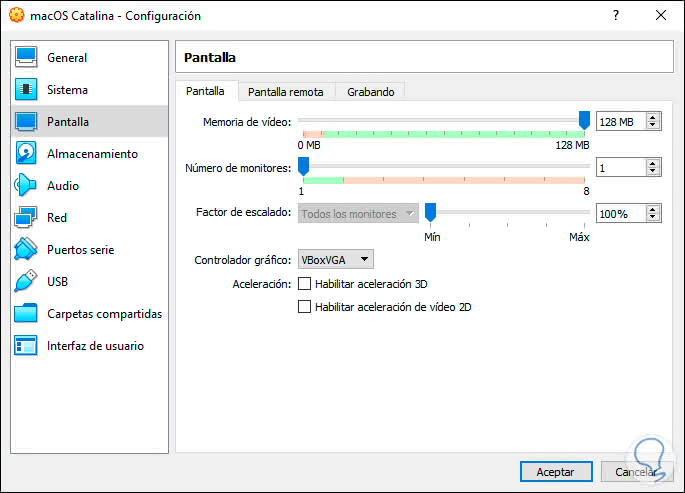
In the “Screen†section we assign the maximum available video memory:
Step 4
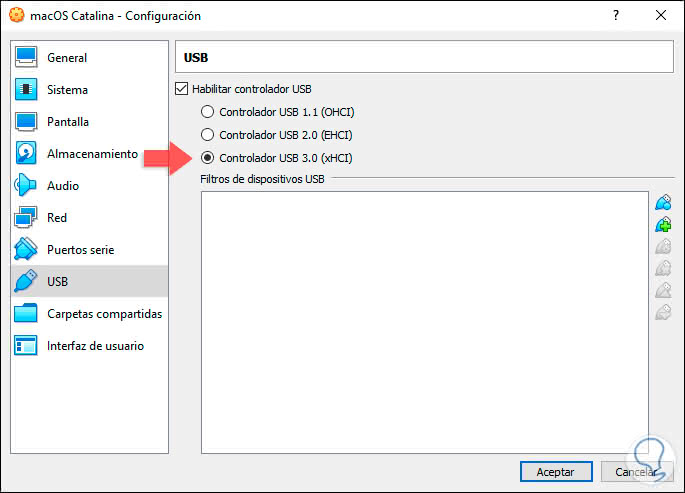
Finally we go to the USB section and activate the “USB 3.0 Controller†box:
Step 5
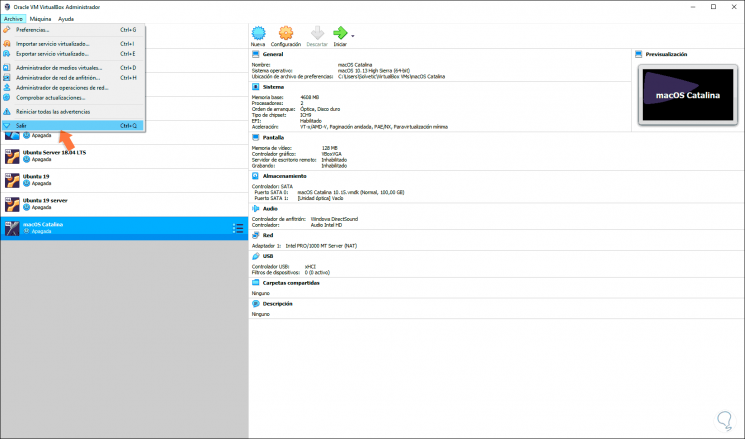
Click OK to save the changes and exit VirtualBox from the File / Exit menu or using the following keys:
+ Q Ctrl + Q
4. Configure VirtualBox from macOS Catalina in Windows 10
The next step we must take is to adjust a code in the VirtualBox configuration so that the virtual machine can be executed correctly.
Step 1
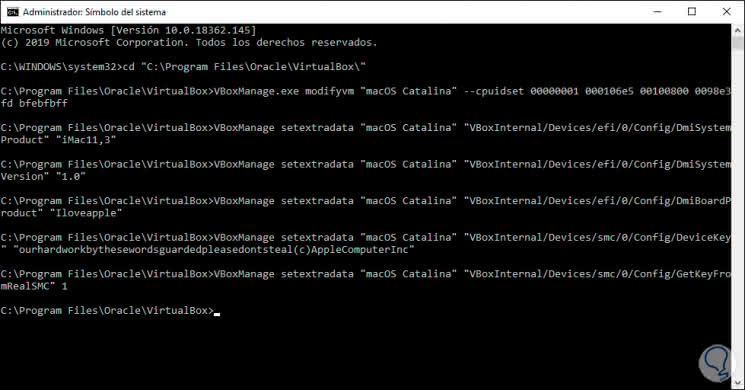
For this we access the command prompt as administrators and there we will execute the following line:
cd "C: \ Program Files \ Oracle \ VirtualBox \"
Step 2
When accessing the VirtualBox directory we will execute each of the following lines in their order:
VBoxManage.exe modifyvm "macOS Catalina" --cpuidset 00000001 000106e5 00100800 0098e3fd bfebfbff VBoxManage setextradata "macOS Catalina" "VBoxInternal / Devices / efi / 0 / Config / DmiSystemProduct" "iMac11,3" VBoxManage setextradata "macOS Catalina" "VBoxInternal / Devices / efi / 0 / Config / DmiSystemVersion" "1.0" VBoxManage setextradata "macOS Catalina" "VBoxInternal / Devices / efi / 0 / Config / DmiBoardProduct" "Iloveapple" VBoxManage setextradata "macOS Catalina" "VBoxInternal / Devices / smc / 0 / Config / DeviceKey" "ourhardworkbythesewordsguardedpleasedontsteal (c) AppleComputerInc" VBoxManage setextradata "macOS Catalina" "VBoxInternal / Devices / smc / 0 / Config / GetKeyFromRealSMC" 1
Note
There we must replace “macOS Catalina†with the name we have assigned to the virtual machine:
5. Run VirtualBox from macOS Catalina on Windows 10
Step 1
Once this is configured, we are going to run the virtual machine by accessing VirtualBox again and there by clicking on the Start line and we can see that the process of creating the macOS Catalina virtual machine in VirtualBox starts:
Step 2
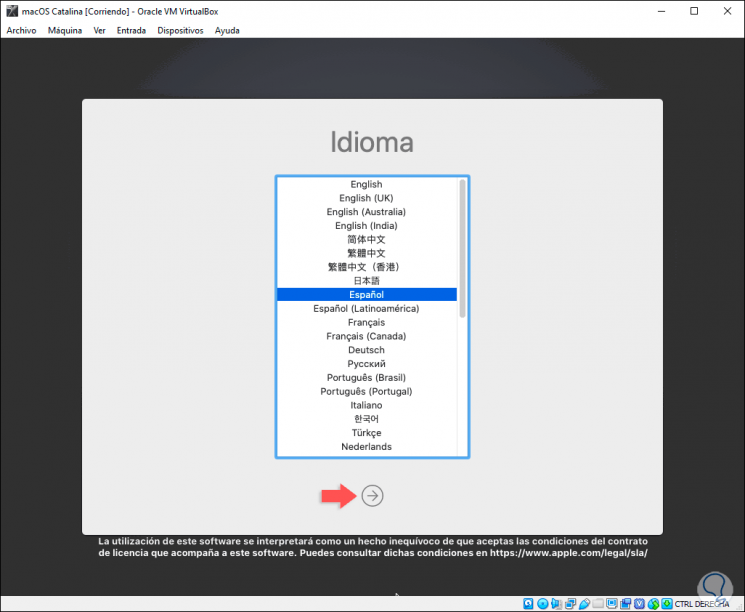
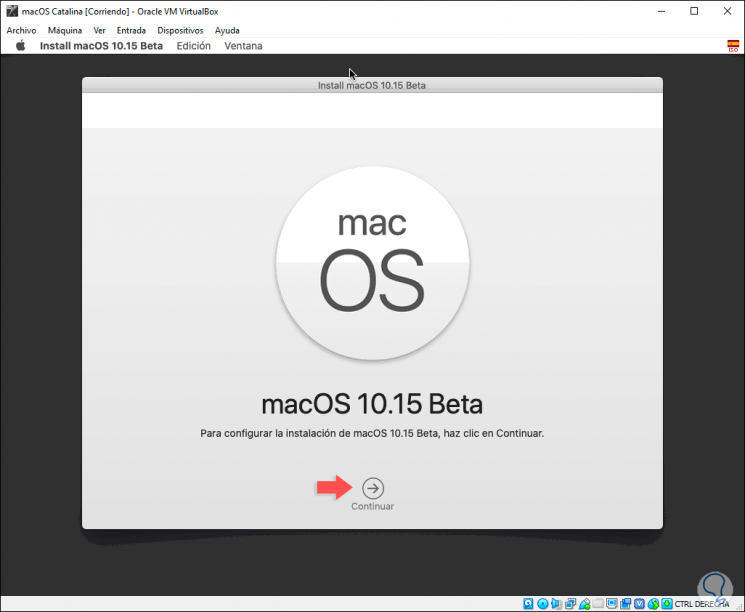
After this we continue with the process of disk selection and account settings and more:
Step 3
We can make use of this great system launched by Apple for initial use:
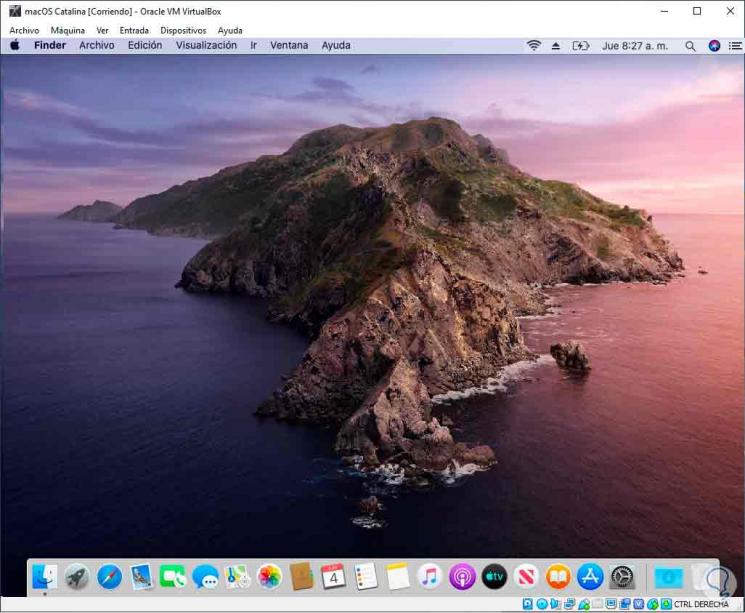
We see that thanks to virtualization we are able to test new operating systems even when our hardware is not compatible with it..