Every day we are creating new files in our teams for personal, work, educational, etc., and each one of them can be of a different type (music, text, images) so it is ideal to maintain an order of them to avoid any kind of confusion..
It is natural and very normal that in some situations we can create a duplicate of a file either for backup purposes or simply because we create two similar files for editing or documentation purposes . However, this can lead to various errors such as editing the wrong file, omitting key details in the file as well as the use of disk space that can be useful for other types of activities.
When we use a computer with macOS we can find duplicate files manually through the Finder or using a third-party app. Then TechnoWikis will explain both methods and you can define which method to use so that the search for duplicate files does not become an impossible mission..
1. How to remove duplicate Mac files using Finder
The Finder is the place where by default we can find all the files that are hosted on the computer and therefore it is the most recommended method by TechnoWikis since it prevents the installation of additional software. To use this method we must create a smart folder which allows it to have special properties for the work and administration of the files stored there.
Step 1
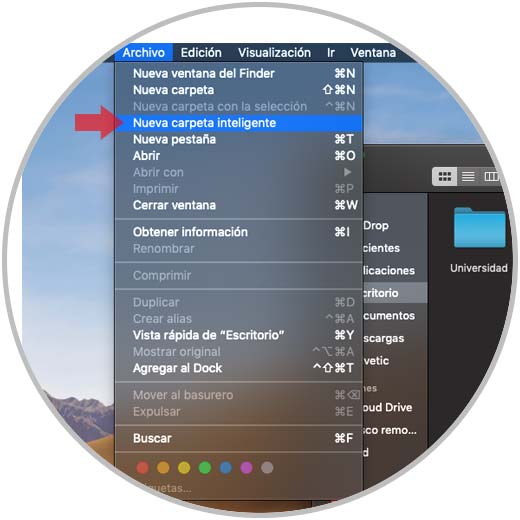
We access the Finder in macOS and select the desired location where the smart folder will be created, in this case on the desktop, and go to the File menu and select the New smart folder option:
Step 2
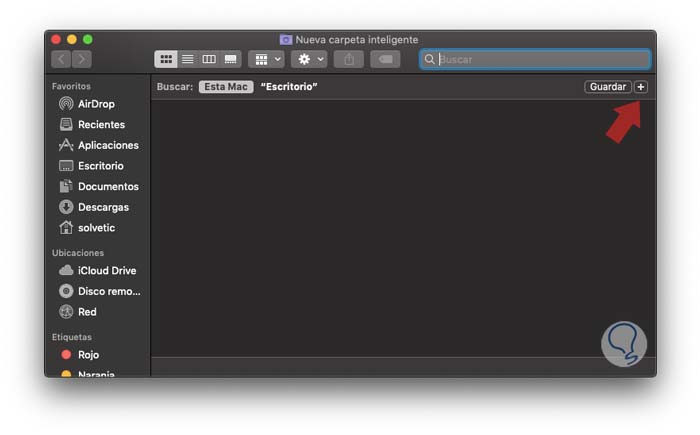
The following window will be displayed:
Step 3
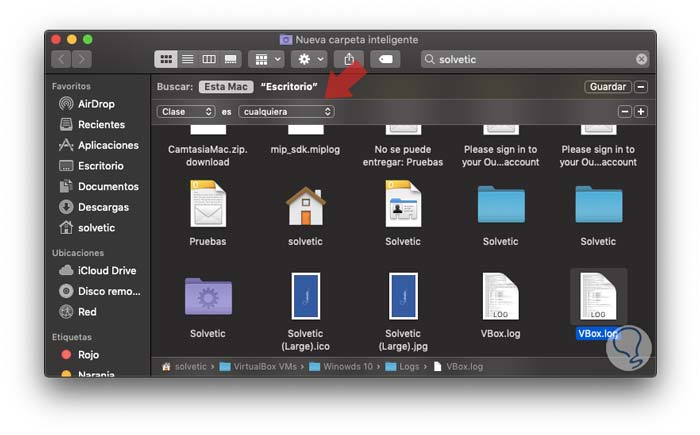
As we can see, in the upper left we find the location where the smart folder will be created. Now we click on the + sign located on the far right, and in the new options displayed we will have various parameters for searching our files.
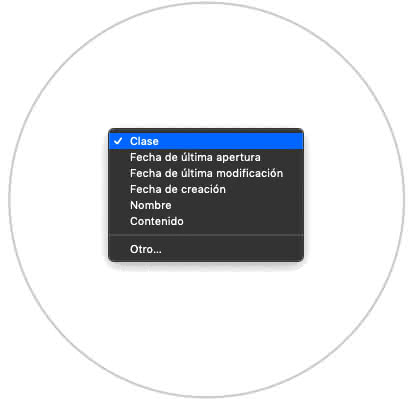
Class
In the Class field we can choose variables such as:
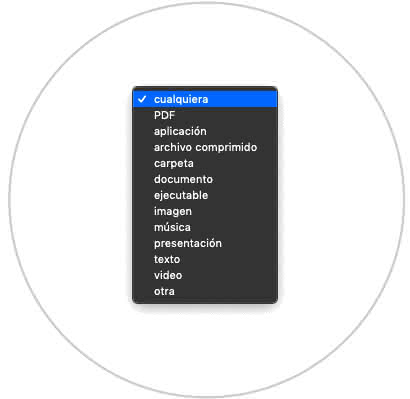
Kind
In the Type section we can define the type of files to look for as:
Step 4
There we can select the desired parameters and then enter the search criteria in the upper field and in the central panel we can see all the results associated with that term:
Step 5
If we select the option “Any†we will see all the files with that name but if we define a special type we will only see the files of this type:
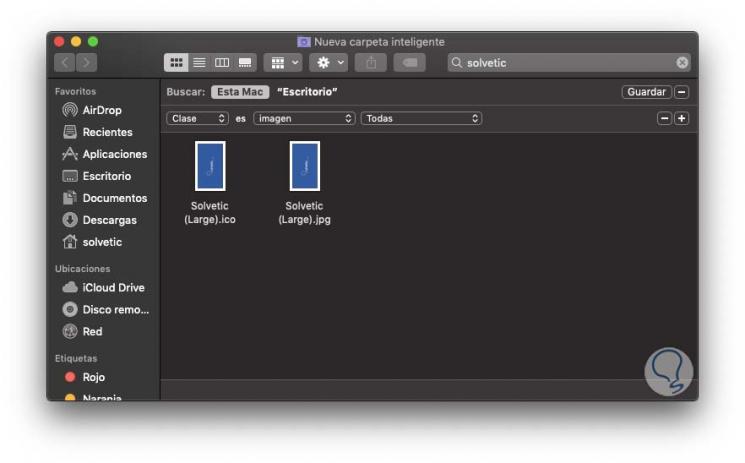
In this way we have a possibility to detect duplicate files and proceed with the deletion of those we consider are not necessary because we already have an original of that.
2. App to delete duplicate Mac files
Step 1
As we mentioned, another of the possibilities in macOS is the use of applications for this purpose, one of these, which is completely free, is Duplicates Cleaner which we can download directly from the App Store. There we click on the Get button to proceed with the download and installation of this utility.
Duplicates Cleaner

Step 2
Duplicates Cleaner is an application whose objective is to detect all duplicate files on the computer and then proceed with its deletion to recover space on the hard disk.
features
Some of its most outstanding features are:
- It has an intelligent scanning algorithm which allows the duplicate file to be detected while retaining the original on the computer.
- Navigation and preview of the duplicate file.
- Multi-select function with one click.
- You can organize the files in the different macOS libraries.
- Compatible with scanning duplicates on external units.
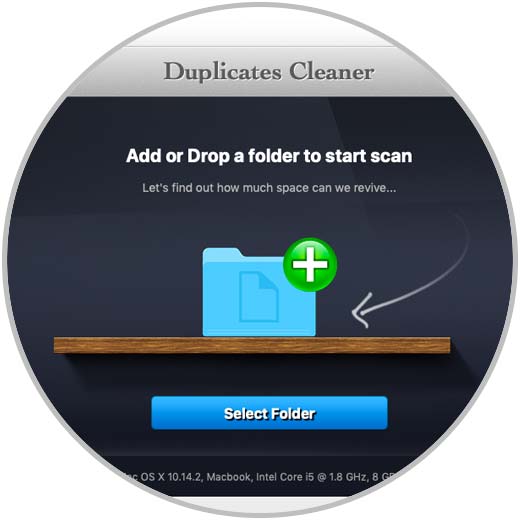
Once we run the utility we will see the following window. There we can drag or browse the folders in which duplicate files will be searched and note at the bottom that the basic hardware characteristics of the equipment are given..
Step 3
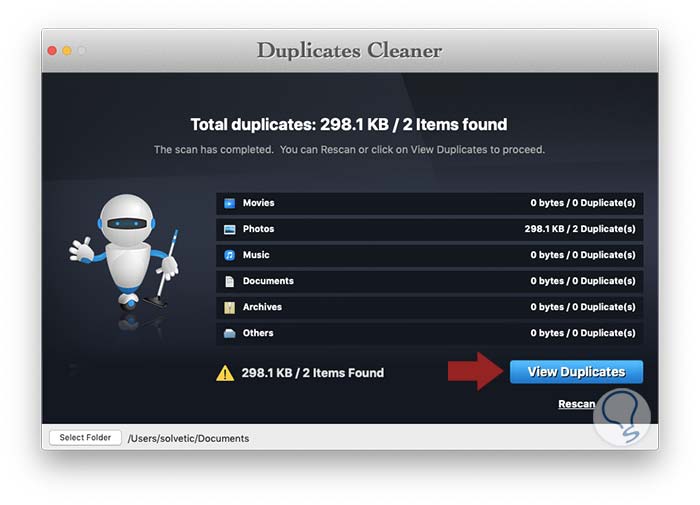
Once we select the folder we will see all the available sections and where there are duplicates, the size occupied and the number of duplicates that have been detected are indicated. There we click on the “View Duplicates†button
Step 4
We will see the following information:
- Route on which it is hosted

Step 5
There we activate the file box to be deleted on the right side and the “Clean Duplicates†button will be activated:
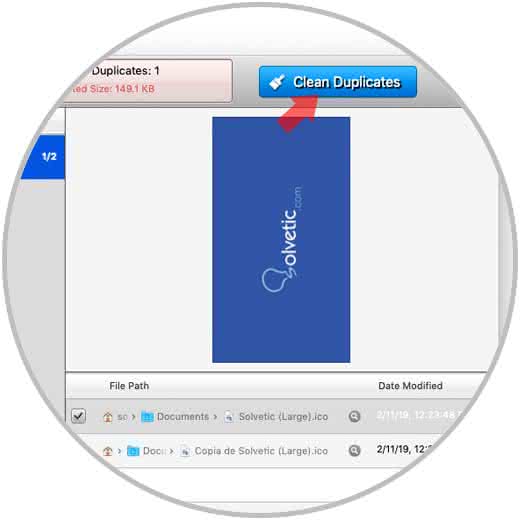
Step 6
We click on this button to eliminate the duplicate and the following message will be displayed. We click on YES to confirm the action.

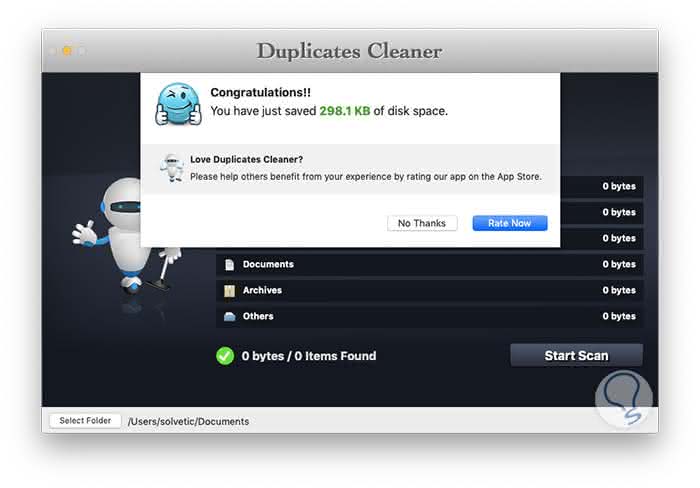
Step 7
We will see that this duplicate was eliminated and we will obtain a summary of the space released:
We have these two useful and functional options to detect and eliminate duplicate files on our macOS computers.