Our computers have become one of our main storage centers, since we store a lot of personal and professional information in most cases. However, none of us are exempt that at some point our files (text, audio, video, etc.) are accidentally deleted from the hard drive, thus losing all stored information..
In the event that this occurs, it is vitally important to know how to act in order to rescue all this information. If you have only deleted it from the Mac, you will be able to recover it by accessing the trash and restoring the file. But if you have also removed it from here, the recovery process will be more complex but not impossible.
In order to access these deleted documents, we need the help of an external program. In this case we have used Stellar Data Recovery Professional, as it offers great possibilities and functions for these types of problems..
What is Stellar Data Recovery Professional for Mac
This is a utility that offers two solutions (free and paid). This program has been specially developed to perform recovery tasks of various elements such as emails, images, photos and videos either on the internal disks of the equipment or on external disks.
If you want to opt for the paid version (with many more functions) the options to choose from are the following:
- Professional Edition for EUR 79.99
- Premium Edition for EUR 99.99
- Technician Edition for EUR 199
Stellar Data Recovery Professional for Mac Webpage & Buy
Start recovering your deleted files on Mac by mistake right now.
Undoubtedly, Stellar Data Recovery Professional for Mac Webpage & Buy is one of the most comprehensive solutions for recovering our data as it not only supports internal and external devices, but is also capable of accessing temporary backup data and data. faulty partitions of the boot, which maximizes its range of reach and integration.
If you use Stellar you can recover data from iMac devices, MacBook Air, MacBook Pro, MacBook, Mac Pro and more..
Features of Stellar Data Recovery Professional for Mac
Among the main features of this tool we highlight the following:
- Integration of a custom scan which allows us to decide what kind of files to scan. This helps to optimize the times and give better results since with this type of scan the selected unit will be analyzed and then we will have the opportunity to see a preview of the recovered files to confirm if it is the necessary ones.
- Stellar Data Recovery allows us to recover files from multiple file systems such as APFS, HFS, HFS +, FAT, ex-FAT, or NTFS so that the search will be complete and comprehensive.
- It will be possible to retrieve the information from encrypted hard drives as long as we have the password assigned to the unit.
- It has a complete and detailed user interface with the various usage options.
- Stellar is compatible with the devices where the TimeMachine backup has been configured so that we can recover the backups made with that medium.
- It recovers the vast majority of objects deleted from the macOS Catalina trash bin and the other versions of macOS.
- With this utility we will have the possibility to create images of the hard disk drive in .DMG format which we can then access using a data recovery program and thus access the compressed files and folders
- Stellar Data Recovery Premium for Mac can repair MOV, MP4, M4V, 3G2, 3GP, AVI, AVCHD video files.
- You can repair damaged photos as well as thumbnails.
- It has a deep scanning system to offer the user the best results.
The download of Stellar Data Recovery is available at the following link:
stellar
1. How to install Stellar Data Recovery Professional for Mac
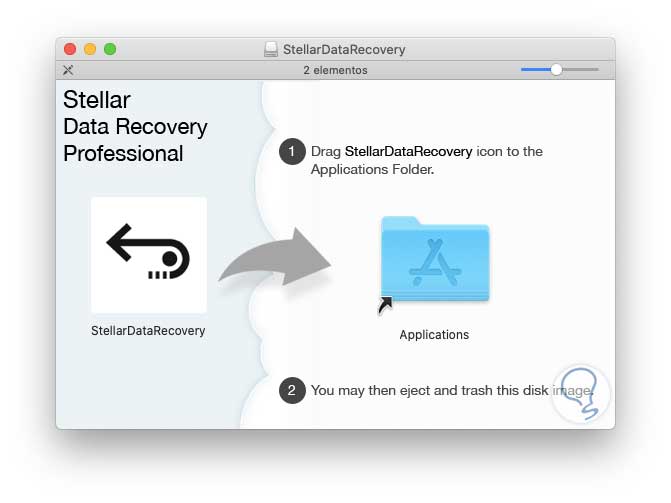
Step 1
The first thing we should do is download the program. Once downloaded the image of the utility, we proceed to its execution and we will see the following. There we move the utility to Applications for execution.
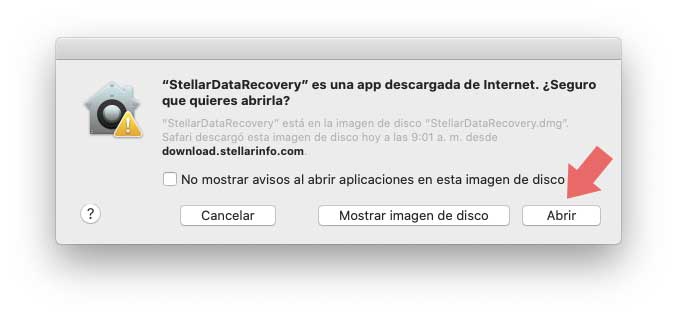
Step 2
Then we double click on the executable and we will see the following message. These are macOS Catalina security measures. We click Open.
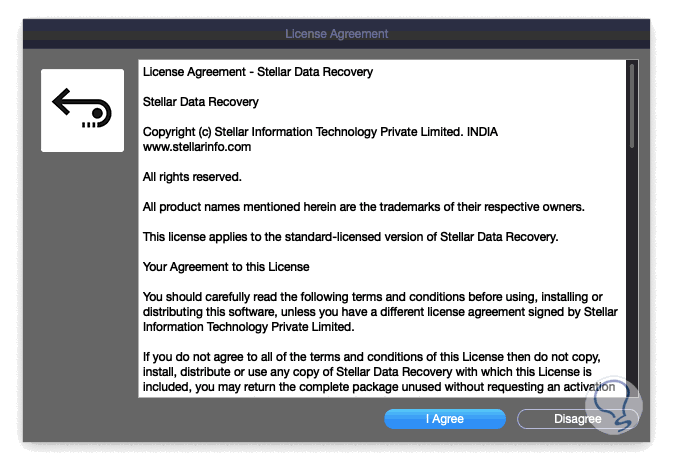
Step 3
We will see the terms of the license of the tool. We click on I Agree to accept them.
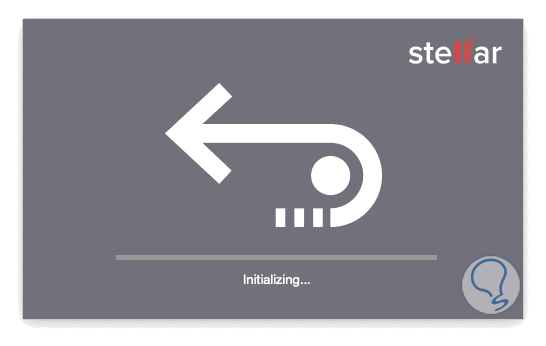
Step 4
We will see how the utility starts.
2. How to use Stellar Data Recovery Professional for Mac
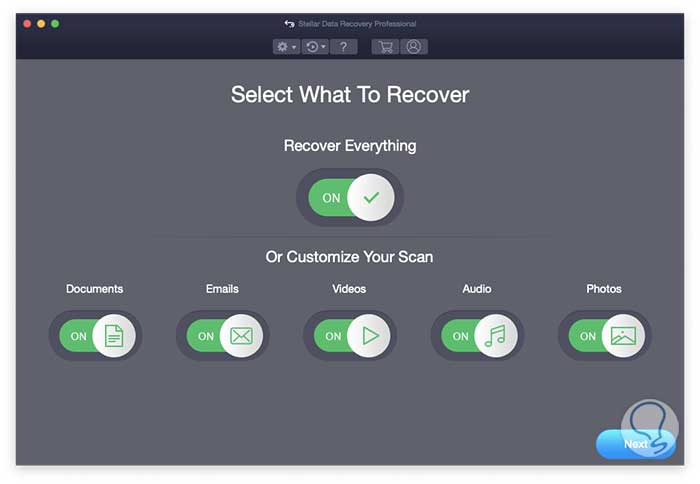
Step 1
Once the application starts we will see the following. There we can see that by default all types of items are searched (emails, documents, videos, images, audio and photos):
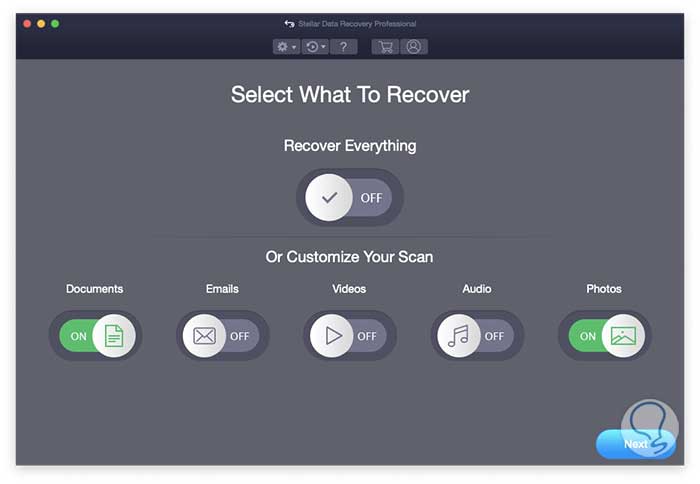
Step 2
However, we do not always want to look for all these types of objects. If we want a more precise search, just click on the desired switches to disable a type of search:
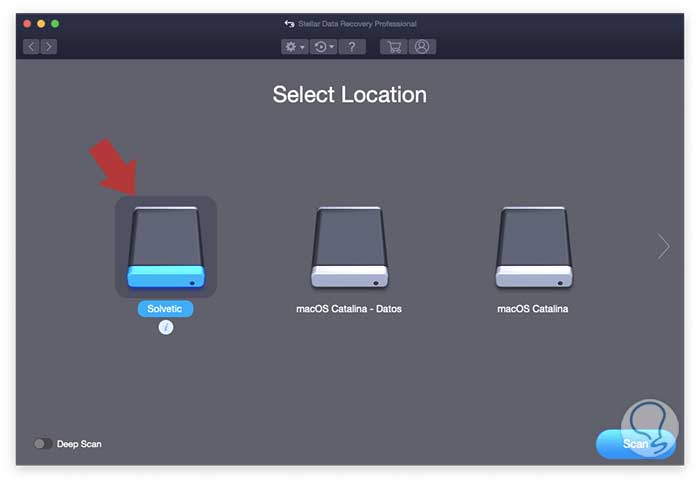
Step 3
Once this is defined, click Next and then select the disk where the Stellar Data Recovery analysis is to be performed:
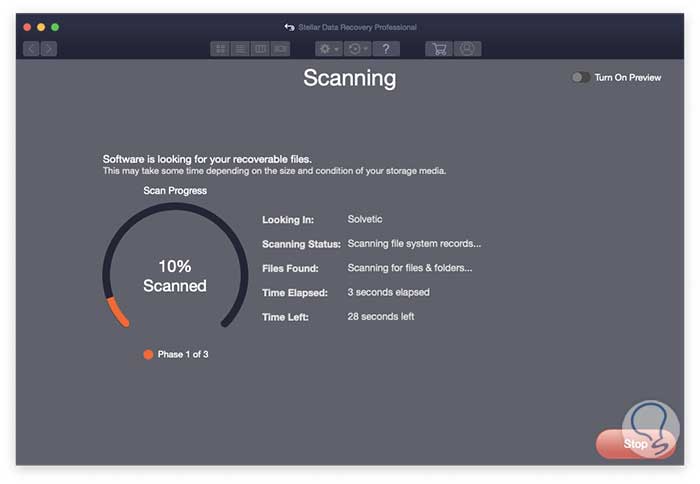
Step 4
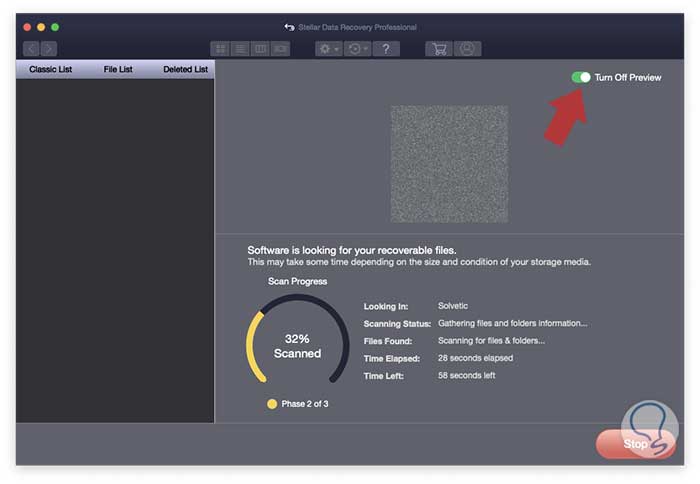
Click on the Scan button to start the analysis process of the selected unit and we will see details such as:
- Name of the selected unit
Step 5
We can activate the “Turn On Preview†switch to preview the recovered objects:
Step 6
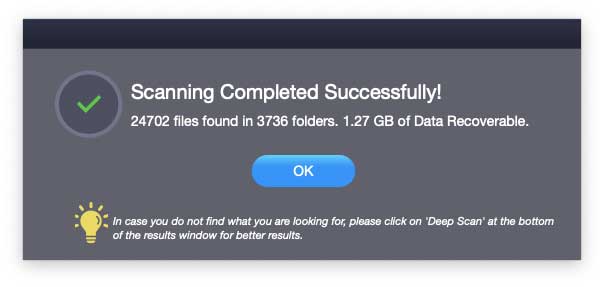
Once the process comes to an end we will see the following message indicating the amount of recovered files as well as their size:
Step 7
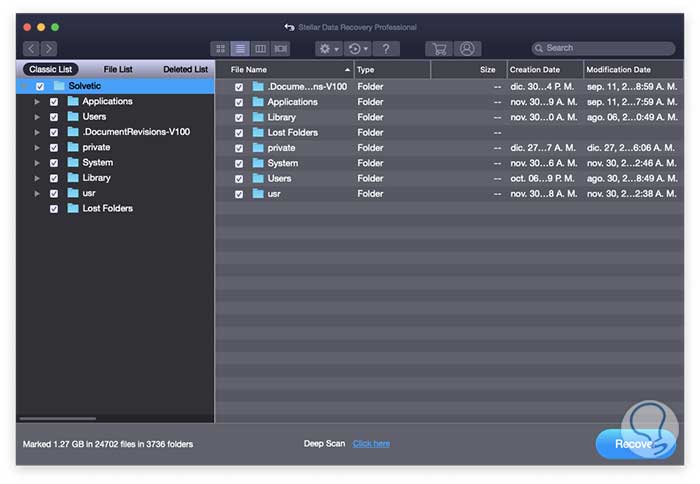
Click OK to close the wizard and the tree structure will be created automatically with the recovered folders:
Step 8
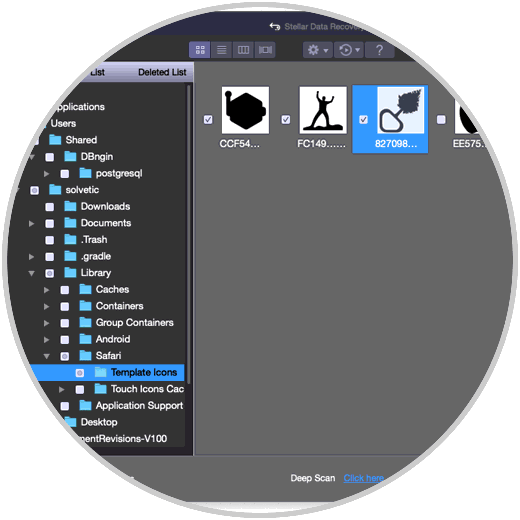
There we can navigate through the different folders to locate the items we want to recover:
Step 9
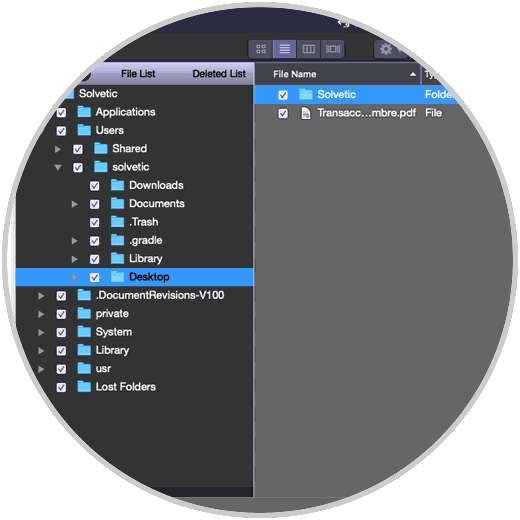
When accessing any of the folders we will see its contents:
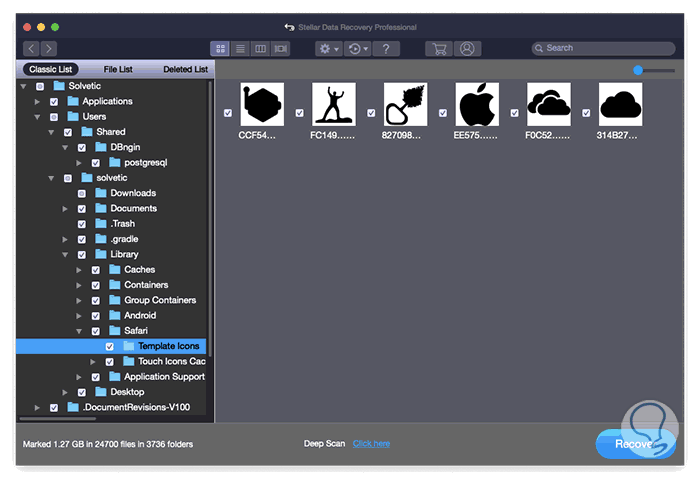
Step 10
To recover items with Stellar Data Recovery Professional for Mac we must check the boxes of the desired objects and at the bottom we will see the amount of selected items as well as their size:
Note
At the bottom you find the “Deep Scan†line which allows you to perform a deep scan of the selected unit but this takes much longer to complete.
Step 11
Once the objects have been selected, click on the “Recover†button and then define the path where the data will be recovered:
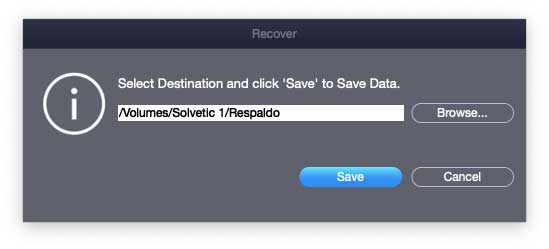
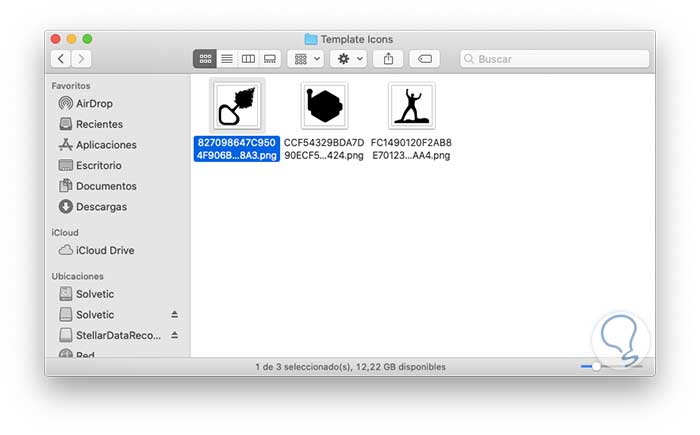
Step 12
We click on Save and now we can go to the destination route and check that the selected elements have been restored:
3. How to configure Stellar Data Recovery Professional for Mac
You can see that in the tool interface there are several options for viewing the elements, but we also have a gear icon which allows you to configure the tool. This consists of three tabs that are:
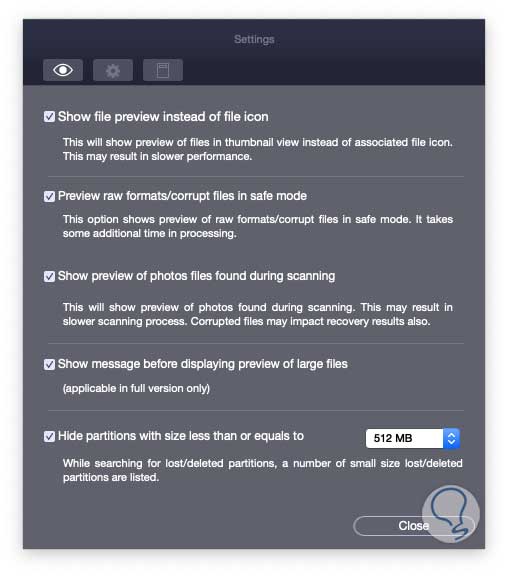
Step 1
In the View tab we can specify aspects such as:
- Show preview of recovered data.
- View raw formats or corrupt files in safe mode.
- See the previews of the photos during the scan.
- Display messages in large data.
- Hide partitions with a specific size.
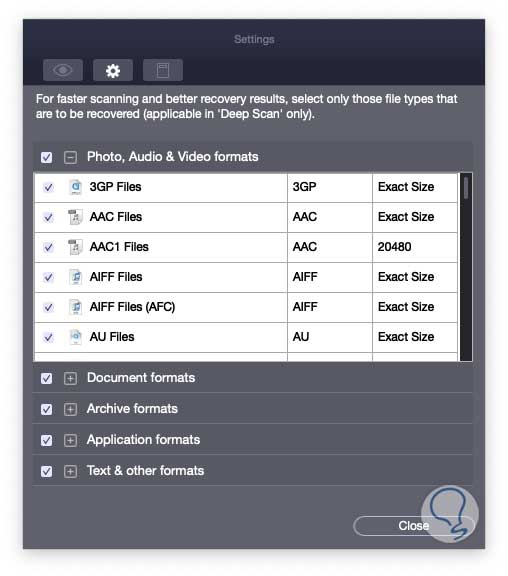
Step 2
In the Configuration tab we can specify aspects such as the type of formats to analyze both audio, video, documents, images or emails:
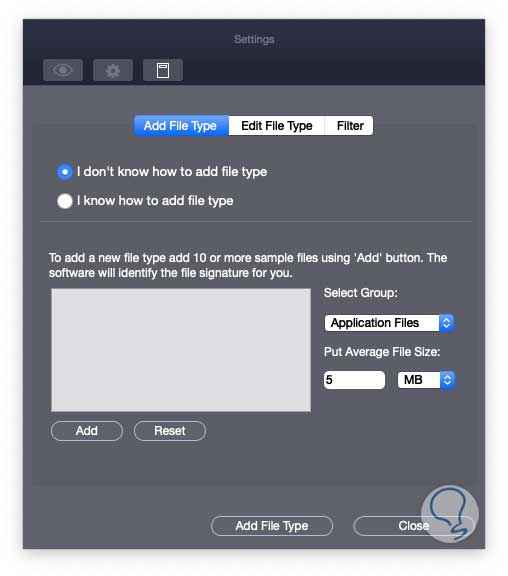
Step 3
In the last tab, general, we can define the following:
- Add new types of format to the scan.
- Edit current usage formats.
Thanks to Stellar Data Recovery Professional for Mac Webpage & Buy we will have at hand a comprehensive solution to recover various types of data with the best functions of integrity, security and above all accuracy and conservation of information. Remember to be careful in the way you handle data and not delete something accidentally.
Note
In addition to the professional version we also have the possibility of acquiring Stellar Data Recovery Premium for Mac Webpage & Buy with more features.
Try for free