Windows 10 has been developed in order to offer users a new experience in terms of performance, accessibility and environment..
One of these improvements or inclusions is related to the Windows mobility center, which has been developed for portable computers, hence its name, and with which various adjustment tasks can be performed, such as:
- Battery status in terms of charge
- Edit power plans and many more options.
In specific situations, we may want to disable this function for security reasons, to prevent other users from adjusting the defined parameters and more.
TechnoWikis, through this tutorial, will explain the ways to carry out this process in a simple way..
To stay up to date, remember to subscribe to our YouTube channel! SUBSCRIBE
1. Disable the Mobility Center through the Registry Editor
The Windows 10 Registry Editor is a powerful solution for setting various parameters within the overall system, but we must be careful in its use.
Step 1
To access it we will use the following key combination and execute the command "regedit", press Enter or OK.
+ R
Step 2
In the displayed window we will go to the following route:
HKEY_LOCAL_MACHINE \ SOFTWARE \ Microsoft \ Windows \ CurrentVersion \ Policies \ MobilityCenter
Step 3
There we must create a new DWORD value by right-clicking on the key and selecting the option "New / DWORD Value (32 bits)":

Step 4
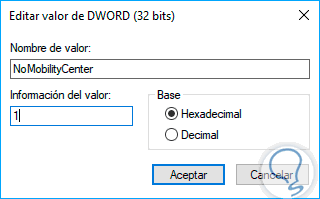
This new value will be called "NoMobilityCenter":

Step 5
Now, we must double click on said value or right click / Modify and in the Value information field we set number 1. Click on OK and we can exit the Windows 10 registry editor.
2. Disable the Mobility Center through Group Policies
This option can be used in Pro and Enterprise editions of Windows 10, while the previous one can be executed in all editions.
Step 1
To access the local policy editor, we will use the following key combination and execute the command gpedit.msc, hit Enter or OK.
+ R
Step 2
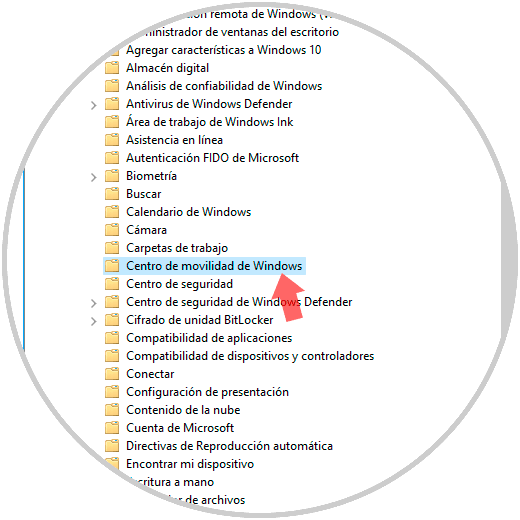
In the displayed window we go to the following route:
Step 2
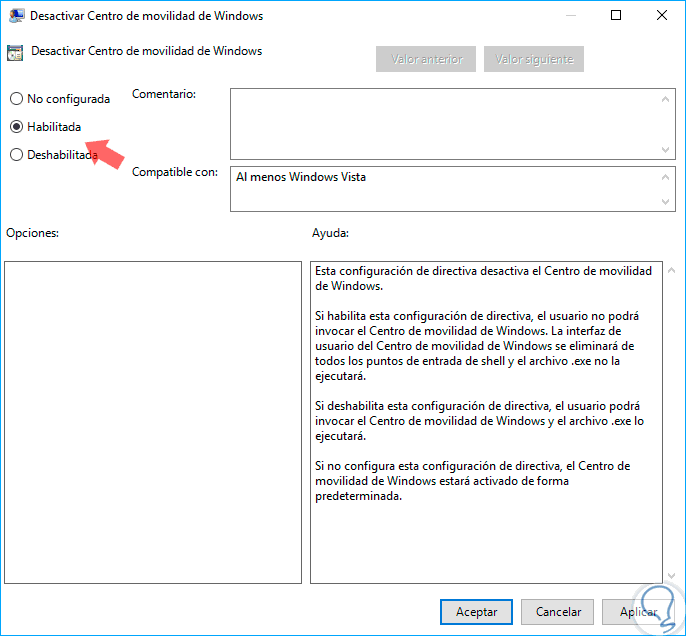
We can see that there is only one policy within it, we double-click on it and in the displayed window we activate the “Enable” box. Click on apply and accept to save the changes.
With either of these two methods it will be possible to disable the mobility center in Windows 10.