Operating systems are developed with some default parameters which can be modified in some way by users..
In the case of the computers with macOS we can see that from the Yosemite edition changes were applied at the source level, Lucida Grande was in the editions prior to Yosemite, then in Yosemite Helvética Neue was established and then, from El Capitán to macOS High Sierra, San Francisco was established as the default source.
Although it is not visible enough, many users want to have the Lucida Grande font in macOS High Sierra for its design, spacing, thickness, etc.
TechnoWikis will explain how we can make this change in a simple way and thus have a new aspect of customization in the system..
Step 1
Before carrying out this process, we recommend creating a backup of the most relevant information in case something goes wrong. Once the backup is made, we will go to the following link where we will download the Lucida Grande application:
macOS LucidaGrande
As its name indicates, this is a small utility that allows us to configure Lucida Grande as the default system font.
With this utility we can
- Easily switch between Lucida Grande and San Francisco as the Mac system source in macOS High Sierra (10.13), macOS Sierra (10.12), and OS X El Capitan (10.11)
- Easily switch between Lucida Grande and Helvetica Neue as the Mac system font in OS X Yosemite (10.10)
- Switch between system fonts without modifying system files, making it simple and secure
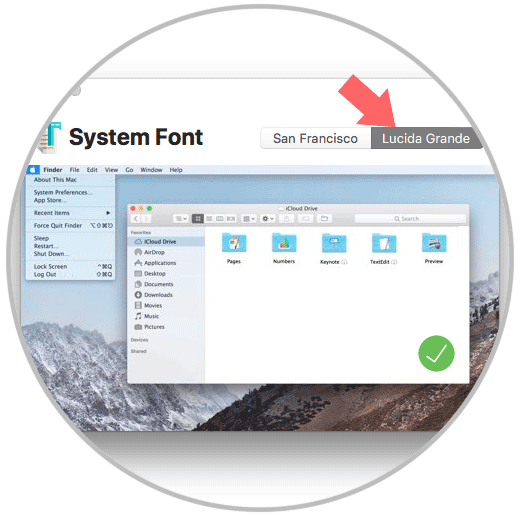
Once the .dmg file is downloaded, we proceed to its execution and we will see the following: There we click on the "Lucida Grande" tab and we can see a preview of it..
Step 2
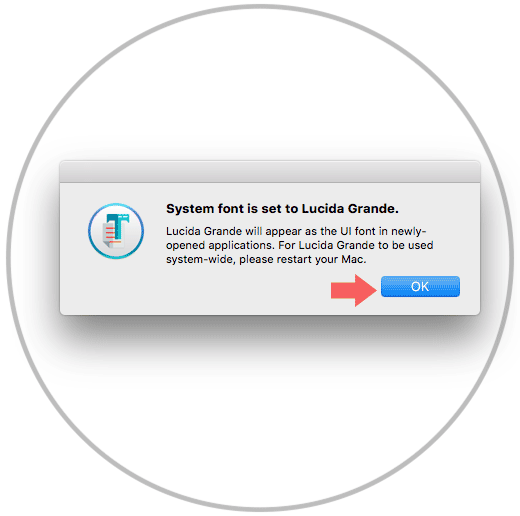
Once we select this tab, click on the green verification icon and we will receive the following notification. As we see the operating system must be restarted to apply the changes.
Step 3
Once we restart the machine, we will see that Lucida Grande is the default system font everywhere, in menus, title bars, window bars, all the system text will change.
For the most part, the effects are flawless, but we might notice some slight issues about fonts with browser tab groups and various apps.
This is the default font in macOS High Sierra: San Francisco
After restarting the machine we will have as source Lucida Grande:
If we decide not to use Lucida Grande anymore, we can easily switch back to the High Sierra de San Francisco default system font again by relaunching the app and clicking the "San Francisco" tab, then clicking the green check button and restarting the Mac again.
Note
The switch between Lucida Grande and San Francisco is quite subtle. Lucida Grande has a larger spacing and is slightly thicker, which makes it easier on the eyes of some users, while San Francisco has a narrower spacing and is thinner overall. Many users may not even notice the change.
With this simple method we can adjust the font of our macOS High Sierra and enjoy a slight but better visual appearance.