When we are in the IT world, we often handle ISO files for the installation of operating systems, applications and various programs within the system..
An ISO image is a container that stores a replica of the contents of a physical disk, which can usually be a CD, DVD, or even Blu-Ray. We can see how software companies use ISO images as a means to distribute their software.
A few years ago we had to use third-party applications to perform the process of mounting and unmounting these images on Windows operating systems..
Mounting is the process of creating a virtual CD / DVD drive on your computer so that it is possible to run ISO files as you would a disk drive. Unmounting, meanwhile, is like pressing the "Eject" button on your disk drive.
TechnoWikis will teach two practical methods to mount and unmount an ISO image in Windows 10..
To stay up to date, remember to subscribe to our YouTube channel! SUBSCRIBE
1. Mount an ISO image in Windows 10 using File Explorer
Step 1
It is a fairly simple process, for this we access the File Explorer using the following key combination and once there we must locate the ISO image to mount.
+ E
Step 2
Once located, we will right-click on it and in the displayed options select "Mount":
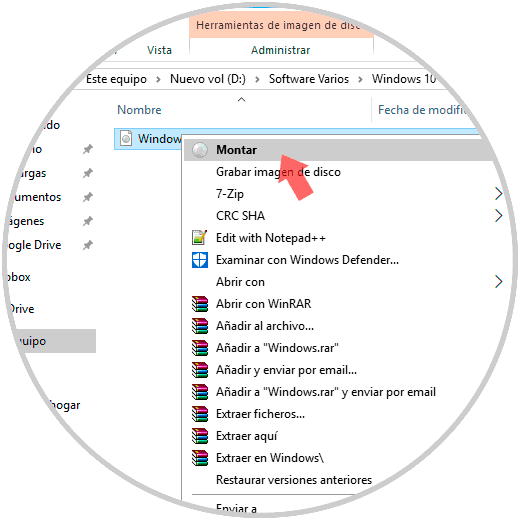
Step 3
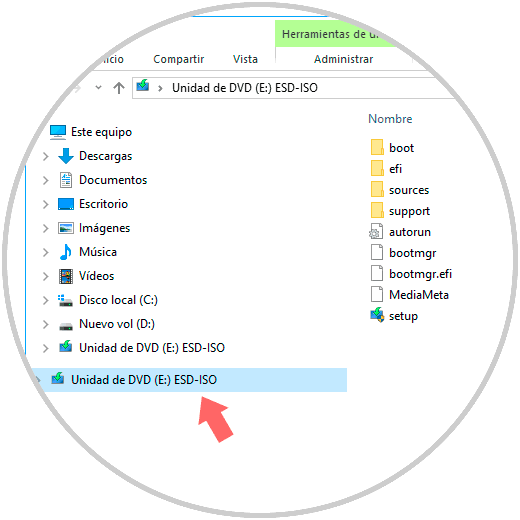
Once we click there, the content of that ISO image should open immediately and appear in Windows Explorer as it would in any previous folder. Meanwhile, the left pane of Windows Explorer in the "This computer" drop-down menu should show a DVD / CD drive icon with the ISO name next to it:
From there we can access the content of said ISO image and perform actions on it.
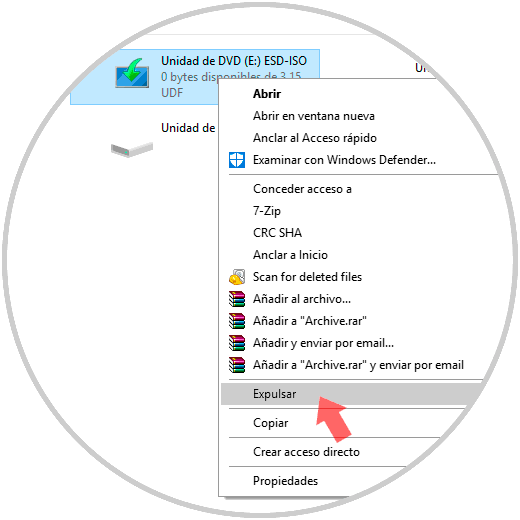
2. Unmount an ISO image in Windows 10 using File Explorer
The process of ejecting an ISO image is simple. To do this we will right click on the virtual drive that is created when mounting the ISO image and in the displayed options select "Eject":
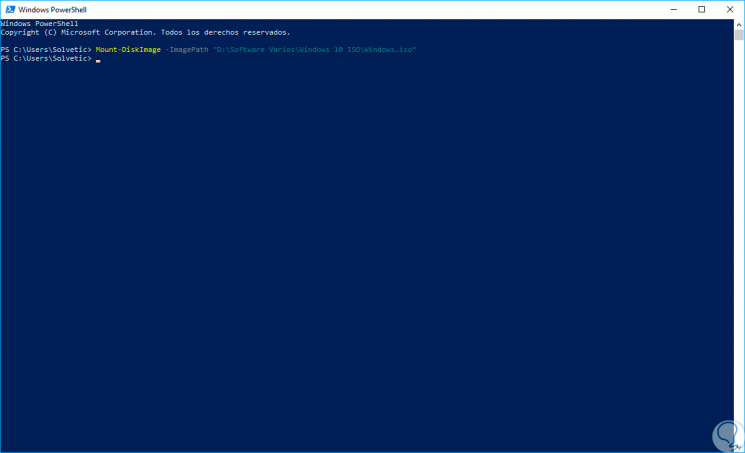
3. Mount an ISO image in Windows 10 using Windows PowerShell
Another option that we have available is to use Windows PowerShell to carry out this task.
For this we open a Windows PowerShell console and execute the following syntax:
Mount-DiskImage -ImagePath "ISO Image Path"
4. Unmount an ISO image in Windows 10 using Windows PowerShell
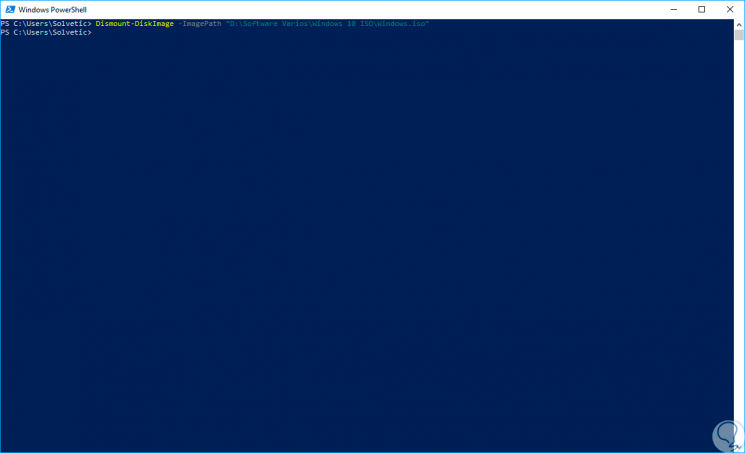
At the moment that we do not want to use the ISO image anymore and proceed to unmount it, we can also do it through Windows PowerShell.
To do this, we open a new Windows PowerShell console and execute the following syntax. After pressing Enter we can see that the task is executed correctly.
Dismount-DiskImage -ImagePath "ISO Image Path"
It's that simple we can mount or unmount an ISO image in Windows 10 and perform various tasks on them.