WiFi networks are one of the most important connections we have thanks to the thousands of devices that handle this type of connectivity, such as mobile phones, laptops, and more. That is why many times the configuration of the equipment allows the connection to the WiFi network to be automatically connected to this network, but this represents a security danger since it is likely that we do not want to connect at this time to the available WiFi network, in This TechnoWikis case will explain how to enable or disable WiFi in Windows 10..
WiFi networks are an effective alternative to the Ethernet cable connection that facilitates access to the Internet. From our PC we can use WiFi for a multitude of things, but we must bear in mind that, in devices with autonomous batteries, this will be affected in duration when using WiFi. So it is normal that we seek to disable WiFi Windows 10.
We also leave you the video tutorial to enable or disable WiFi Windows 10 CMD or menu..
To stay up to date, remember to subscribe to our YouTube channel! SUBSCRIBE
1. Enable or disable WiFi Windows 10 from the Control Panel
Step 1
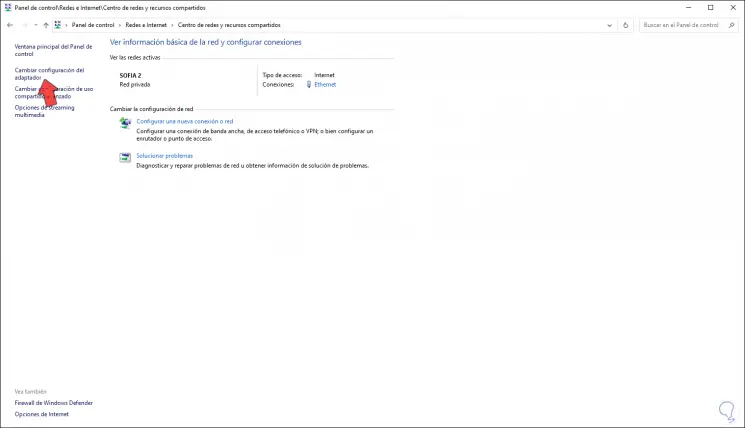
To use this process we go to the control panel in the following path:
- Center network and sharing
Step 2
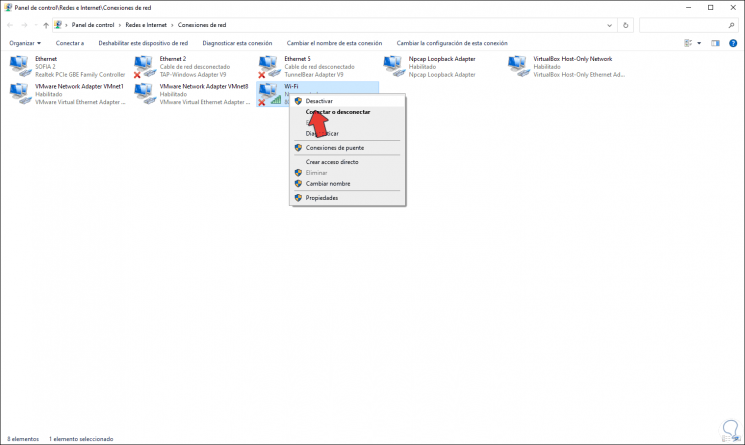
We click on the line "Change adapter settings" and to disable WiFi we right-click on the adapter and select "Disable":
Step 3
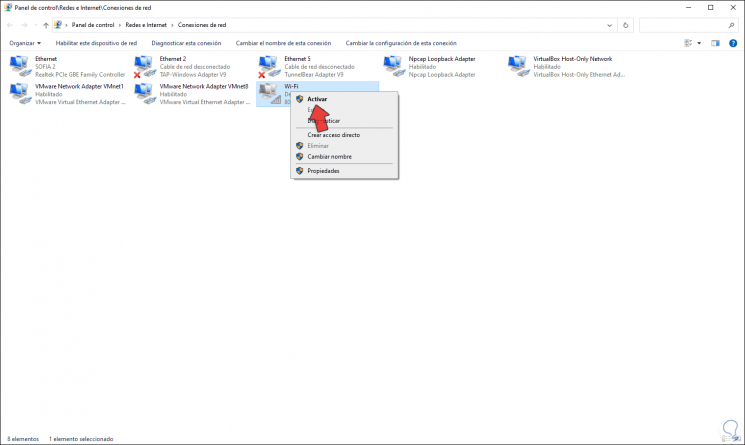
To activate it again and access the available networks we right-click again and select "Activate". After this it will be possible to access the WiFi network.
2. Enable or disable WiFi Windows 10 CMD
Step 1
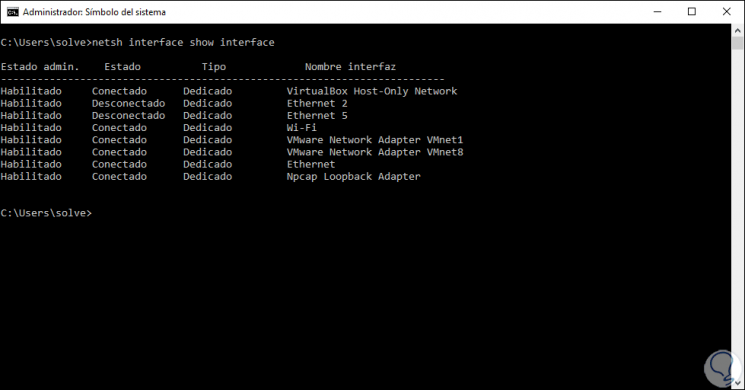
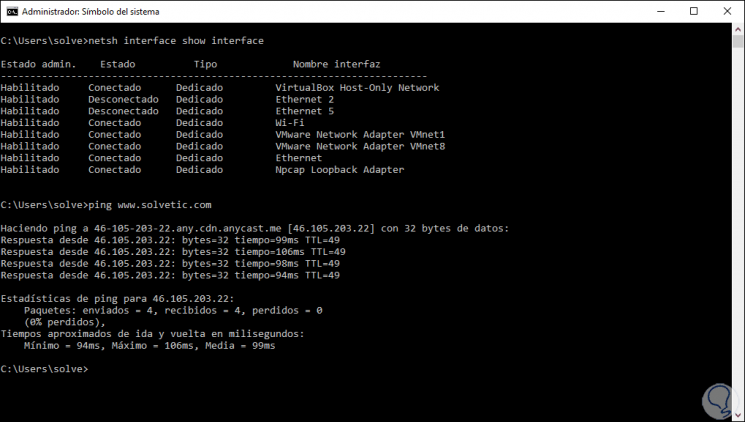
In this case we can use the command prompt console, for this we open it and the first command will be to display the status of the WiFi network:
netsh interface show interface
Step 2
As we see the WiFi network is connected, we can check it by pinging any website: We
check that the remote response of the site is correct which indicates that we are connected correctly.
Step 3
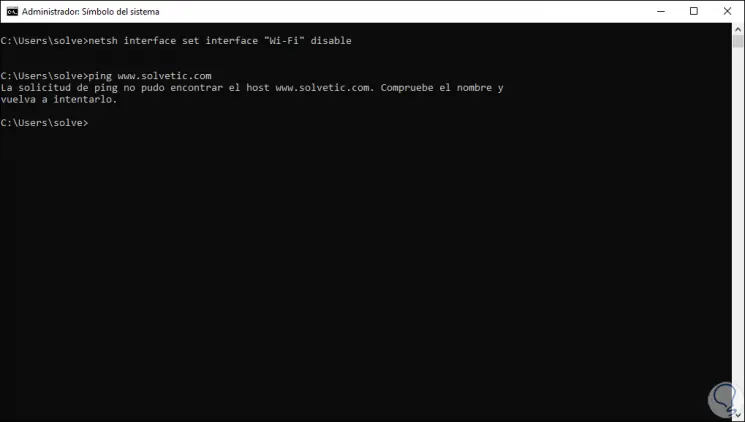
To disable WiFi CM we run the following:
netsh interface set interface “WiFi” disable
We ping to see the status again:
Step 4
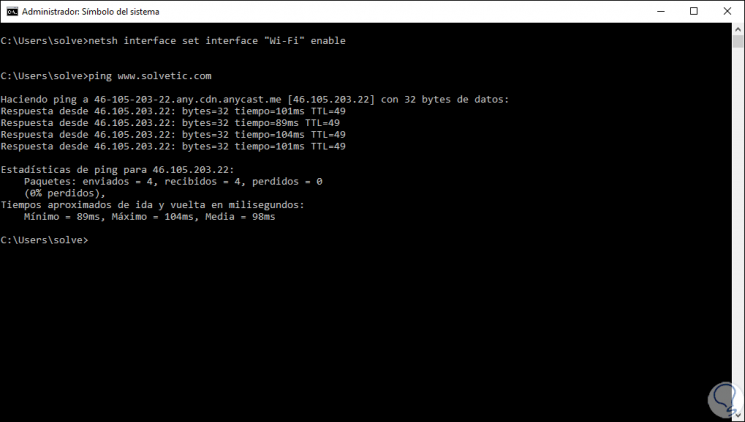
To enable it again we execute the following:
netsh interface set interface “WiFi” enable
Step 5
We check the status again with ping:
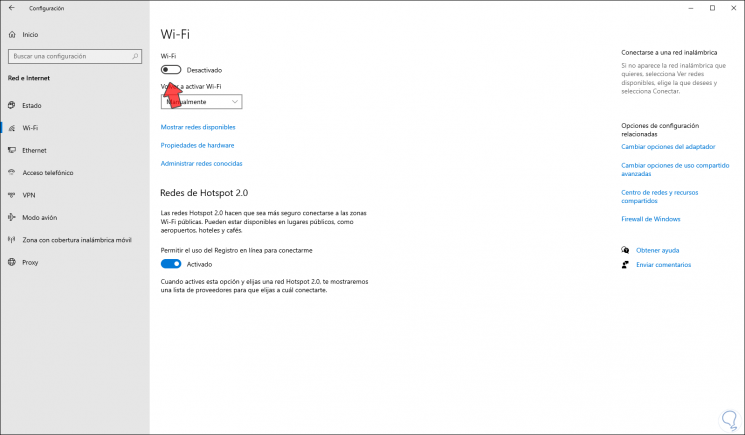
3. Enable or disable WiFi Windows 10 in Settings
Step 1
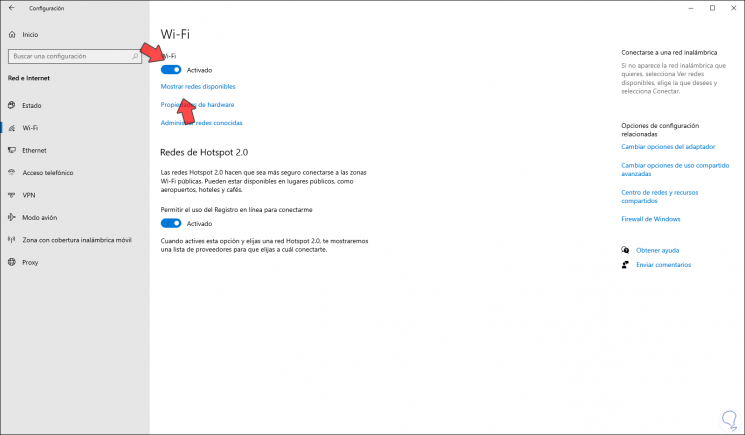
Finally, it is possible to activate or not the WiFi networks in Windows 10 from the configuration utility, for this we will go to the following route.
Step 2
We will go to the WiFi section and to activate it we must press on the WiFi switch. After this we click on "Show available networks" to connect to the desired network.
Step 3
To deactivate it, simply click on the switch again:
With any of these methods we can activate or not the WiFi network in Windows 10.