Virtualization is one of the technologies that most helps both administrators and IT users to know in advance new operating systems with their functionalities and compatibility as well as to test applications in an environment totally isolated from the physical and real environment, this is an advantage not only of security but also of costs since we will be avoiding causing errors in the real system and we do not require the purchase of additional hardware to mount new machines..
There are several virtualization platforms where each of them has an essential element such as the virtual hard disk without which it would be impossible to start the virtual machine and execute actions on it, for this reason today TechnoWikis will talk about one of the types of disk virtual hard drives better known as the VMDK format.
What is VMDK?
VMDK (Virtual Machine Disk) is basically a virtual disk file where all the content that is edited and entered in the hard disk drive of the virtual machine that we have created is stored, and it is important that you know that a virtual disk can be integrated For one or more .vmdk files, that is, the amount of .vmdk files will depend on the size of the virtual disk at the time of its configuration.
In the way data is added to the virtual machine , the size of the virtual disk will grow, vmdk up to a range of 2 GB each, and if the created virtual machine has been connected directly to a physical disk of the computer but not to a virtual hard disk, the .vmdk file is responsible for storing the information directly on the partitions on which the virtual machine has permission and access.
Hard drives.vmdk are typical of virtualization platforms such as VMware , VirtualBox , etc., and best of all, we can access the content of this file on one of these platforms with the process that TechnoWikis will explain to you both for VMware and for VirtualBox
If you do not have these platforms you can download them in the following link:
Virtualbox
VMware
1. How to open a VMDK file in VirtualBox
Step 1
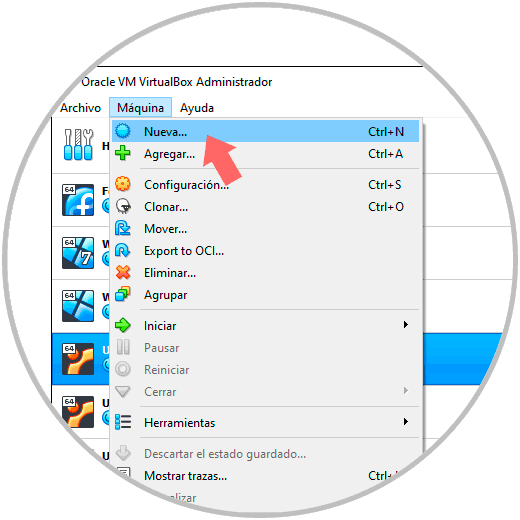
To start this process in VirtualBox we must create a virtual machine, for this we have the following options:
- Click on the "New" button.
- Use the following key combination:
+ N Ctrl + N
- From the Machine / New menu
Step 2
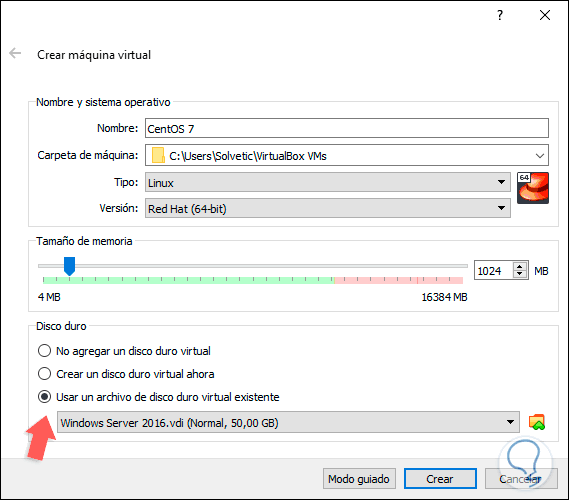
In the displayed window we select the Expert Mode and initially enter details such as:
- Rita where she will be staying
Step 3
At the bottom we activate the “Use an existing virtual hard disk file†box and click on the browse icon and the following will be displayed:
Step 4
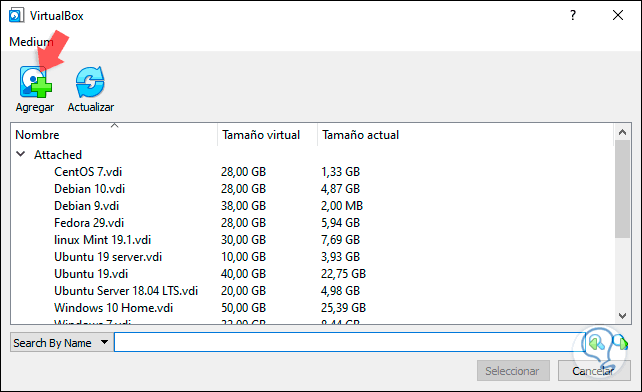
There we click on “Add†and we will go to the path where the VMDK file is:
Step 5
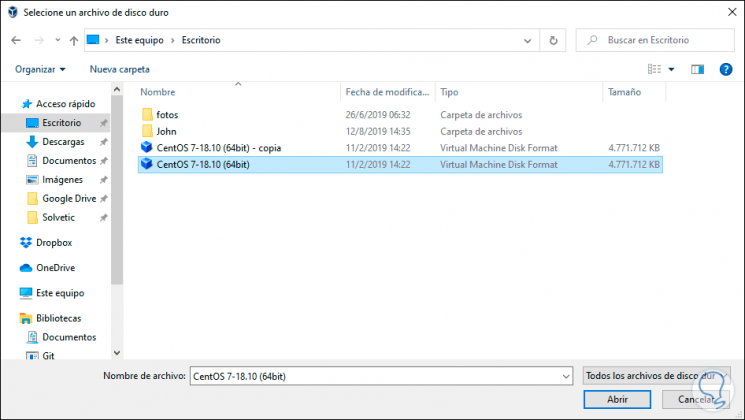
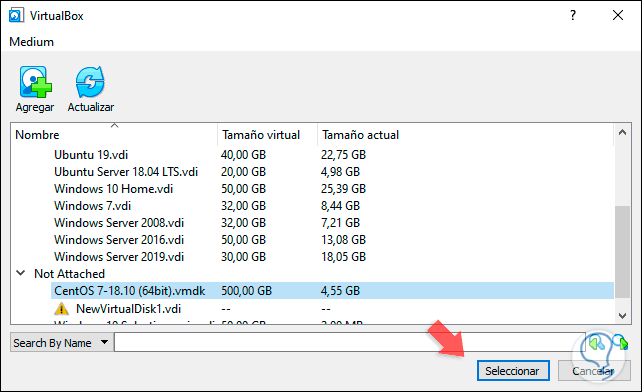
Select the file and click on "Open" and there we will see the disk with its respective specifications:
Step 6
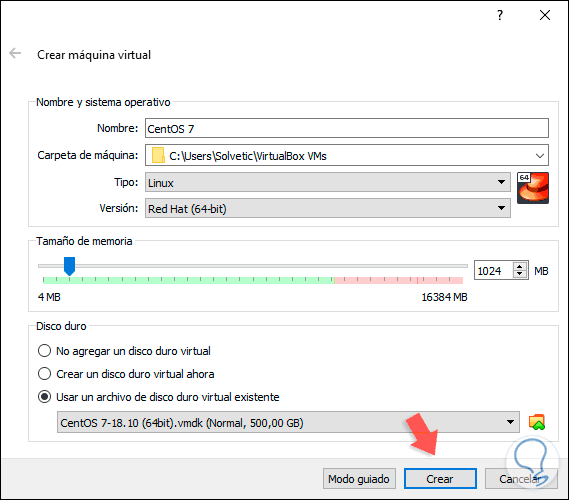
We click on “Select†and we will see that the .vmdk file is the one selected for the virtual machine:
Step 7
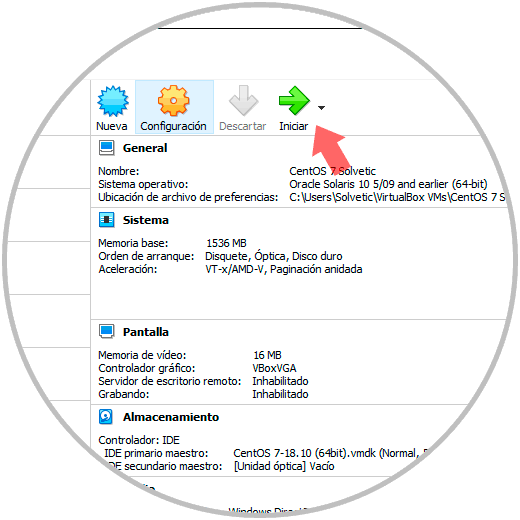
Click on the "Create" button and proceed with the creation of the virtual machine. There we simply click on "Start" to proceed with the execution and configuration of the virtual machine.
2. How to open a VMDK file in VMware
VMware is another popular application for creating and managing virtual machines and, as we mentioned earlier, it accepts the .vmdk format for its virtual hard drives.
Step 1
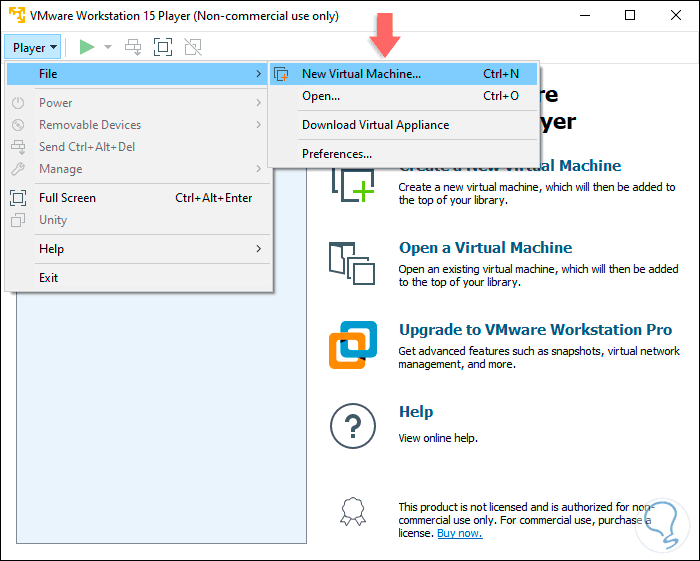
If you want to mount a .vmdk disk in VMware, you must access the application and create a new machine using one of the following options:
- Using the following keys:
+ N Ctrl + N
- From the Player / File / New Machine menu
- Clicking on the Create a New Virtual Machine line in the central panel
Step 2
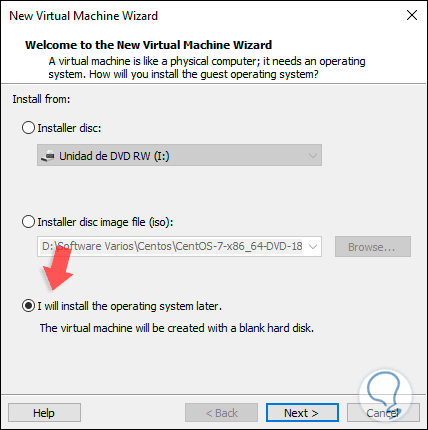
The following wizard will be displayed where we select the “I Will install the operating system later†box:
Step 3
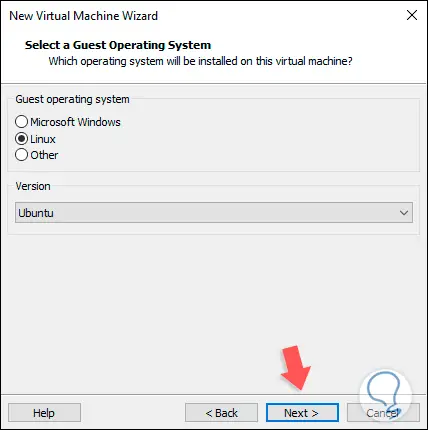
Click Next and then define the type of system to install:
Step 4
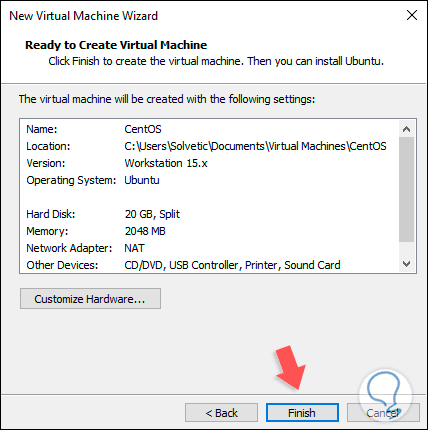
After this we will define both the name and the size of the disk and finally we will see the following:
Step 5
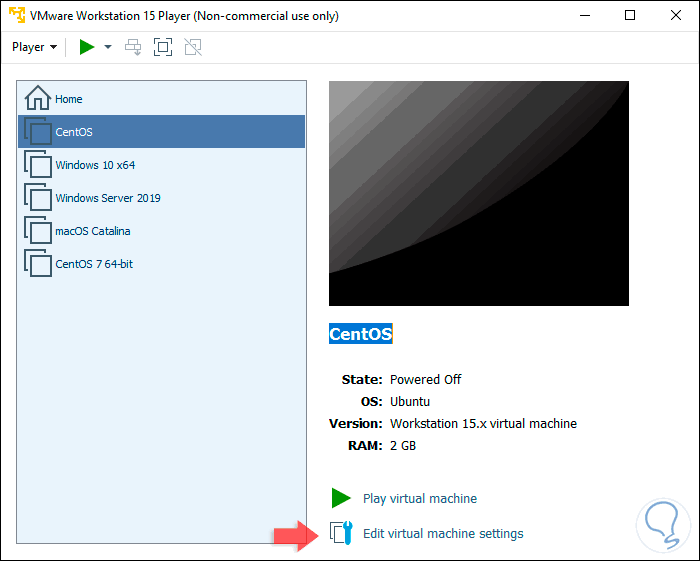
There we click on the “Finish†button to create the machine, now we will see that the virtual machine has been created:
Step 6
There we select the “Edit virtual machine settings†line and in the window we will go to the Hard Disk section:
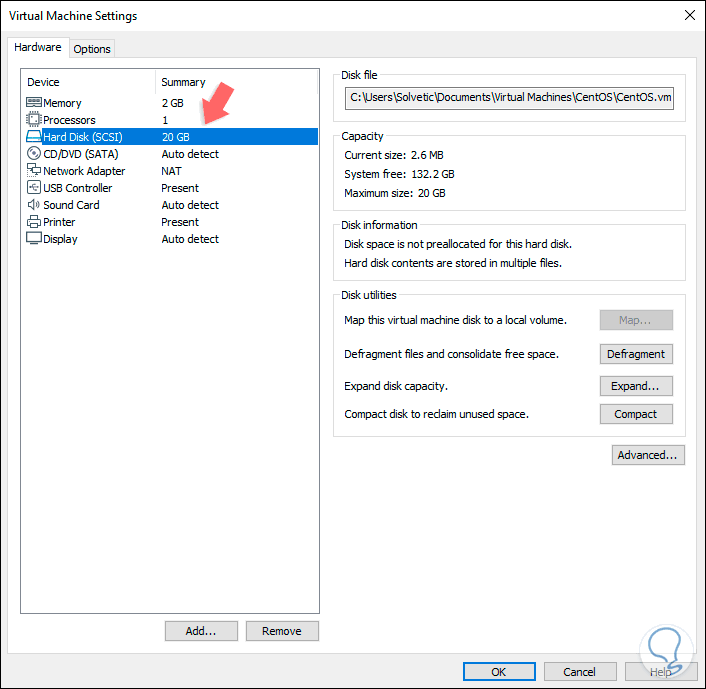
Step 7
There we select “Remove†to remove the disk created by default:
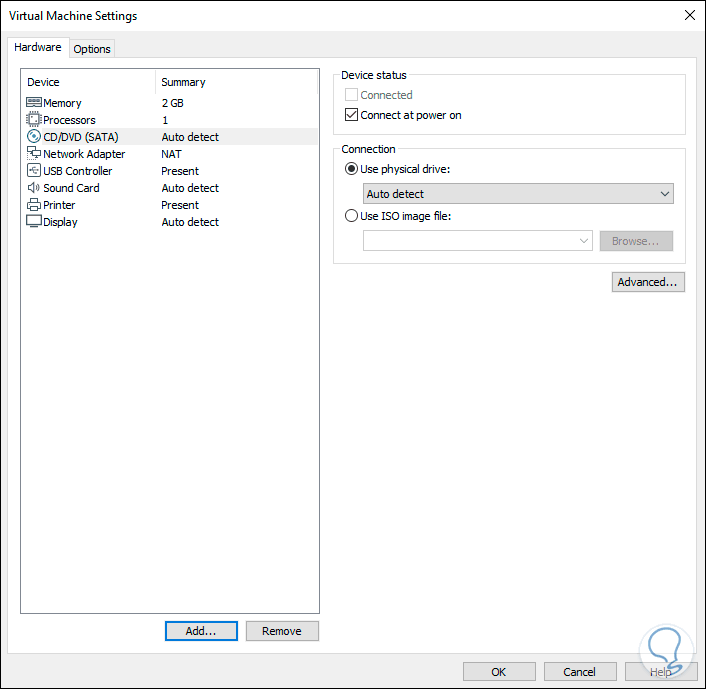
Step 8
We click on “Add†and select “Hard Diskâ€:
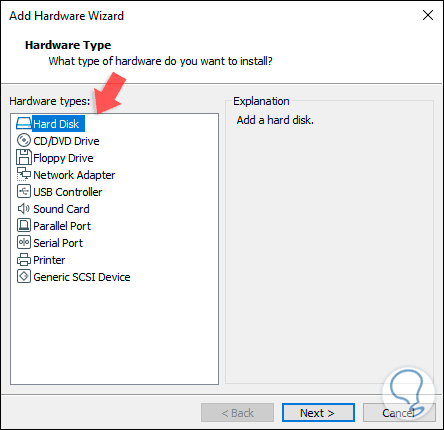
Step 9
In the following window we define the type of disk to use:
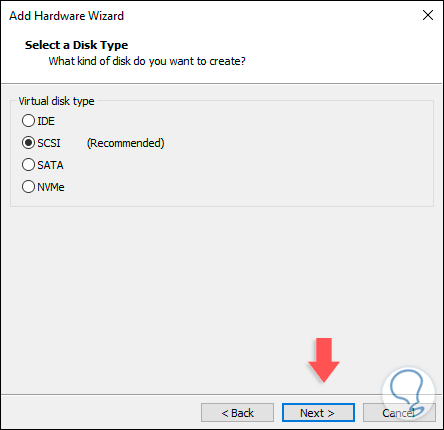
Step 10
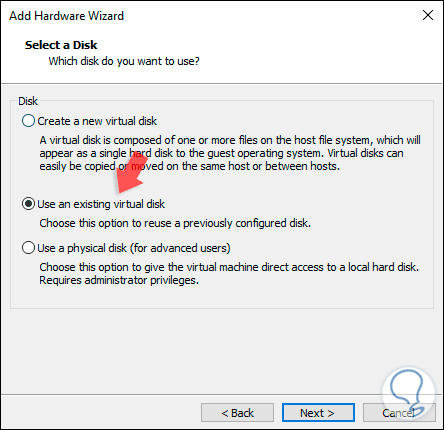
In the next window we activate the “Use an existing virtual disk†box:
Step 11
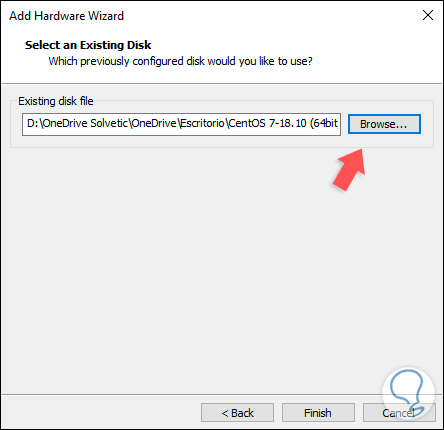
We click Next and in the next window we will go to the path where the .vmdk disk is hosted:
Step 12
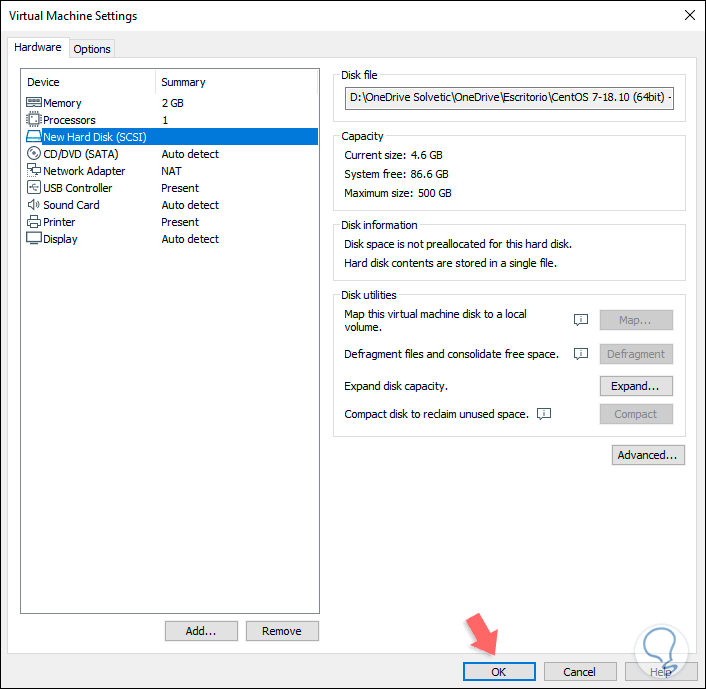
Click on "Finish" to complete the process of mounting the .vmdk disk in VMware:
Step 13
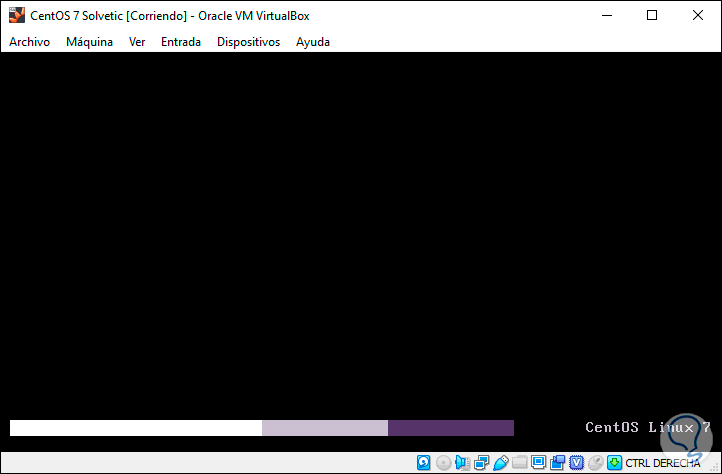
Click OK and we will be ready to start this virtual machine directly using the .vmdk disk. With any of the platforms we can see that its startup is normal and without problems:
It's that simple to open a .vmdk file in both VMware and VirtualBox and continue to enjoy the benefits that virtualization gives us and will continue to offer us in our day-to-day activities..