Two of the most practical and functional utilities that as personnel of the systems area we must manage are:
ISO images
These are disk images usually of Windows and Linux operating systems and of many applications or tools.
Virtual machines
These have been developed with the objective of allowing us to mount operating systems in order to test their performance, compatibility and news before being launched into a productive environment or not having the possibility of having a physical equipment.
In the case of virtual platforms, VirtualBox is positioned as one of the best options not only because it is a free platform but because it has several functions and features focused on a complete administration of the operating system. This is because it is a virtualization product for x86 (32 bit) and AMD64 / Intel64 systems and is available for operating systems such as Linux, Microsoft Windows, Mac OS X, Solaris and a portable version for FreeBSD..
When we create a new virtual machine in VirtualBox, the associated image file is VDI (.vdi) - VirtualBox Image.
One of the great administrative advantages that we have available is the conversion of an ISO image to VDI which is a process of taking the desired .iso image and then converting it into a virtual disk image. Vdi. VirtualBox will simplify the entire configuration process already known in VirtualBox which requires installing the system from scratch.
In case of not having VirtualBox we can download it in the following link:
Virtualbox
Now we are going to learn how to convert an ISO image to a VDI file on Windows 10 and macOS Mojave systems..
Prerequisite
For the conversion to be effective we must install VirtualBox because the installation includes the command line utility “VBoxManage†which is vital for this ISO to VDI conversion process to work.
1. Convert ISO image to VDI in Windows 10
Step 1
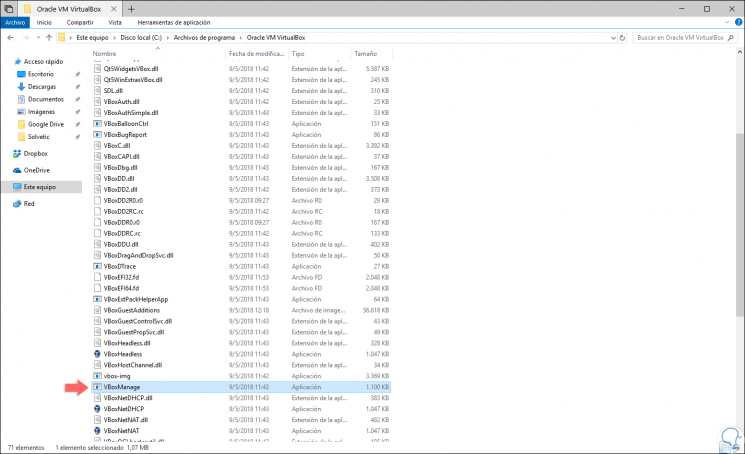
The first step to validate is that the VBoxManage command line is available, for this we go to the following route:
C: \ Program Files \ Oracle VM VirtualBox
Step 2
There we validate the existence of the utility:
Step 3
Now, we access the command prompt and it will be necessary to use the following syntax:
VBoxManage convertfromraw Imagen.iso Disco_Virtual.vdi
Step 4
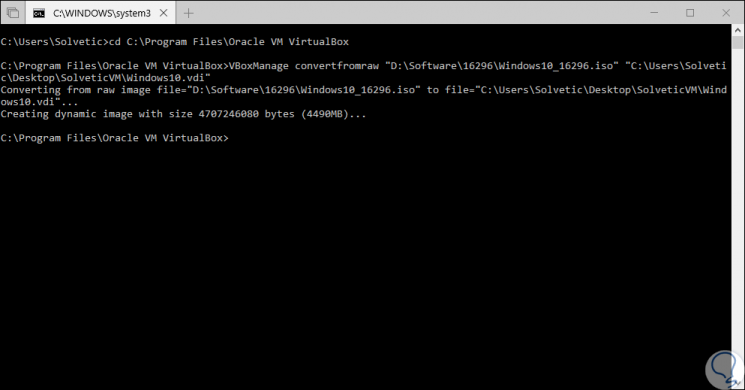
First, we execute the following at the command prompt:
cd C: \ Program Files \ Oracle VM VirtualBox
Step 5
Then we execute the syntax defining the path where the ISO image is to be converted and the path where it will be stored, the result will be as follows:
Step 6
This process takes between 2 to 3 minutes depending on the hardware resources and the size of the ISO image.
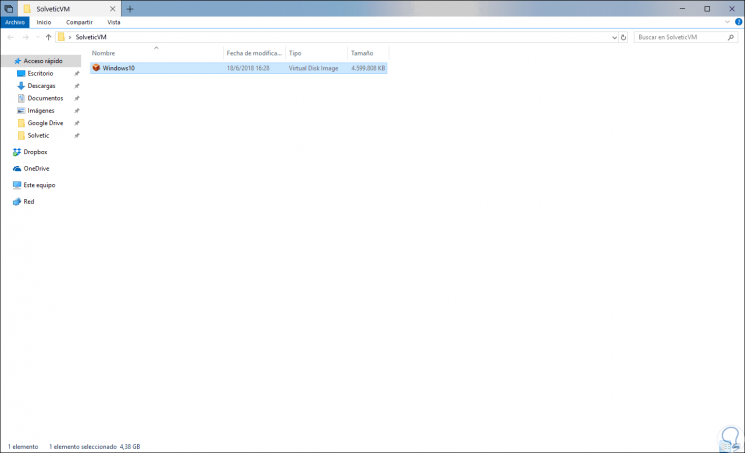
Now, we can go to the path where the VDI image has been stored and verify that it was created correctly:
2. Convert ISO image to VDI in macOS Mojave
Step 1
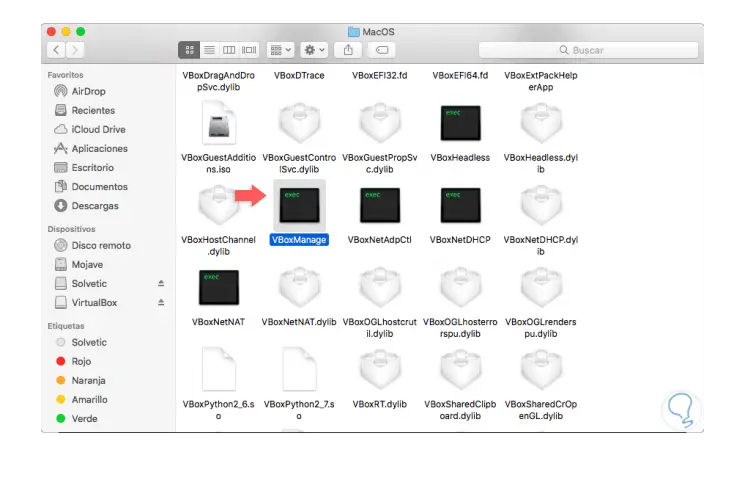
In the case of macOS Mojave, first of all we will check that we have the VBoxManage utility, for this we go to “Applicationsâ€, right click on VirtualBox and select the option “Access content†and in the window we will go to the folder MacOS and there we will find the command line utility VBoxManage:
Step 2
Now, as in Windows 10 we run the following syntax:
VBoxManage convertfromraw Imagen.iso Disco_Virtual.vdi
Step 3
We can see that the command is completed correctly:
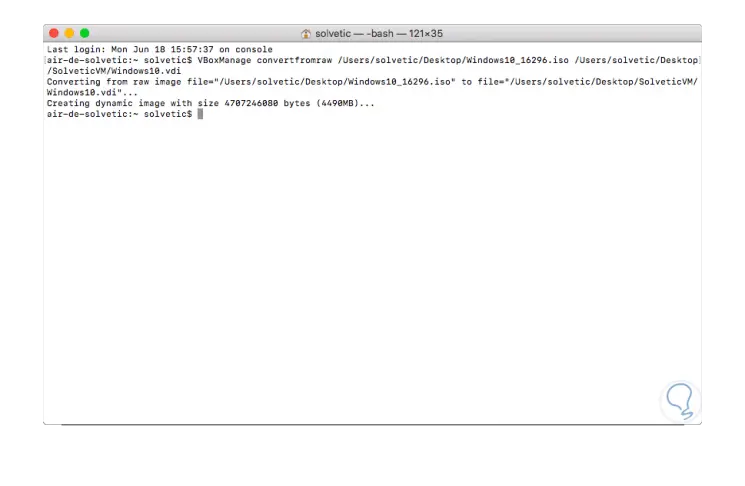
Step 4
If we go to the folder defined for the VDI disk we can see that it is created correctly:
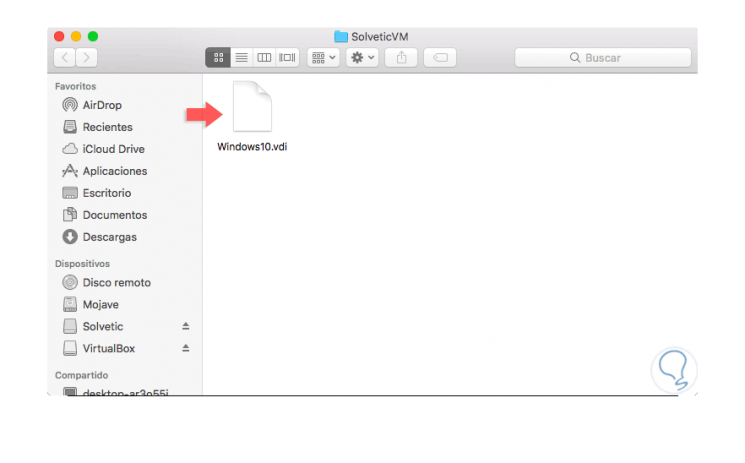
3. Use VDI disk in VirtualBox
Once the VDI disk is created, we can start the virtual machine creation process and at the moment of defining the hard disk we activate the “Use an existing virtual hard disk file†box and click on the folder icon to select the disk Hard VDI created in the previous steps. Click on Create and in this way we will not use an ISO image but directly from the hard disk.
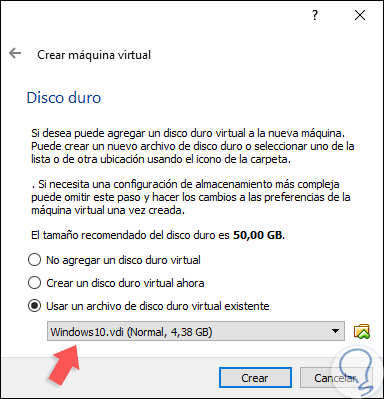
This way we can manage virtual machines in a much more practical and complete way.