To stay up to date, remember to subscribe to our YouTube channel!
SUBSCRIBE ON YOUTUBE
The use of virtual machines is currently one of the most versatile and functional mechanisms to test new operating systems, applications and performance, but without affecting the physical machine at any time, much less the user's information, which can reach be a really complex topic..
formats
When a virtual machine is created, we set a size for the virtual hard disk which can be one of the following types:
- VMDK – This is VMware's virtual hard disk format.
- VHD/VHDX: This is the Microsoft Hyper-V virtual hard disk format.
- VDI: is the Oracle VirtualBox virtual hard disk format
- Likewise, virtual hard disks can be fixed or dynamic.
Now, with the passage of time, we may need to modify the size of the hard disk to have the ability to add more information, which is why TechnoWikis will explain some ways to increase the size of the virtual hard disk in VirtualBox and in VMware.
1 How to expand the size of the virtual hard disk in VirtualBox from the app
Step 1
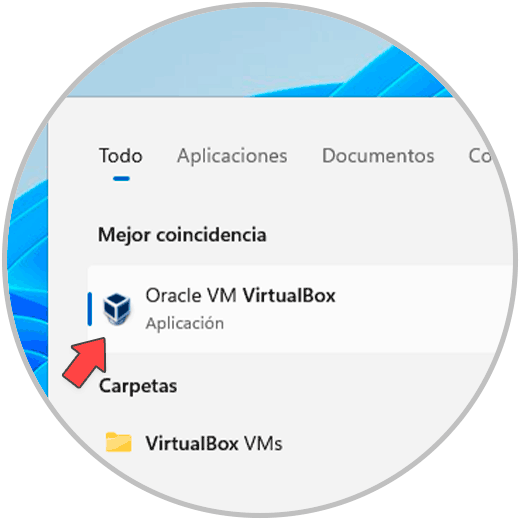
This is the first method to perform and it will be directly from the VirtualBox application, we open our application:
Step 2
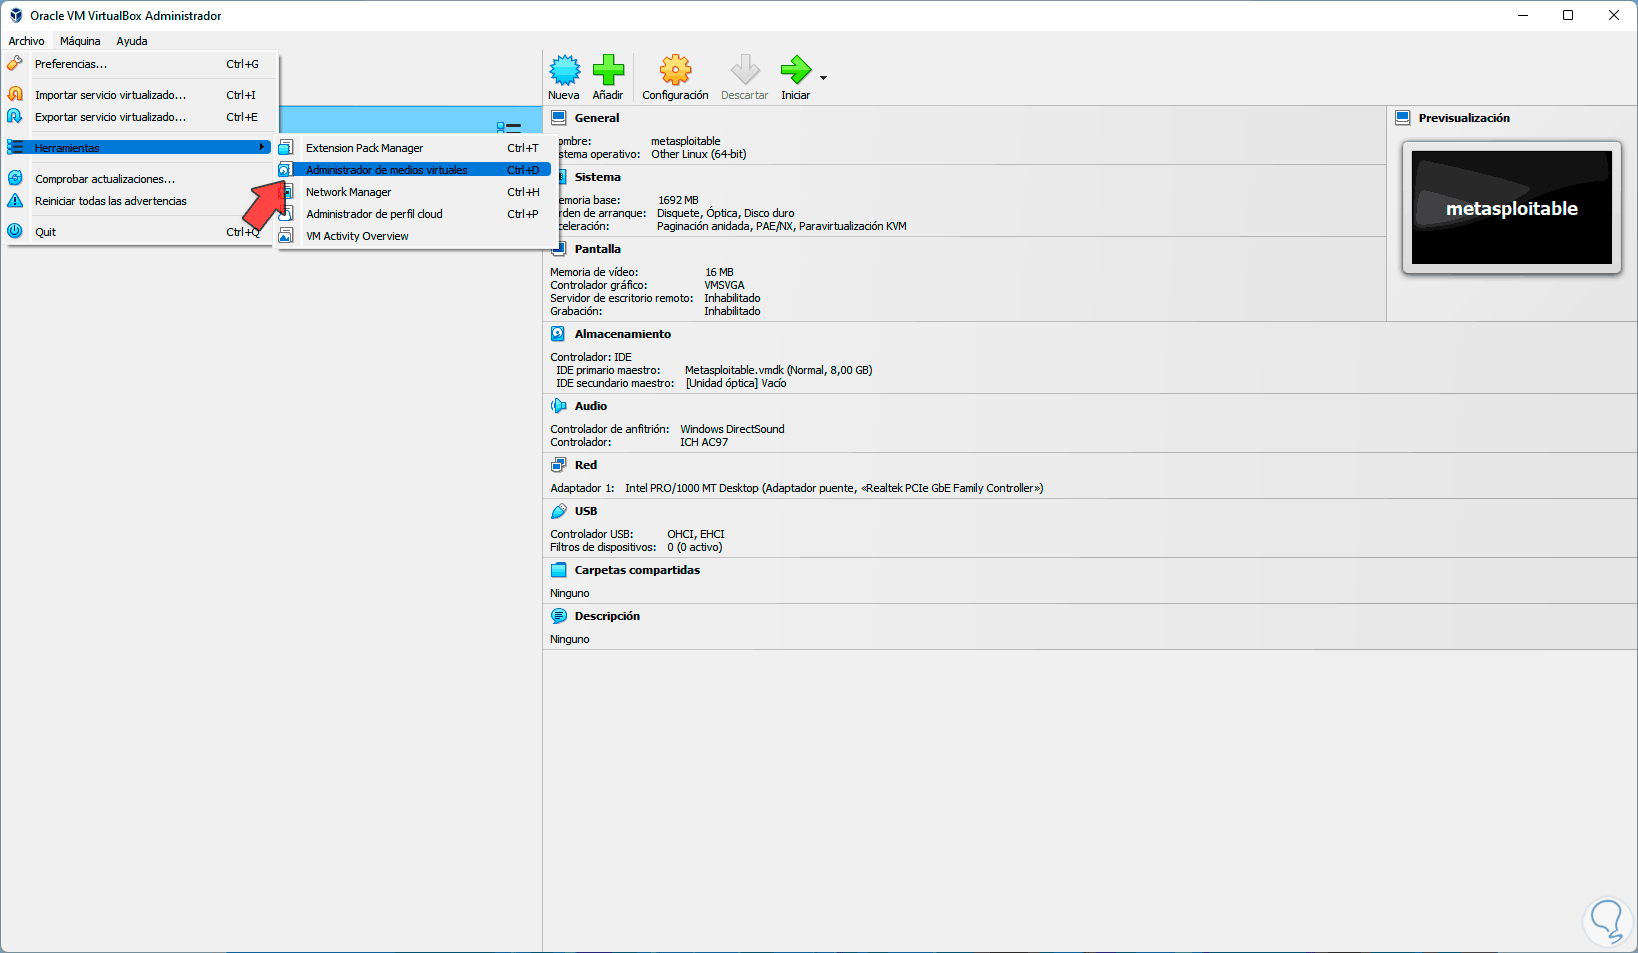
Once open, we will go to the "File" menu and there we will go to "Tools - Virtual Media Manager":
Step 3
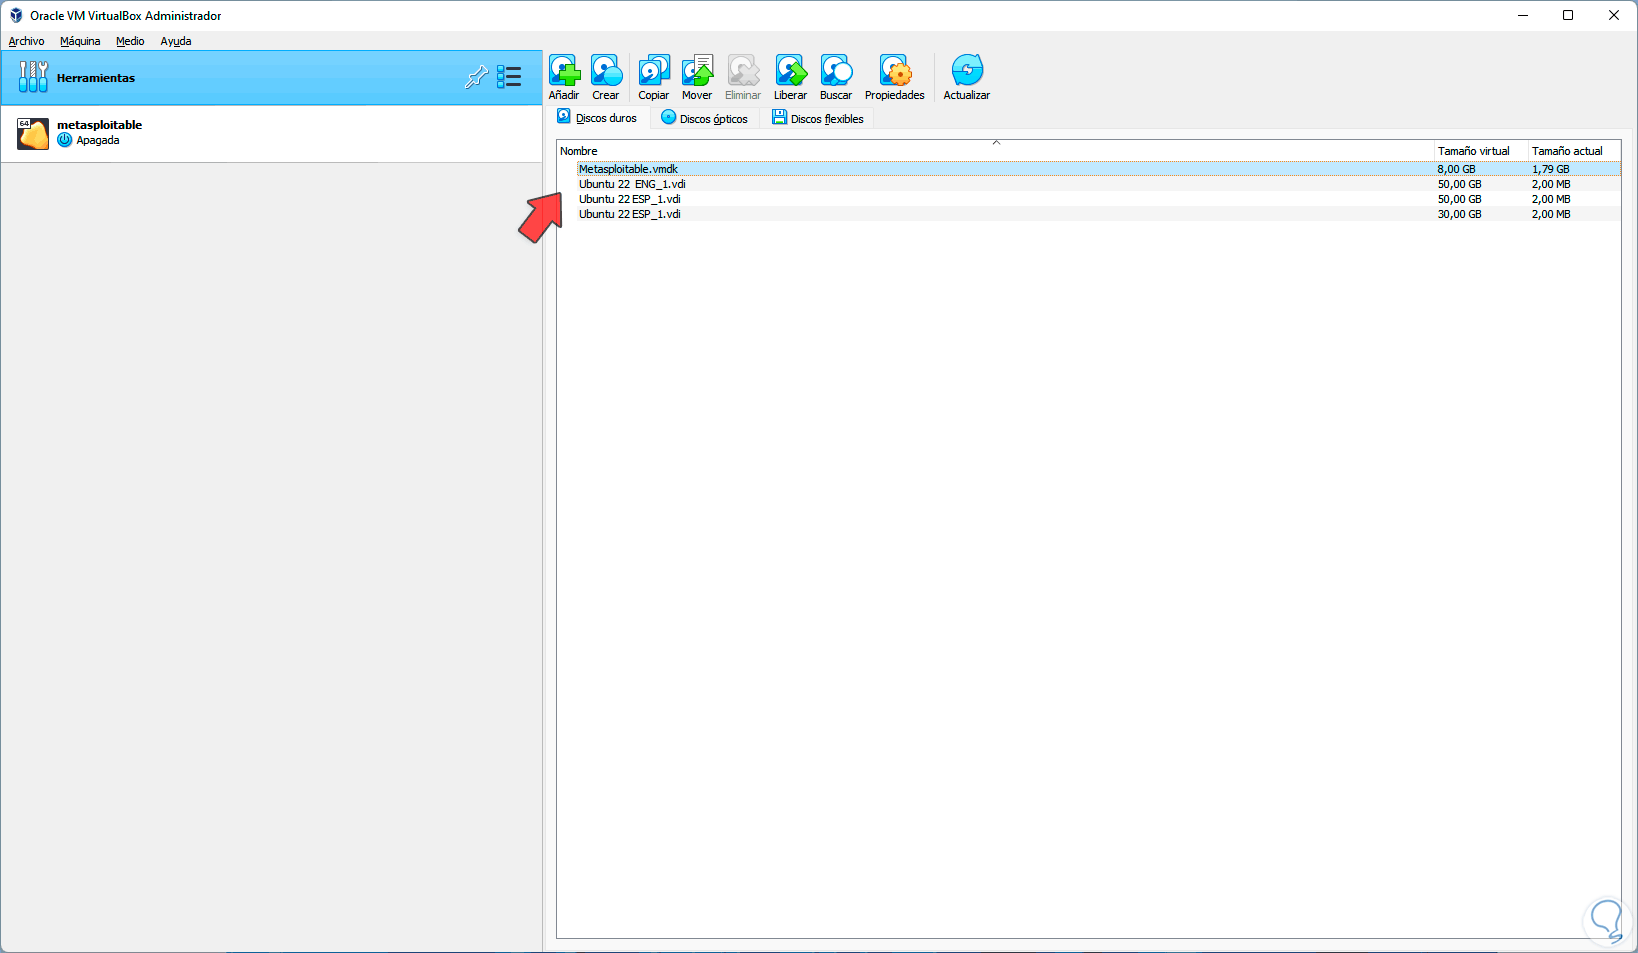
The following will be displayed:
Step 4
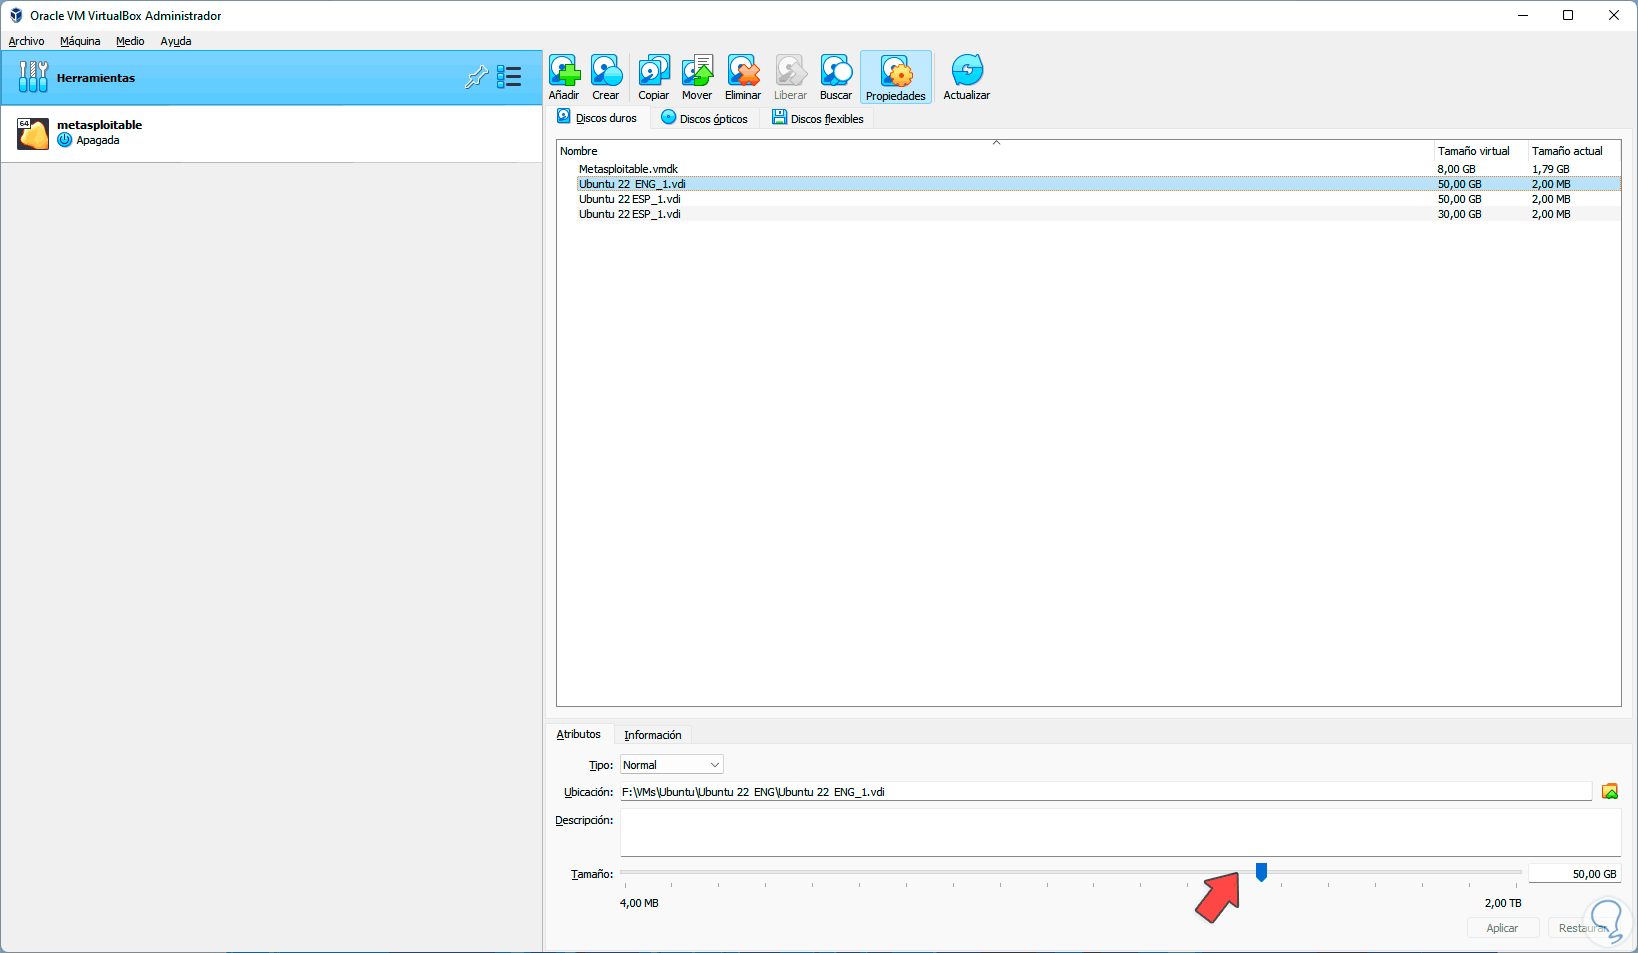
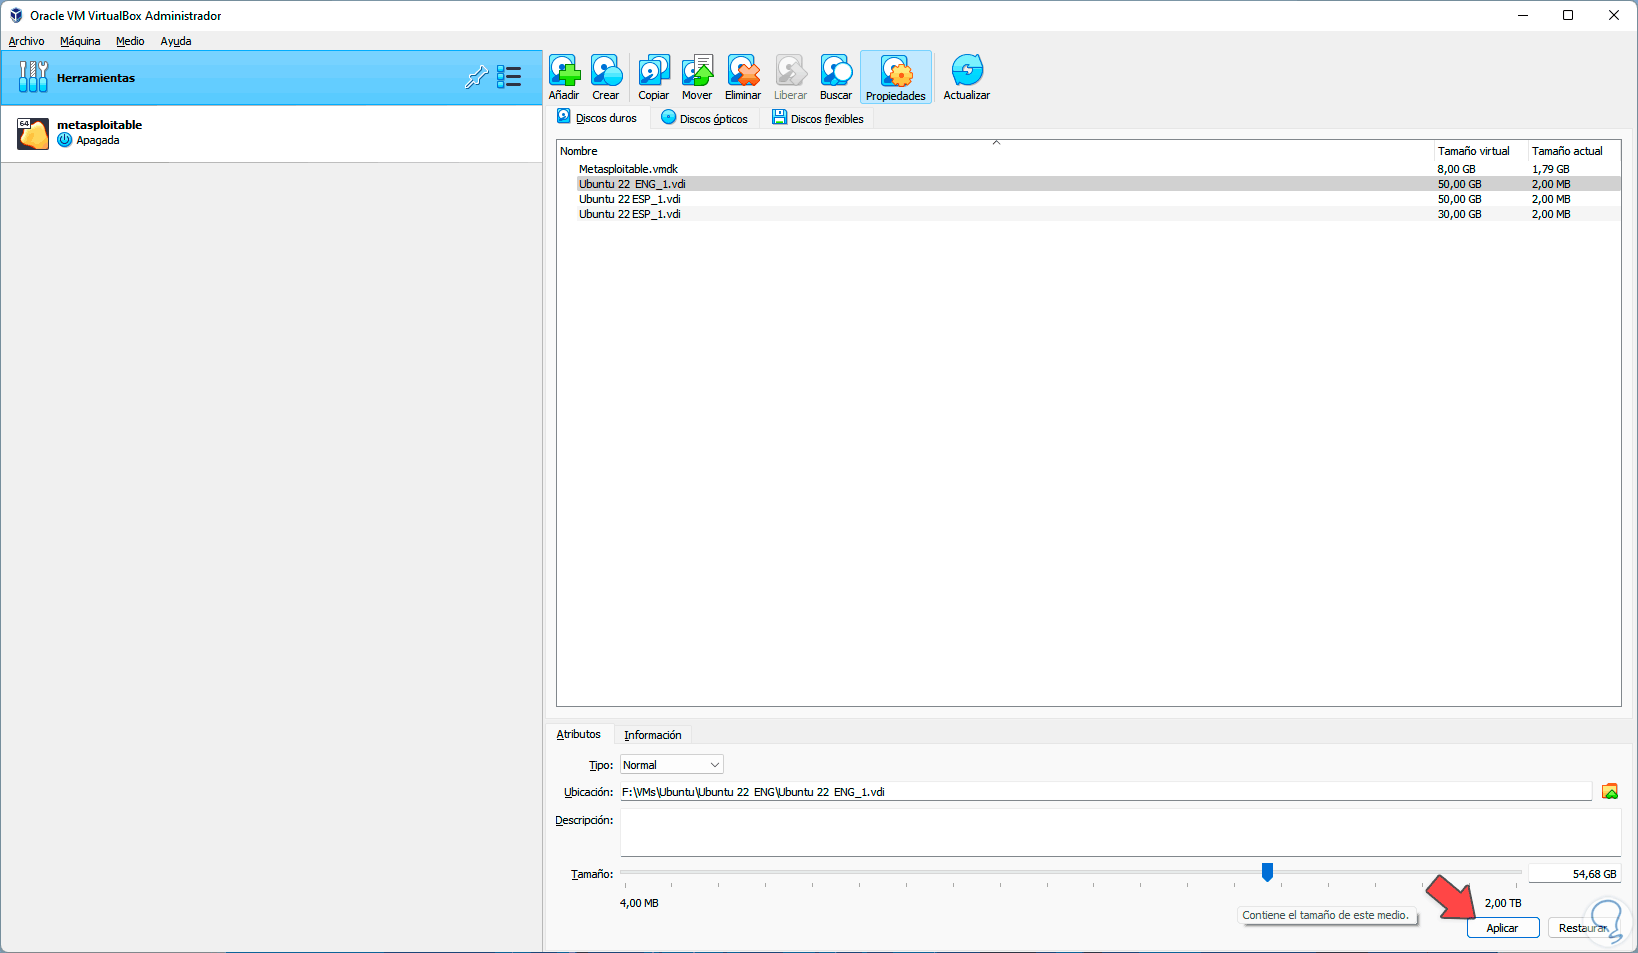
On the right side we can see the various virtual hard drives with their current and used size, just double click on the drive to be modified to access its properties:
step 5
At the bottom it will be possible to adjust the new size of the hard drive with the slider bar:
step 6
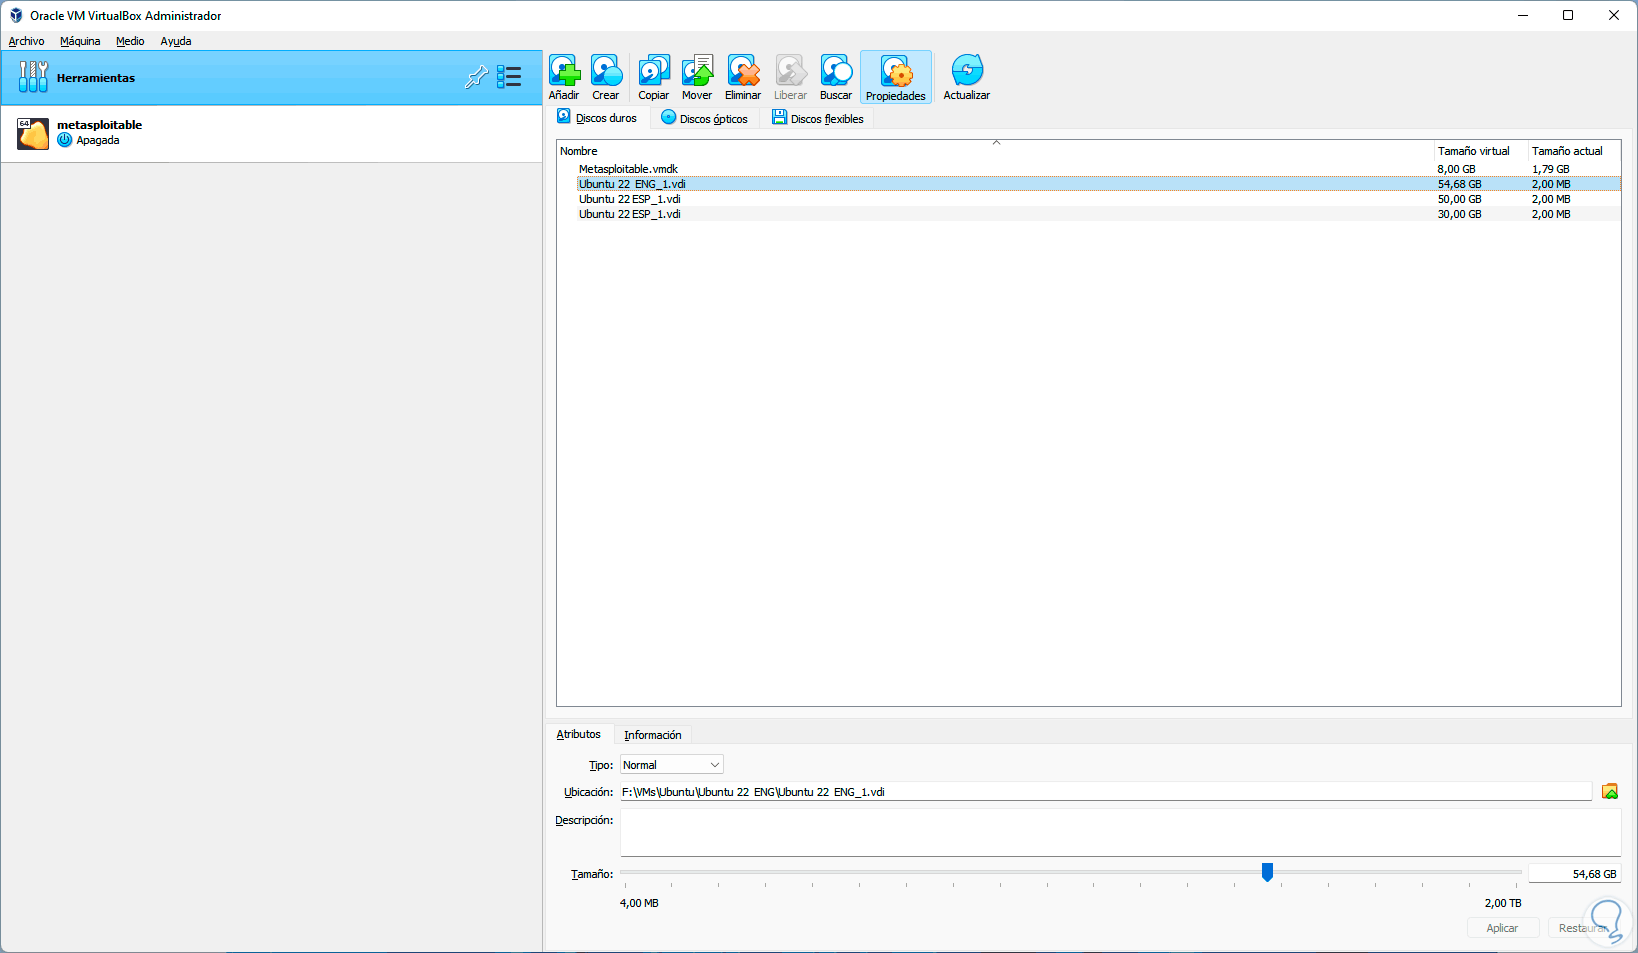
We apply the changes:
2 How to extend the size of the virtual hard disk in VirtualBox from CMD
Step 1
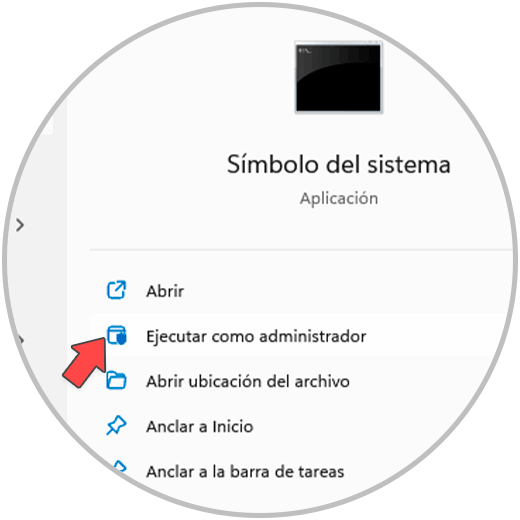
The command prompt console is another of the options available to carry out this process of adjusting the size of the hard drive, to achieve this we are going to open the CMD console as administrators from the search engine:
Step 2
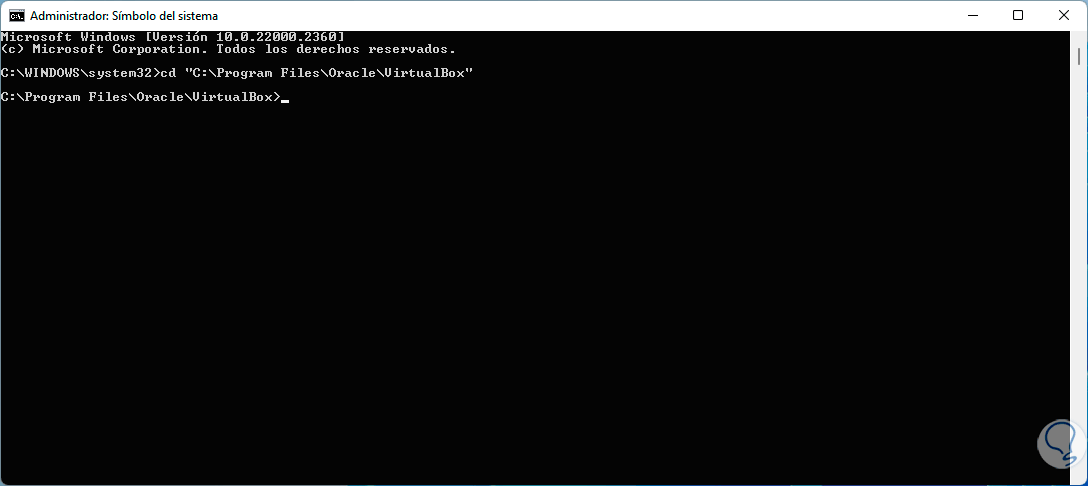
Now with the following command we are going to access the path where VirtualBox is installed by default:
cd "C:\Program Files\Oracle\VirtualBox"
Step 3
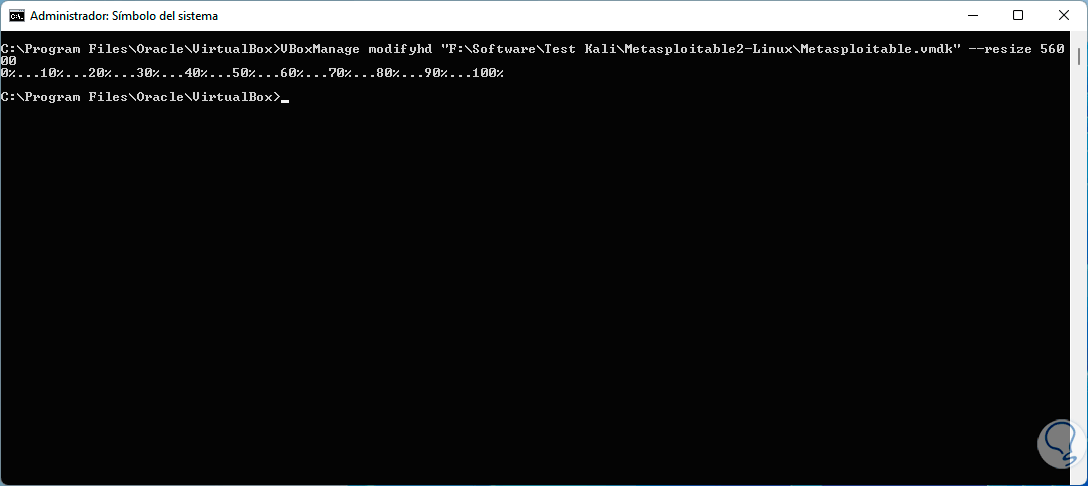
Now, to adjust the size of the hard drive, we are going to execute the following syntax:
VBoxManage modifyhd "C:\vm_path\disk_name.type" --resize ####
Step 4
There it is possible to see that the percentage of the task was correct. So we will use the Command Prompt console to adjust the size of this disk in VirtualBox.
3 How to extend the size of the virtual hard disk in VMware from the app
Step 1
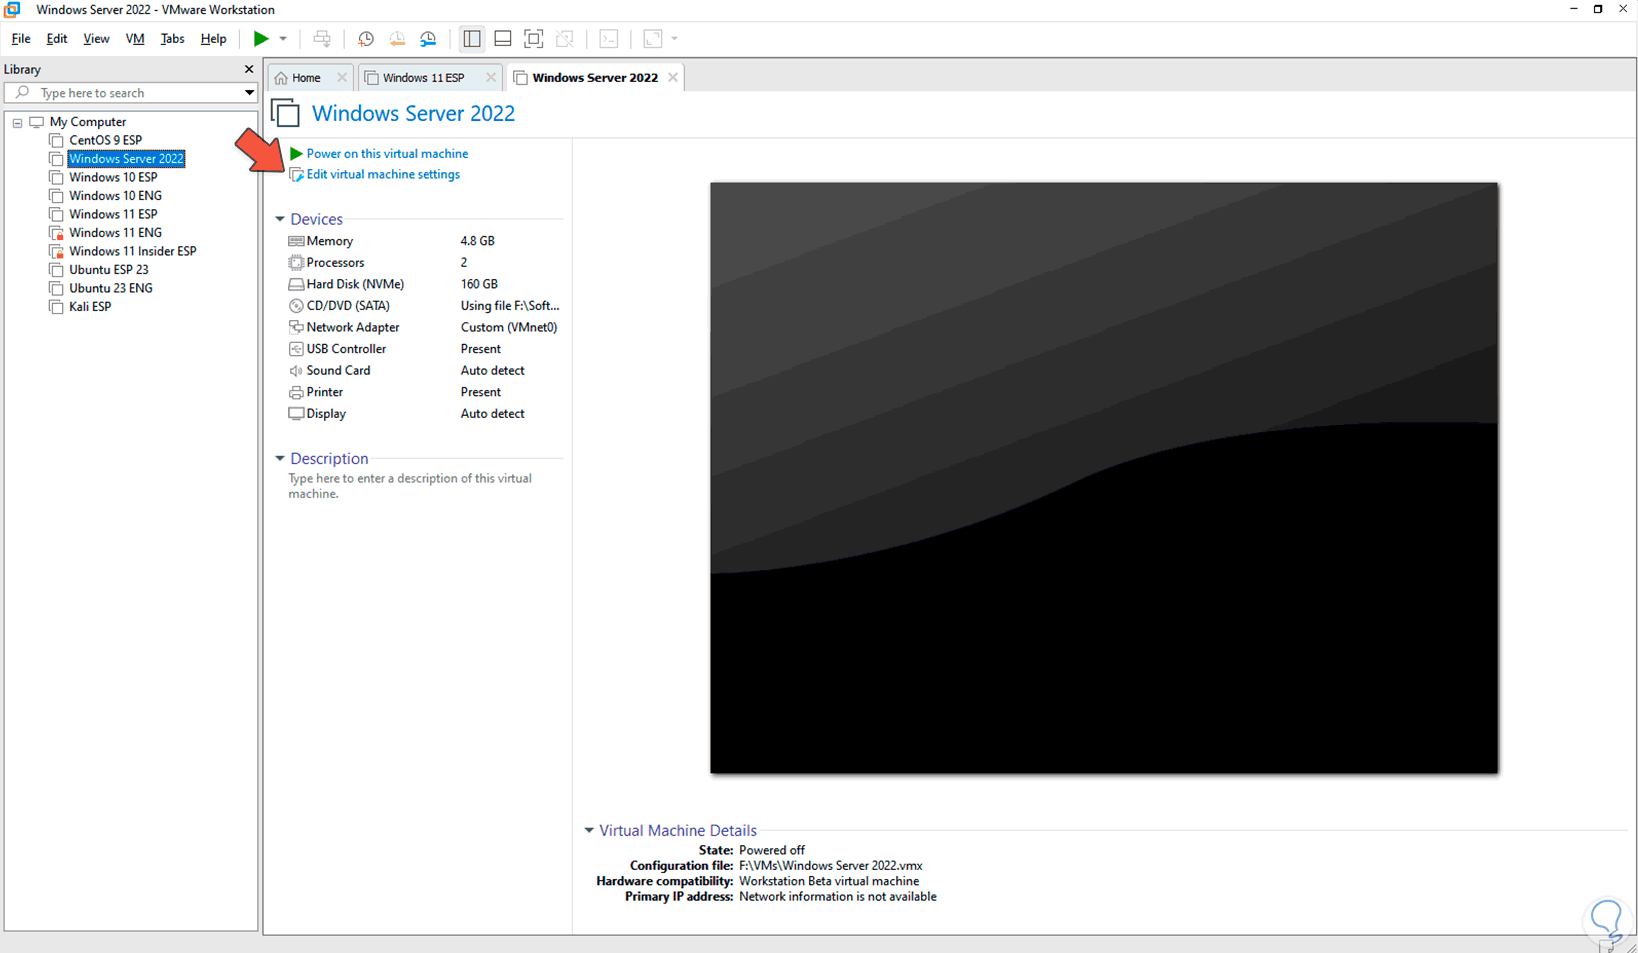
In the case of VMware we have equally simple methods, the first will be using the application itself, for this case we open VMware, select the virtual machine to modify and then click on "Edit virtual machine settings":
Step 2
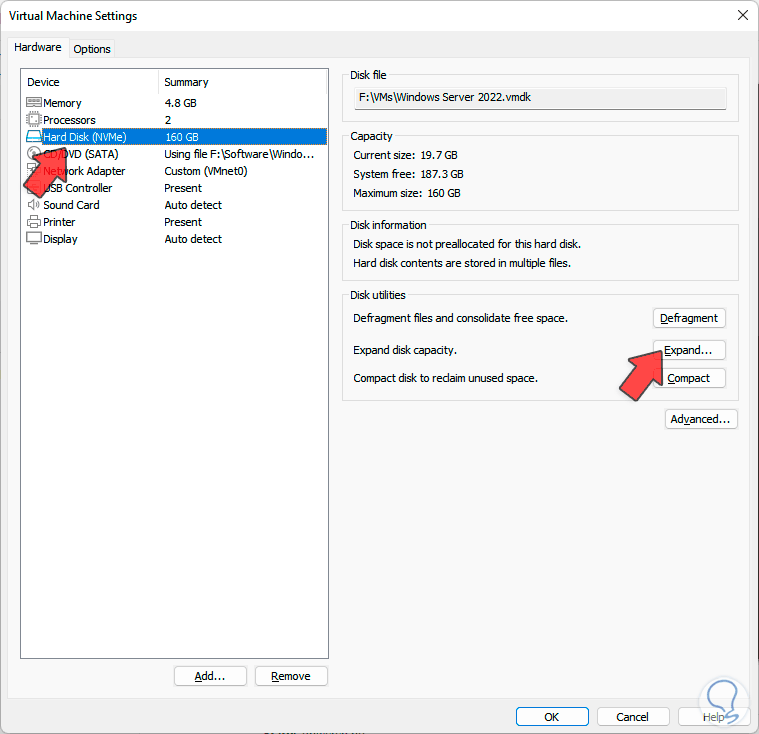
In the displayed window we will go to the "Hard disk" section:
Step 3
Once there we click on the "Expand" button and then assign the new size of the hard drive:
Step 4
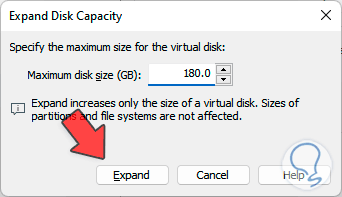
We click on "Expand" to proceed with this change:
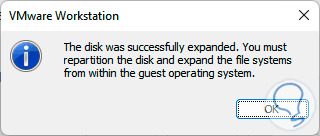
step 5
We click "Ok" and we can see that the hard drive has the new size:
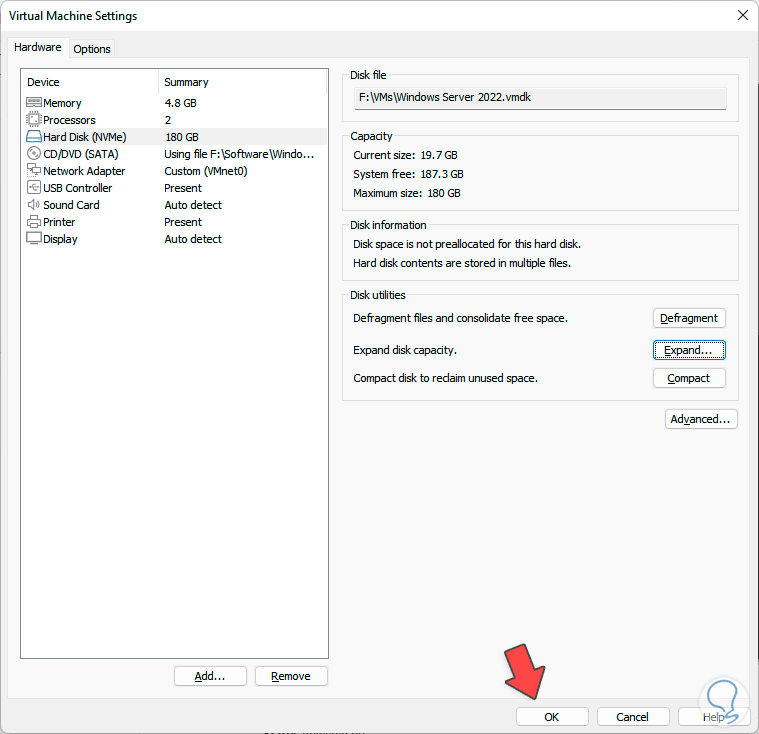
4 How to extend virtual hard disk size in VMware using ISO
This method can also apply to VirtualBox since we will use a program that allows us to manage the partitions and it applies when the virtual machine has unallocated space on the hard disk, for this case we are going to download the GParted utility at the following link:
gparted
Some of the tasks that we can perform with this utility are:
- Create or delete partitions
- Resize or move a partition
With Gparted it is possible to work with file systems like btrfs, exfat, ext2 / ext3 / ext4, fat16 / fat32, hfs / hfs+, linux-swap and many more..
Step 1
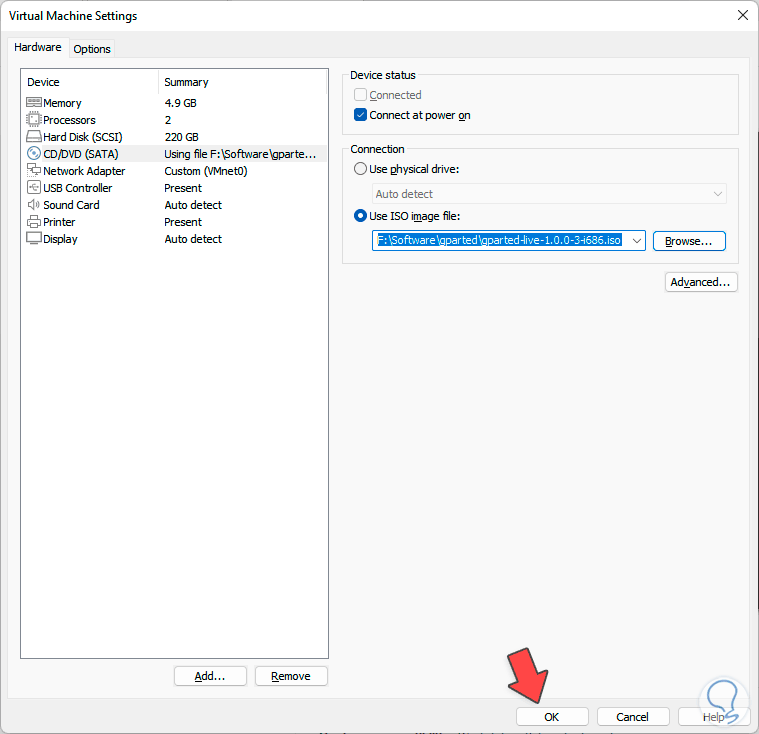
To use this method, in this case in VMware, we select the virtual machine and click on "Edit virtual machine settings", then we will go to the CD/DVD section:
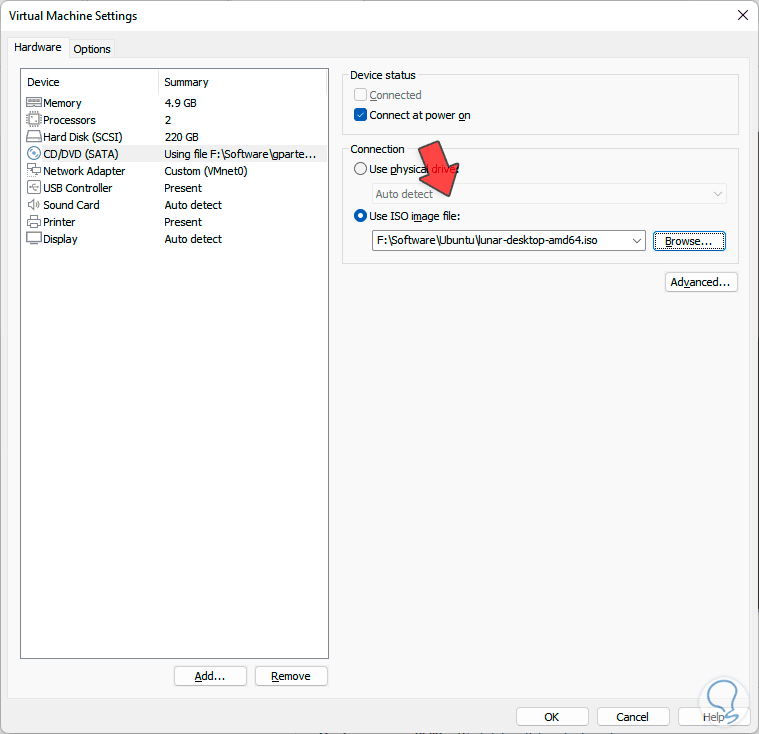
Step 2
We click on "Browse" and select the ISO image of the GParted utility:
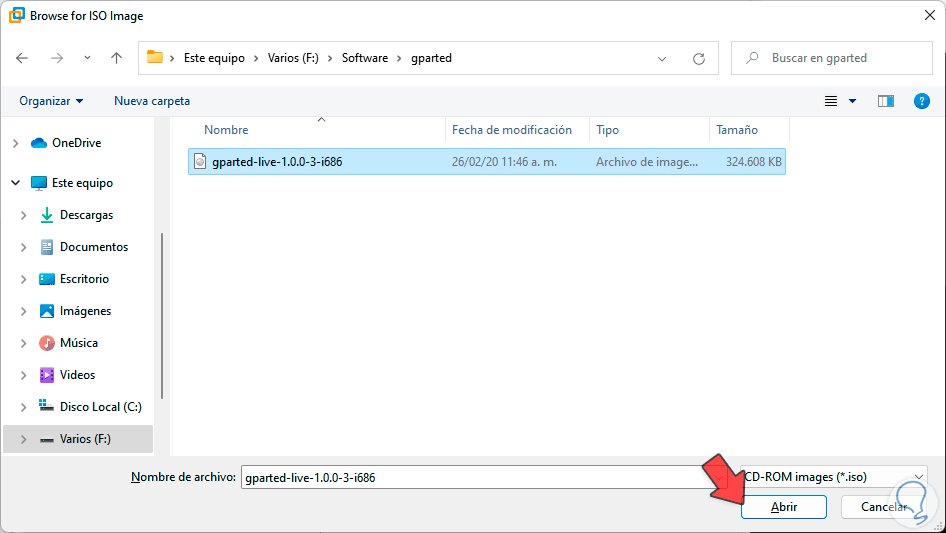
Step 3
We click on "Open" to add it: Then we click on "OK" to confirm this change.
Step 4
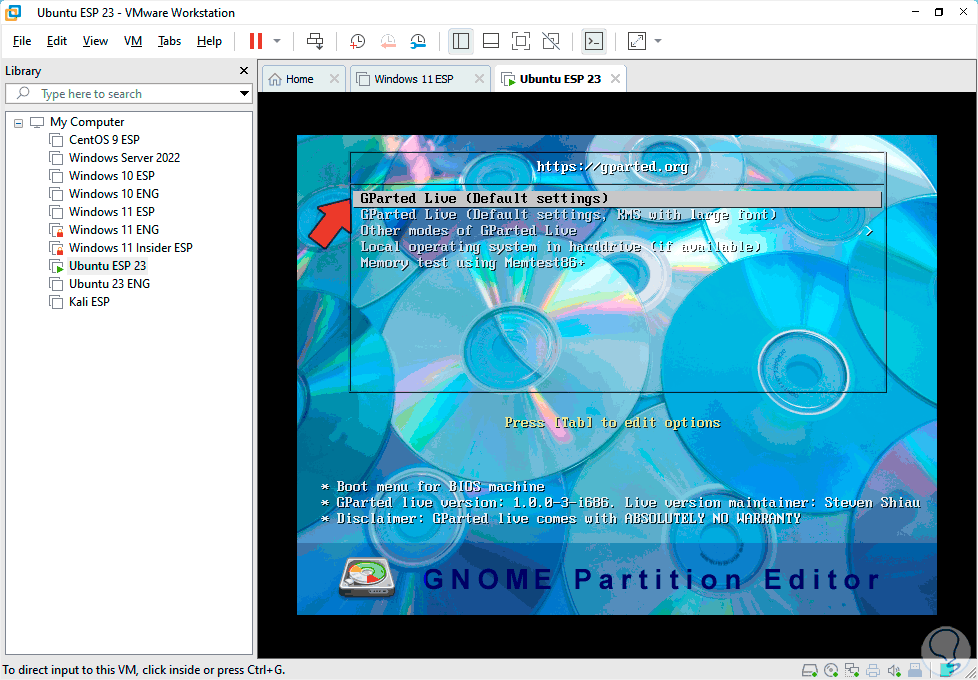
We start the virtual machine and we will see the following. We click on "GParted Live" and wait a moment
step 5
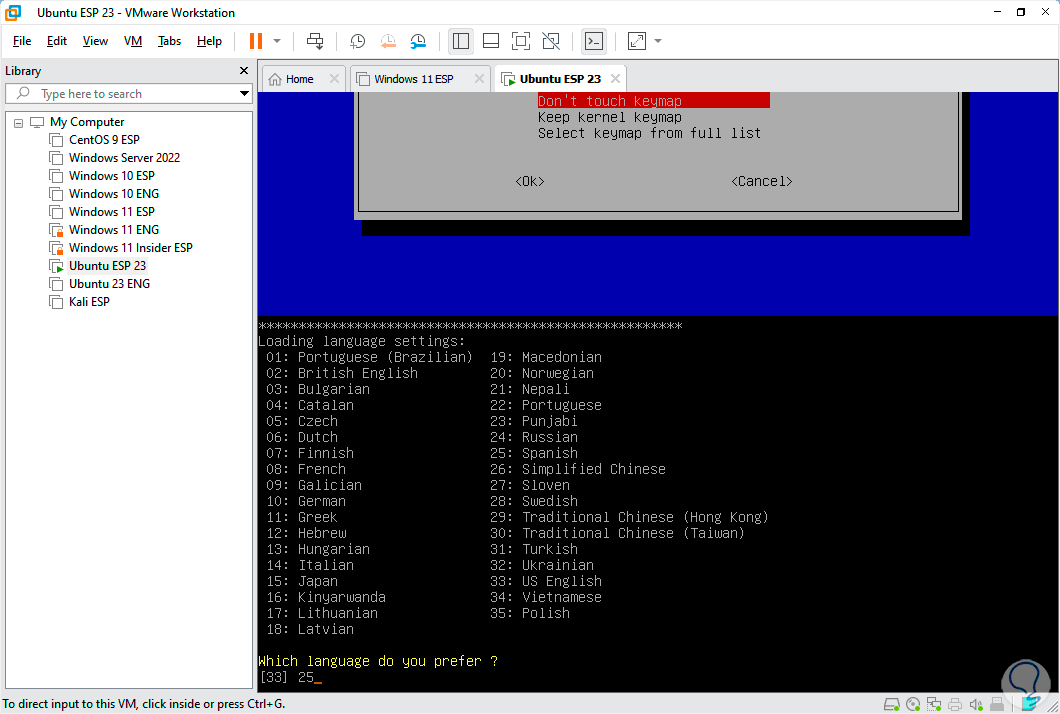
, now we are going to enter the desired number to choose the interface language:
step 6
By entering it and pressing Enter we expect it to load the interface:
step 7
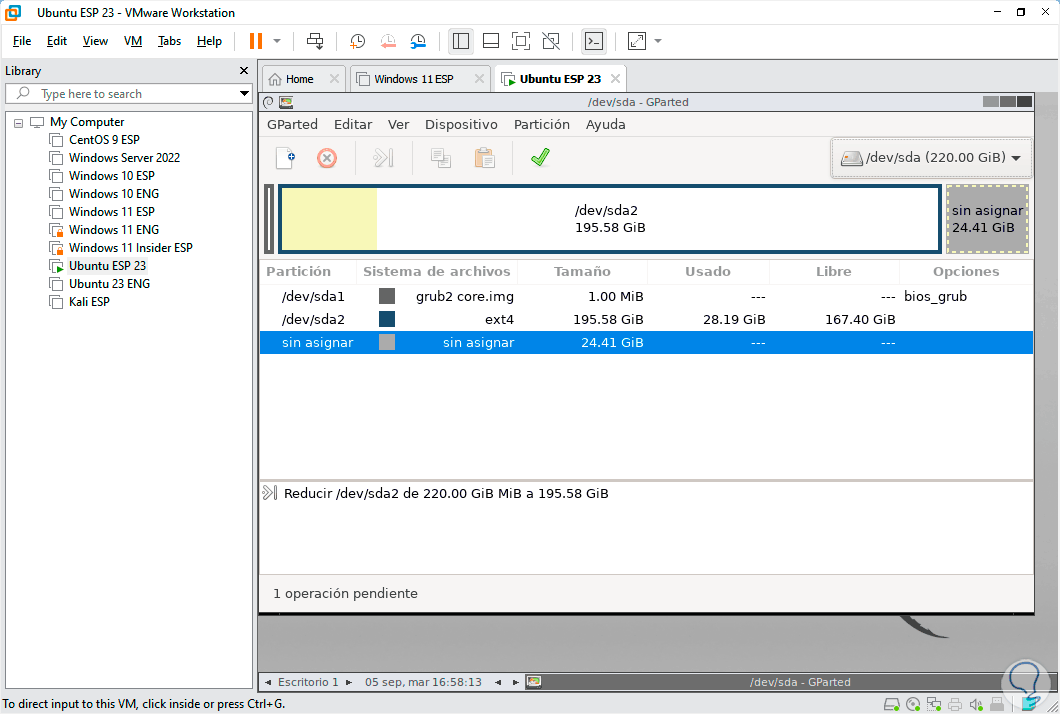
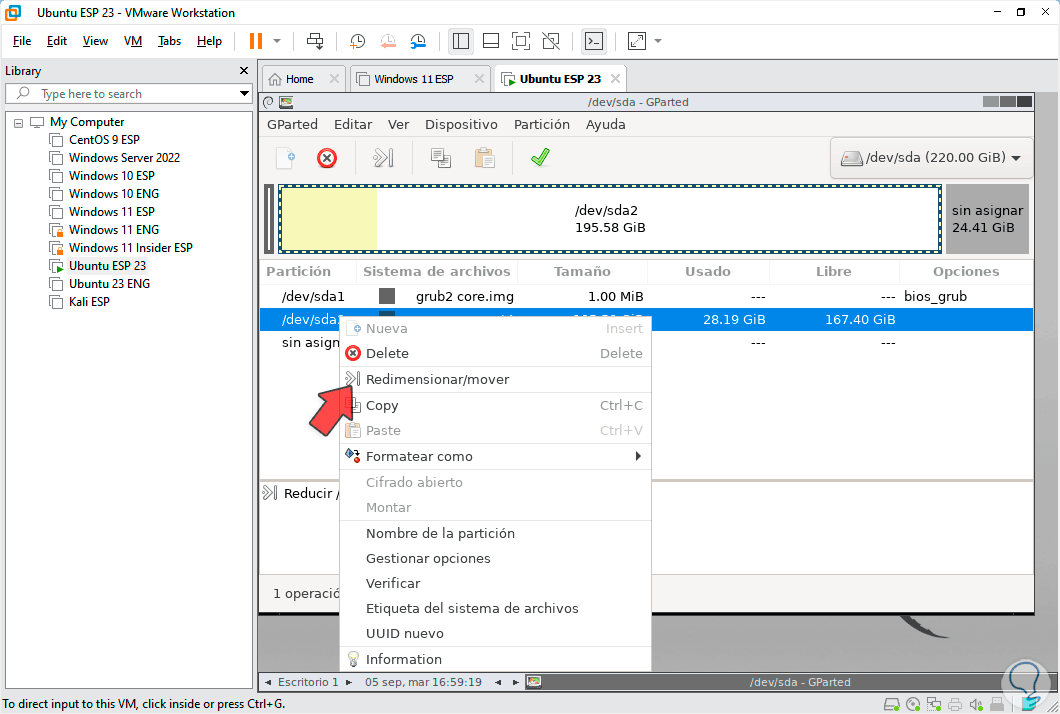
We can see in the gray area the unallocated space of the hard drive, we right click on the partition and in the displayed options we click on "Resize/move":
step 8
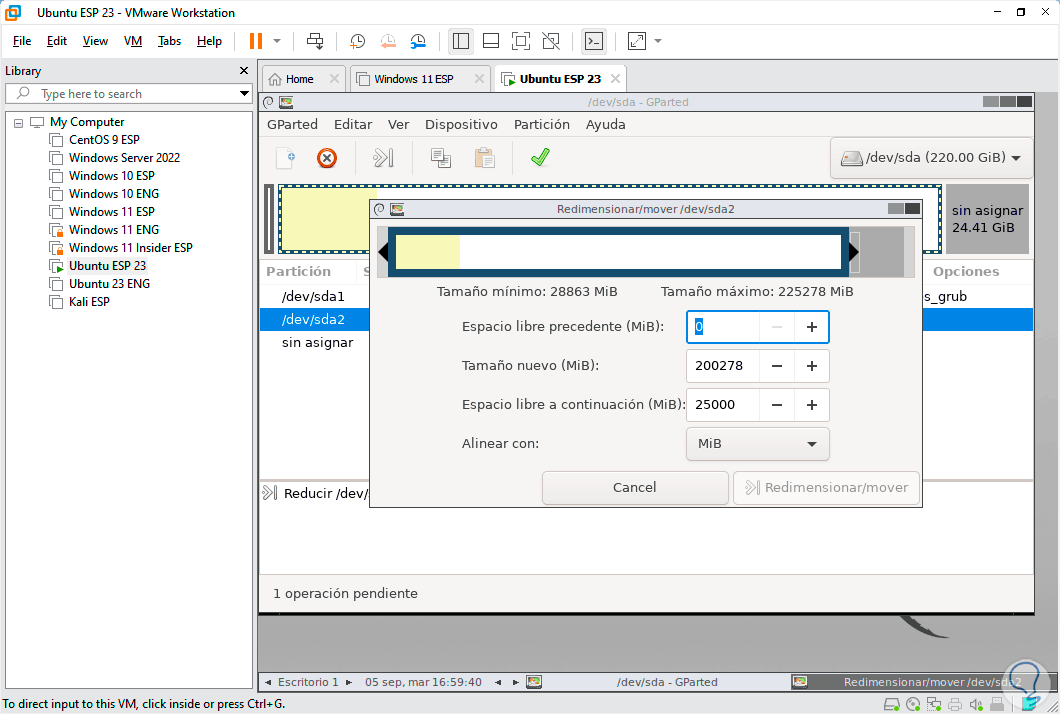
The following will open:
step 9
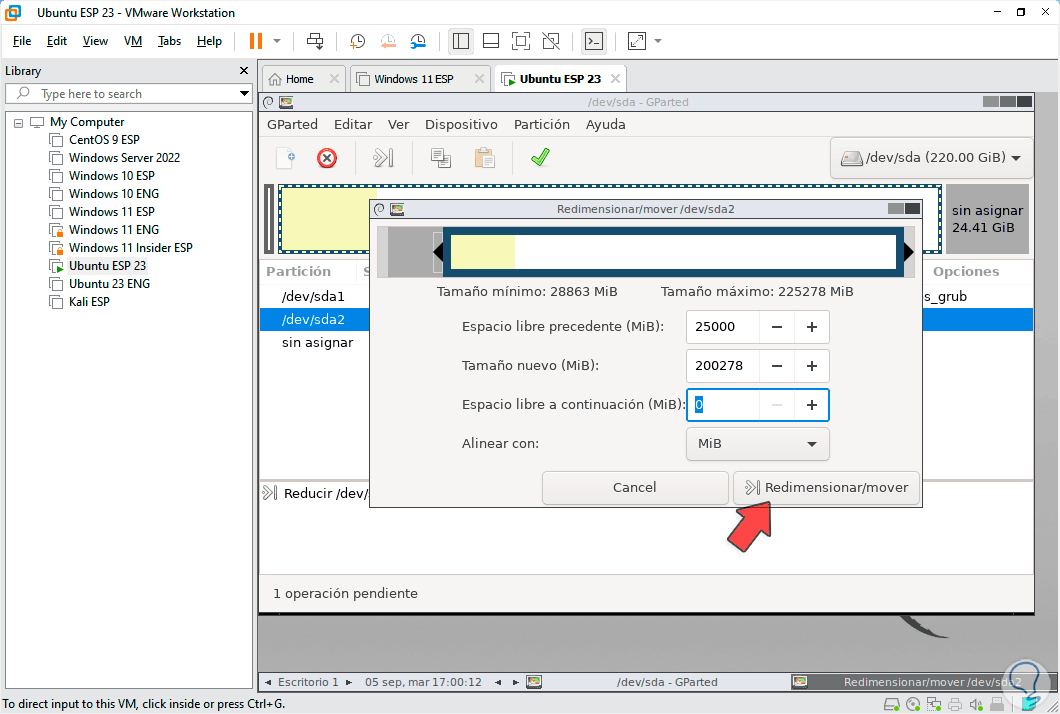
In the field "Previous free space" we are going to enter the value of the space to use:
step 10
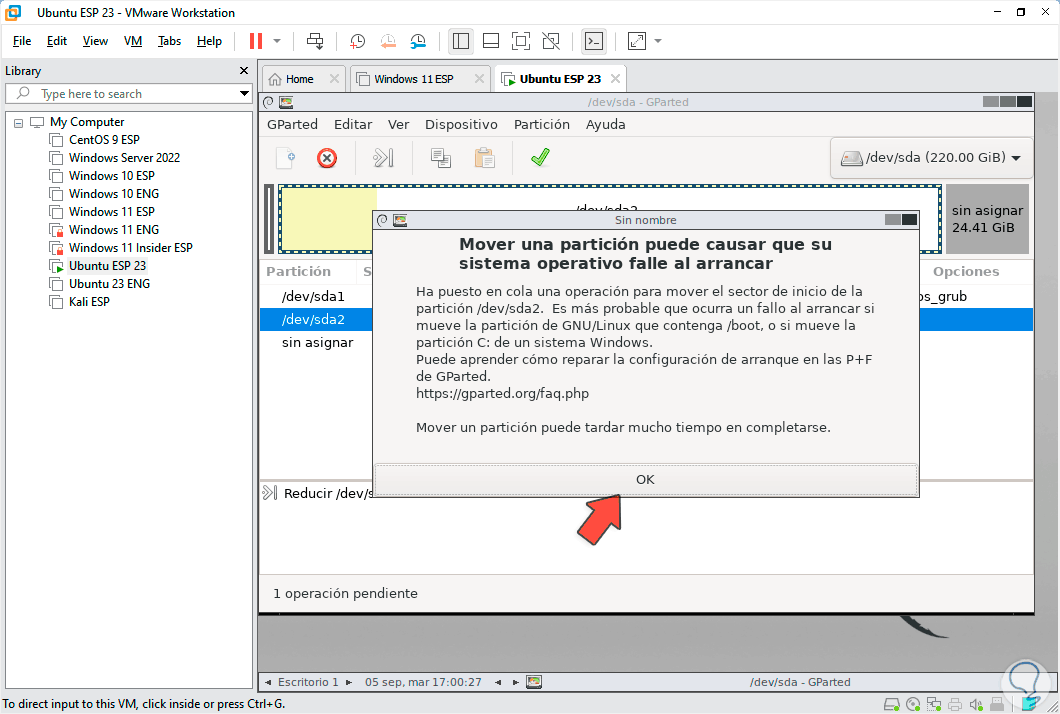
We click on "Resize / move" and the following message will open:
step 11
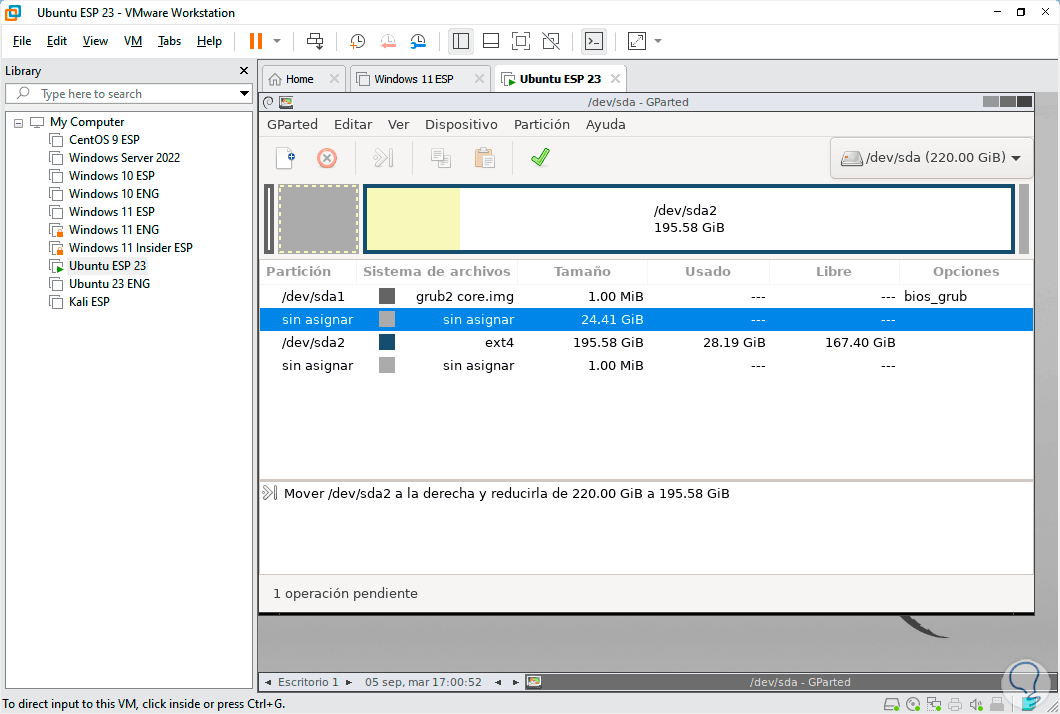
We click "OK" to confirm the process and we will see the following:
step 12
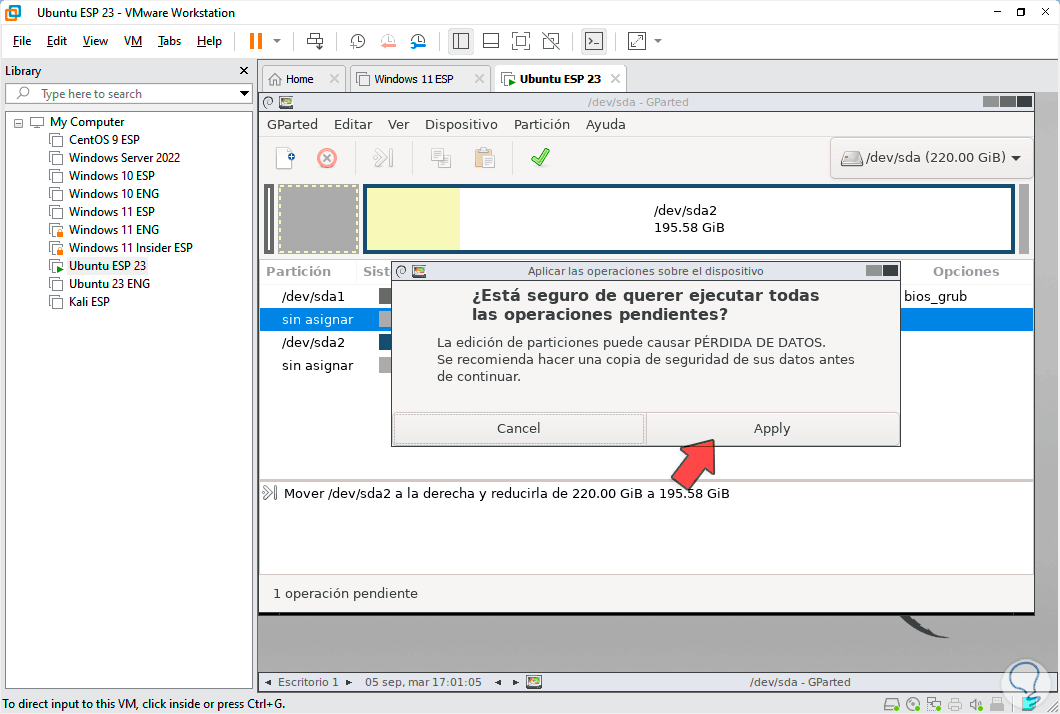
We click on the verification sign and we must confirm the message to apply the changes:
step 13
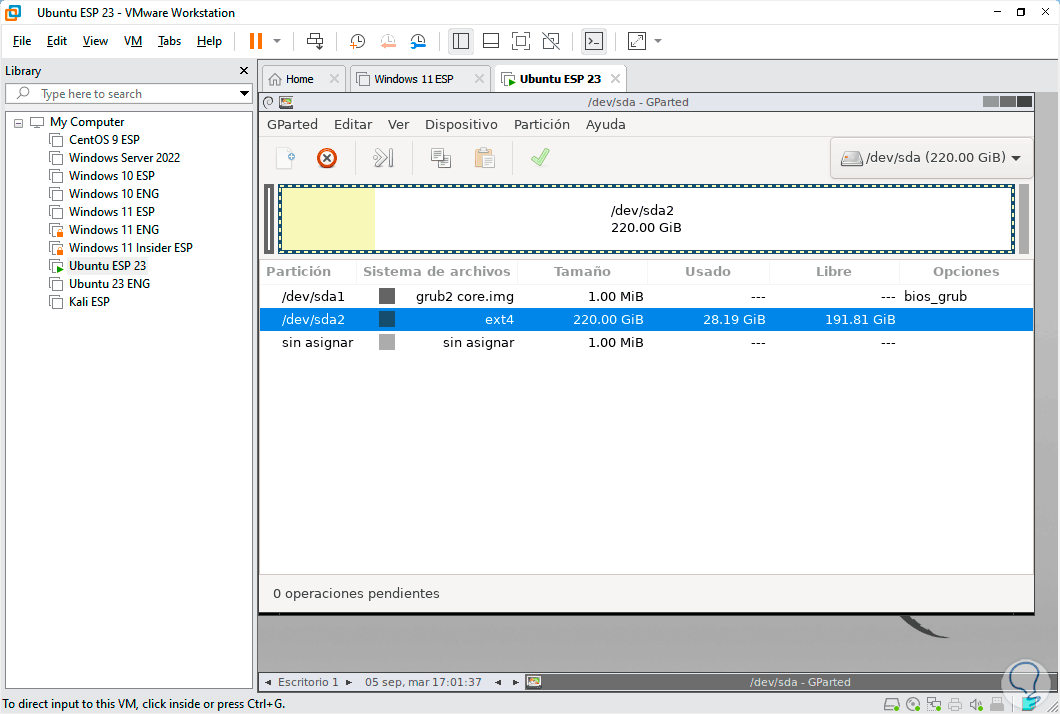
There we click on "Apply" so that the hard drive can use its maximum capacity:
step 14
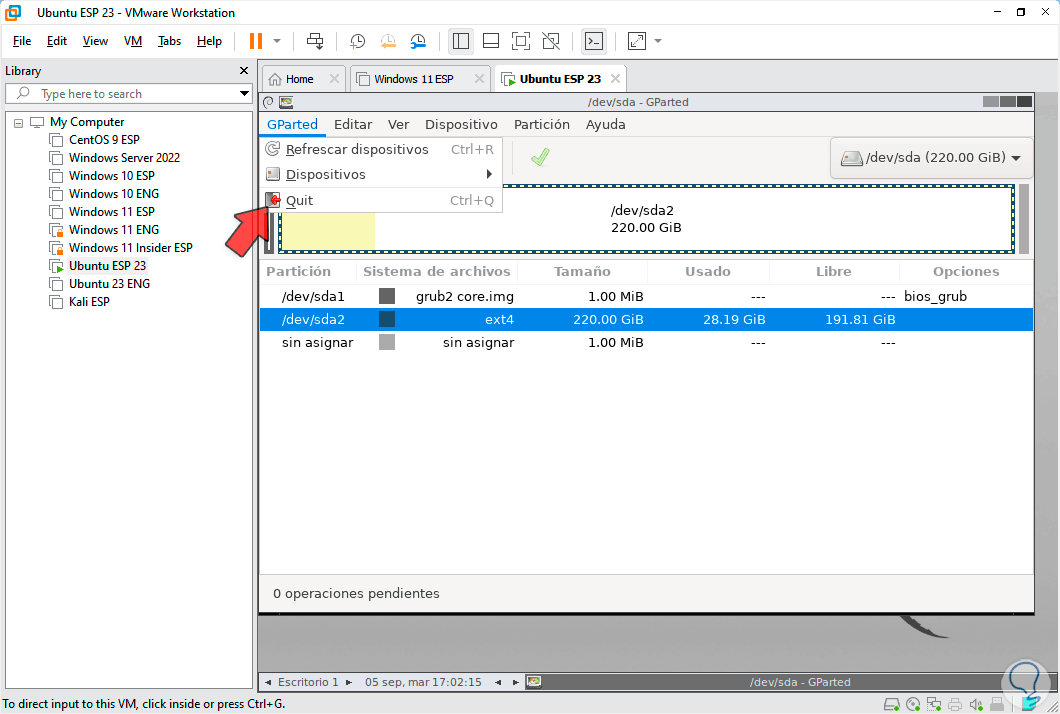
Now we can exit GParted from the GParted menu and clicking on “Quit”:
step 15
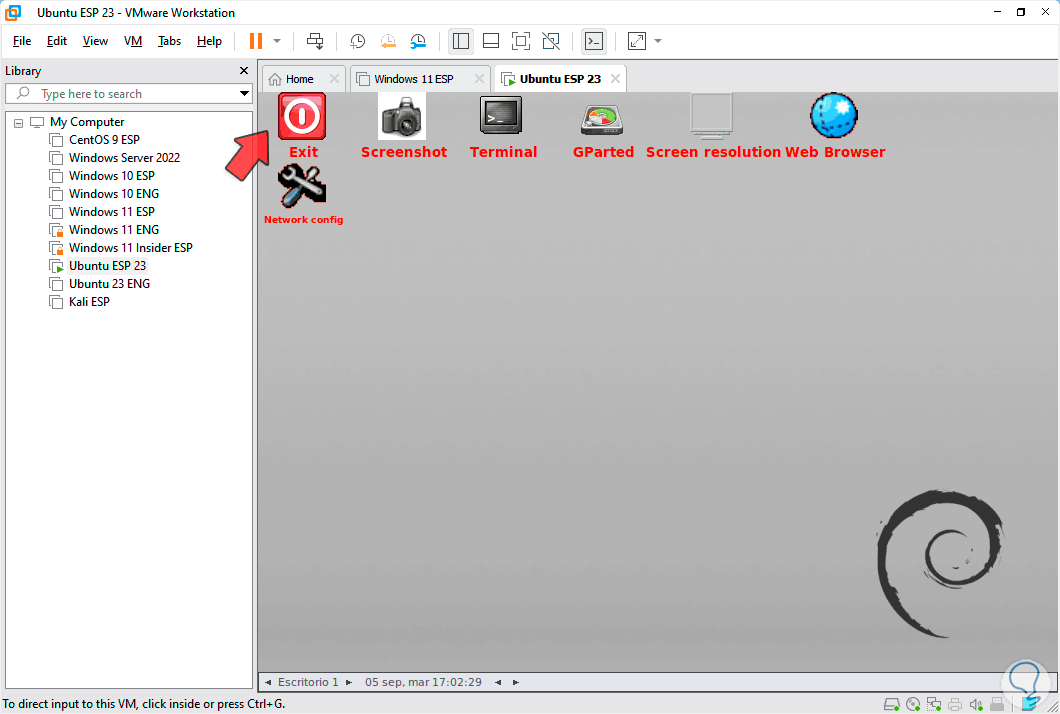
There we click on "Exit" to exit the utility and thus be able to increase the capacity of the hard drive.
This is how we can increase the size of the hard drive in VirtualBox and VMware and have full storage for our virtual machines.